 You will need:
– Wood plaque
– Mod podge
– Construction paper
– White all purpose paper
– Snowflake paper punch
– Acrylic paint (light blue, cobalt blue, glitter blue, pearl blue, white)
– Paintbrush
– Contact paper
– Fine white or iridescent glitter
Directions:
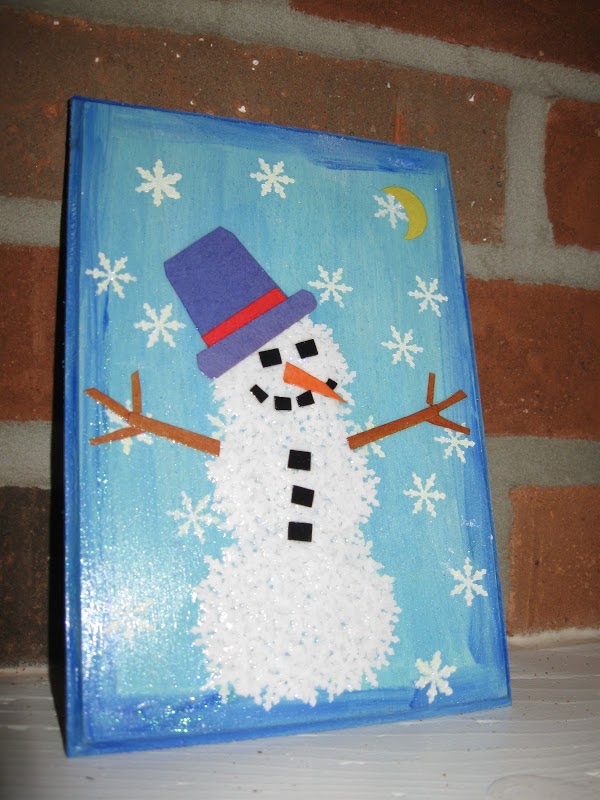
1. Use the different light blue colors to paint the background. Take the cobalt blue, watered down, and create streaks over the light blue. Then use the cobalt blue to paint around the edges to create a border.
2. Take a piece of contact paper and punch out a snowflake (with snowflake paper punch).
3. Use a stencil brush and white acrylic paint to stencil snowflakes on the background, top with the fine glitter. Allow to dry and shake off excess glitter.
4. Using the snowflake punch, punch out a bunch of snowflakes — out of a regular white paper.
5. Using the snowflakes and the Mod Podge, begin to layer the snowflakes into a snowman. Make it multiple layers so little to none of the background shows through. Allow to dry.
6. Using construction paper, cut out blue pieces for the top hat, orange for the carrot nose, black for pieces of coal, brown for the stick arms and yellow for a crescent moon.
7. Place each piece and Mod Podge into place.
8. Allow everything to dry and then put one or two more layers of Mod Podge over the entire piece.
9. Allow to dry and enjoy your ART!!
Hope you try it. It takes a little patience, but offers a folksy sort of feel to some winter artwork!

Happy Holidays and Happy Crafting!!
Mona