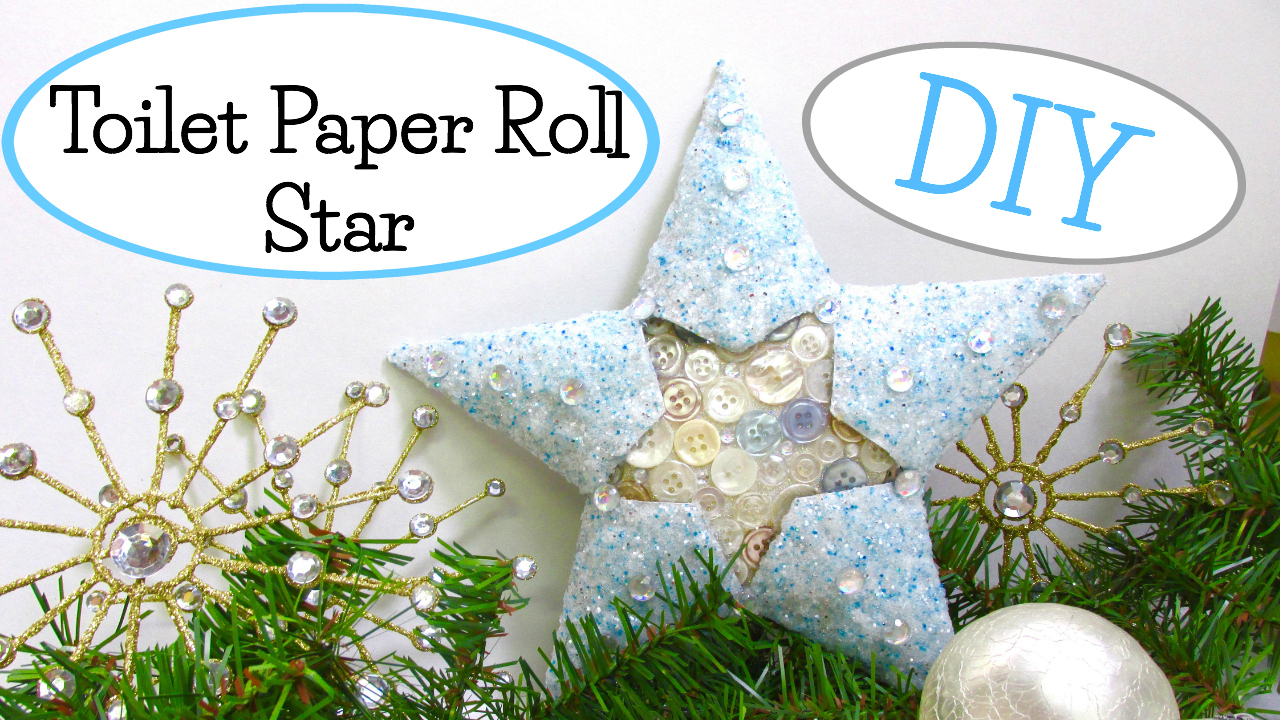
Craft your own stunning Christmas star with this step by step DIY Christmas star tutorial. Toilet paper rolls can be holiday decorations.
Crafting with recyclable items adds a unique touch to your creative projects. Toilet paper rolls, a crafting staple, can be transformed into something extraordinary. Join us in this exciting Craft Klatch vs. Suzy’s Sitcom Christmas Craft Challenge, where we take on the theme of Christmas and give a fresh twist to the almighty toilet paper roll!
Craft Challenge Recap: Unveiling Our Creations
In a showdown between Craft Klatch and Suzy’s Sitcom, the challenge was set: Christmas creativity using buttons and toilet paper rolls. The results were so stunning and so different!
While my creation embraced non-traditional colors with a Frosty Star, Suzy ventured into traditional shades, crafting a charming Christmas Tree Napkin Ring. Check out our respective tutorials for detailed directions.
Materials You’ll Need for the Frosty Christmas Star
*This blog uses affiliate links. As an Amazon Associate I earn from qualifying purchases.
- 7 Toilet paper rolls (I suggest you collect your own)
- Chunky white glitter
- Fine blue glitter
- Fine silver glitter
- Glamour Dust Glitter
- Gemstones
- Buttons
- Hot glue
- White glue
- Ultimate glue
- Silver acrylic paint
- Pearl white acrylic paint
- Pearl champagne acrylic paint
- Tape
Crafting Magic: Step-by-Step DIY Christmas Star Video
Note: For a visual guide, watch the tutorial video provided.
Step by Step DIY Christmas Star Directions
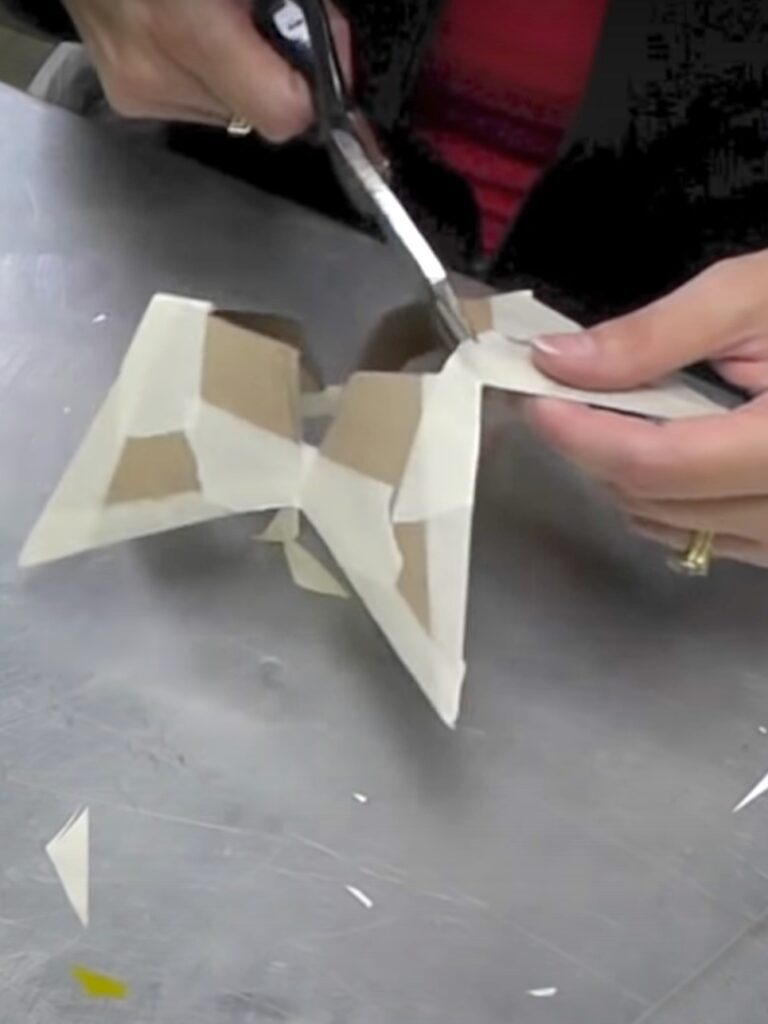
Step 1: Creating the Star Arms
I flattened the toilet paper tubes and cut the shapes of the arms.
They are kind of like triangles, but have a lower part. You need to customize the size to fit your toilet paper rolls, because as I found out, not all toilet paper rolls are the same size.
When you cut the shape, you want the front and the back to stay together, so just keep that in mind.
(I created a template to make it a little easier.)
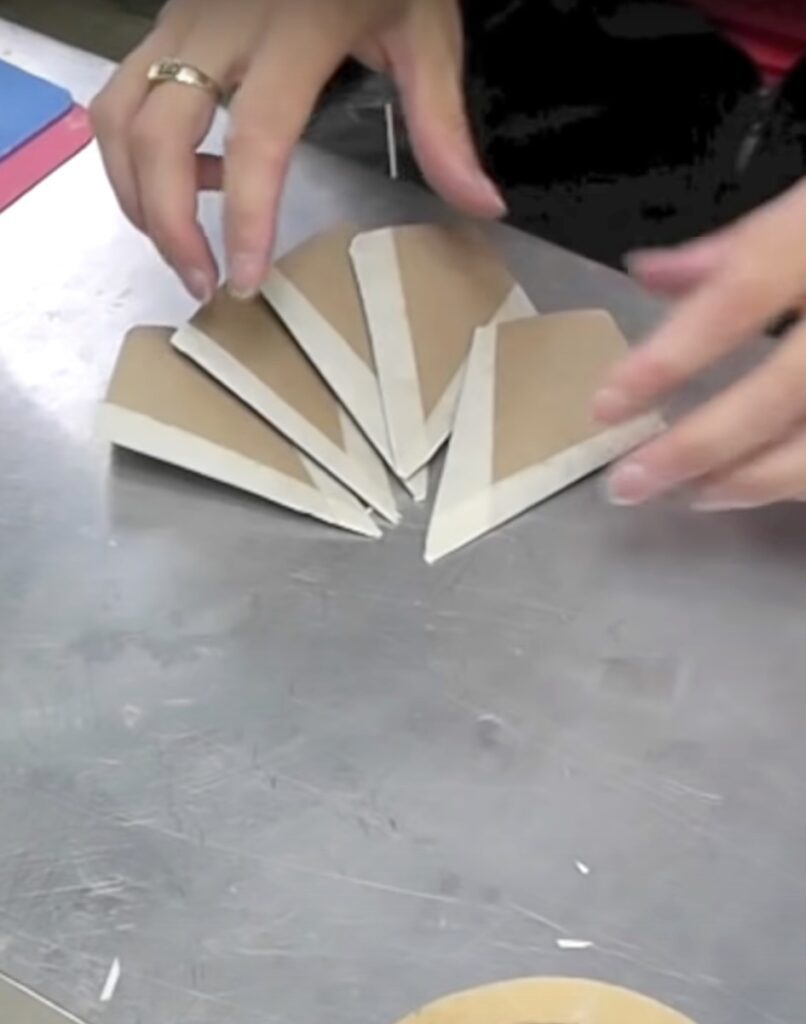
Step 2: Assembly Begins
Once you have cut five arms out, you need to use a masking tape, to tape the sides together, leaving the bottoms open.
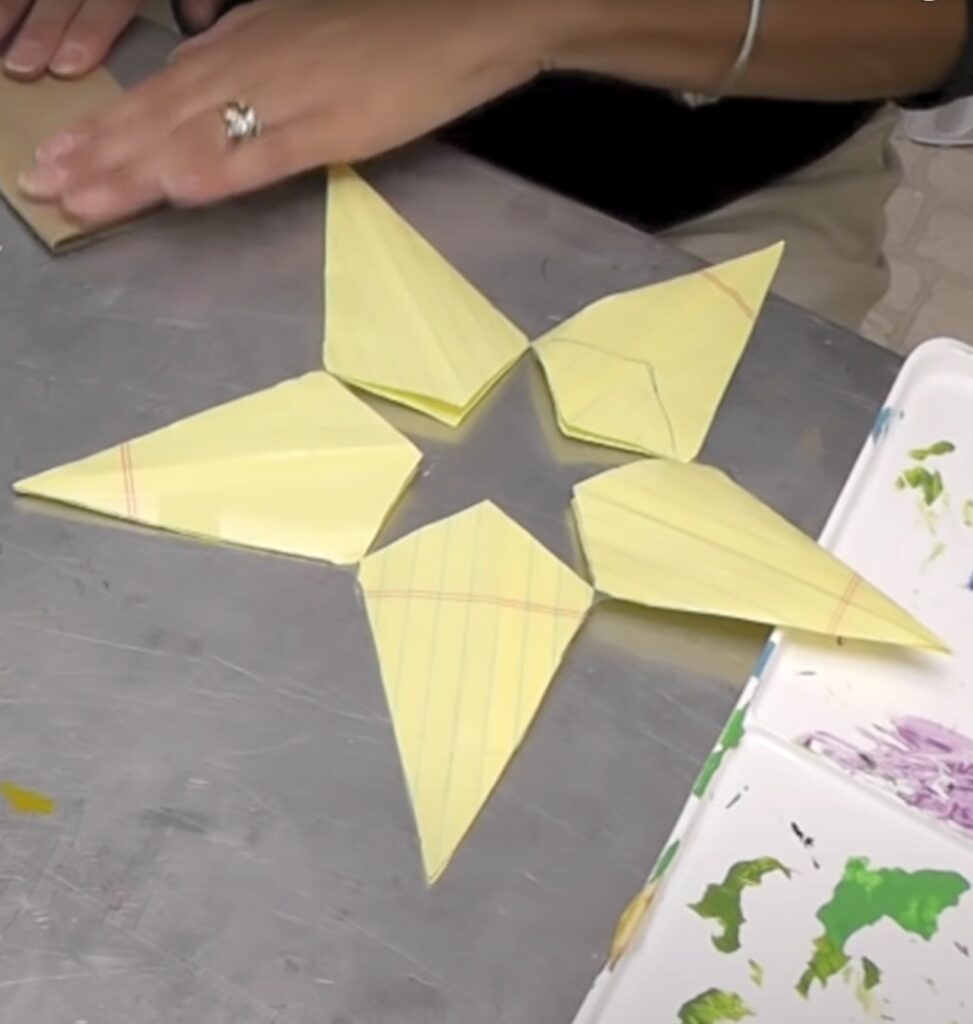
Step 3: Planning the Layout & Connecting the Arms
On your work surface, lay out the arms in the shape you want. The fun thing about this is that you will have the main star shape, but also have a smaller star in the middle.
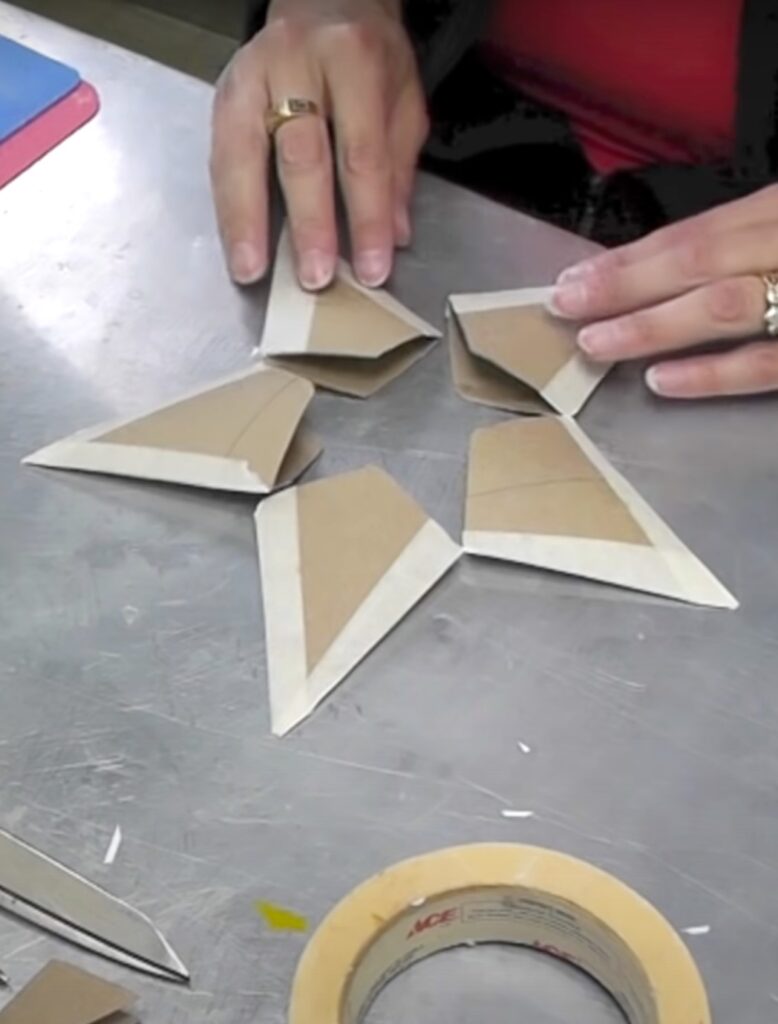
Now you need to make your connections. While you have them laid out, press two next to each other flat. With a small piece of tape, connect the pieces (I show you how to do it in the video).
Flip those two over and repeat not the back side. Repeat with all the arms of the star until they are all connected.
Step 5: Strengthening the Christmas Star Structure
Trim the excess tape, but don’t cut them apart! It is going to be flimsy and flexible, but don’t worry about that!
Take hot glue and put some into the tip of each of the arms. Do it one at a time. Be careful because the cardboard will get hot. This will help the arms of the star keep their shape and make them less likely to get squished.
Step 6: Crafting the Inner Circles
Cut out two circles, from two additional toilet paper rolls. The circle should fit into the middle of your star. Mine was just under four inches in diameter, but yours might be different, depending on the size of your toilet paper rolls.

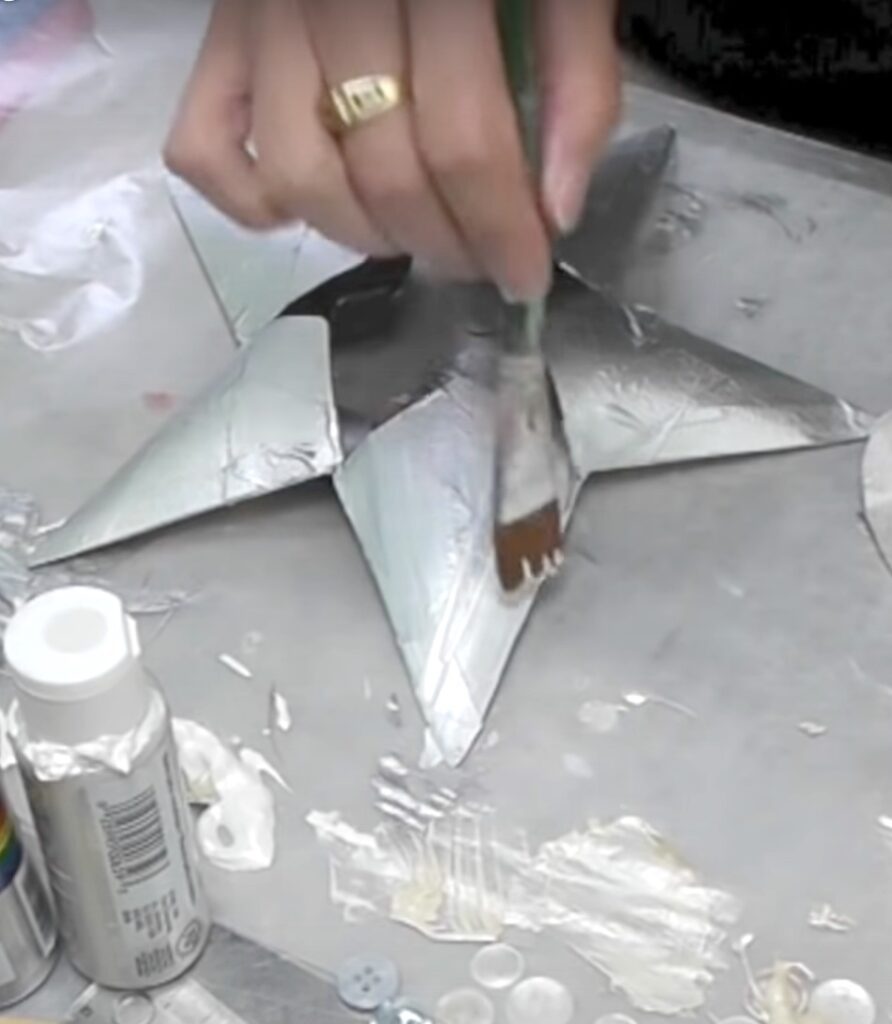
Step 7: Sparkling Finish
Paint the star either a silver or a pearl white. Paint the inner circles a metallic champagne. It might take two coats. Allow to dry.
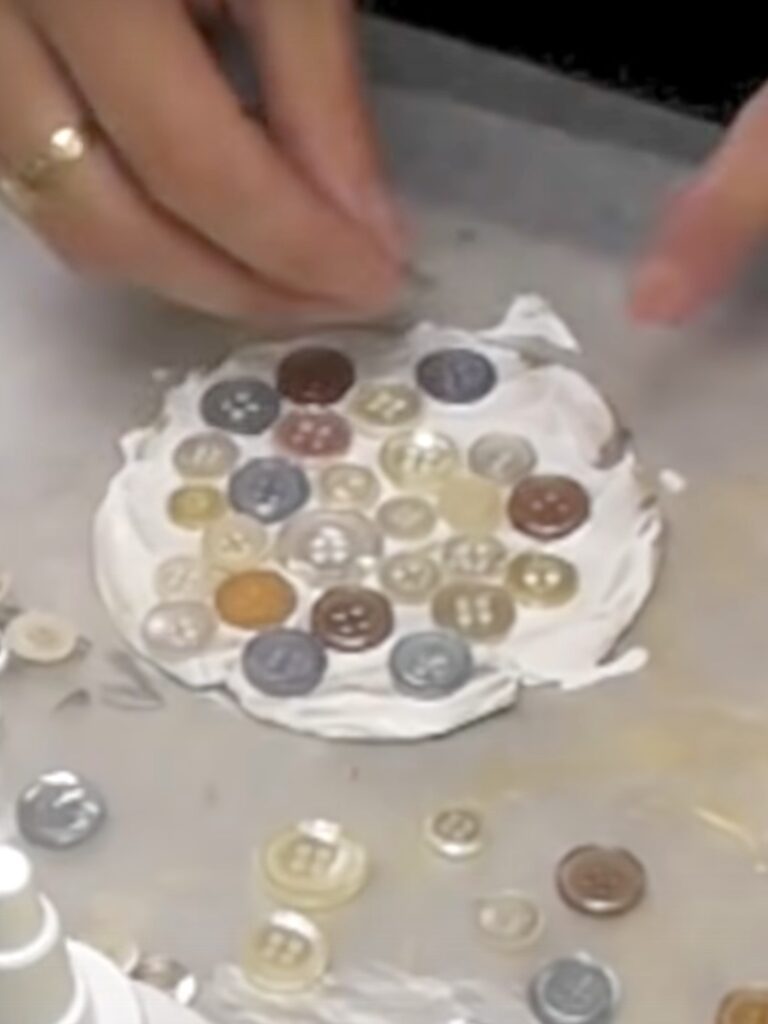
Step 8: Embellishing with Buttons and Glitter
Take your glue and put a thick coat onto the circles. Place your buttons in the glue. Once you have the buttons in place, add small gemstones. Then dust with a fine glitter. I used the Glamour Dust glitter.
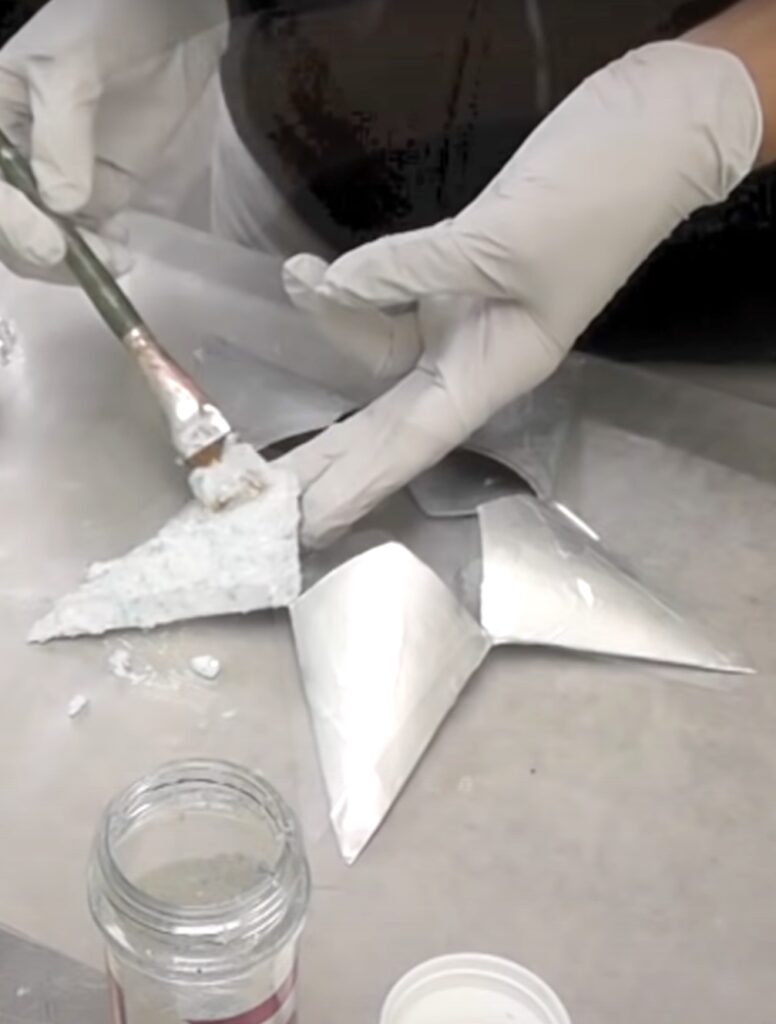
Set those aside to dry. Now mix white chunky glitter, with light blue chunky glitter, with just a hint of silver. Mix with some of your white glue and brush it onto your star – do one side at a time. Sprinkle with more of your glitter mix and allow to dry. Repeat on backside.
Step 9: Final Assembly
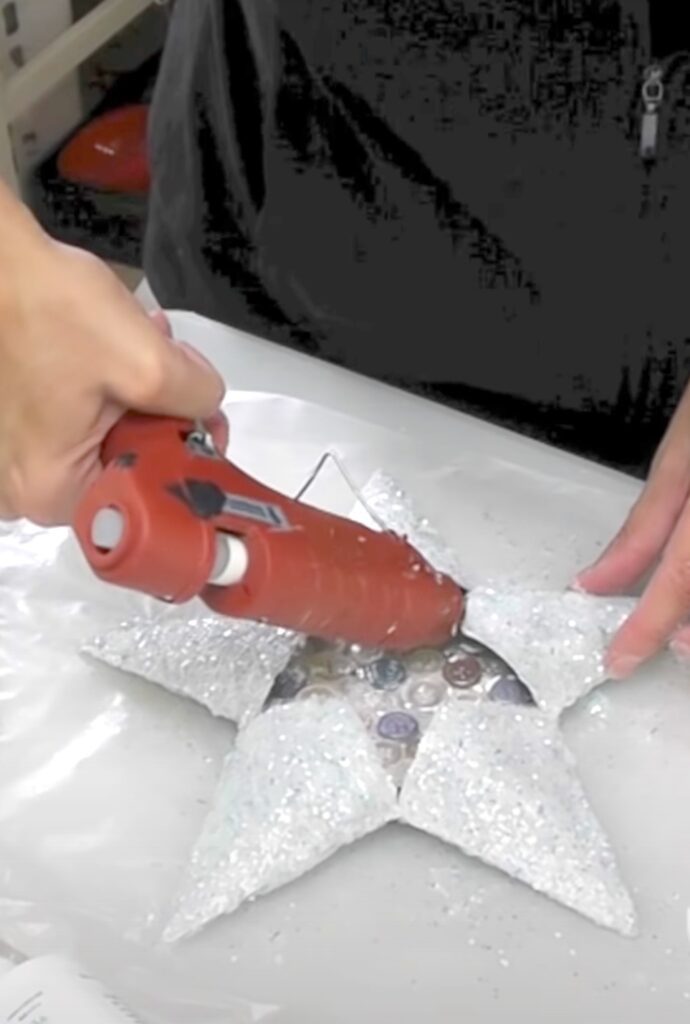
Insert one button circle. Take a stir stick and your Ultimate glue and put some on the inside arm of your star. I found doing this one arm at a time worked best. Then add some hot glue. The hot glue will hold everything in place, while the other glue dries. You will need to hold it in place until the hot glue cools. Repeat with the other four arms.
Repeat with the backside. It’s hard to hold things in place on the backside, so I inserted a skewer stick between and was able to hold the piece in place while the glue dried. Then I just pulled it out.
Step 10: Finishing Touches
Hot glue on some additional gemstones and that’s it!
It’s a great star that can be tucked anywhere to add a little Christmas cheer! However, if you think about it, if you leave a hole in the bottom, this could just as easily have been a step by step DIY star for a Christmas tree.
Share Your Creations
Now that I’ve shown you the step by step DIY Christmas star directions, you need to go check out Suzy’s Project!
We’d love to see your creations! Let us know how you did and if you’d like more challenges in the future.
Unlock More Step by Step DIY Christmas Crafts
I have so many fun Christmas crafts to share! Here are a few more I think you will love!
Crafting is a joyful journey where creativity knows no bounds and ideas really take flight during the holidays!
In case you missed it, be sure to check out how this challenge was giving me nightmares!
That’s it! Thanks for stopping by and be sure to let us know how we did and if you would like us to do something like this again!
Remember: Life’s too short not to shimmer, so grab your glue gun and your glitter!™ Stay safe
Mona
Hi my love Mona, gorgeous!!!! You have such a creative mind! Thank you for sharing it with the rest of us. Love ya' Patricia B
Thank you Patricia!
Great tutorial and lovely finished product.
Thank you so much!
I can't wait to try the star
I hope you do! 🙂
I make purses fro tp rolls and I love this star, do u have a template for the 5 points of the star by chance?
I know all tubes are not the same but for a basic shape since u have the slight v shape on the bottom of them
Hi Jessica- You are about a year too late! I don't have it anymore. I flattened a tube, cut the "V" at the bottom and then cut a template. I then used the same sized rolls and put it together that way. Toilet paper rolls are cheap, so you can easily experiment!! Sorry I couldn't be of more help!
Mona