Life’s too short not to shimmer, so grab your glue gun and your glitter!™
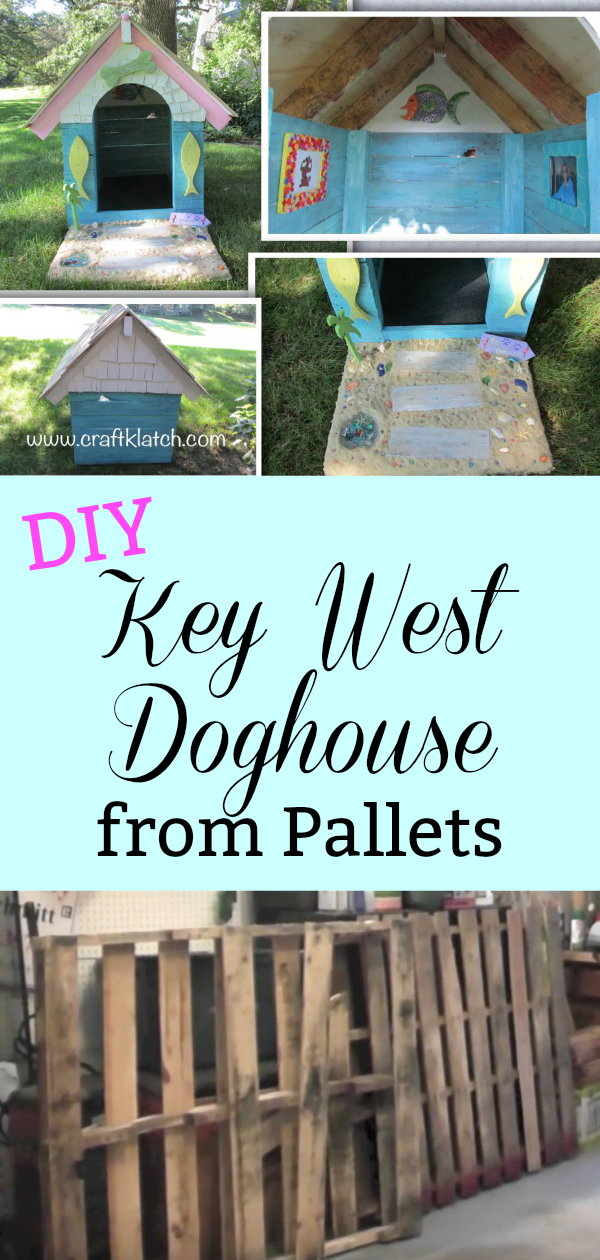
Garbage to Gorgeous Episode #6 – Part 1: I Built a Doghouse Out of What?!?! Coco’s Key West Inspired Beach House! Extreme Dog House
I was contacted by Dog Fence DIY (http://www.dogfencediy.com), to contribute to their Do It Yourself Hackathon. I was asked if I would make a dog related craft. I gave it some thought and decided I wanted to stretch my crafting chops and make a doghouse. I wanted it to be a Key West beach house inspired doghouse – like someone built a colorful cottage, right on there on beach. I wanted it to be sturdy, but I wanted it to look like someone just decided to put it there. And of course it had to be colorful!
I wanted to use as many recycled materials as I could. I used a table (found just outside of a dumpster, up in Wisconsin), for the frame. I used three old pallets, for the siding and building the roof structure. I did buy plywood for the base and for the part of the roof. I used shims, from Home Depot, for the shingles. I wanted the shingles to be different sizes because remember this is a beach cottage.
The main tools I used were: – Hammer – Pliers – Jigsaw – Rotary tool – Nail gun – Staple gun Since it would be impossible for me to fully write out the directions, here are the videos for Part 1 and Part 2, so you can see the details, including the interior decorating and how I made the front yard!
Here are some highlights:
1. I turned the table upside down, so it could create the frame of the doghouse.
2. I purchased a piece of plywood that would be a nice base for the doghouse and allow me to create a front yard.
3. I used a sealer that is good for outdoors and sealed the base. I don’t want it to rot when is it outside.
4. I cut out the false bottom from under the table and screwed the table onto the plywood.
5. I had Greg help me find some pallets (there may have been some whining and eye rolling – not me) and he helped me take them apart (which means he took them apart). Who knew pallets could be so hard to take apart?!?!?!
6. I took the pallet wood and nailed them to the legs of the table, to make the siding.
7. I used a jigsaw to cut the walls straight.
8. I then used smaller pieces on the front and cut the opening wider for the entrance.
9. I painted the walls with an indoor/outdoor paint. I used a blue and white mix.
10. I used two by fours to create gable for the roof.
11. Then we nailed on plywood.
12. I cut out an arched piece for the entrance, but didn’t attach it yet.
13. I bought a bundle of shims for the roof and nailed them on one by one.
Look! I fit!
14. I shingled the front part of the arch, painted it white and attached it to the house, but first I attached a bone, with Coco’s name on it. Oh, I also whitewashed the roof, to seal it.
15. I attached smaller pieces of wood to look like a wood walkway and gathered small shells. I cut some fish out of wood and attached them to the house and cut a small palm tree.
16. I prepared some resin and mixed it with sand and white/clear glitter and applied it to the front yard. Be sure to watch the video to see all the cute little details!
17. I also created a little indent and made a resin pond for her, with little things floating in the “water”.
That’s it! I added a little rug and decor pieces inside, which you can see in the video!
You can find the home decor items used to decorate the interior here:
Thanks for stopping by! Remember: Life’s too short not to shimmer, so grab your glue gun and your glitter!™ Stay safe!