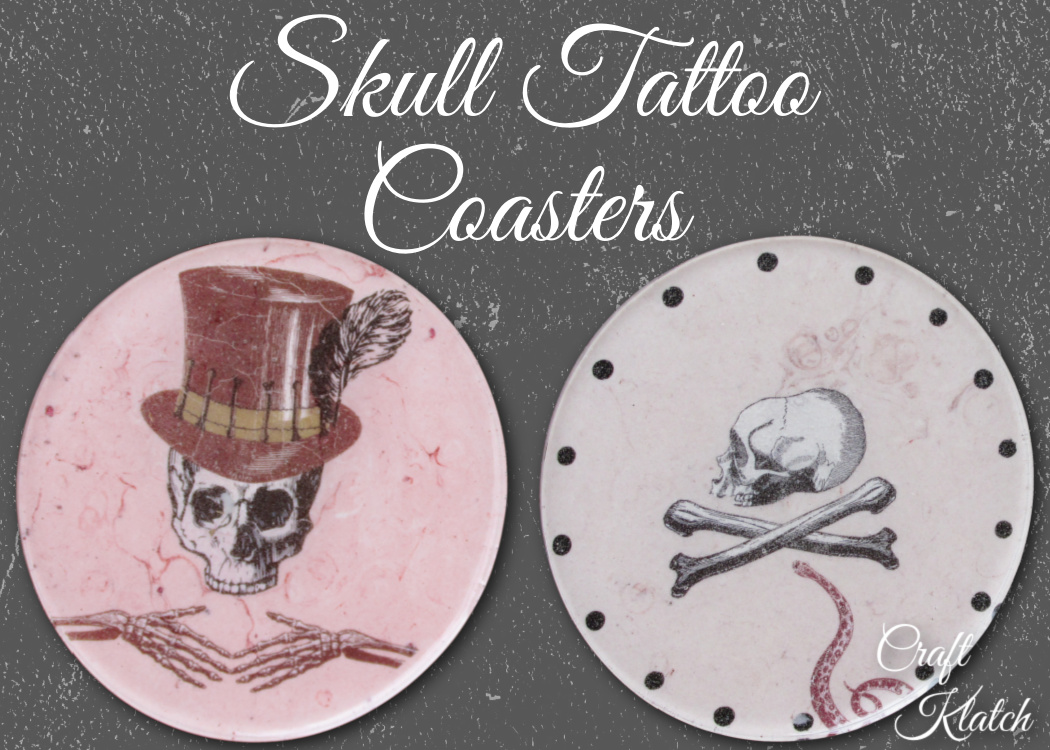
Learn how to make resin coasters using temporary skull tattoo for Halloween! It’s a fun DIY project!
Maybe you like tattoos, but don’t want them on your body permanently. You can incorporate a tattoo in a resin coaster and make it part of your home decor!
Skull tattoos aren’t just for Halloween anymore!
Take a trip to the party store or online and you will find some amazing tattoo ideas!
Skull Tattoo Coaster Video Tutorial
Here is a quick video tutorial, so you can see exactly how I made them:
*This blog uses affiliate links. As an Amazon Associate I earn from qualifying purchases.
Other Skull Crafts That Don’t Involve Tattoos
Before we get started, be sure to check out some of my other skull and skeleton crafts. They don’t involve tattoos, but are pretty cool!
I have a Dollar Store Skull Wall Hanging and Halloween Skull Coaster. He’s quite bright!
For a different kind of resin project, you can try Sugar Skull Decoration! that involves resin, or Garbage to Gorgeous Episode: Sugar Skull Wall Hanging, which was made from pallet wood.
Supplies To Make Skull Tattoo Coasters
- Mold: http://amzn.to/2FcRd7J
- Temporary tattoos: Party City
- Pigment powders: https://amzn.to/2RL523A
- Black acrylic paint: https://amzn.to/2J8YXKm
- Skewer: https://amzn.to/2CTXTJR
- Lighter: https://amzn.to/2NQusts
- Wet Ones: https://amzn.to/2pXbqrQ
- Fast Cast (optional for white background): https://amzn.to/2wTZ6wc
- White pigment (optional to tint clear resin for background): https://amzn.to/2QbPRiU
- Resin
- When deciding on which resin to use for your coasters, you need to keep in mind whether you want it just for cold cups or for hot ones as well.
- If only for cold drinks, you can be flexible and use whatever brand you like:
- If you want it to work for both hot and cold drinks, you need to look for a heat-resistant resin, like these:
- FX Poxy ~ According to the manufacturer, this one is heat resistant to 500° F.
- Stone Coat
Directions on How To Make Skull Tattoo Coasters
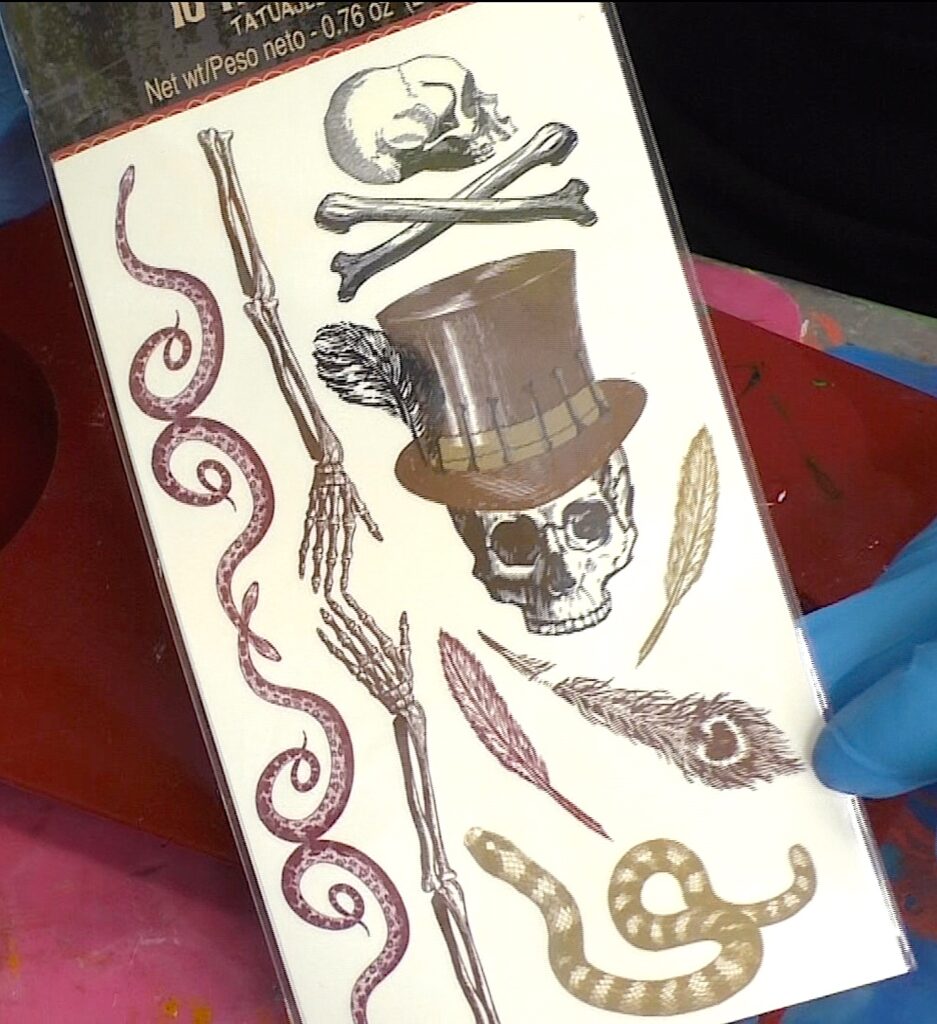
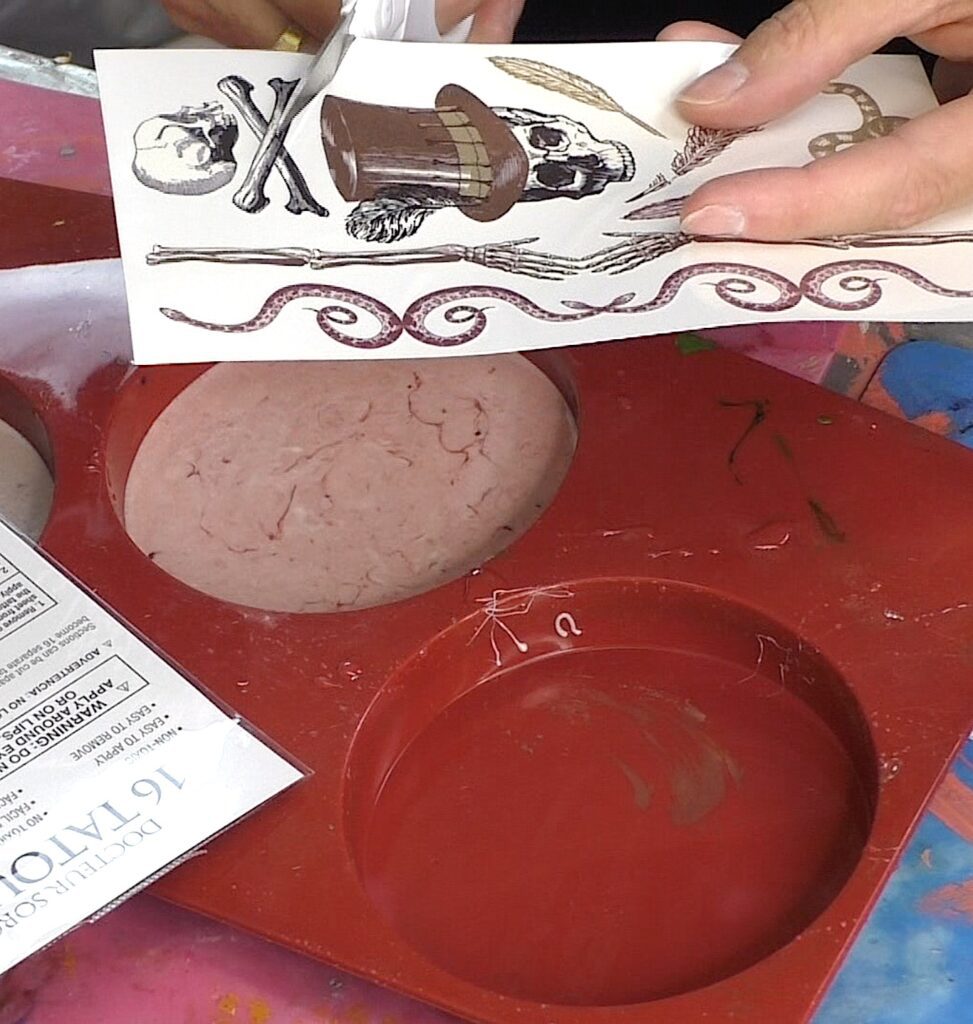
Step 1: Go find your skull tattoo!
I found some temporary skull tattoos with an old world creepiness to them.
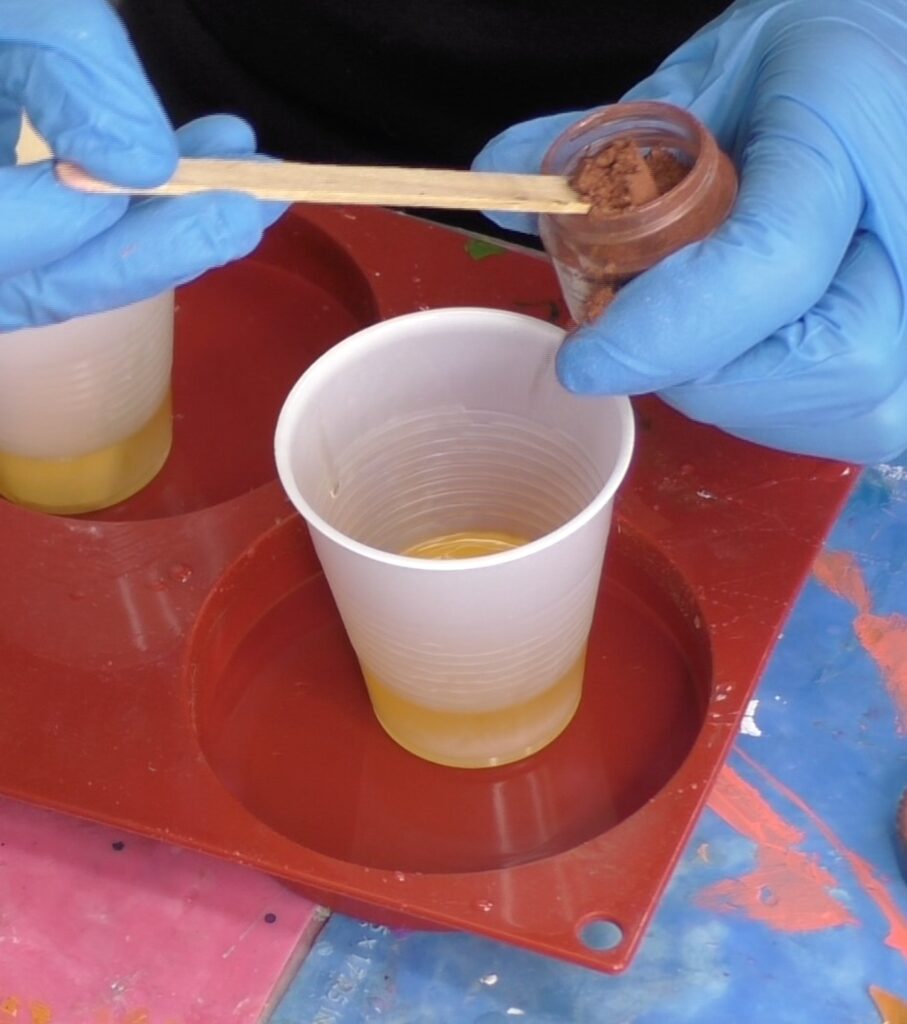
Step 2: Mix your resin
I mixed two ounces of resin. I used a resin that cures white and is a quick curing resin. You can use regular clear resin and add color instead. Because the resin I used cures white, I had to take that into consideration when adding color.

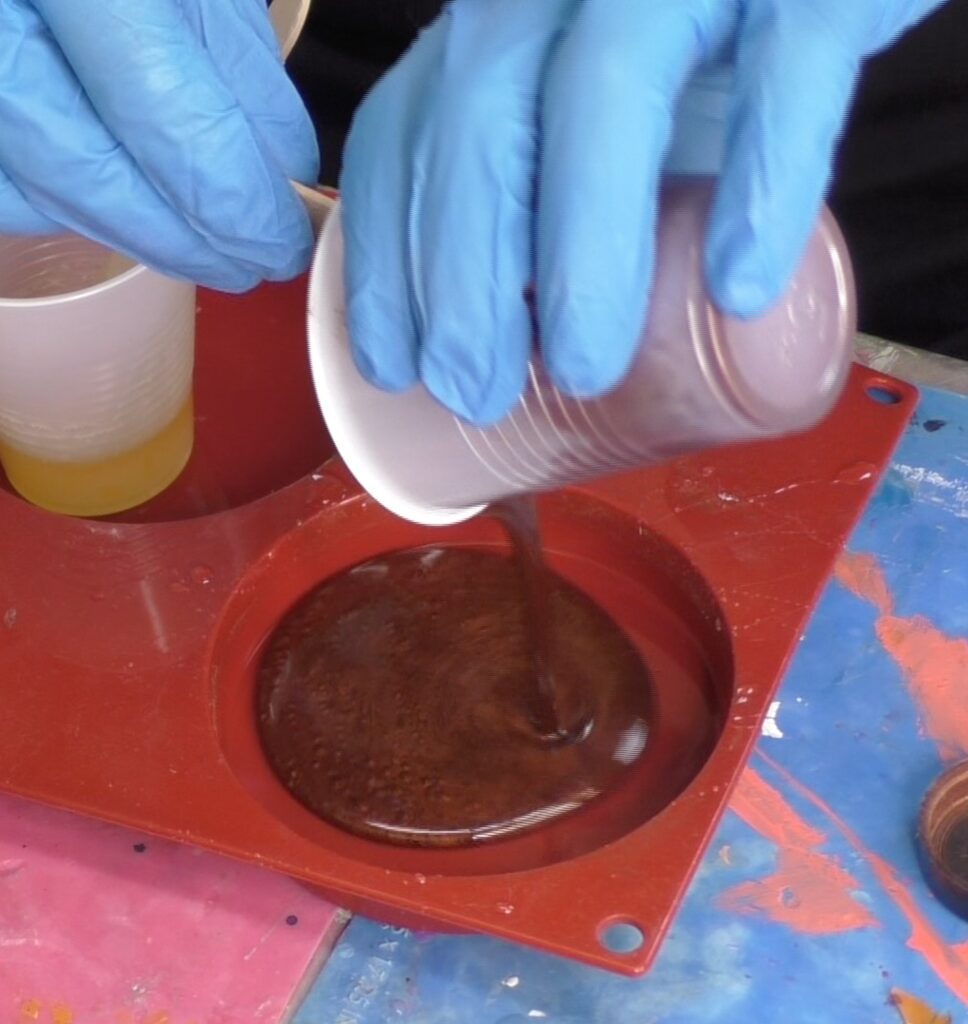
Step 3: Pour resin
Once mixed, I poured the resin into the mold.
Step 4: Trim your skull tattoo
Once cured, I cut out the tattoos.
Step 5: Determine your layout
I laid them out on the coasters, for spacing purposes.
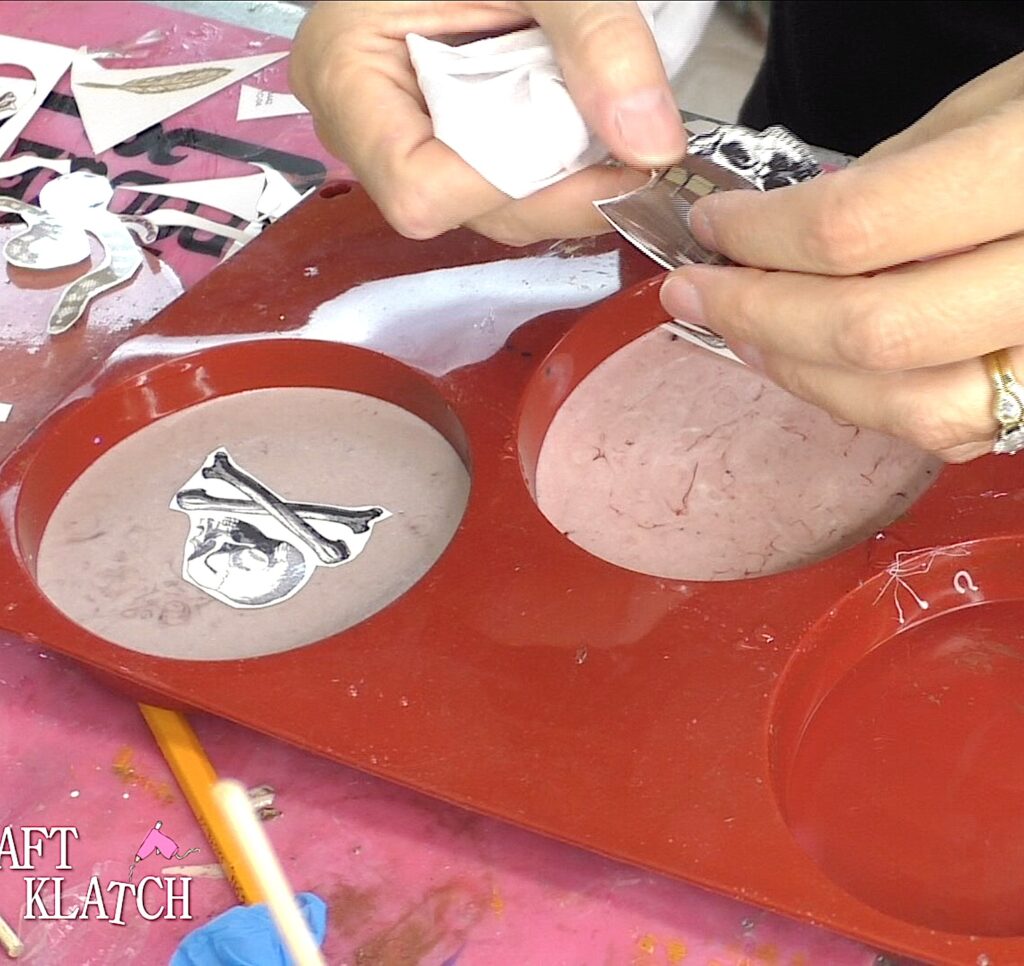
Step 6: Peel off the skull tattoo backing
I peeled off the clear backing and placed the tattoo face down.
Step 7: Wet it down
I used a wet one – you can also use a damp paper towel.
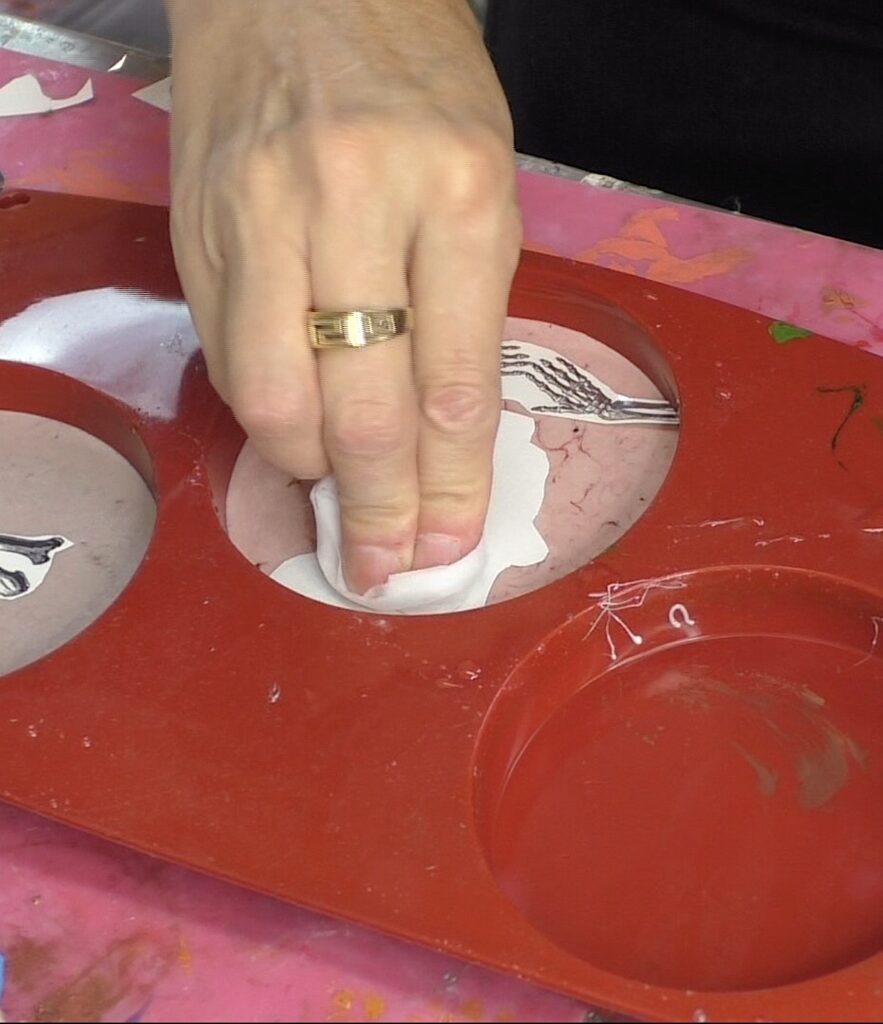
Step 8: Peel it!
I carefully peeled it up.
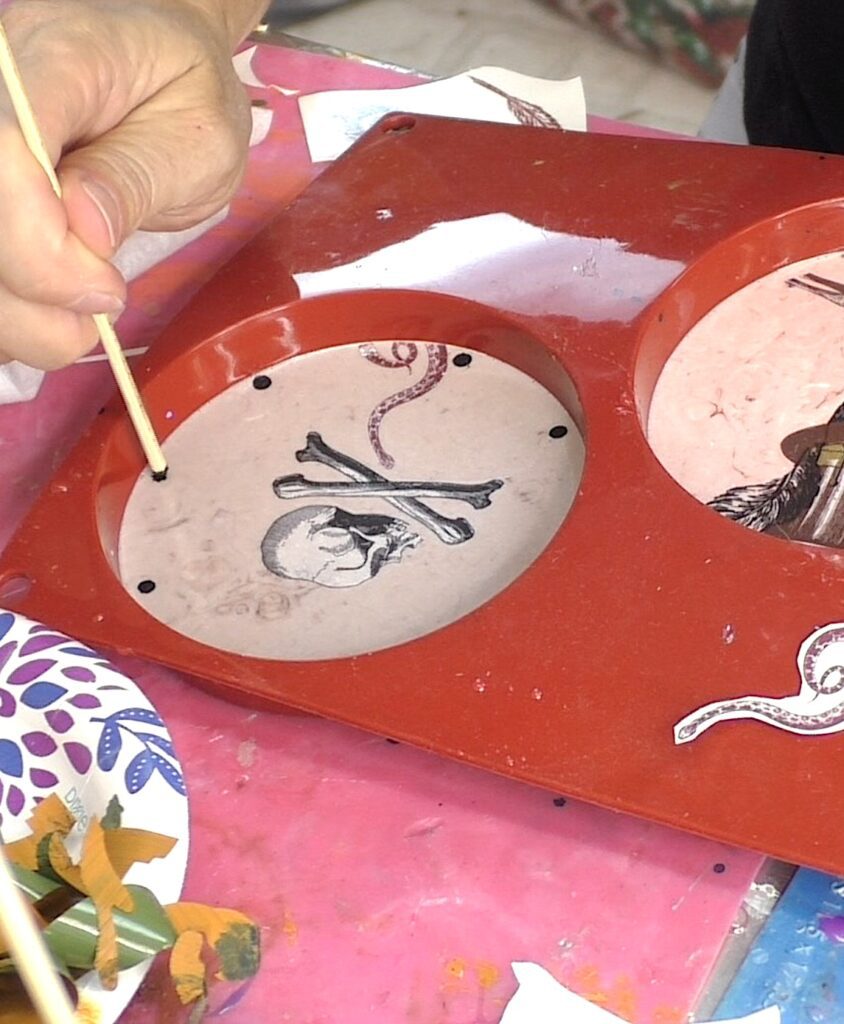
Step 9: A little embellishment
I painted on dots for additional embellishment.
Step 10: More resin for the skull tattoo!
I mixed two ounces of resin and poured it onto the coasters.

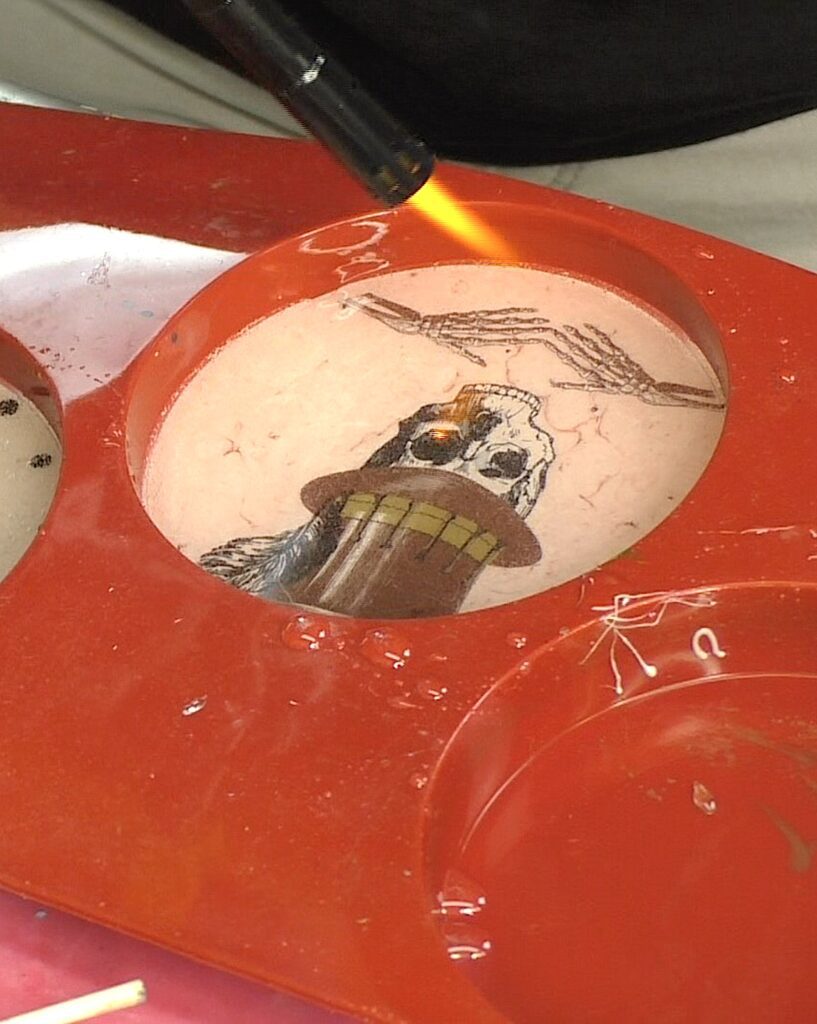
Step 11: A little heat
I popped the bubbles, with my lighter and let it cure.
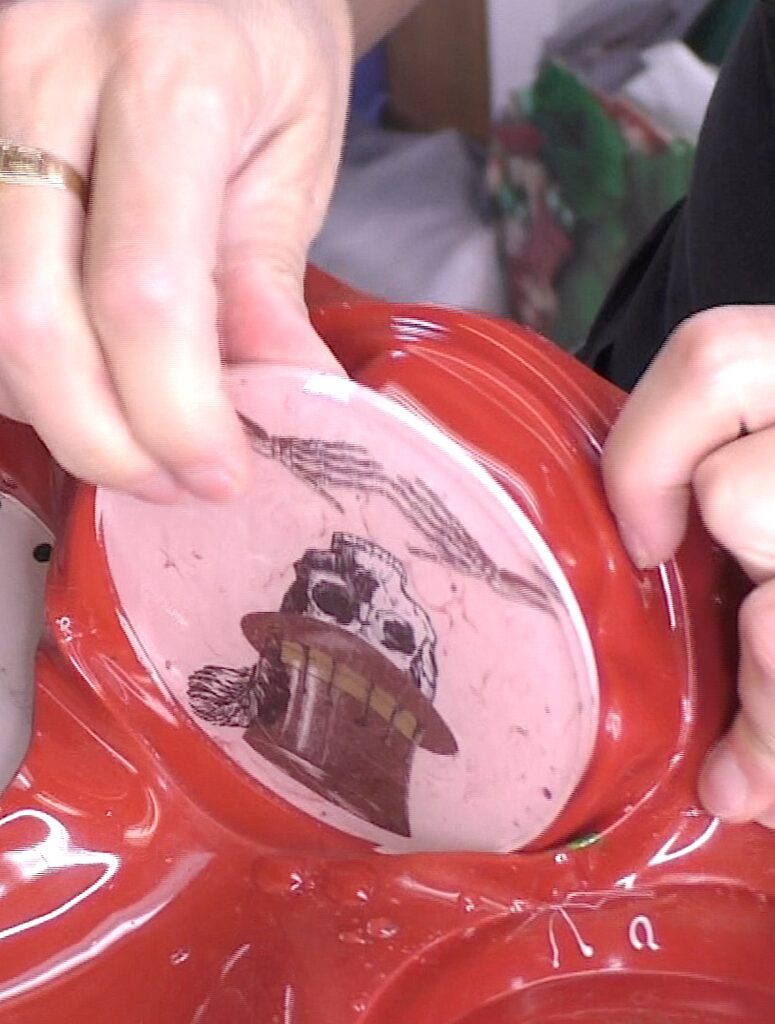
Step 12: Pull it on out!
Once cured, I removed it from the mold.
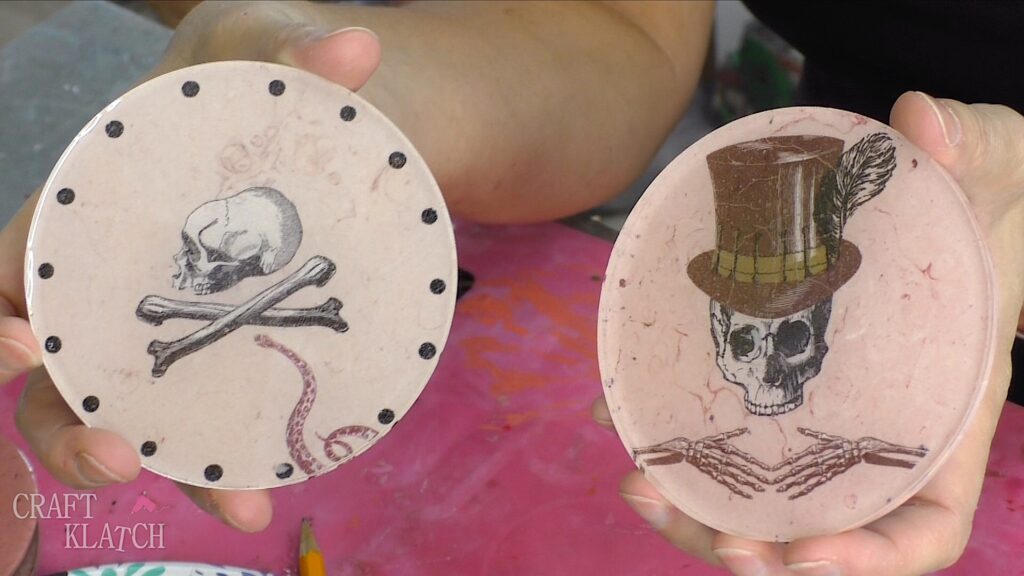
That’s it! Now you have some cool, but creepy skull tattoo coasters!
Thanks for stopping by! Find more Halloween Crafts HERE!
If you are looking for some Halloween curb appeal, you can find Four Inexpensive Halloween Door Decorations HERE!
Amazing Halloween Coasters!
If you don’t have time to make the Halloween coasters but want some for the holiday, here are some amazing finds!

Remember: Life’s too short not to shimmer, so grab your glue gun and your glitter!™ Stay safe!
Mona