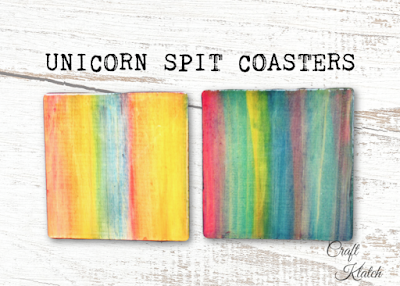
Learn how to make a Unicorn Spit Coaster! It’s an easy resin coaster DIY! The thing I love about doing coasters is they are a small canvas to try different art techniques and decor techniques. This coaster is a perfect example of how you can take this small and inexpensive project and apply it to a larger canvas to make an inexpensive home decor item that looks like a million bucks as wall art or leaned up on your mantel. You can customize the color to reflect your personal style and home decor theme!

You will need:
– Wood squares: https://amzn.to/2YwFx8H
– Unicorn Spit Blue Thunder: https://amzn.to/2YBFets
– Unicorn Spit Lemon Kiss: https://amzn.to/2HlsuB8
– Unicorn Spit Pixie Punk Pink: https://amzn.to/2HoCJVq
– Unicorn Spit Purple Hill Majesty: https://amzn.to/30pZ3FB
– Unicorn Spit Dragon’s Belly: https://amzn.to/2EcTNvG
– Cork: https://amzn.to/2HpjdZ3
– Resin (use whatever resin brand you like):
Glaze Coat (top): https://amzn.to/2DQa1dN
Easy Cast: http://amzn.to/2yjYmBC
Art Resin: http://amzn.to/2yk9X3z
Clear Cast: http://amzn.to/2z4rxGw
This is the resin I used for this project:
FX Poxy: http://amzn.to/2AF3Pkk ~ According to the manufacturer, this one is heat resistant to 500 degrees F.
I used #UnicornSpit and #GlazeCoat! Their website: http://tryglazecoat.com
Here is a quick video tutorial, so you can see exactly how I made them:
1. I found these wood squares at the craft store.

2. I used Unicorn Spit in five different colors.


3. I put two colors at a time, on my paint brush and put it on the wood squares. They blend beautifully!


4. I used a paper towel to wipe off the excess,


5. I put the coasters up on cups. I mixed two ounces of resin and poured it on the coasters.

6. I used a sponge brush to move the resin around the coaster and to have more control.

7. Once I had it all covered, I used a lighter to pop the bubbles and let it cure a minimum of 12 hours.

Now they look great and shiny!


8. I did not to the back of the coasters, so I pulled out my cork shelf liner.


9. I cut it to size.

10. I peeled off the backing.

11. I applied it to the back of the coasters.

12. Rubbed it down.

That’s it! Now you have beautiful coasters that won’t scratch your table.


Thank you for stopping by! Remember: Life’s too short not to shimmer, so grab your glue gun and your glitter!™ Stay safe!
Mona


