It’s time to reveal the Holiday Craft Challenge projects. For a quick review, this is the second Holiday Craft Challenge between Craft Klatch and Suzys Sitcom.
If you missed the first one, you can find it HERE!
This time, we had two restrictions.
1. We could use anything we wanted, but we HAD to include newspapers.
2. It had to be a holiday-themed craft.
So, off we went to our craft rooms and this is what we came up with:
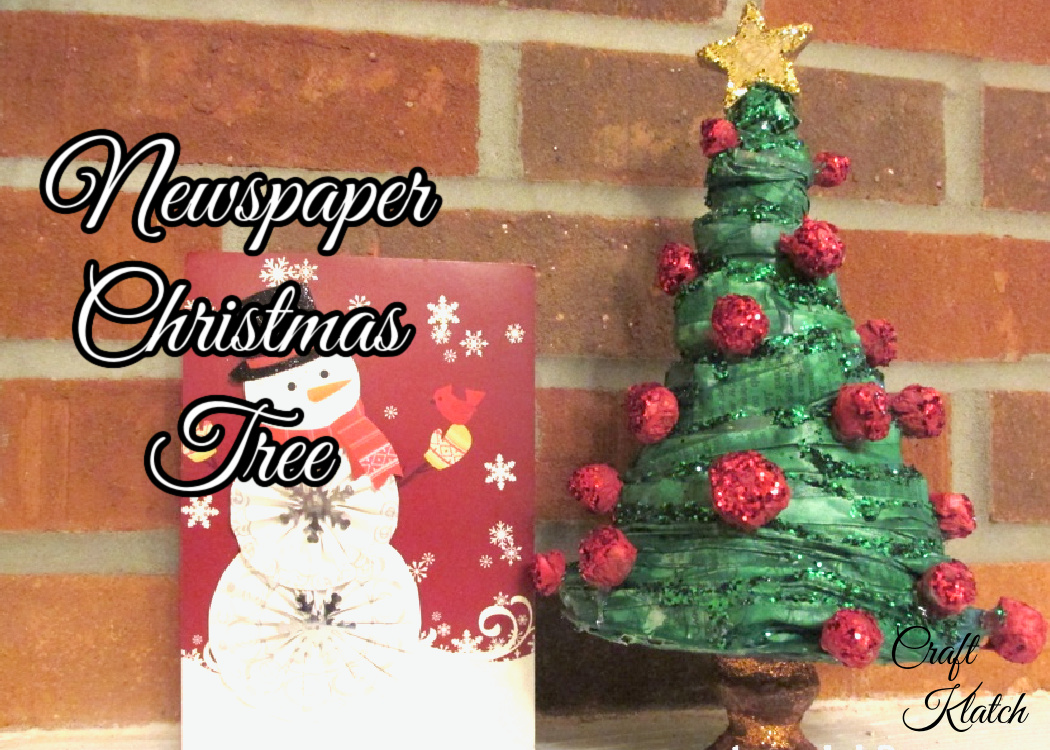
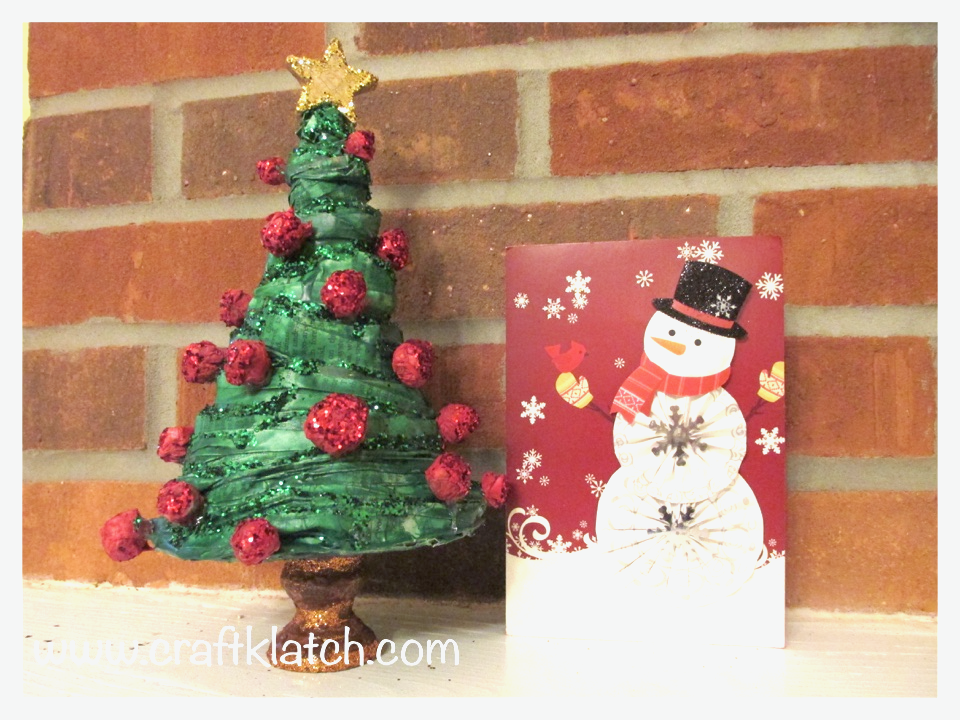
I decided to do a Christmas Tree.
And Suzy made these A-D-O-R-A-B-L-E Holiday Birds:

They turned out SO CUTE!!
If you want to see how Suzy came up with her project, you can find all the directions HERE!
*This blog uses affiliate links. As an Amazon Associate I earn from qualifying purchases, at no additional cost to you.
Supplies you will need:
- Newspapers
- White glue (a lot): https://amzn.to/2S6l7R1
- Green acrylic paint: https://amzn.to/2LmokJG
- Red acrylic paint: https://amzn.to/2LmoCjK
- Gold acrylic paint: https://amzn.to/2Grxgi2
- Brown acrylic paint: https://amzn.to/2Lns1Pq
- Hot glue or tacky glue: https://amzn.to/2LmgoIB
- Varnish: https://amzn.to/2QEZTgm
- Chunky green glitter: https://amzn.to/2S6nmnp
- Chunky red glitter: https://amzn.to/2S6kK9d
- Chunky gold glitter: https://amzn.to/2URgegw
- Fine copper or brown glitter: https://amzn.to/2CjFggZ
- Wooden star: https://amzn.to/2EBBh1S
- Wooden candleholder: https://amzn.to/2SeUvgE
- Wax paper: https://amzn.to/2GmHCzM
- Patience (It takes quite a while to dry.)
Here is the video tutorial:
Directions:
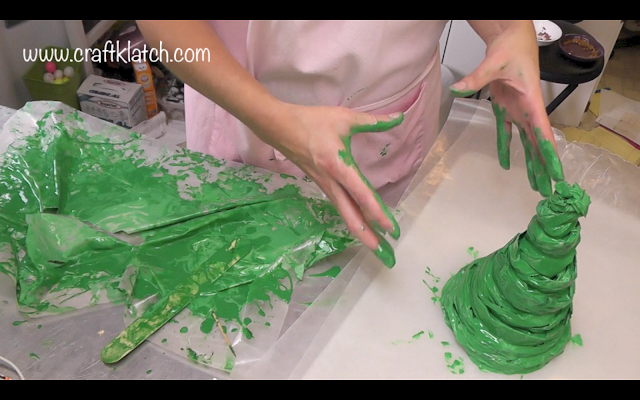
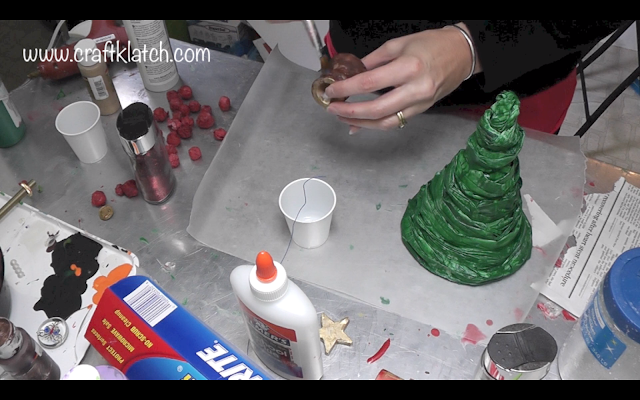
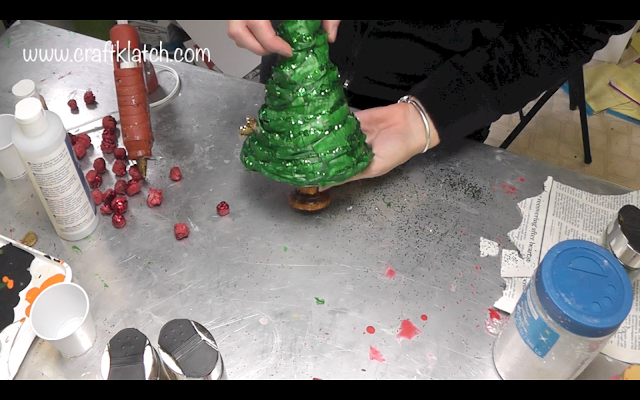
1. In a plastic container, pour a bottle of glue and add green acrylic paint to color. Mix well.

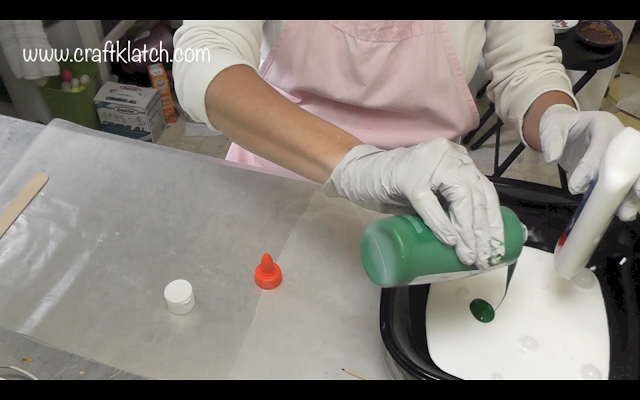

2. Line your work surface with wax paper, or garbage bags to protect your table top. Rip a section of newspaper (I used half sheets) and dip a section into your glue and paint mixture. Make sure it is well covered and squeeze off any excess.


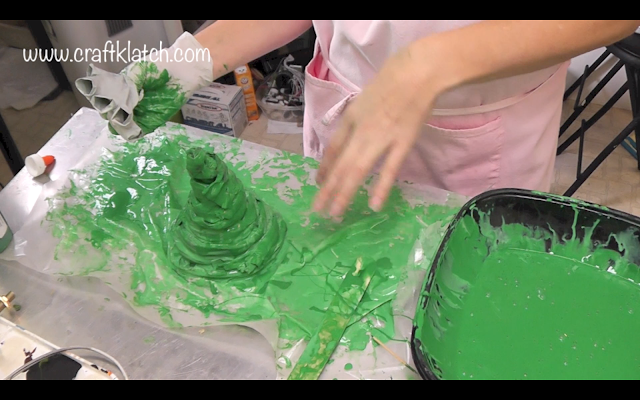
3. Make it kind of a snake shape and coil it around in a circle, on your wax paper. You can squish it down to make it wider, but keep coiling. You can put the next level up on the base and keep coiling until you get the shape of a tree.


4. Once you have it the size you want, take thinner strips and wrap those around as well. The tree is very moldable and pliable at this time, so you can squish it and shape it as you wish.

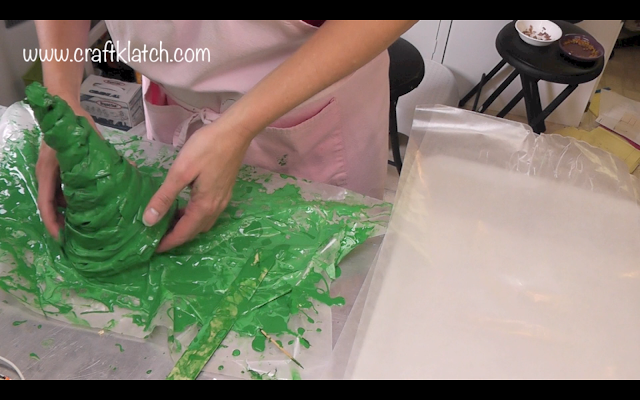
5. Once I had it shaped, I gently scooped it up and moved it to a tray that was also lined with a fresh sheet of wax paper. I then moved it to a warm spot to dry. Warning: This will take probably 48 hours to dry enough – depending on how humid and warm it is where you are at.
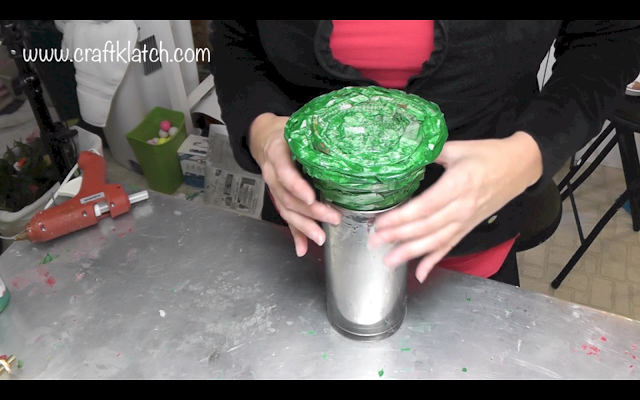
6. After 24 hours, I carefully removed the wax paper from the bottom and flipped it over into a vase, so the bottom could better dry. I left that for another 24 hours.
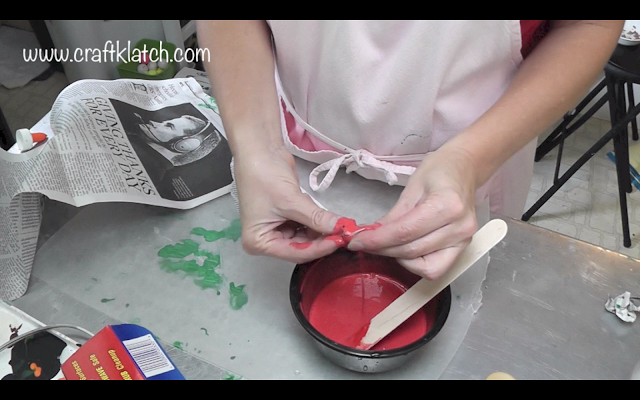
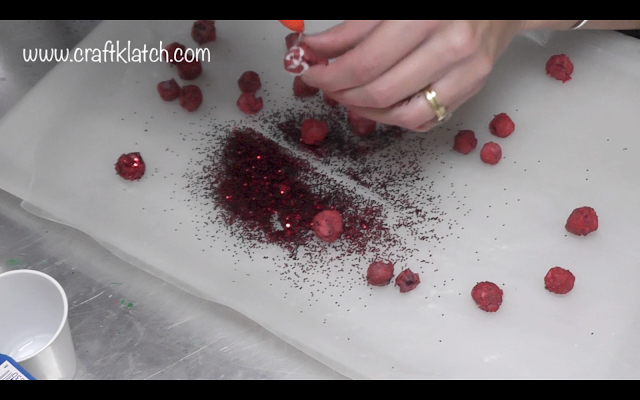
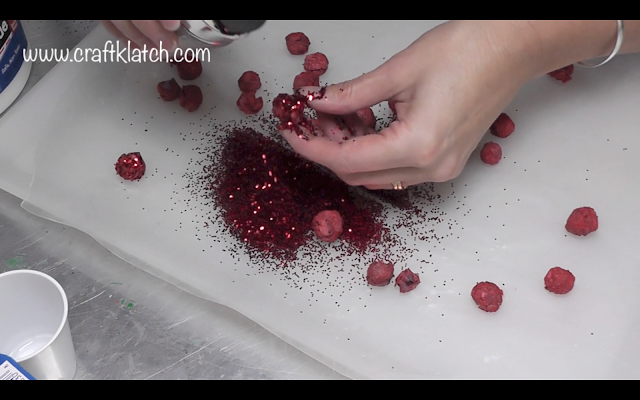
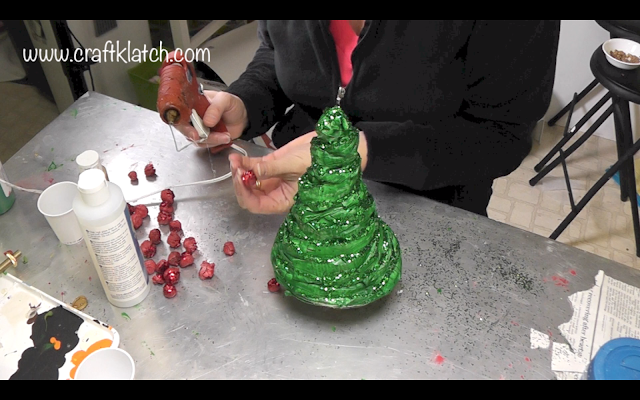
7. While it was drying, I made a red acrylic paint and glue mixture and tore small pieces of newspaper, dipped them and rolled them into balls. I let them dry on wax paper as well.
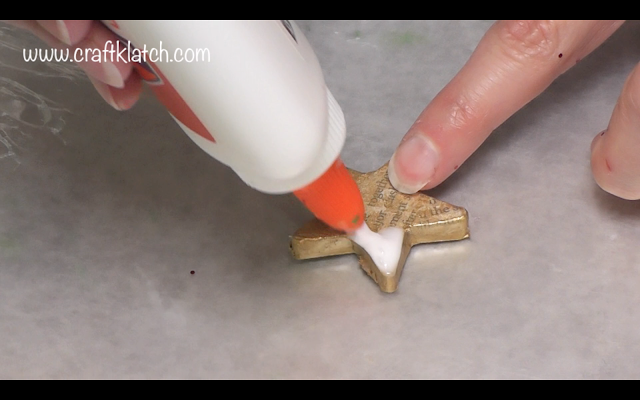
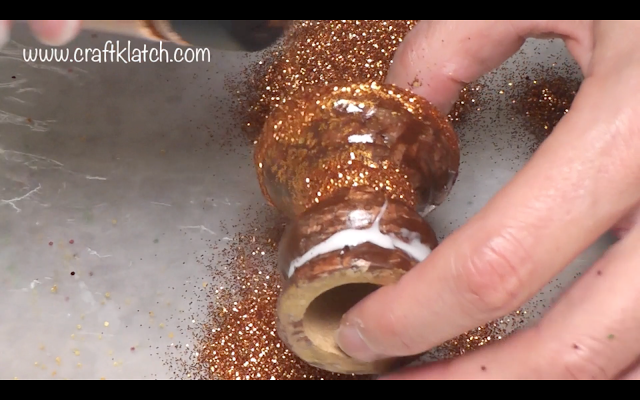
8. I also used a watered down glue mixture and added newspaper to the candleholder and the star.


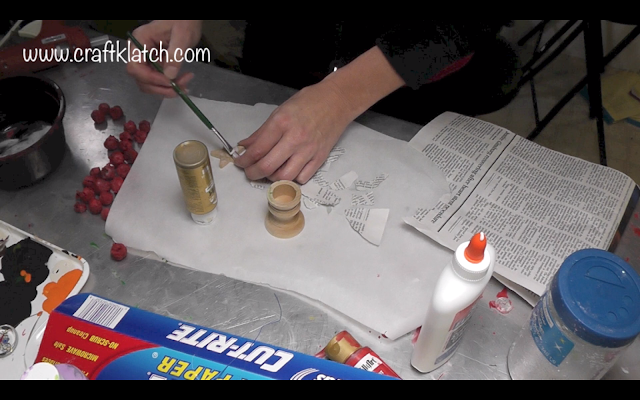
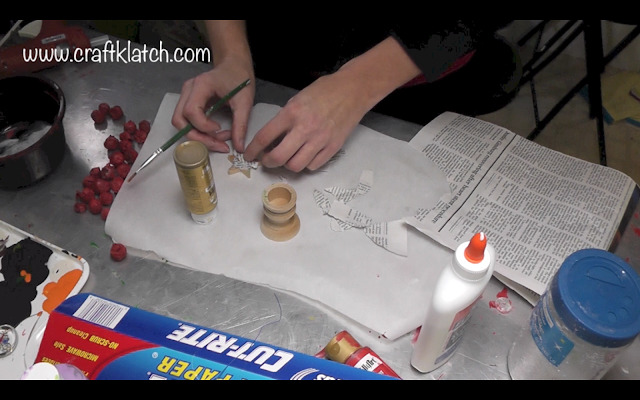
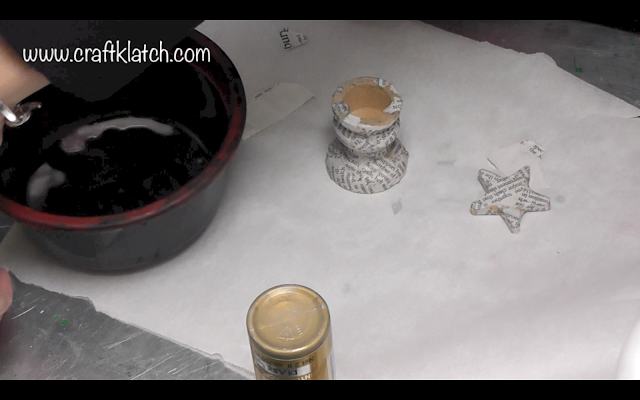
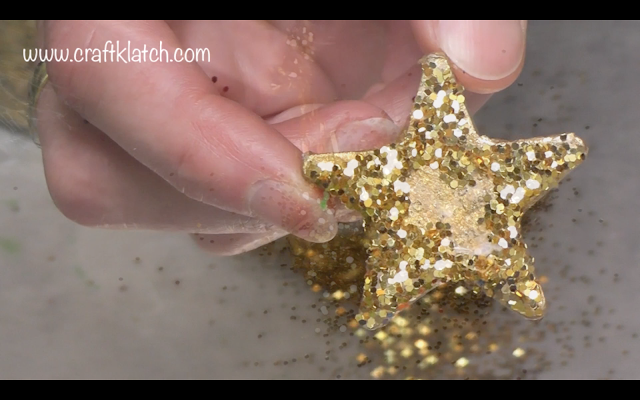
9. I then painted the star gold and the candleholder brown.

10. I put Triple Thick varnish on the candleholder and the star.
11. When everything was dry, I took more glue and ran a bead around the tree and sprinkled it with green glitter. I did the same with the ornaments, the star and the candleholder, but used coordinating colored glitter. Again, I let everything dry.


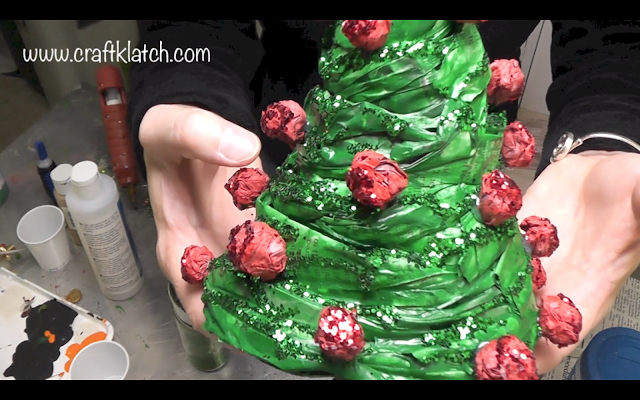
12. Time to put it together! I simply used hot glue to attach the candleholder as the base and the red balls as ornaments and the star on the top of the tree of course!!


That’s it! I was trying to make a project that was inexpensive and kids could get involved in too! I wanted the newsprint to show, but if you would rather it didn’t, you could always put a coat of paint over it, before you add the glitter.
Thanks for stopping by!
Remember: Life’s too short not to shimmer, so grab your glue gun and your glitter!™ Stay safe!
Mona