Can you really make ice cream art with toothpaste? I’ll put painting with toothpaste to the test…see what works, what doesn’t, and how it turned into a fun experiment!
I’ve done a lot of quirky craft experiments over years, but painting with toothpaste might be one of the oddest I have tried. Today, I’m turning toothpaste into ice cream art and I’m taking you along for the ride!
Be sure to FOLLOW ME on Instagram!
Supplies You Will Need
*Disclosure: This blog uses affiliate links from Amazon and other retailers. I earn a small amount from qualifying purchases at no additional cost to you.
- Canvas
- Toothpaste
- Textured medium/paint
- Pencil
- Perle Paint
- Patience
Ice Cream Art | Painting with Toothpaste Video Tutorial
Ice Cream Art Directions
Step 1: Getting Started on the Ice Cream Art
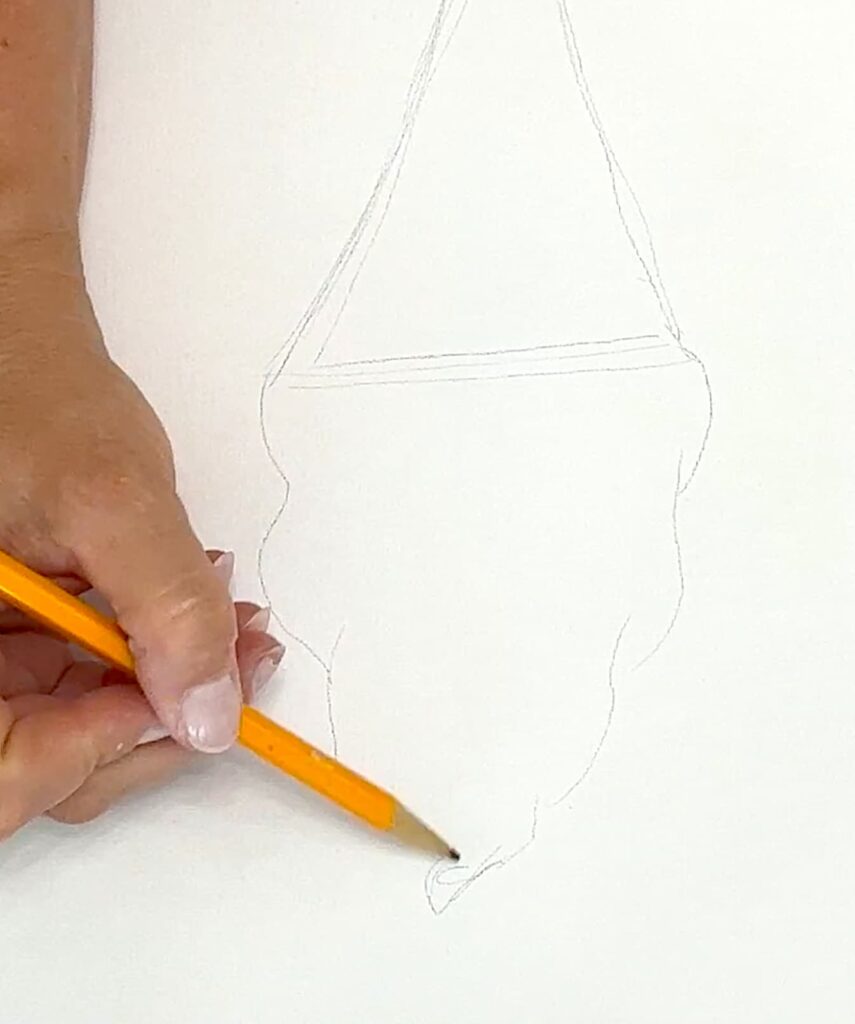
When I said painting with toothpaste, I really meant it! I wanted to see if I could use something as simple as a tube of dollar store toothpaste to create a fun an textured ice cream art piece.
I started by lightly sketching the outline of a classic soft-serve cone. You can totally freehand it, but I like having a bit of a guide to make sure everything fits nicely on the canvas.
Step 2: Creating the Striped Background
I used beautiful Perle paints from FolkArt – Cashmere Blue and Iced Aqua. I watered them down a bit and paint stripes as a background.
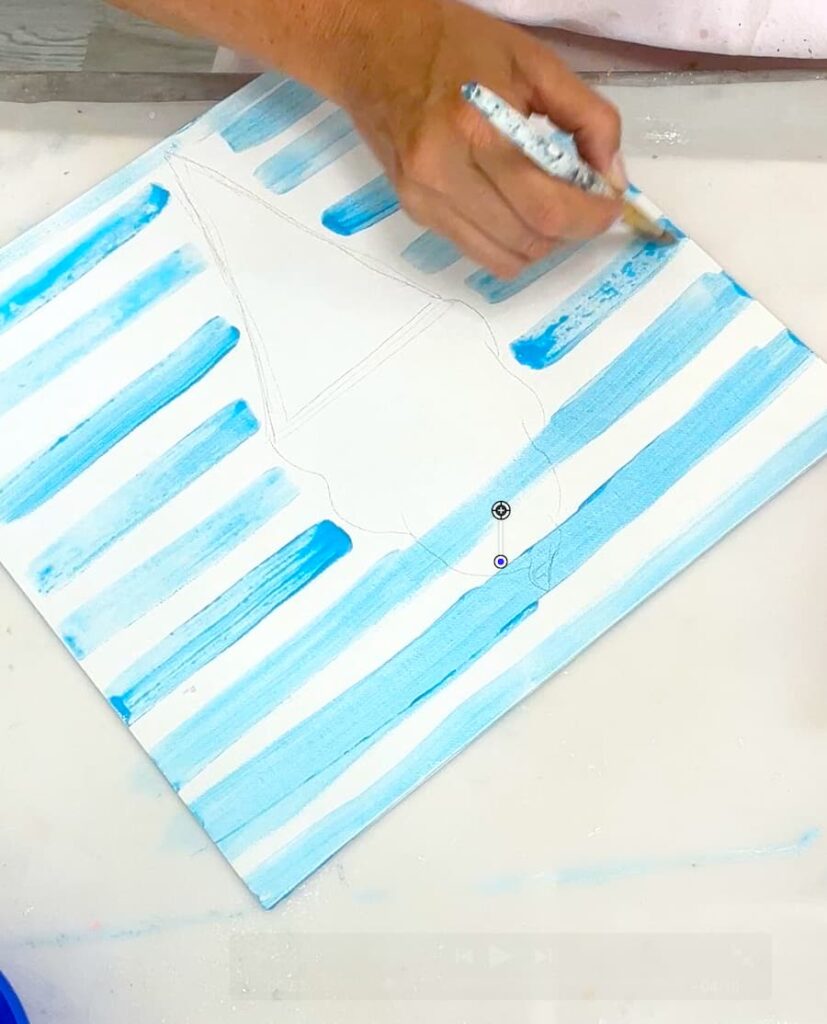
At first, I just did the stripes along the edges of the ice cream cone but then realized, I could paint right over it and still see it.
It’s a soft and dreamy background for summer ice cream art!
Step 3: Building Texture in the Cone
For the cone itself, I went with FolkArt’s textured paints in Bark and Sand. These paints have small grains in them that give the cone a realistic texture.
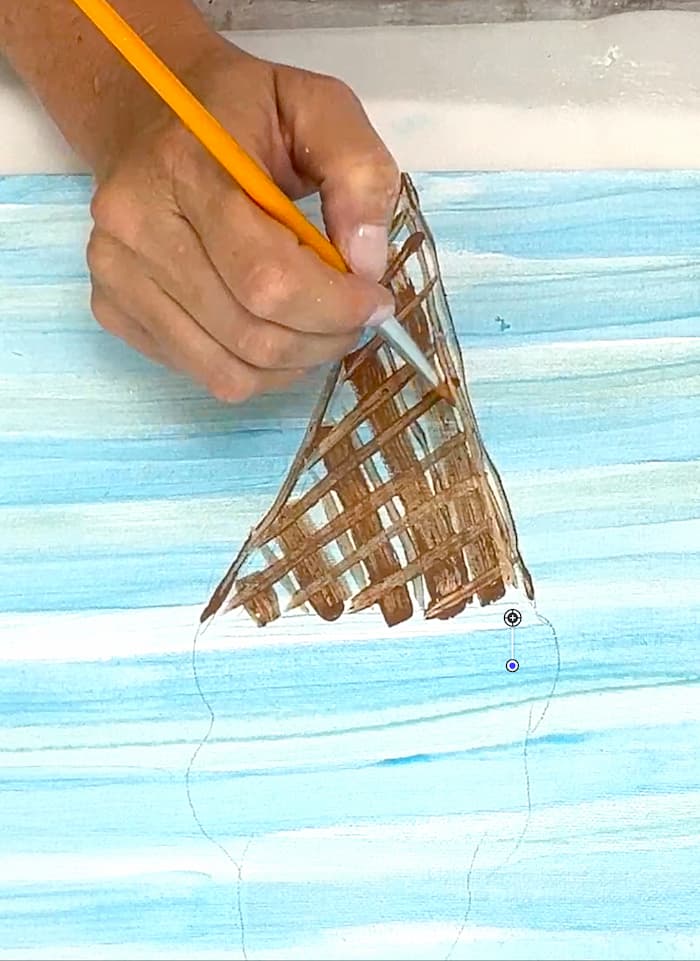
I used a thinner brush to create diagonal stripes and crisscrossed them for the perfect cone look!
Using both colors wet helped them blend beautifully, while keeping the grainy texture.
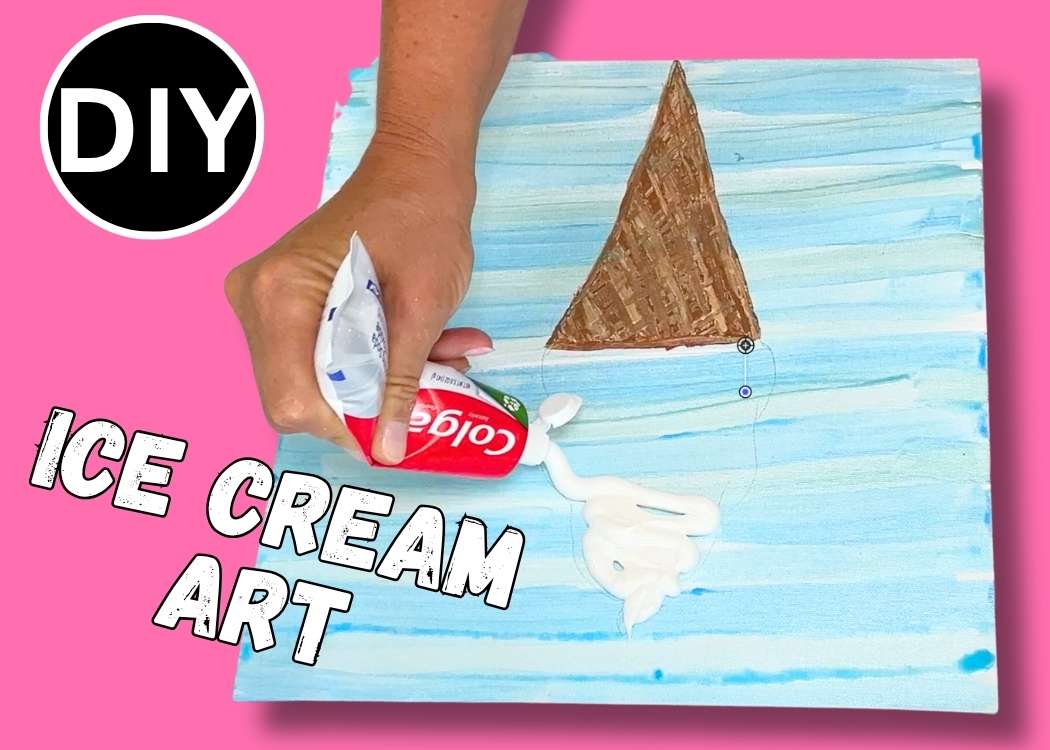
Step 4: Painting with Toothpaste: The Main Event
Here’s where things get weird…and fun!
I grabbed a tube of mint toothpaste…whatever was cheap at the store…nothing fancy!
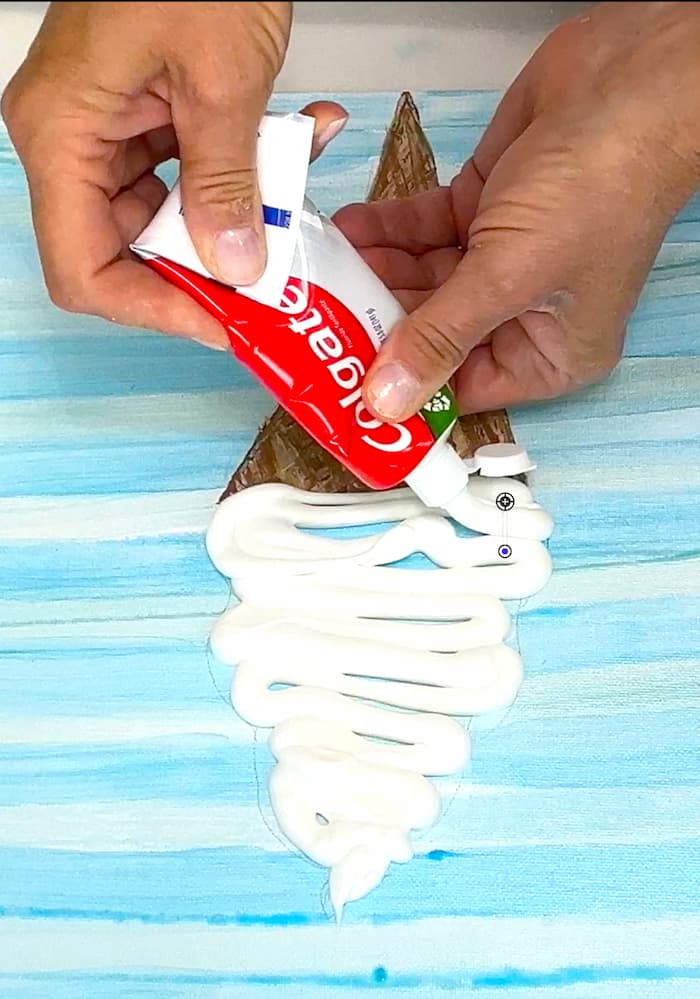
I followed the outline of the ice cream swirl with the toothpaste, creating a soft serve look by swirling it back and forth.
I couldn’t believe how consistent it was and how it actually looked just like the ice cream!
As a bonus, the room smelled minty fresh! It’s the best-smelling ice cream art I have ever encountered!
Then, I set it to dry but….that resulted in…
The Drying Dilemma
Here is where things got a little sticky…literally. I let the toothpaste sit overnight, assuming it would dry like it does in my bathroom sink. Nope. Even after 24 hours, it was still soft.

I tried putting it in my tumbler dryer. Still soft.
Then, I used my oven’s dehydrator setting for over 9 HOURS…and yep, still soft!
So what now? I decided to move forward anyway.
Step 5: Painting Over the Toothpaste
Using the soft pink Perle paint, I gently painted over the toothpaste with a light touch. I mean…really light.

I didn’t want to mess up the texture I had created. It worked! The toothpase held up and didn’t collapse or get dented.
The Final Result and What I Learned
He is my final ice cream art project, made by painting with toothpase! I’m actually happy with how it turned out, even thought it’s still not fully dry…a week later.
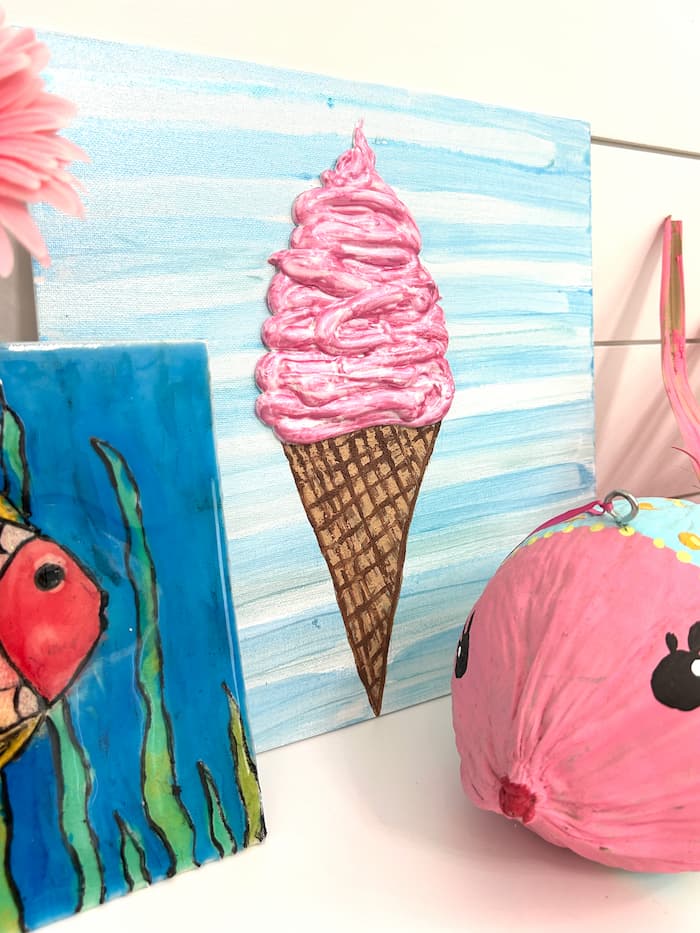
So, I would recommend painting with toothpaste? For a fun experiment – absolutely! Maybe try a different brand without the additives.
However, I’m thinking a better long-term finish might be accomplished by using caulk instead. Let me know if you think I should try it…maybe I’ll caulk my shower at the same time.
Fun Experiments I Have Tried
If you want to see some other experiments, here they are:
- Colossal Cupcake Lamp
- Sharpie Watercolor Coaster Experiment
- Resin and Ink Experiment
- How to Reuse an Old Shirt and Turn It into a Stunning Resin Vase
Let Me Know
Let me know what you think in the comments! Would you try painting with toothpaste?
And remember: Life’s too short not to shimmer, so grab your glue gun and your glitter!
Mona