To stay up on the latest, be sure to
SUBSCRIBE to my YouTube Channel!
For easy reference, click on the Tutorials tab above.
Also, I created an Amazon store link, with items that I use in my crafts, just click on the
Products I Use above!
Products I Use above!

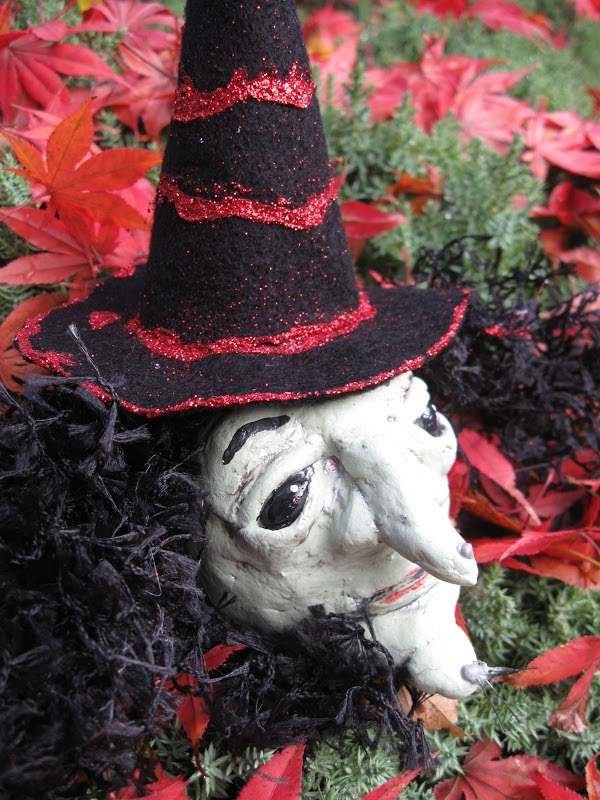
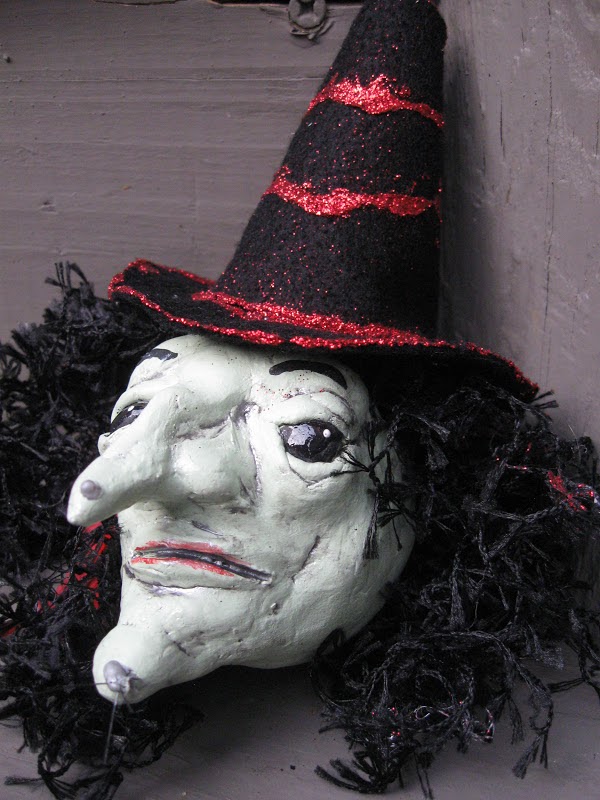
Here is a fun and easy craft for Halloween. Even the kids could make her, with a little help!
I do need help picking out a name, so if you have any suggestions, please share it in the comments!
This project is a little more involved, so I will let the video tutorial do the explaining. You can watch it here:
You will need:
– Aluminum foil (I buy mine at the dollar store)
– Black felt
– Hot glue and white glue
– Air dry clay – any kind will do – paper clay works very well too!
– Green acrylic paint
– Black acrylic paint
– Red acrylic paint
– Metallic pewter acrylic paint
– A wire (can be regular wire, paper clip, or from a wire hanger)
– Red glitter (could be any color glitter)
– Yarn or trim for the hair
– Toothpick
– A few small pieces of fishing line
Very basic directions, again I suggest watching the video for specifics and demonstrations:
– Create a ball of aluminum foil – for the head.
– Stick your wire into the top and attach with hot glue
– Create a noise out of aluminum foil – take a toothpick and stick it into the nose and the other side into the head and attach with hot glue. The toothpick adds support for the nose, so it won’t break off.
– Create a chin with the aluminum foil and attach with hot glue. The chin won’t be as large and won’t need the extra support of the toothpick, but you could always add it for additional support.
– Cover the entire head with air dry clay. Smooth as you need. See video to see how I built up the eyes, brow and mouth.
– Allow to dry. You can let it air dry, or you can put it in the oven. I put it in the oven, which will make it crack some more, but she’s a witch and I’m okay with that. I will put it on a little quilt batting, which will help support it a little and you won’t end up with a flat side. Also, the oven should be set to 200 degrees or less. Just leaver her in there until she is dry. It will take hours.
– Paint the entire head green and let dry.
– Paint any parts you want to be black and let dry.
– Take the pewter paint and paint over a section at a time, making sure to get it into the cracks and crevices. Then, immediately wipe it off with a damp paper towel and then a dry paper towel. This will leave the pewter in the cracks and crevices, or as I like to call them, wrinkles, and give her a little more character. Allow to dry.
– Cut a circle out of felt for the brim of the hat. Fold the circle in half and in half again and snip off the corner. Folding the circle allows you to find the center and snipping the point gives you a hole in the center.
– Cut a rectangular piece from the felt.
– Take the yarn, or trim and glue it onto the head for the hair.
– Hot glue the brim (round part) of the hat on the head.
– Make a cone out of the rectangle and glue a spot to hold it. You will need to trim the bottom and any excess fabric when you have the shape.
– Put hot glue just on the bottom of the cone and glue onto the brim of the hat. Now she’s really coming together!
– Take your white glue and trim out any parts you want (I just did stripes) and sprinkle with glitter.
– Like anything else, it’s all in the details. Whats missing? Why warts of course! Support your witch, so you can work on her. Let your hot glue get really hot. Carefully put a drip of hot glue on the chin and immediately add the fishing line (three pieces painted black – if they are too long, don’t worry about it, they can be trimmed – better too long than too short!) Hold the fishing line until the glue cools enough where they stand on their own. Add a drip to the end of the nose and the hair is optional. I did not make it a hairy wart on the nose. Touch up the glue with the pewter paint.
That’s it! She looks great!
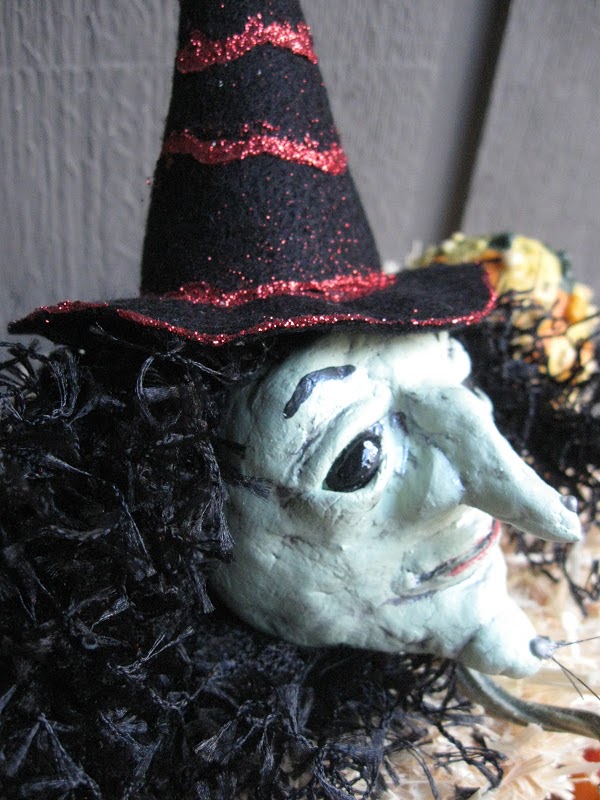
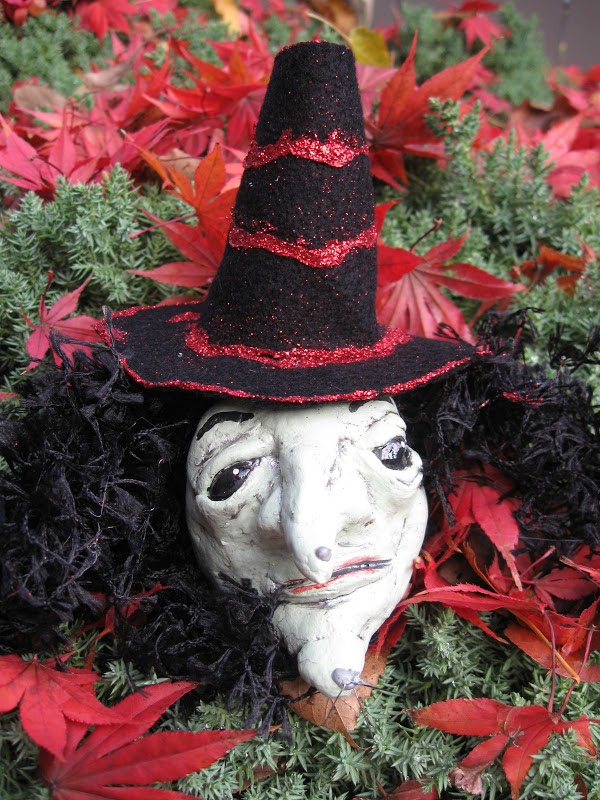
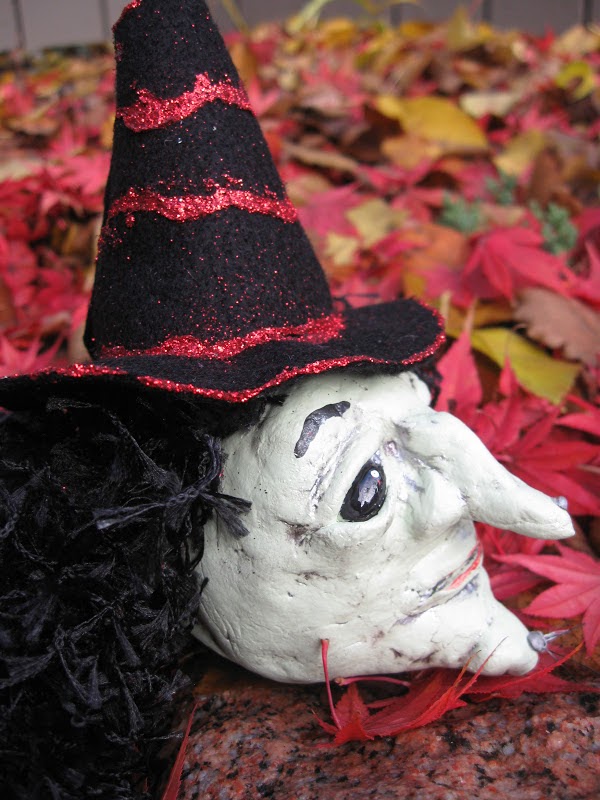
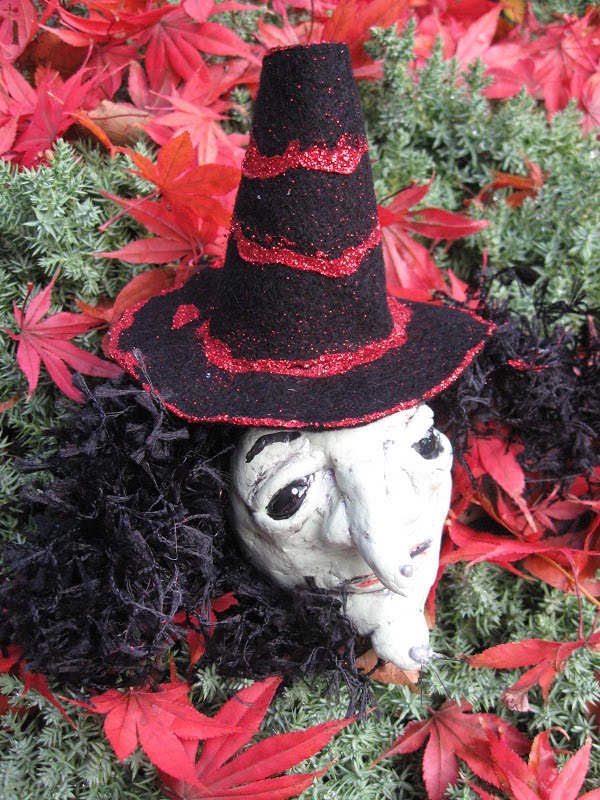
Here are some additional shots of her at different angles:


Thanks for stopping by! Happy Halloween and Happy Crafting!
Mona