Here is a fun and festive craft to brighten up your holiday decor!

You will need:
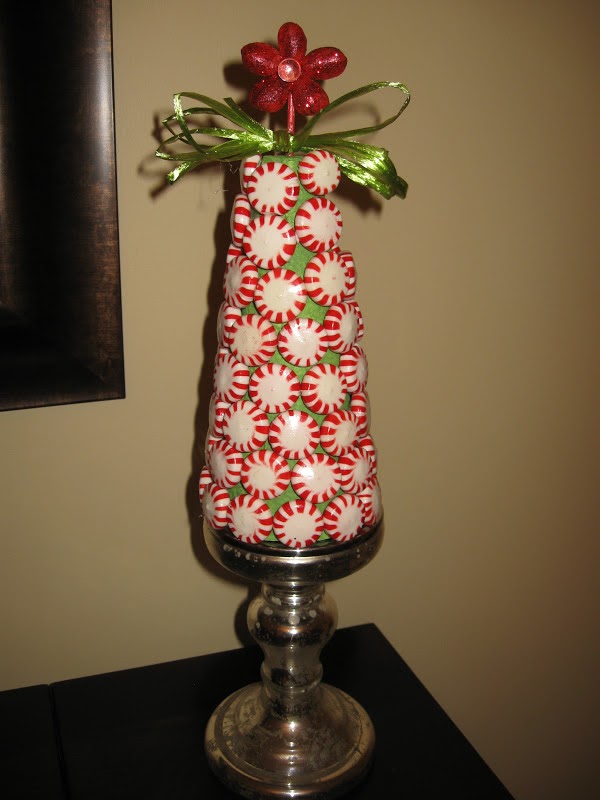
– Styrofoam cone
– Mints
– Hot glue
– Green acrylic paint
– Five clean and dry pistachio shells
– Red paint and a little glitter
– Green ribbon/raffia
– Small clear marble
– Skewer stick
Here is the video tutorial:
Directions:
1. Paint the styrofoam cone green and allow to dry.
2. Starting at the bottom, hot glue the mints on the tree. Go around one line at a time, until you reach the top.
3. Paint a skewer stick — break it like 2/3rds of the way down and paint it red.
4. Arrange the pistachio shells on a piece of parchment paper. Put them into a flower shape. Put a glob of hot glue in the center of all of the shells, making sure all shells are secured and allow to cool.
5. Paint the flower red and allow to dry. While the paint is still wet, sprinkle some glitter on the wet paint.
6. Put a dab of hot glue in the middle of the flower and attach the small marble. Allow to cool.
7. Make a rough bow with the raffia (loop back and forth, six to eight times) and wrap a piece around the middle. Put a dab of hot glue in the middle and do one more wrap.
8. Separate ribbon and hot glue at base of stick.
Put it on a candleholder and you are done!
Thank you for stopping by! Happy Holidays and Happy Crafting!
Mona

Very cute! Can ask if you have any issues with ants?
So far so good, knock wood! It is winter here and gets pretty cold. In warmer climates it might become a problem. If you want to make it a piece you can use year after year, you might consider sealing it. You can seal it with a resin – I generally use Easy Cast. That would solve any ant problems and make it more permanent.
Hope that helps!
Mona
This brings back memories. My mom would make a gumdrop tree like this each year.
That's a great idea! I love using candy to decorate with.