
Create fun and spooky Frankenstein art resin coasters in 5 easy steps—perfect for any Frankenstein fan art lover this Halloween!
Frankenstein has been a Halloween classic for generations. When I was a kid, I was convinced he lived in our basement.
Every time I turned off the lights, I’d flip the switch and run upstairs, certain he was right behind me.
I’d imagine him grabbing my ankles halfway up the stairs and pulling me into the darkness!
Luckily, that never happened…
PHEW!
…but those creepy little heart-stopping moments are probably why I love making Frankenstein art today!
This coaster project is my own playful spin on the iconic green monster, perfect for anyone who loves Frankenstein fan art and wants to add a quirky touch to their Halloween decor.
Plus, it’s simple, fun, and only takes a few steps to make.
Supplies You Will Need
*Disclosure: This blog uses affiliate links from Amazon and other retailers. I earn a small amount from qualifying purchases at no additional cost to you.
- Coaster mold
- Acrylic paint (green, white, black, and silver)
- Fine point permanent marker
- Paint brushes
- Resin
- When deciding on which resin to use for your coasters, you need to keep in mind whether you want it just for cold cups or for hot ones as well.
- If only for cold drinks, you can be flexible and use whatever brand you like:
- If you want it to work for both hot and cold drinks, you need to look for a heat-resistant resin, like these:
- Stone Coat (Quick coat)
- Stone Coat (Heat resistant)
- FX Poxy ~ According to the manufacturer, this one is heat resistant to 500° F.
Frankenstein Art Coaster Video Tutorial
You can see exactly how I made it!
How to Make Frankenstein Art Resin Coasters in 5 Easy Steps
Get ready! Here we go! Let’s start crafting!
Step 1: Prep and Pour the First Resin Layer
Mix your resin according to the package directions.
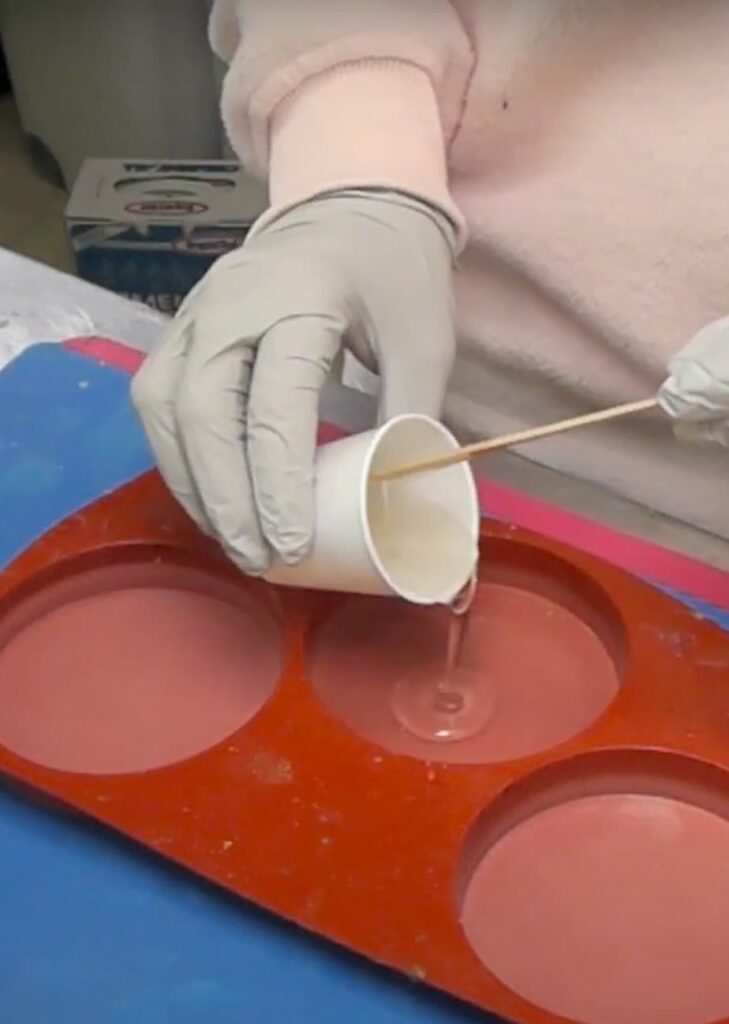
Pour a thin layer into your mold – just enough to cover the bottom.
Let it cure for at least 12 hours.
Step 2: Paint the Base Layer
Once the resin is set, paint the entire surface green for Frankenstein’s skin. You’ll likely need 2-3 coats for full coverage.
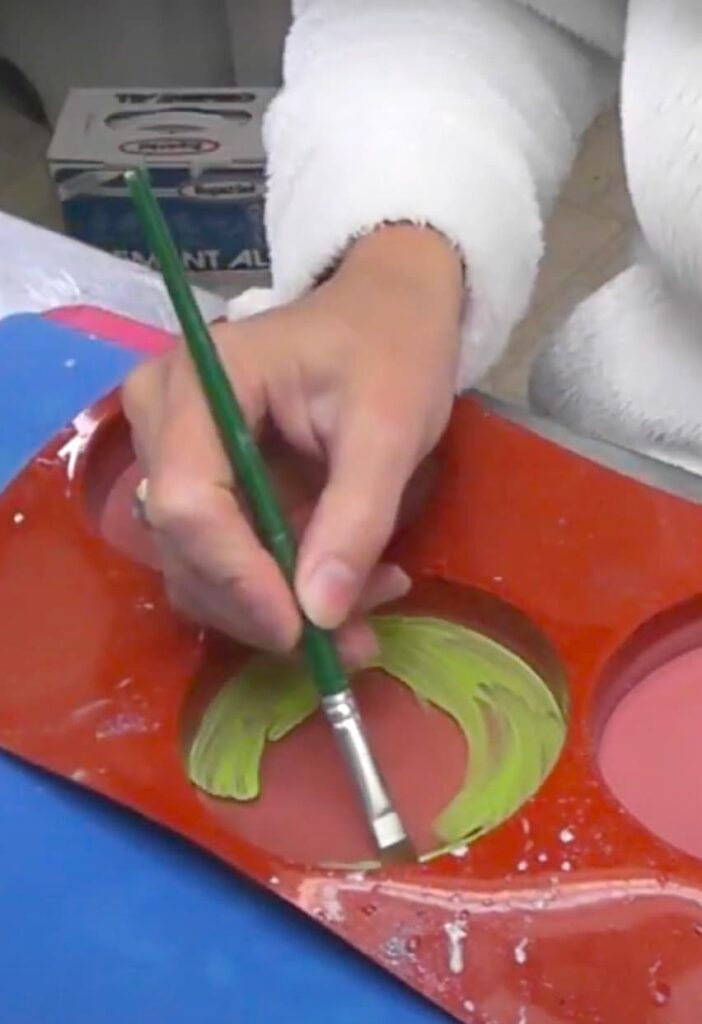
Allow it to dry completely.
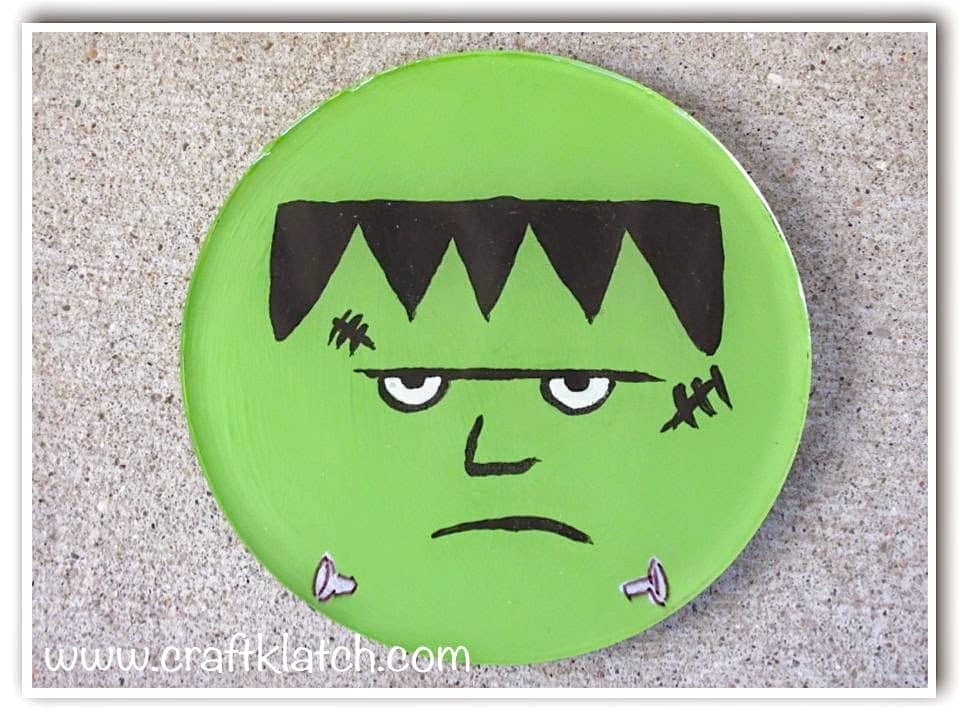
Step 3: Add Hair, Face, and Bolts
Paint a straight black hairline across the top, then add triangles to mimic Frankenstein’s jagged hair. Remember to square off the triangles on the ends for that signature flat head.
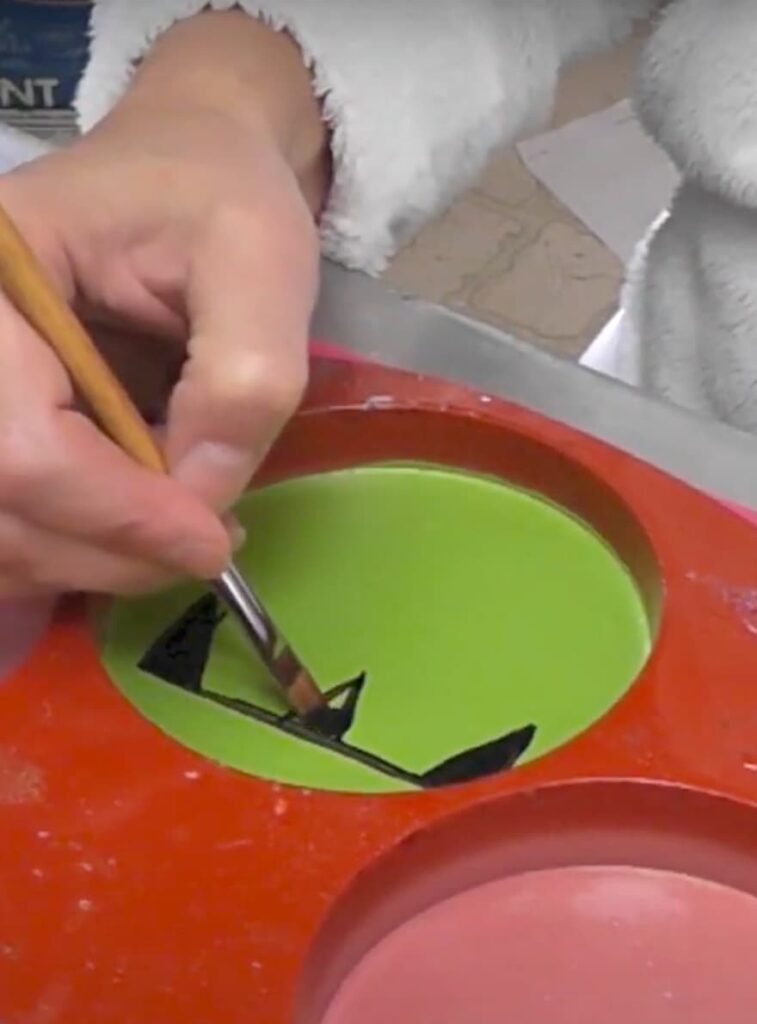
Paint the nose, eyes, mouth, and silver bolts.
Step 4: Detail Your Frankenstein Fan Art
Fill in the whites of the eyes and use a fine-point permanent marker to outline the bolts and add small facial details.
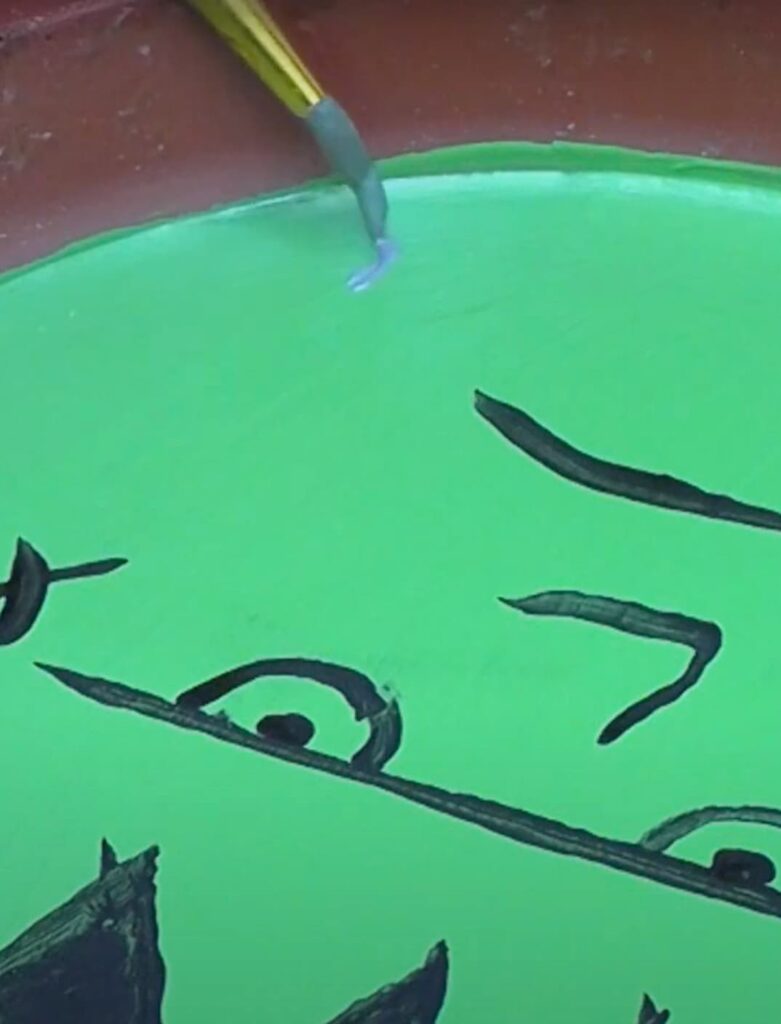
Touch up with green paint as needed for crisp lines.
Step 5: Seal with a Final Resin Layer
When all the paint is dry, pour another layer of resin over the top to seal and protect your
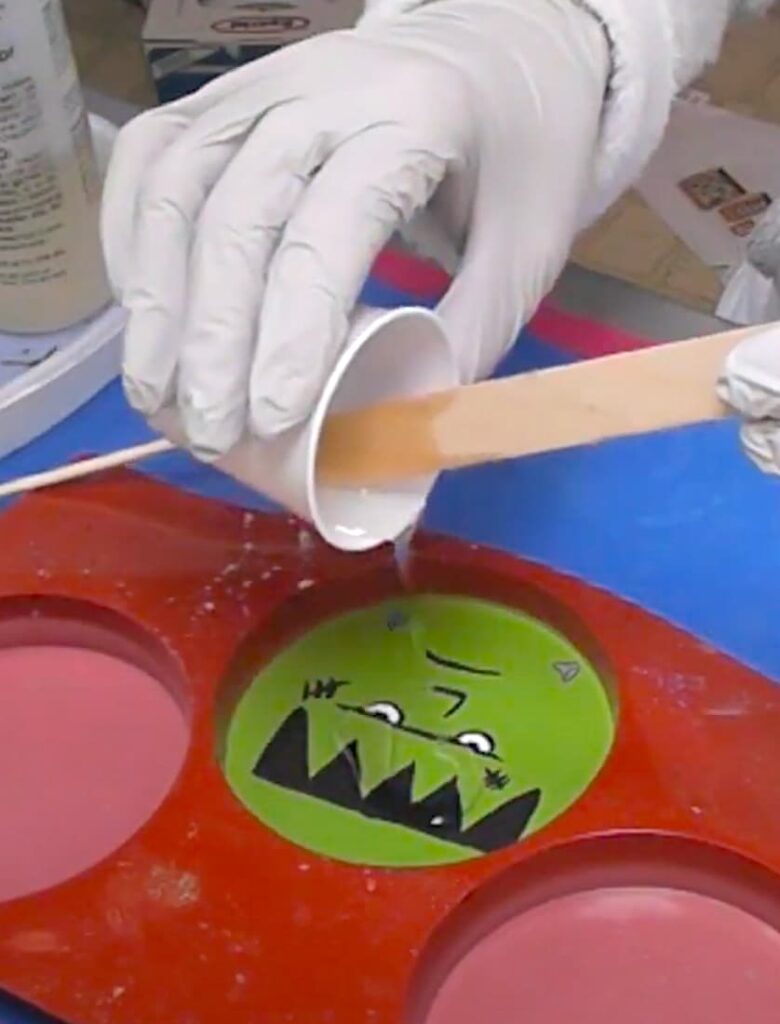
Frankenstein art. Let it cure fully before unmolding.
Why This Frankenstein Art Project is So Fun
This resin coaster project is like working on a mini canvas – you can let your creativity run wild. If you’re a Frankenstein fan art collector, create your own to add to your Halloween display!
While this design is a nod to Frankenstein, you can adapt the technique to create any character or theme you like.
It’s a great craft for adults and older kids (with resin safety in mind).
Other Great Halloween Projects
- Halloween Sign Cricut DIY
- Skeleton Halloween Dollar Store Craft
- Bloody Skeleton Hand Coaster
- Creepy Skeleton Candle Holders
So, whether you’re decorating for Halloween, creating gifts, or just looking for a creative weekend project, these Frankenstein art coasters are sure to bring a little spooky joy to your space.
Remember: Let’s remember, Life’s too short not to shimmer, so grab your glue gun and your glitter!™
Mona
You Can Catch Me on YouTube!
Be sure to find me on YouTube and Subscribe so you don’t miss a thing!
Your Frankenstein Coasters are adorable and look like a fun project for the kids. Thank you for sharing with the Clever Chicks Blog Hop! I hope you’ll join us again next week!
Cheers,
Kathy Shea Mormino
The Chicken Chick
The-Chicken-Chick.com