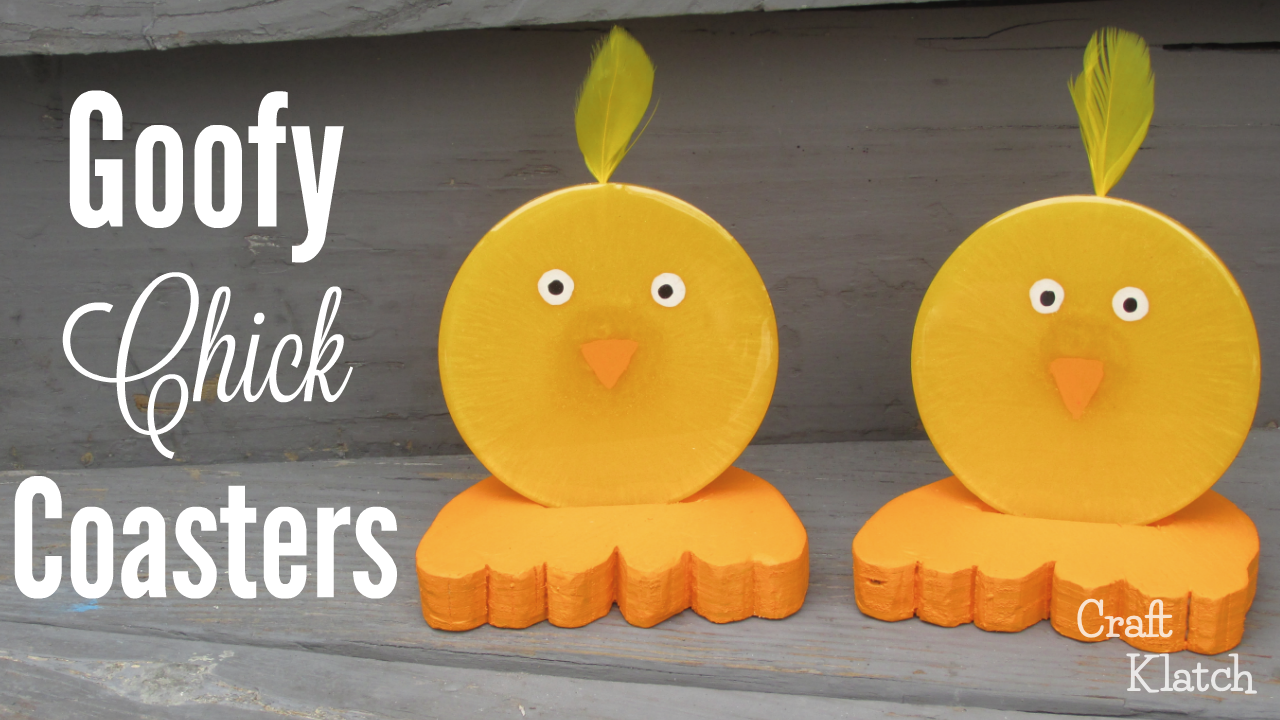
Learn how to make Goofy Easter Chick Resin Coasters!

The links below help support this channel, as I may earn a small commission at no extra cost to you.
You will need:
Mold: https://amzn.to/2FcRd7J
Yellow pigment: https://amzn.to/2TgpApa
Orange pigment: https://amzn.to/2IKKFD6
Yellow powdered pigment: https://amzn.to/2TbBDnx
Orange paint: https://amzn.to/2UbJMop
White paint: https://amzn.to/2EHFO1p
Black paint: https://amzn.to/2TbOfuZ
Yellow feathers: https://amzn.to/2T8TpHS
Dremel: https://amzn.to/2EGz3gu
Lighter: https://amzn.to/2NQusts
Resin (use whatever resin brand you like):
Easy Cast: https://amzn.to/2yjYmBC
Art Resin: https://amzn.to/2yk9X3z
Clear Cast: https://amzn.to/2z4rxGw
This is the resin I used for this project:
FX Poxy: https://amzn.to/2AF3Pkk ~ According to the manufacturer, this one is heat resistant to 500 degrees F.
Here is a quick video, so you can see exactly how I made them:
Directions:
1. I mixed four ounces of resin and added some yellow pigment.

2. I also added a tiny bit of orange pigment.

3. I mixed it all real well.

4. I added yellow powdered pigment because it gives it less of a flat look.

5. I mixed a little more.

6. I poured the resin into two cavities.

7. I removed the coasters from the mold.

8. Now it’s time to paint. I am going to paint them similar to last year’s Easy Chick Coasters.

9. I started by painting the beak, which was a simple, orange triangle.

10. Then, I used a dowel rod and made white dots for the eyes.

11. Once dry, I used the end of my paintbrush and made little black dots, for pupils.

12. I mixed two ounces of resin and slowly poured them onto the coasters.

13. I used my lighter to pop the bubbles.

14. While the coasters are curing, I used a different coaster, to help determine the size I needed for the oversized foot stands.

15. I drew it and cut it out.

16. I traced the template onto a piece of plywood.

17. The coasters are cured and you can stop here, but I wanted to go a little further.

18. I traced the thicknesses of the coasters, to determine how much I needed to cut out.

19. I used my rotary tool, to cut the lines.

20. I used wood working/carving tools to shave out the wood.

Now the coasters fit right in it!

21. I painted the bases the same color as the beaks.

22. I then drilled a hole into the tops of the coasters.

23. I added a feather. I like the big feather, but thought a smaller one might be a little more practical.

24. To shorten a feather, cut the top off of a feather, a little longer than you want it.

25. Remove a few of the bottom feather pieces.

There it is! If you didn’t want to add the base, you can be done now.

26. Here they are sitting on their big feet. So cute!

That’s it! Thanks for stopping by! Remember: Life’s too short not to shimmer, so grab your glue gun and your glitter!™ Stay safe!
Mona
