Create a festive snowman decoration DIY using resin or plaster and a silicone mold. This easy holiday craft is perfect for home decor or to get the kids involved.
If you love bold holiday decor, this snowman decoration DIY is for you! I absolutely love using oversized cake molds to create large resin pieces that really make a statement around the house.
When I spotted this silicone snowman cake mold at Walmart for just $3.47, I knew it was coming home with me!
This project is made with resin, but it can easily be adapted by using plaster instead. In fact, if you’re looking for a holiday craft to do with kids, plaster is a fantastic option.
You can make the plaster snowmen ahead of time, then let the kids paint them and even sign their names on the back…don’t forget the year too!
For plaster versions, you can embed a wire while casting, so there’s no need to drill later. I’ll link a helpful video at the end that shows exactly how to do that.
Supplies Needed
*Disclosure: This blog uses affiliate links from Amazon and other retailers. I earn a small amount from qualifying purchases at no additional cost to you.
- Silicone snowman cake mold
- Acrylic paint (orange and black)
- White pigment for resin
- Red beads
- Artificial leaves
- Resin
- When deciding on which resin to use for your coasters, you need to keep in mind whether you want it just for cold cups or for hot ones as well.
- If only for cold drinks, you can be flexible and use whatever brand you like:
- If you want it to work for both hot and cold drinks, you need to look for a heat-resistant resin, like these:
- Stone Coat (Quick coat)
- Stone Coat (Heat resistant)
- FX Poxy ~ According to the manufacturer, this one is heat resistant to 500° F.
Big Resin Snowman Decoration DIY Video Tutorial
Be sure to watch the video tutorial where I walk you through the entire snowman decoration diy process from start to finish.
How to Make a Resin Snowman Decoration
Step 1: Paint the Mold
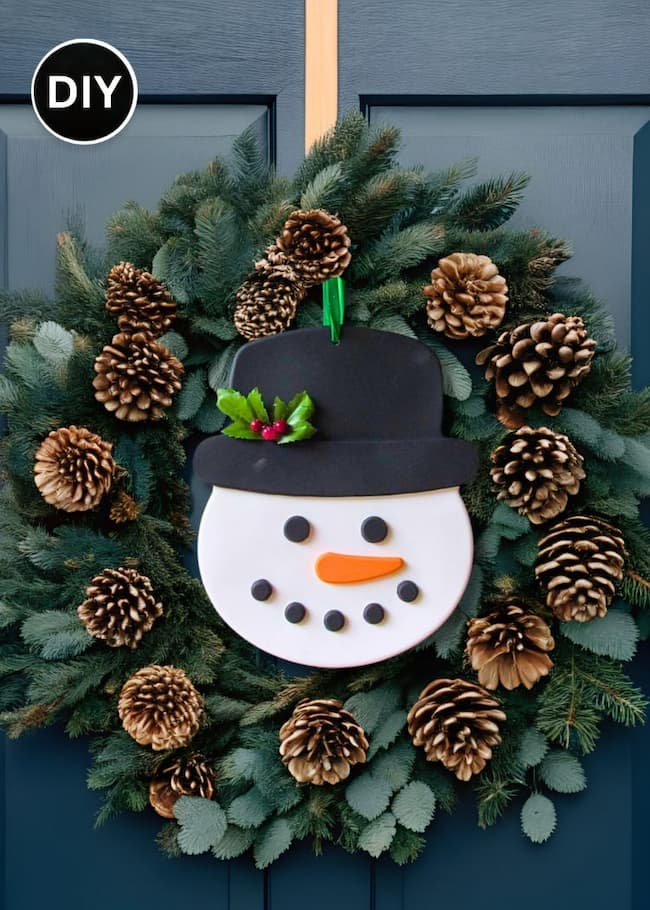
Using acrylic paint, paint directly inside the silicone mold. Paint the carrot nose orange and the eyes, mouth, and hat black.
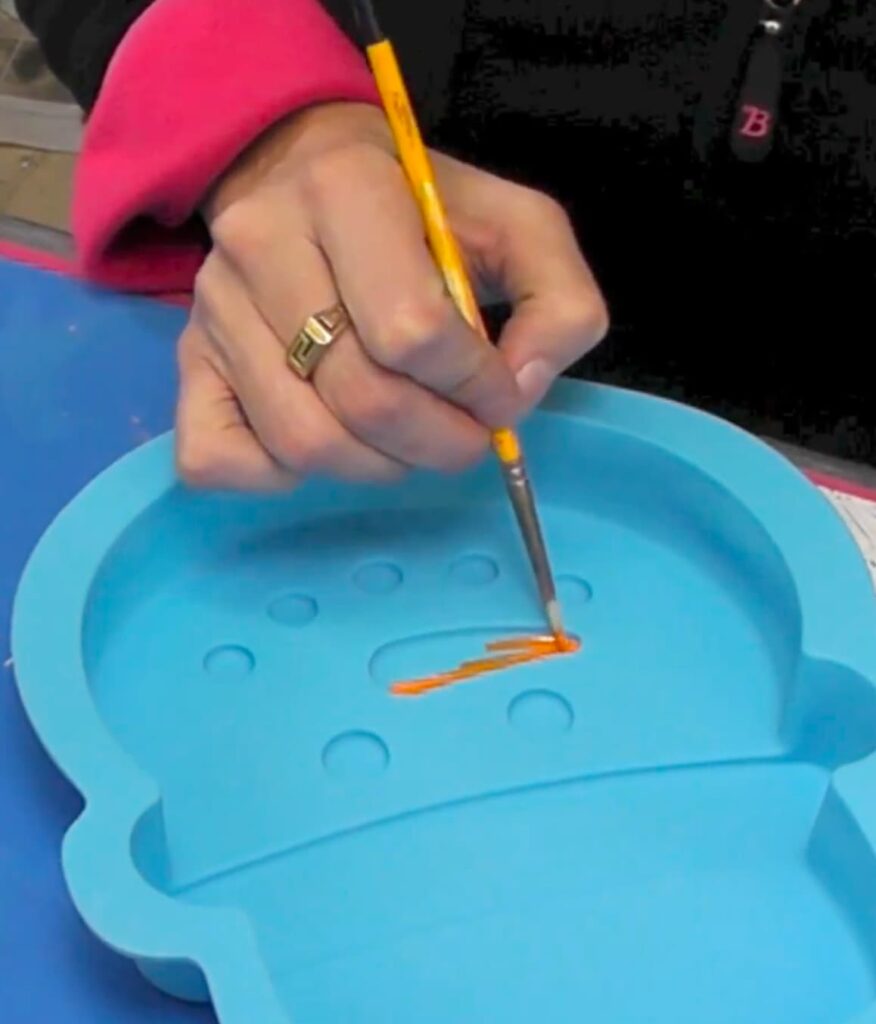
This will take several coats, so allow each layer to dry completely before painting the next one.
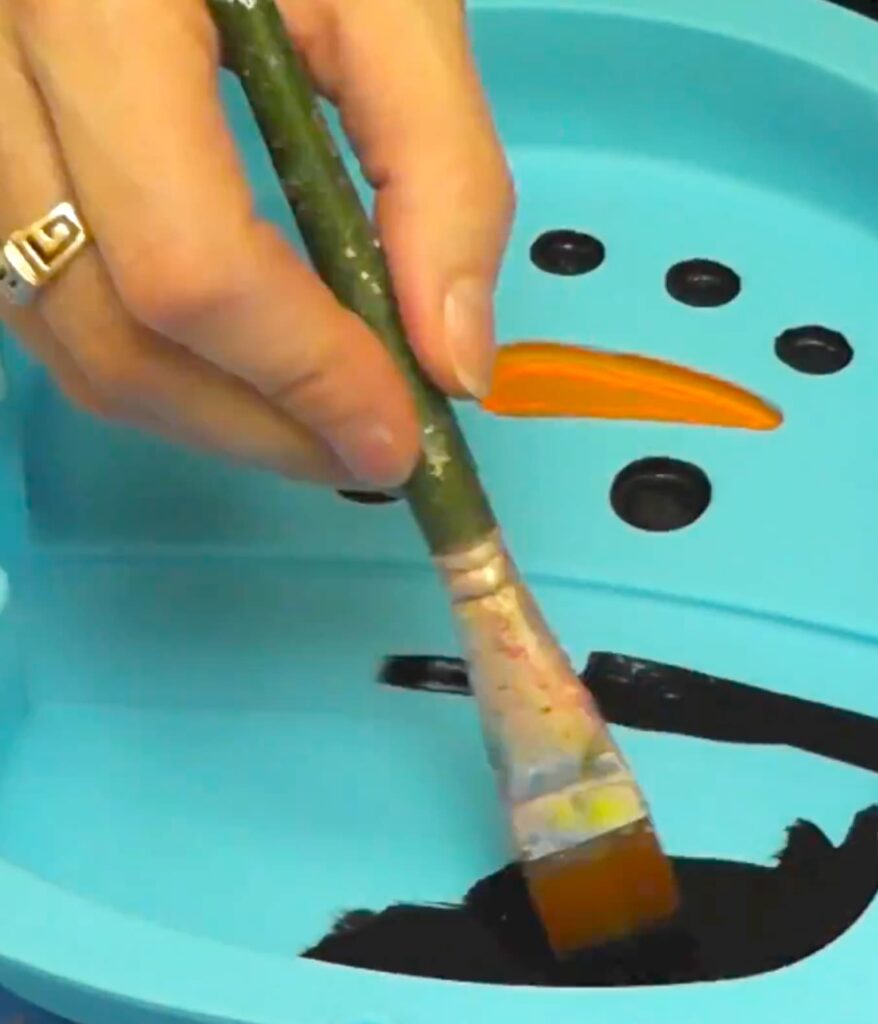
For the hat, paint slightly up the sides to ensure full coverage.
Step 2: Mix the Resin and Pour
Prepare your resin according to the manufacturer’s instructions. I used six ounces for this project.
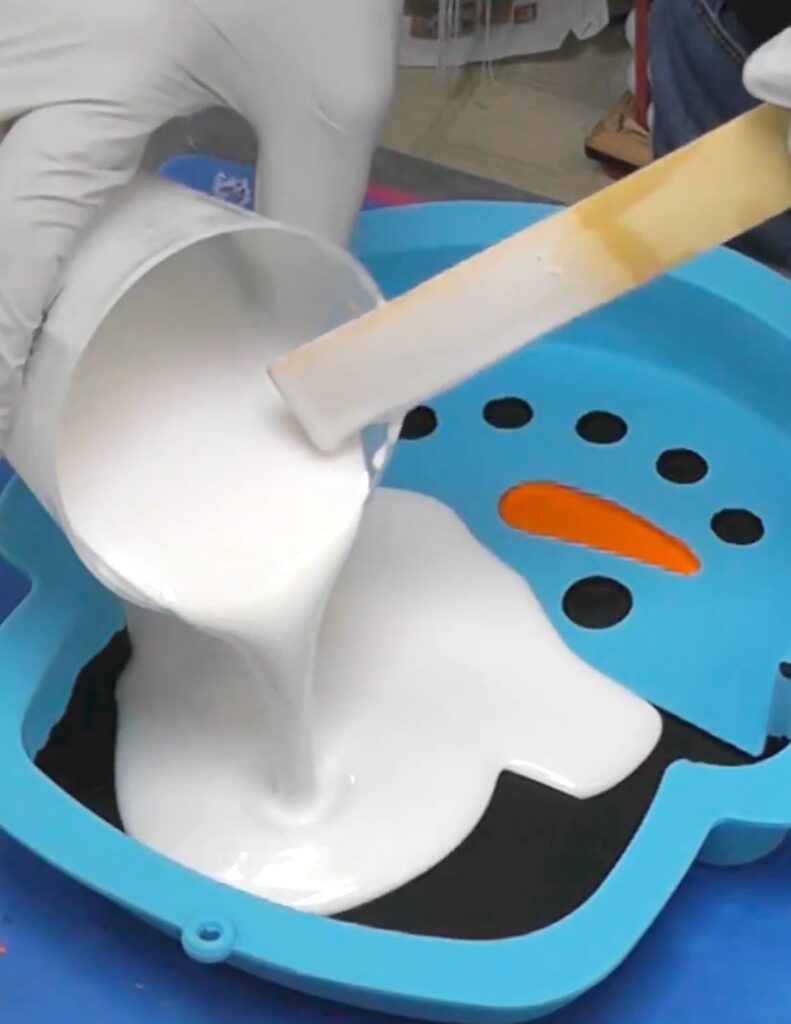
Add white pigment dye (or pigment powder if you prefer) and mix thoroughly.
Then, carefully pour the resin into the mold. As bubbles rise to the surface, use a lighter to pop them.
Allow the resin to cure for a minimum of 12 hours.
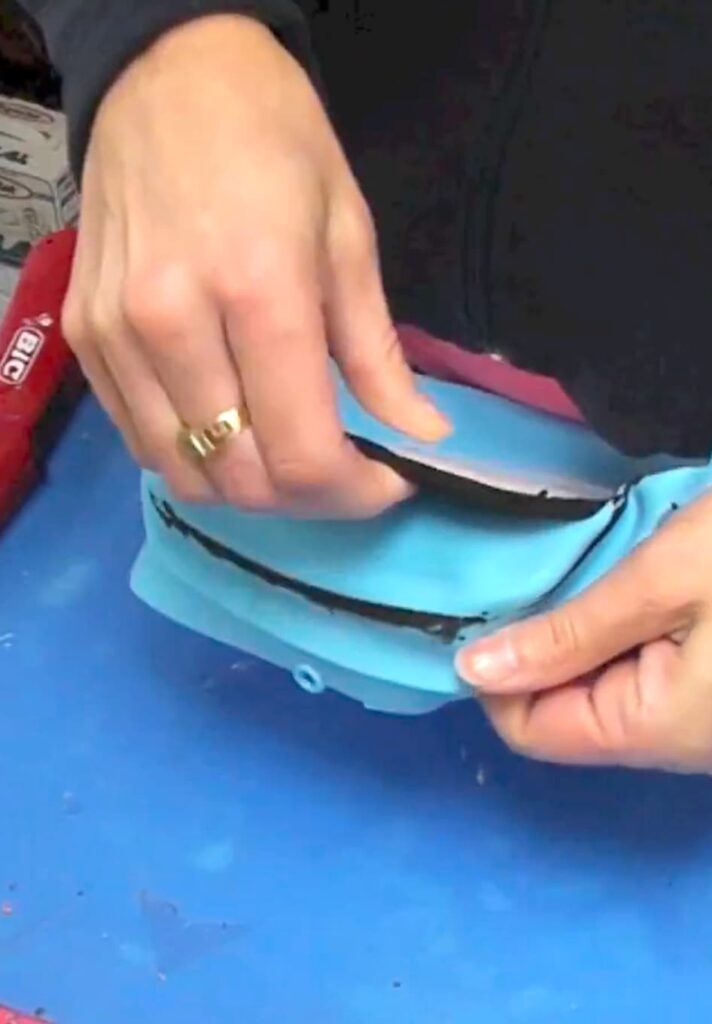
Step 3: Unmold the Snowman
Once fully cured, gently remove your snowman from the mold
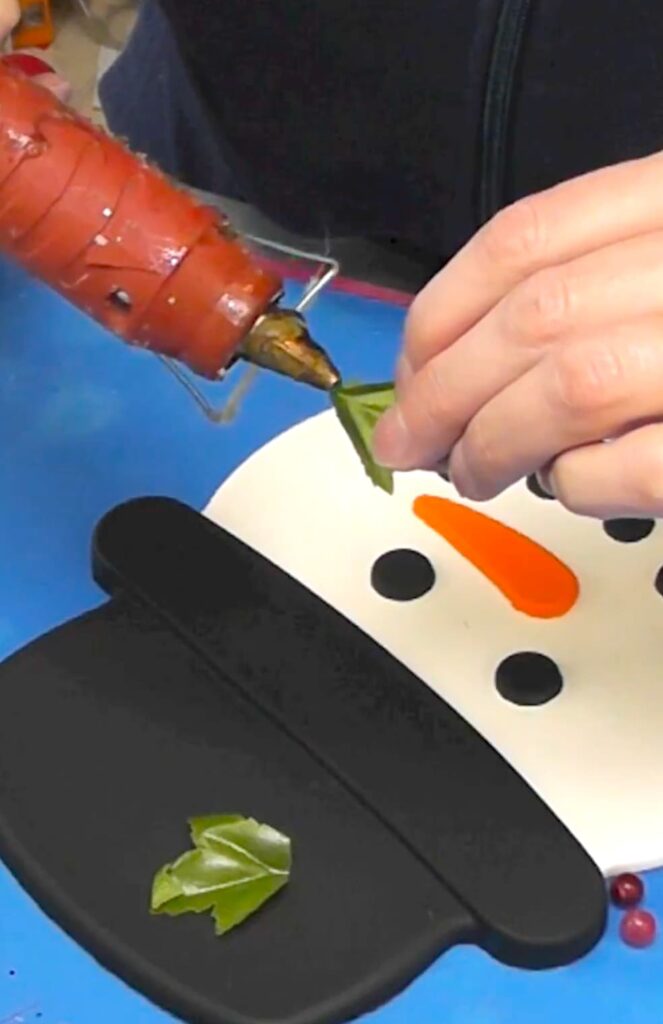
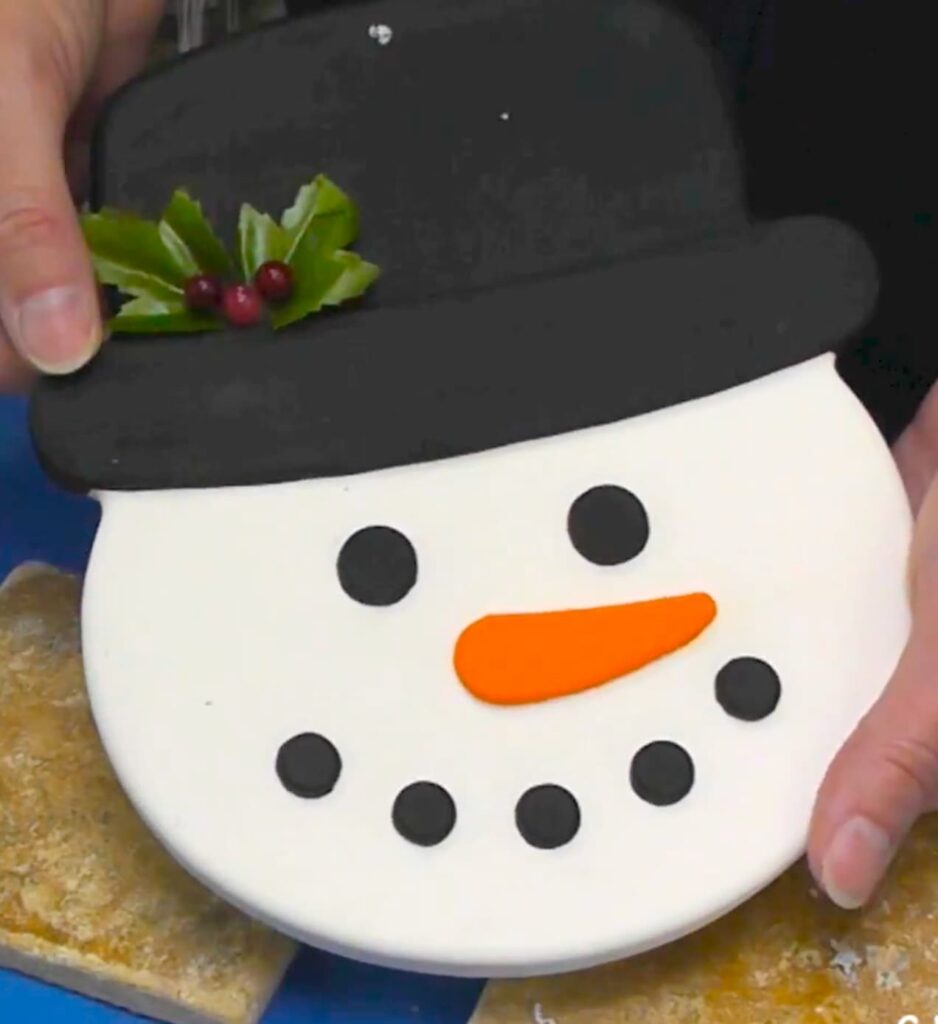
Step 4: Add Decorative Details
Glue artificial leaves to the snowman to create a festive accent on the hat. Add red beads and berries for a pop of color and holiday charm.
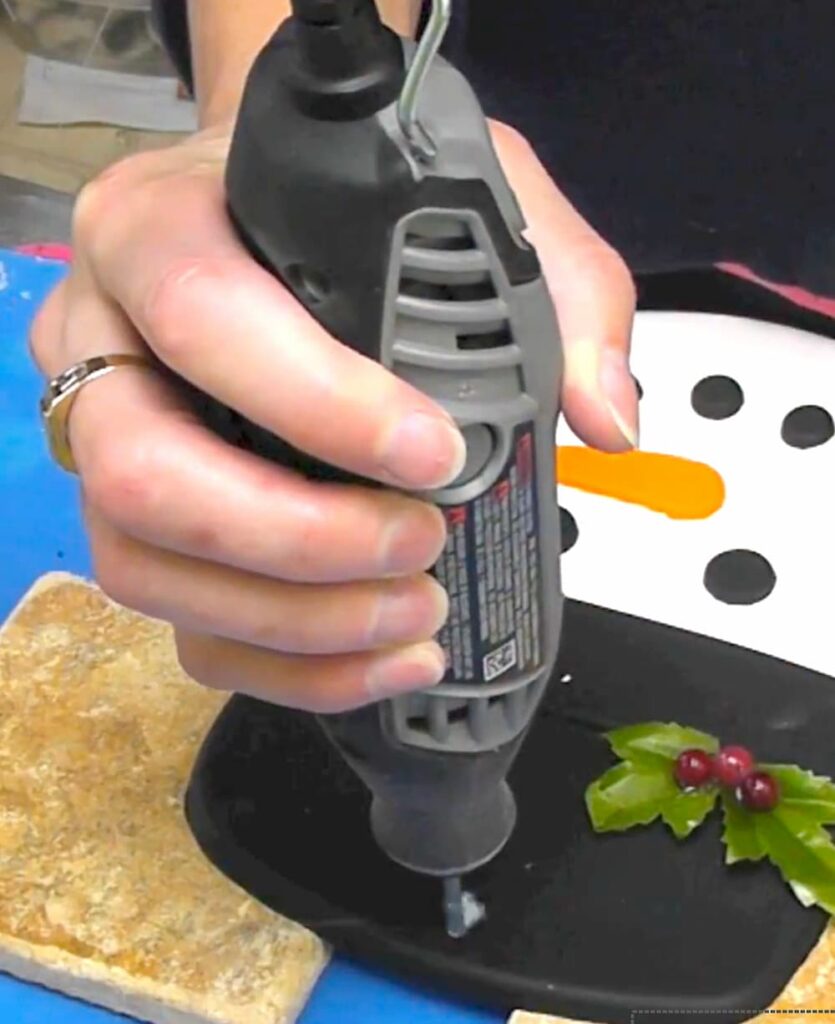
Step 5: Add a Hanger
Drill a small hole into the top of the hat and thread a ribbon through it so your snowman decoration can be hung.
That’s it! This snowman decoration DIY is such a fun way to add the merry to your Christmas and create an oversized holiday decor.
Remember: Life’s too short not to shimmer, so grab your glue gun and your glitter!™
Mona
Bonus Video: Embedding Wire in Plaster
If you’re using plaster instead of resin, check out the video where I show how to embed wire into the back of a plaster piece, so it’s ready to hang with no drilling required.
That is an adorable Snowman you have made. Love snowman and can leave them out for awhile to brighten up the long winter. Thank you for sharing with the Clever Chicks Blog Hop! I hope you’ll join us again next week!
Cheers,
Kathy Shea Mormino
The Chicken Chick
The-Chicken-Chick.com
This is so super cute, I had no idea you could paint the mold before filling with resin! Can't wait to try this out!