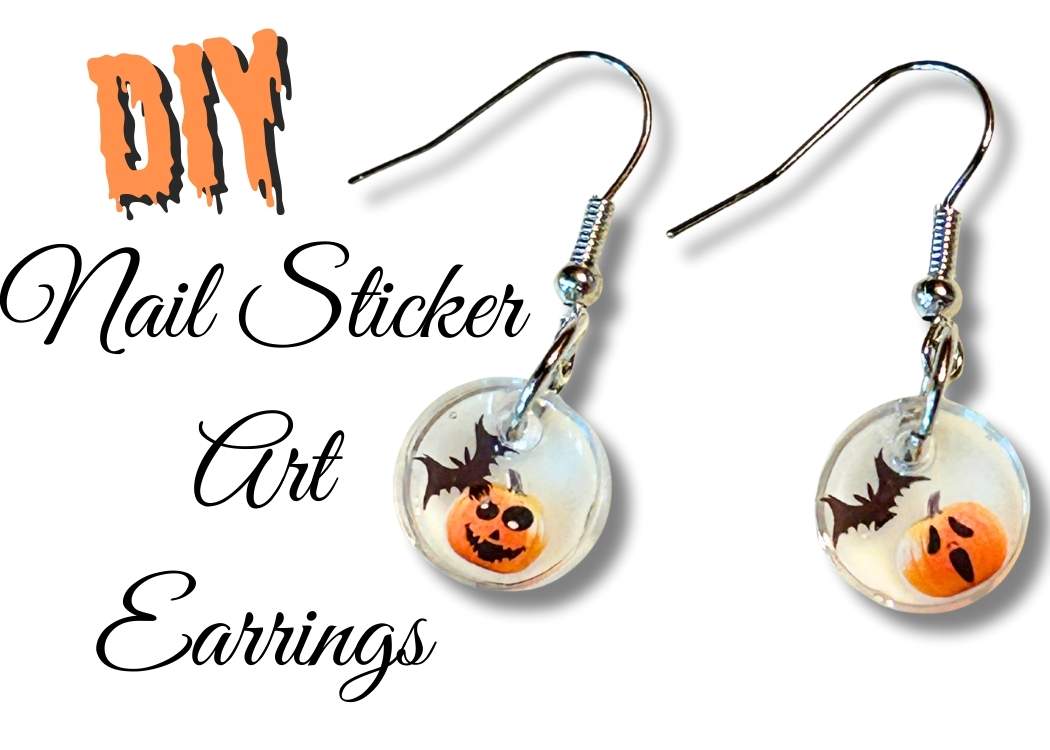
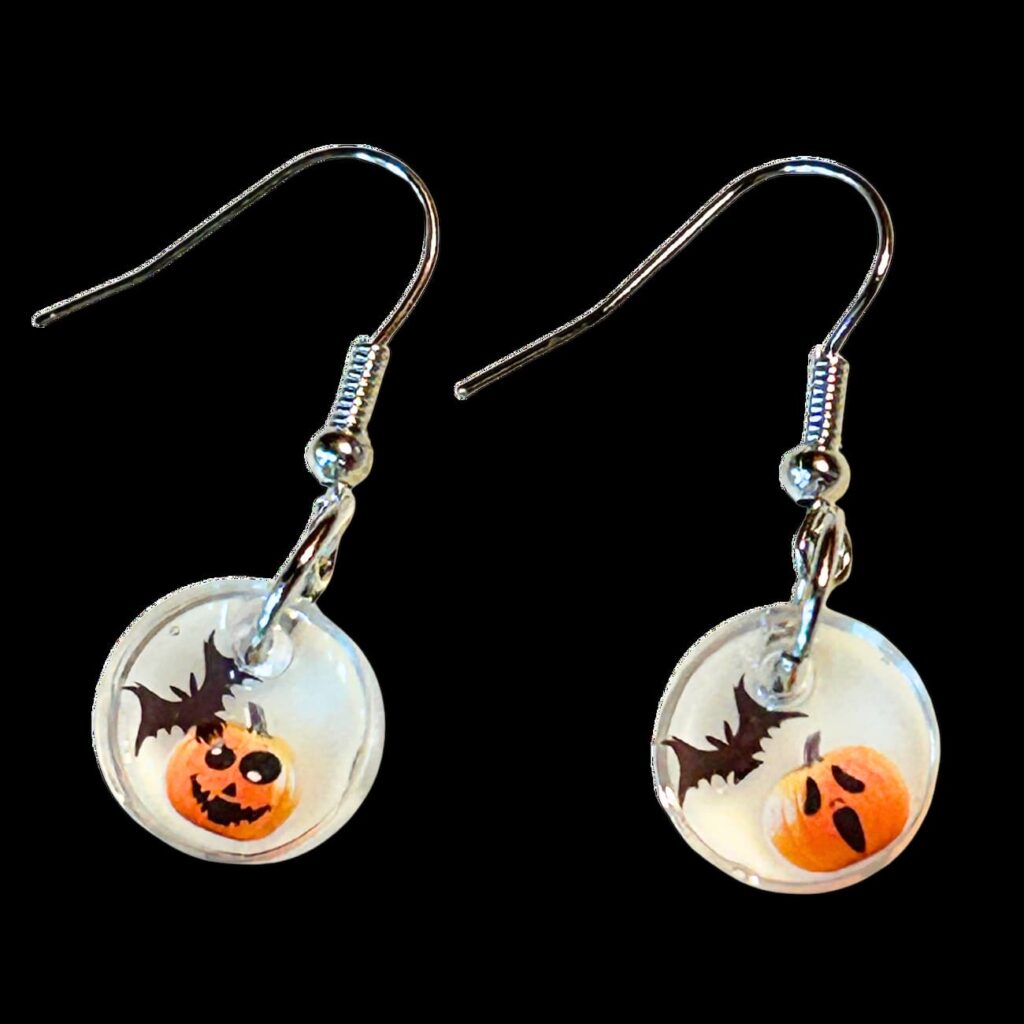
Make your own pumpkin earrings with UV resin and nail sticker art! I’ll show you how to use nail stickers to create easy Halloween jewelry anyone can make.
Halloween is my favorite excuse to make fun seasonal jewelry, and these DIY pumpkin earrings are so quick and easy! All you need is some UV resin, a mold, and a little nail sticker art to bring them to life.
If you’ve been curious about how to use nail stickers beyond manicures, this project is a perfect way to try it out. Plus, it’s a great option if you’re looking for easy Halloween earring ideas…
…that won’t take all day!
Supplies You’ll Need
*Disclosure: This blog uses affiliate links from Amazon and other retailers. I earn a small amount from qualifying purchases at no additional cost to you.
- Let’s Resin earring and charm molds (include earring findings and jump rings)
- Let’s Resin UV Resin starter kit (includes resin, UV light, and more)
- Nail stickers
- Jewelry pliers
Quick Video Tutorial
Here is a quickie video so you can see exactly how I made them.
Be sure to find me on Instagram!
Directions for Nail Sticker Art Halloween Earrings
Here are the step-by-step directions on how to make these cute earrings!
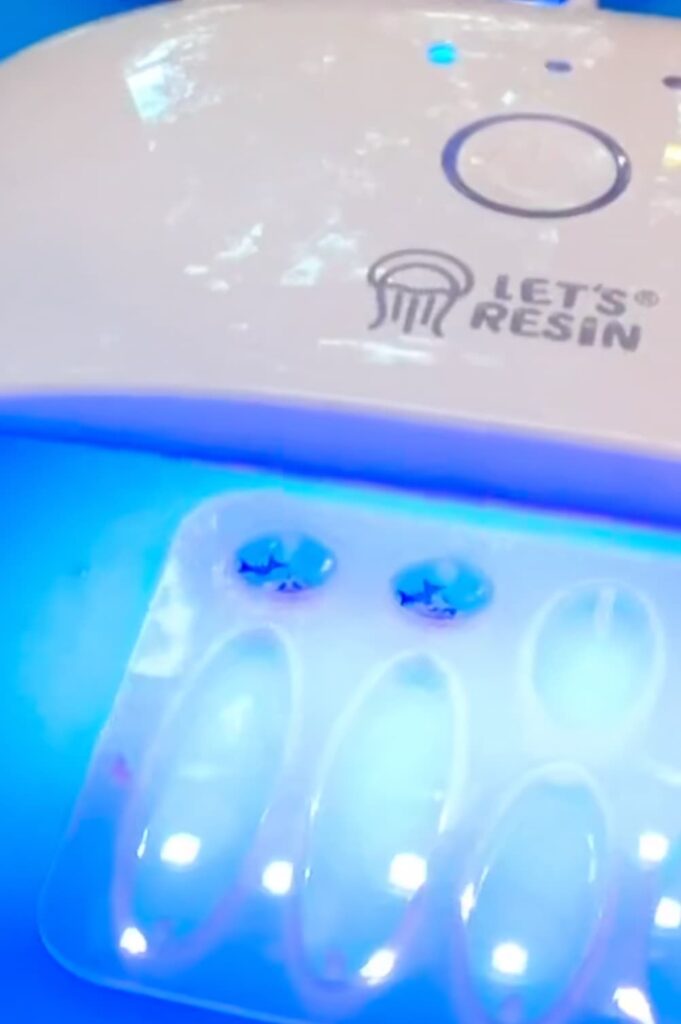
Step 1: Pour the Base Resin
The kit I linked comes with lots of different shapes and sizes.
I decided to start with the small circle molds. They have little nubs a the top so you don’t have to worry about drilling holes later.
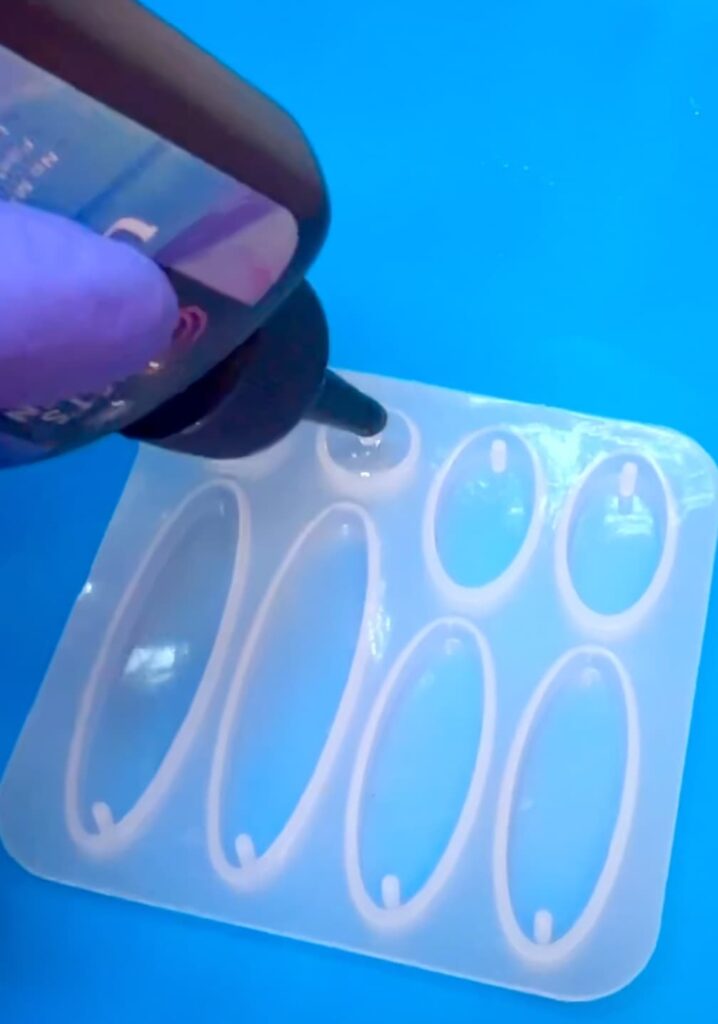
I poured UV resin into the mold. I made sure to move the resin around the mold and made sure to get it to the edges.
Then, I cured it under the UV light.
Step 2: Add Nail Sticker Art
Here’s the fun part – the nail sticker art!
There are so many nail stickers out there with the best designs!
I added a small pumpkin sticker to each earring… but let’s be honest, a pumpkin alone just isn’t enough for Halloween. So I added a little bat too!
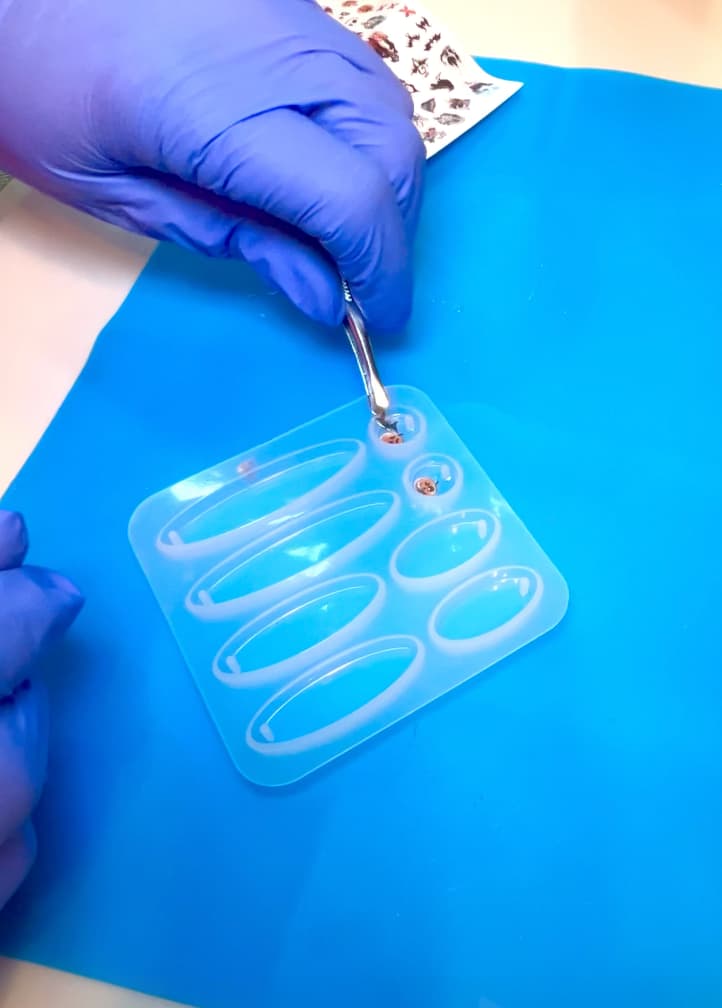
If you’ve ever wondered how to apply nail stickers to resin, it’s basically as simple as sticking them down and sealing them in place.
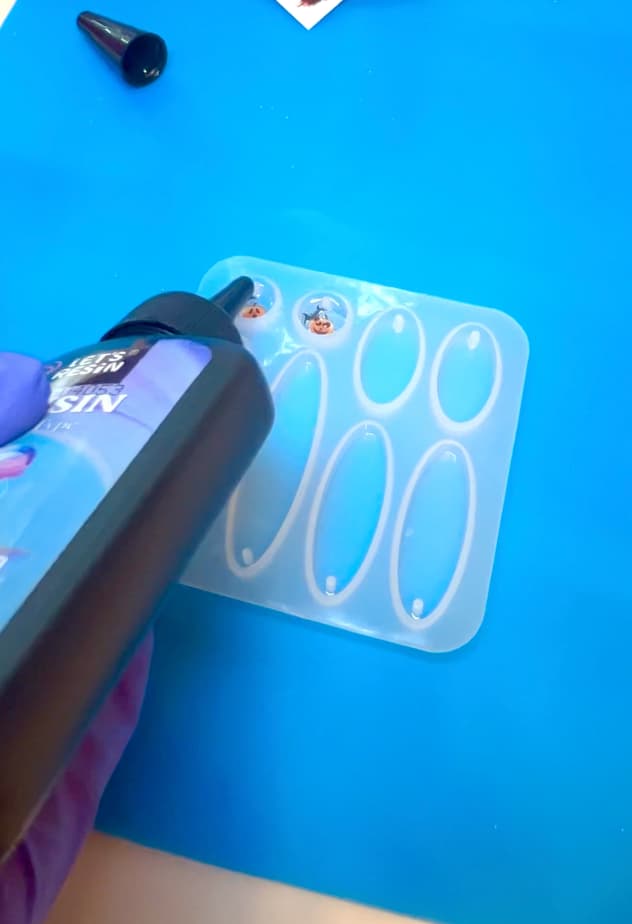
Once I had them placed, I covered everything with another layer of resin and cured it again under the UV light.
Step 3: Attach the Findings
Once cured, I popped the carms out of the mold. The built-in nub left the perfect little hole for jewelry findings. I just added a jump ring and an earring hook to each one – pliers make this part much easier!
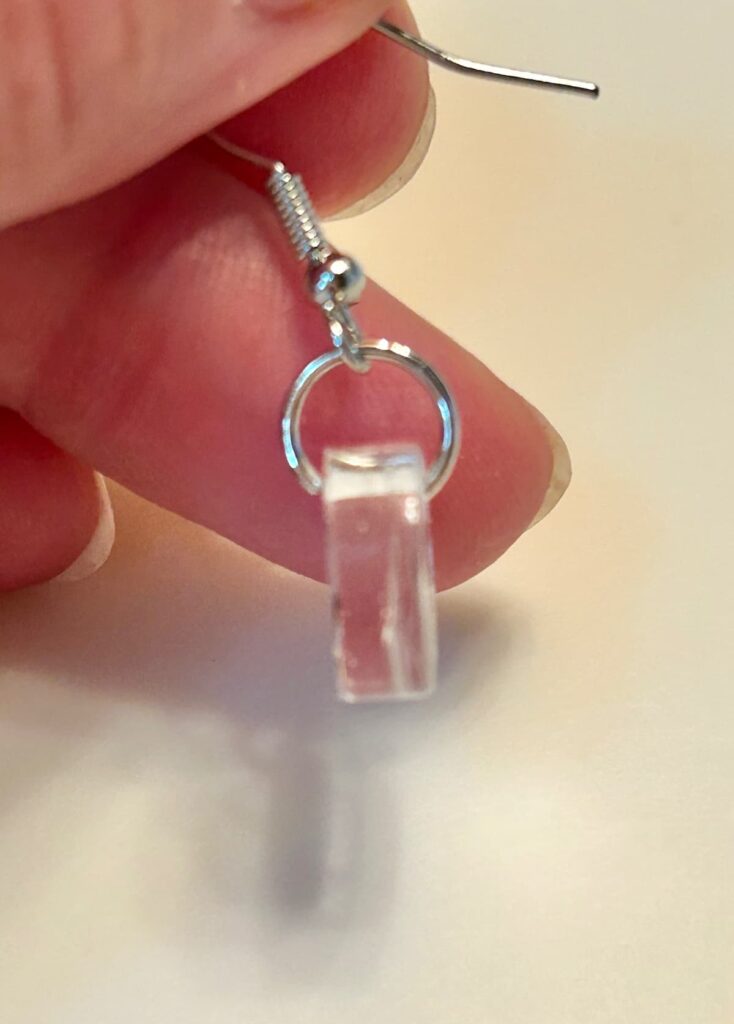
You can use regular needle-nose pliers, but there are affordable jewelry pliers that are better sized to do the detail work.
And just like that, I had a pair of handmade pumpkin earrings ready to wear!
Why I love Nail Sticker Art Jewelry
I’ve always admired nail stickers on manicures, but I really love how well they work in resin crafts too. Using nail sticker art is such an easy way to get detailed designs without having to try to paint something so small.
If you are just learning how to use nail stickers in new ways, this is such a fun project to start with. And since there are so many designs out there, you can come up with endless Halloween earrings ideas – ghosts, skulls, spiders, or anything else that screams spooky season.
Here are Some Other Fun Halloween Crafts
Here are some other Halloween and pumpkin projects you are sure to love!
Thanks for stopping by! Remember: Life’s too short not to shimmer, so grab your glue gun and your glitter!
Mona