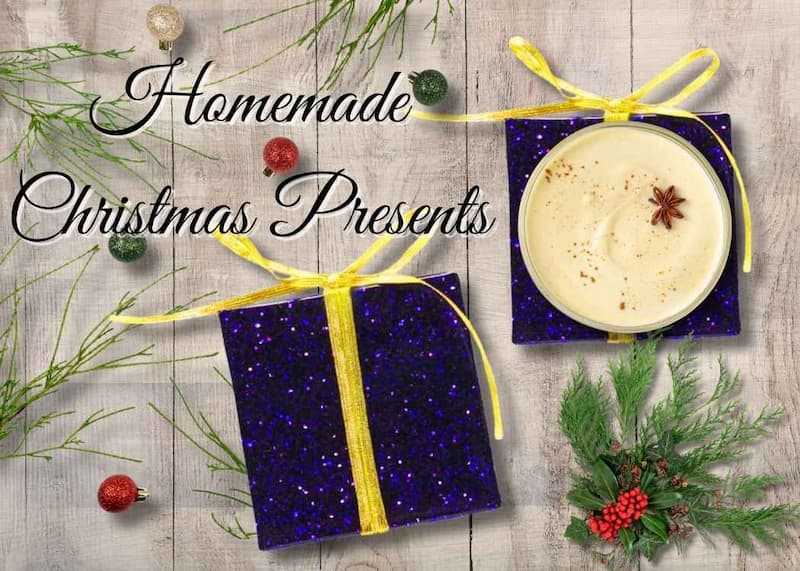
Create a glitter present resin coaster! This easy DIY is perfect for homemade Christmas presents and adds sparkle to your holiday decor or gifting.
Every year when the holidays roll around, I find my self in the same happy little place, surrounded by glitter, ribbon, resin, and a hot cup of cocoa that I promise myself I won’t accidentally dip my paintbrush into.
I love making homemade Christmas presents more than anything store bought. There is just something special about giving someone a gift that literally come from your hands.
This Christmas craft definitely falls into one of my favorite homemade Christmas presents because it’s ridiculously easy and looks stunning when it’s done.
If you make a full coaster set, or pair one with a gift card and a festive mug, this project checks all the boxes, sparkly, simple, and inexpensive.
Check. Check. And CHECK!
Let’s be honest, I’ll use any excuse to break out the chunky purple glitter. If you are a glitter fan (and if you are here, I’m guessing you are), this project is basically happiness in resin form.
If you are giving homemade Christmas presents this year, a little handmade sparkle never hurt anyone. It’s practically required in my craft shed.
So let’s dive in, grab your riggon, and get ready for a coaster that looks like a little wrapped gift, because nothing says holiday cheer quite like a present that can hold your hot chocolate.
Easy Christmas Presents Video Tutorial
Here is a quick tutorial to get you started. You can find the full video tutorial at the end of this post.
You can find this and more inspiration on my
Be sure to Subscribe
Supplies You Will Need
*Disclosure: This blog uses affiliate links from Amazon and other retailers. I earn a small amount from qualifying purchases at no additional cost to you.
- Square silicone mold (option 1)
- Square silicone mold (option 2)
- Chunky purple glitter
- Thin gold ribbon
- 20 gauge gold wire
- Glue
- Resin
- When deciding on which resin to use for your coasters, you need to keep in mind whether you want it just for cold cups or for hot ones as well.
- If only for cold drinks, you can be flexible and use whatever brand you like:
- If you want it to work for both hot and cold drinks, you need to look for a heat-resistant resin, like these:
- Stone Coat (Quick coat)
- Stone Coat (Heat resistant)
- FX Poxy ~ According to the manufacturer, this one is heat resistant to 500° F.
Homemade Christmas Presents Directions
Step 1: Pour the Glitter Layer
Mix two ounces of resin and stir in that gorgeous chunky purple glitter. I always say: If it looks like too much glitter, it’s probably just right.
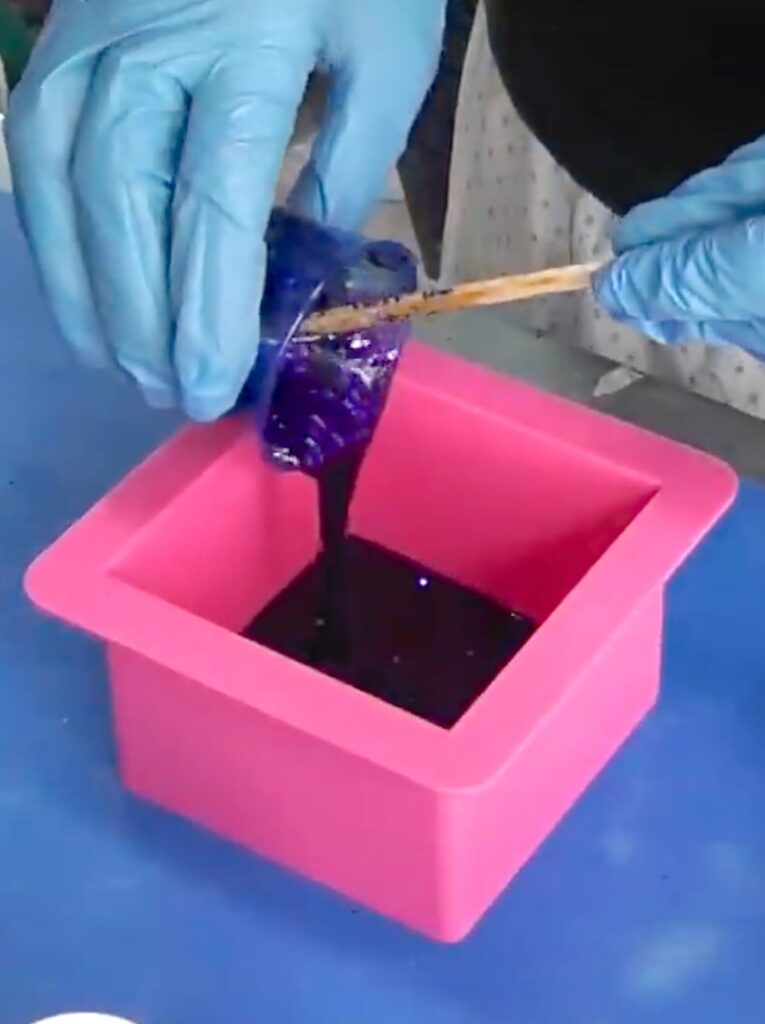
Pour it into your old and pop any bubbles. Let it cure so you have a nice, solid base.
Step 2: Add the Ribbon
Pop your coaster out of the mold and glue thin gold ribbon across the top, like you’re wrapping a tiny gift. If your ribbon is too narrow, just layer two strips side-by-side to make it look fuller.
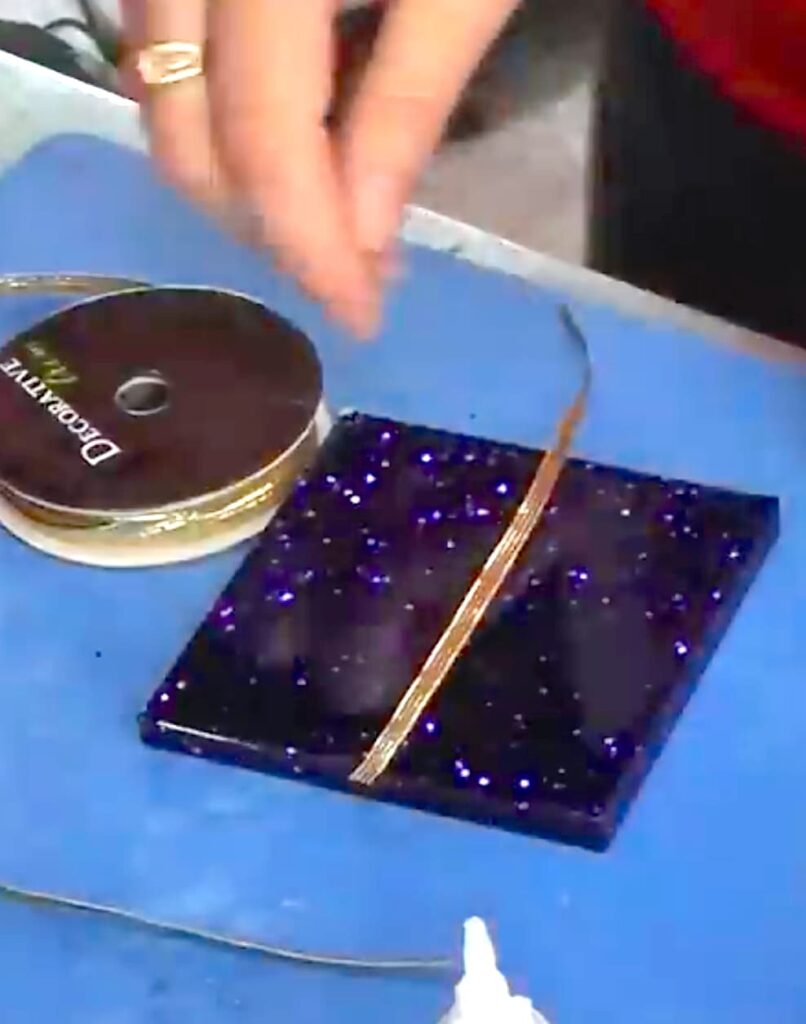
Trim the edges so everything looks neat and crisp, like a present that actually looks good under the tree,
Step 3: Seal Everything with a Resin Topcoat
Mix one ounce of resin and pour a thin, even layer over your coaster. This seals in the ribbon, adds shine, and give the coaster that smooth, glassy finish we all love.
Don’t forget to pop the bubbles! This step might feel simple, but it truly transforms the piece from “cute” to “oh wow, you MADE this?”, which is exactly what we want when gifting homemade Christmas presents.
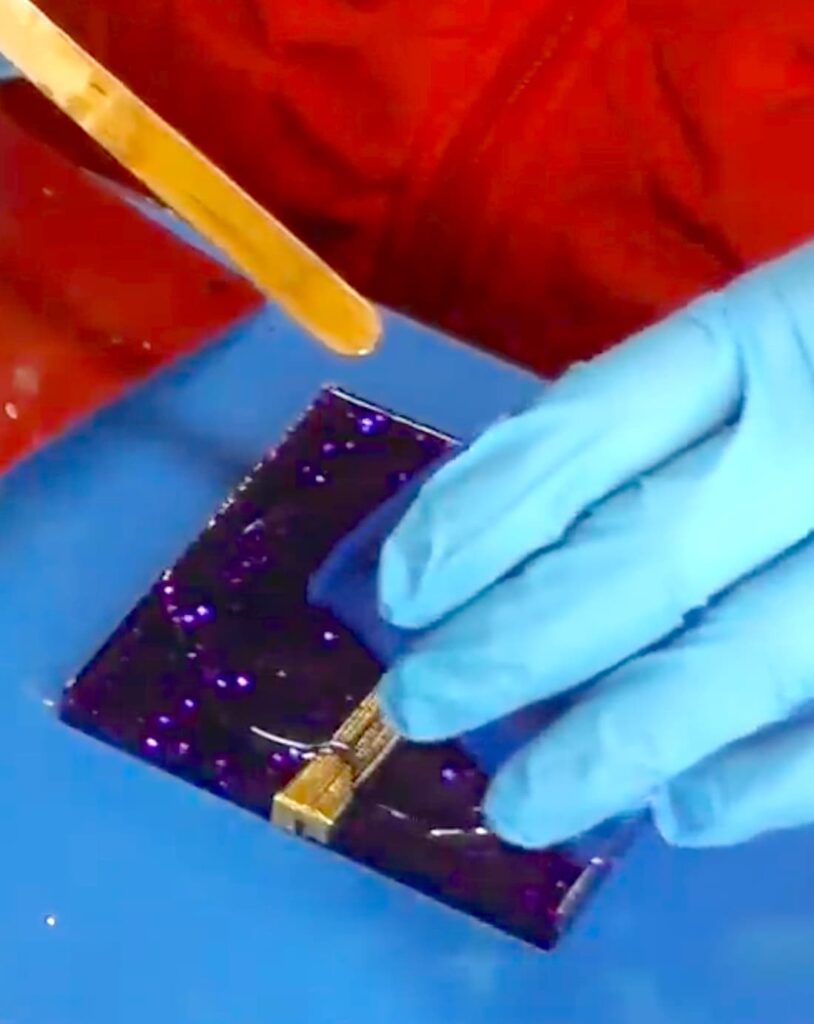
Step 4: Make the Bow
Drill a small hole at the top of your coaster. Tie a small bow with your gold ribbon. This part always makes me smile because the bow is just so darn cute!
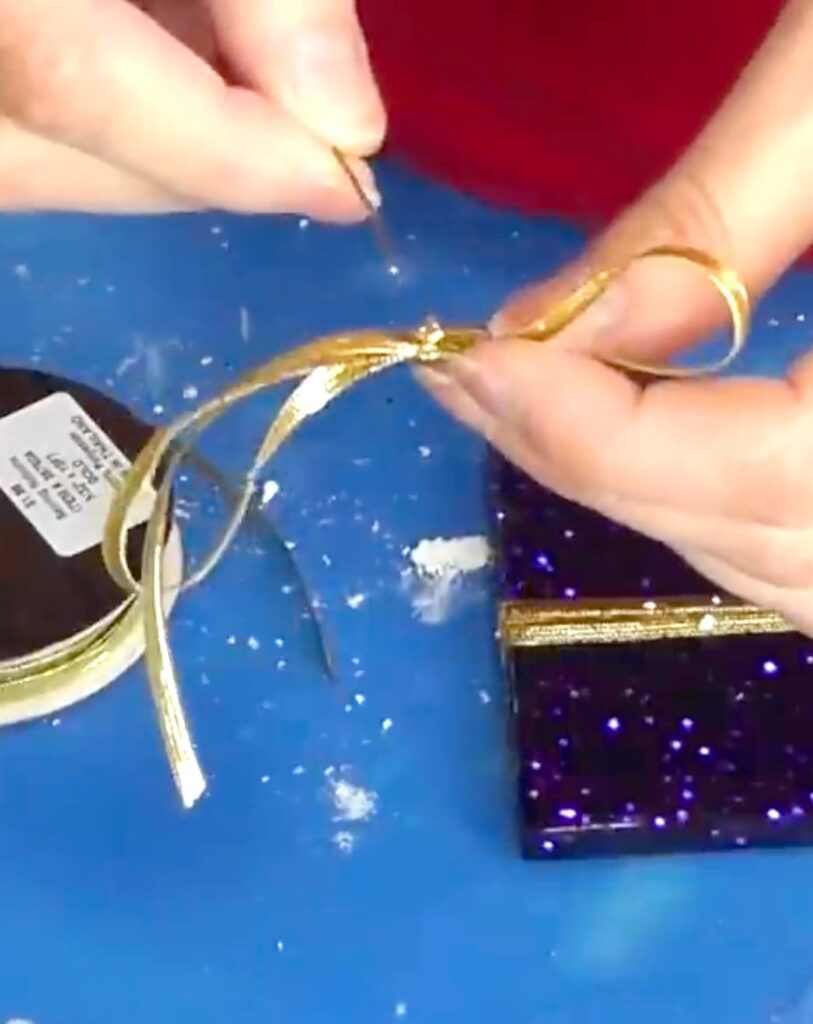
Wrap the know with gold wire and twist the wire ends together so you have a little “stem” to insert into the hole.
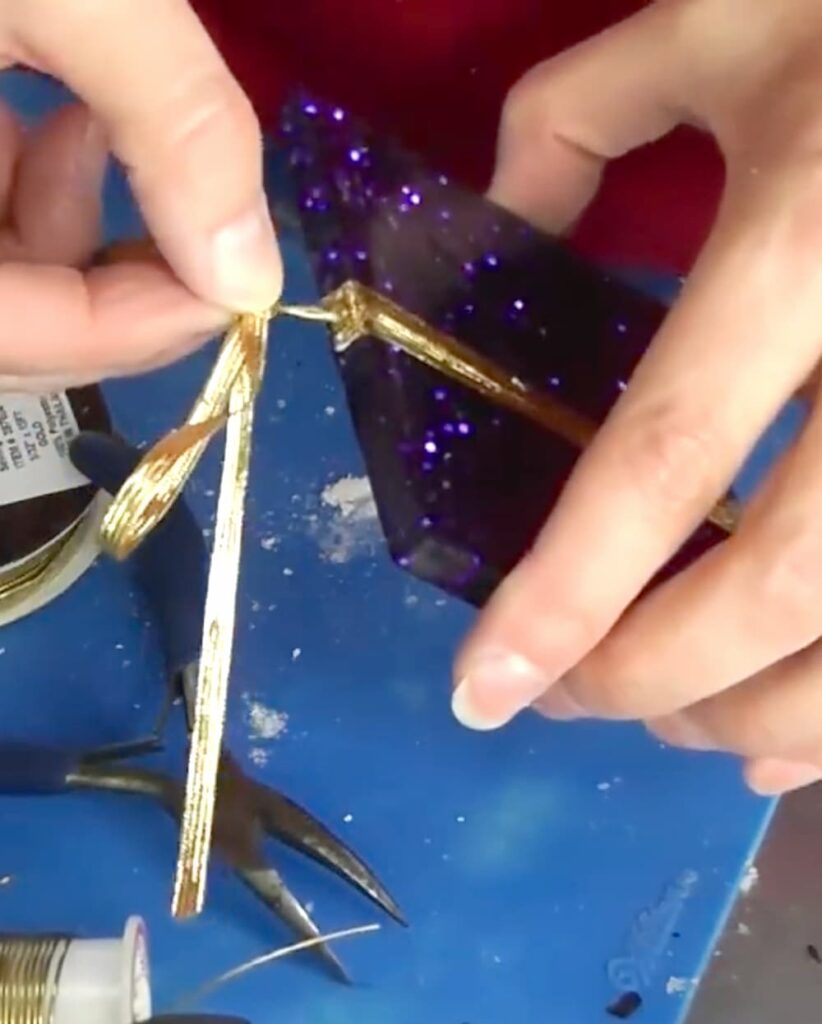
Step 5: Attach and Finish
Add a dab of glue to the wire stem and insert it into the drilled hole. Let everything set.
And that’s it!
You now have the sparkliest little coaster that doubles as on of the easiest homemade Christmas presents for teachers, friends, neighbors, or literally anyone who appreciates a handmade touch.
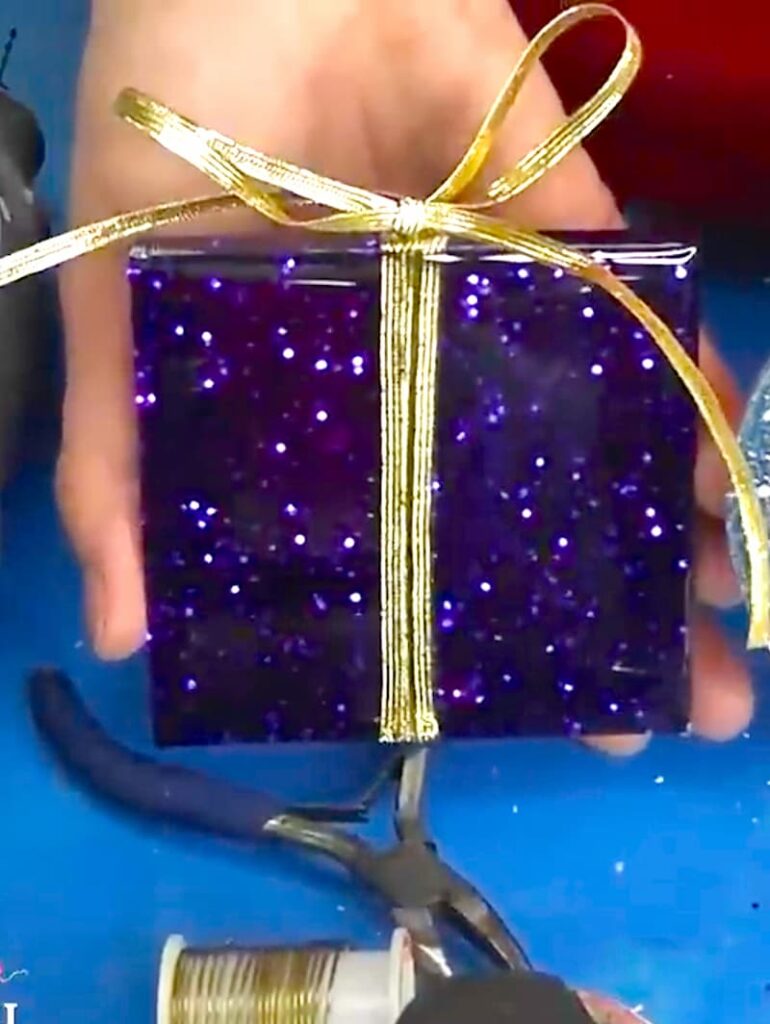
These are perfect to add to part of a holiday gift bundle. You can even make different colors so everyone gets a “present” coaster that matches their decor.

Whether you’re crafting for fun or making a whole lineup of homemade Christmas presents, this project really shines (literally!).
More Fun Christmas Crafts
If you are looking for more information, be sure to check out these for inspiration!
- Wood Engraved Christmas Ornament
- Luminary Christmas Craft
- Nail Polish Ornaments
- How to Make a Snowflake Ornament
Remember: Life’s too short not to shimmer, so grab your glue gun and your glitter!™
Mona