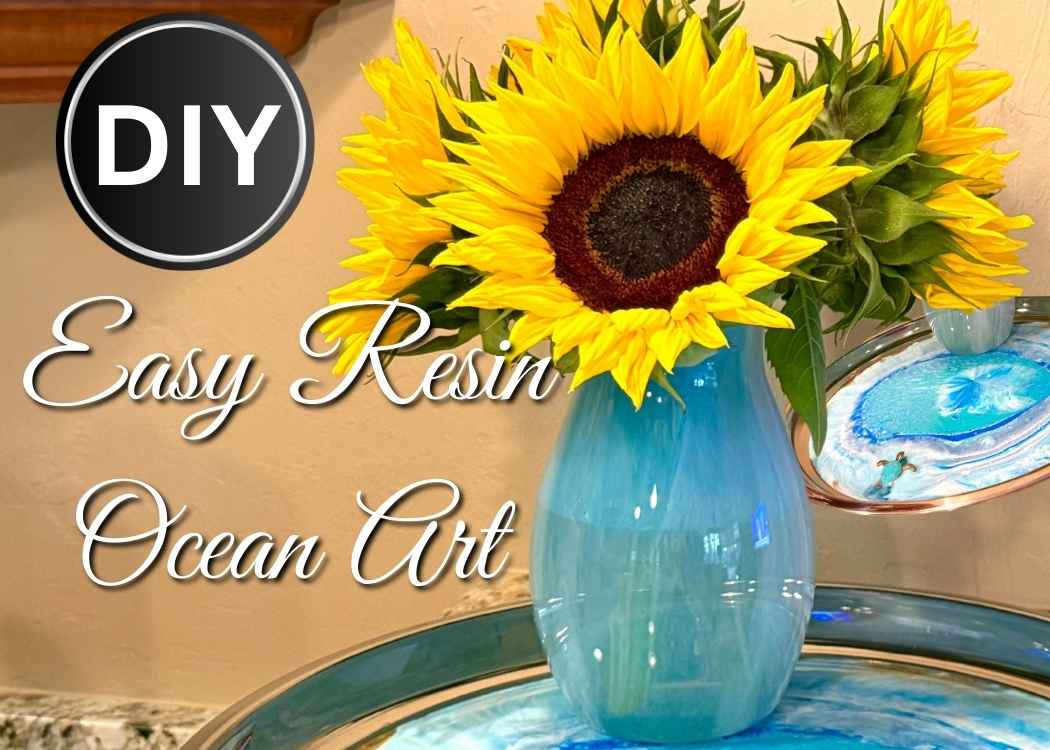
Learn how to create resin ocean art on a glass vase using a zero waste technique. Easy Dollar Tree coastal decor DIY with video tutorial.
Have you ever looked at a simple glass vase and imagined it has high end coastal decor?
I have and took it one step further by thrifting a metal tray from Goodwill.
Sidenote: I find it interesting how vastly different pricing is from one Goodwill to another. Have you experienced that?
It had been far too long since I did a resin vase pouring, and I truly missed watching the colors flow together. So today, I am transforming a curved vase from Dollar Tree and the thrifted metal tray into easy resin ocean art using a zero waste resin pouring technique.
This project turned into a full Dollar Tree makeover…and a thrifted metal tray flip all in one.
And yes…I had a sinking turtle situation. I’ll show you how I fixed that, too!
Why Resin Ocean Art is Perfect for Coastal Decor
Resin ocean art has been popular for a while. I get why that is, because almost everyone loves the beach and the ocean.
The resin ocean art works beautifully to make DIY coastal home decor because resin naturally looks like water. It moves, it blends, and it can have soft, lacking effects to create the shoreline look.
I did one that was a little more extensive on a Coffee Bar Makeover project, which I think you will enjoy.
Instead of pouring into a mold, we’re pouring resin over a curved vase and onto a tray. If you’ve ever wondered how to pour resin over curved surfaces successfully, this tutorial walks you through it.
Supplies Used
*Disclosure: This blog uses affiliate links from Amazon and other retailers. I earn a small amount from qualifying purchases at no additional cost to you.
- Resin
- Let’s Resin Mixer
- Let’s Resin Pigments (Cyan, Blue, White, Gold)
- Heat Gun (optional – good for extra blending and bubble popping)
- Torch or lighter (optional)
- Silicone Mat
- HTVRONT reusable stir sticks
- 15″ Thrifted metal tray – found at Goodwill
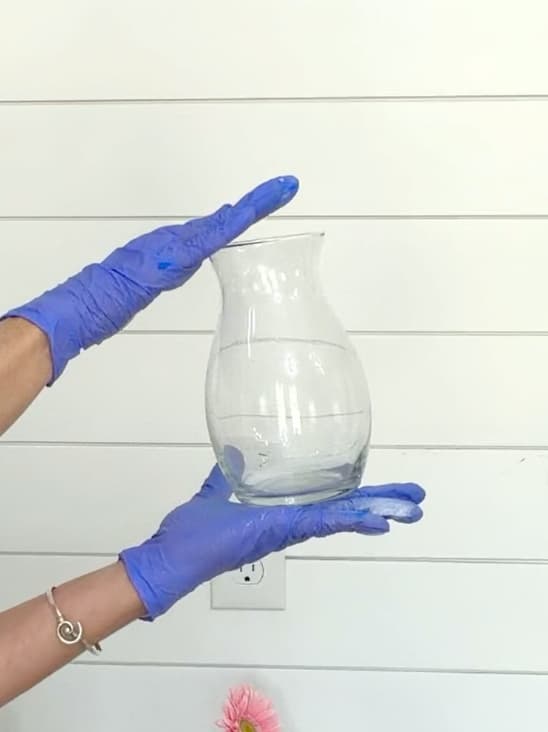
- Dollar Tree vase
- Turtle options:
- Larger turtle brooch
- And other larger turtle possibilities
- Turtle charms (typically smaller)
Video Tutorial for Easy Resin Ocean Art
If you enjoy watching color flow and blend, this resin ocean art pour is especially satisfying.
Be sure to follow me on YouTube for more video tutorials!
Easy Ocean Art Pouring Directions
Step 1: Prep Your Charm, Vase, and Tray
Before starting the resin ocean art pour, I removed the loop from the turtle charm using my wire cutters. It would not have looked too nice with the loop on his nose.
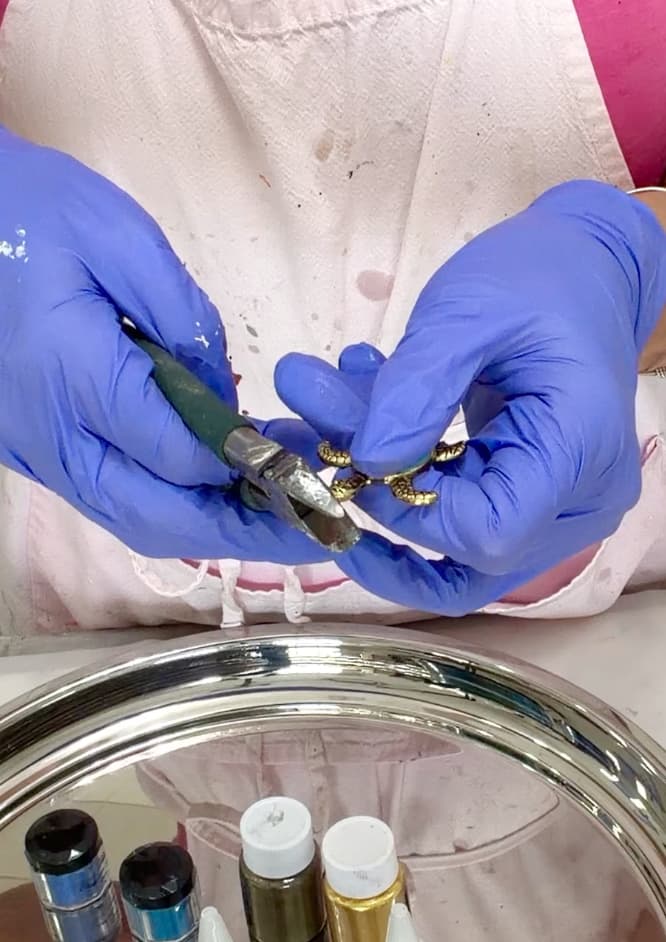
If you plan to embed decorative elements (charms or whatnot), planning the placement ahead of time helps avoid having to fix sinking turtles later…but we’ll get into that…because I thought I had planned…
To set up the pouring situation, place your vase upside down on a cup, on the tray, so the resin can drip freely.
Dripping on the resin makes it a zero waste project, and you pretty up two things at once.
Make sure your surface is level. Resin will always self-level to whatever base is beneath it.
Cleaning your vase with rubbing alcohol is all you need to do…other than removing the label, of course.
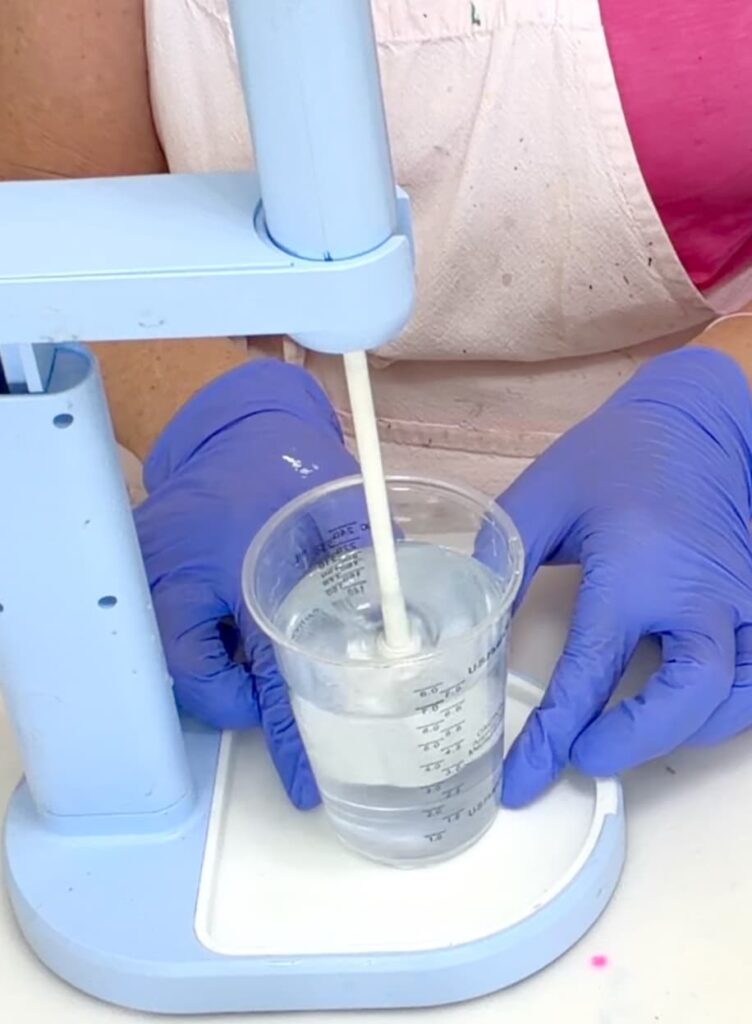
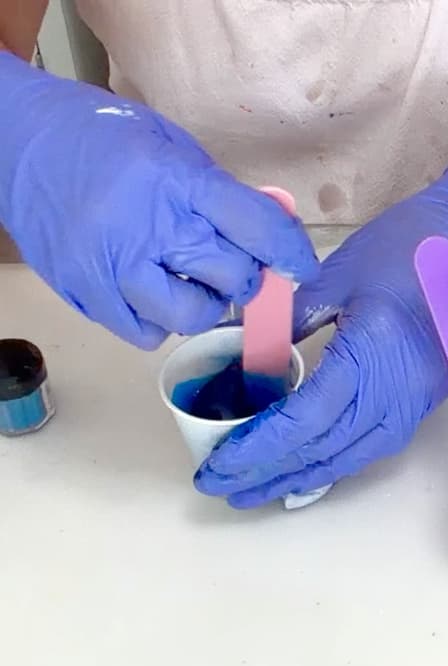
Step 2: Mixing the Resin and the Ocean Colors
I mixed approximately 13 ounces of resin for this project. Using a resin mixer saves your hands and time.
For this project, I used Let’s Resin pigment pastes in cyan, deep blue, and white. The perfect beachy colors!
I also did some mica colors in metallic blue and teal, as well as mixing gold and bronze mica powders to create a beautiful gold that goes well with the gold on the turtle charm.
To prevent the piece from becoming too dark, I did plan for the white in between layers.
I did not plan on the gold being a sandy shoreline, but that’s how it worked out!
Step 3: The Clear Flood Coat
I don’t know if I would call the flood coat a critical step, but I think it’s a very helpful step.
Before adding or pouring any colors, I poured a thin, clear flood coat over the vase. I used my gloved hands to make sure it covered the outside of the vase.
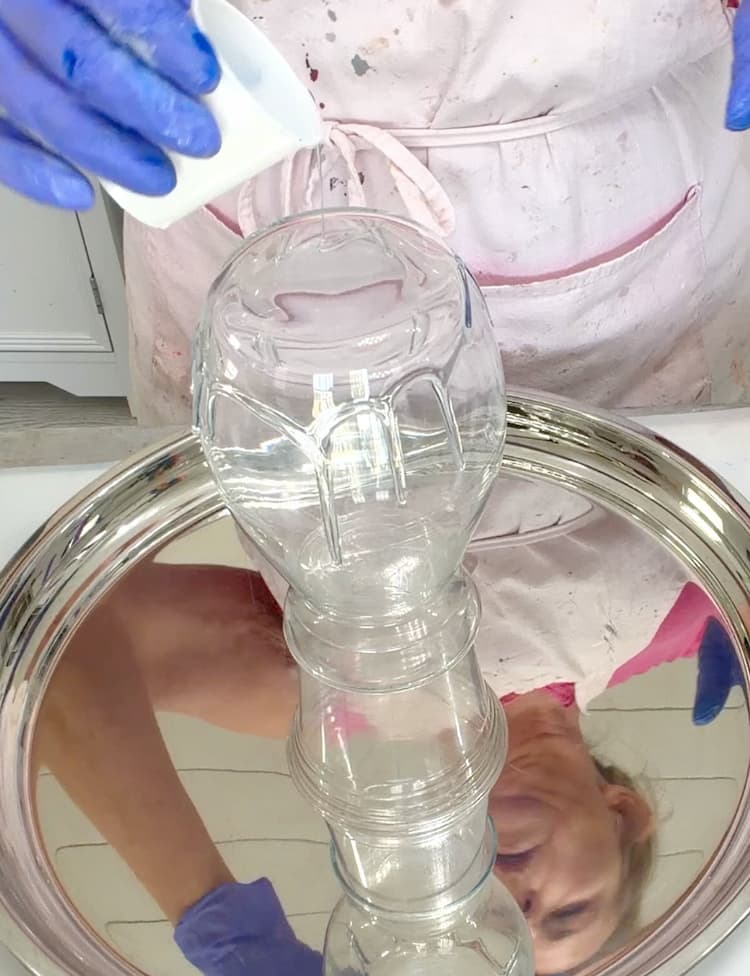
A clear base layer allows the colored resin the glide all over the vase instead of having to work harder to cover missed areas.
Step 4: Creating the Ocean Art Effect
Now the fun part…start pouring!
I alternated all of the colors with white between them. Just realize that when you are pouring that you cannot control what happens. Most of the color will run off the base, and it will become totally different than what you expected or anticipated.
While I was pouring, I realized I was losing all of the gold, so I added a thin border of gold around the outer edge of the resin on the tray.
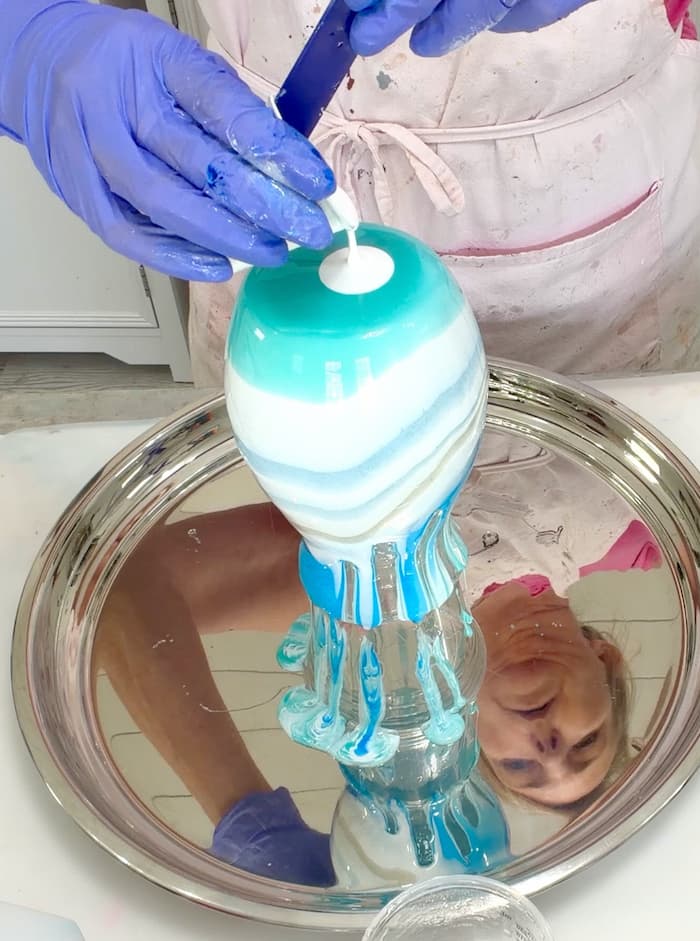
I found out that the gold is subtle and not much of it was remaining, but what is peeking out along the edge gives the look of sand.
When I set out, I was looking to use coastal colors, not give it the ocean look, but I feel like it did that on its own.
I didn’t do any additional blending, but if doing it again, I might have used my heat gun and moved some of the colors around a bit more.
But always be careful because overheating the resin and overworking it can distort the design and also cause the resin to cure unevenly.
Step 5: Zero Waste Resin Runoff Technique
Here’s where this becomes a zero waste resin pouring.
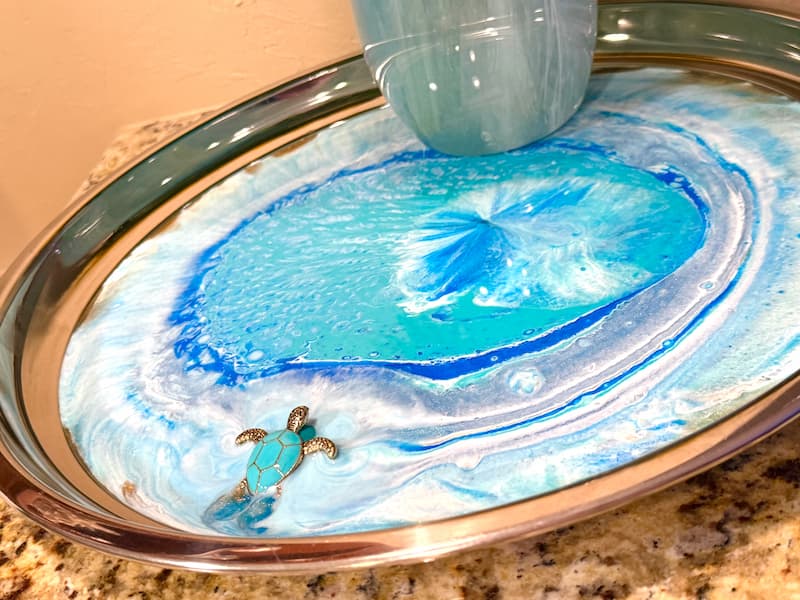
All the excess resin dripped directly onto the thrifted tray underneath it. Instead of wasting the runoff, I created a coordinating piece.
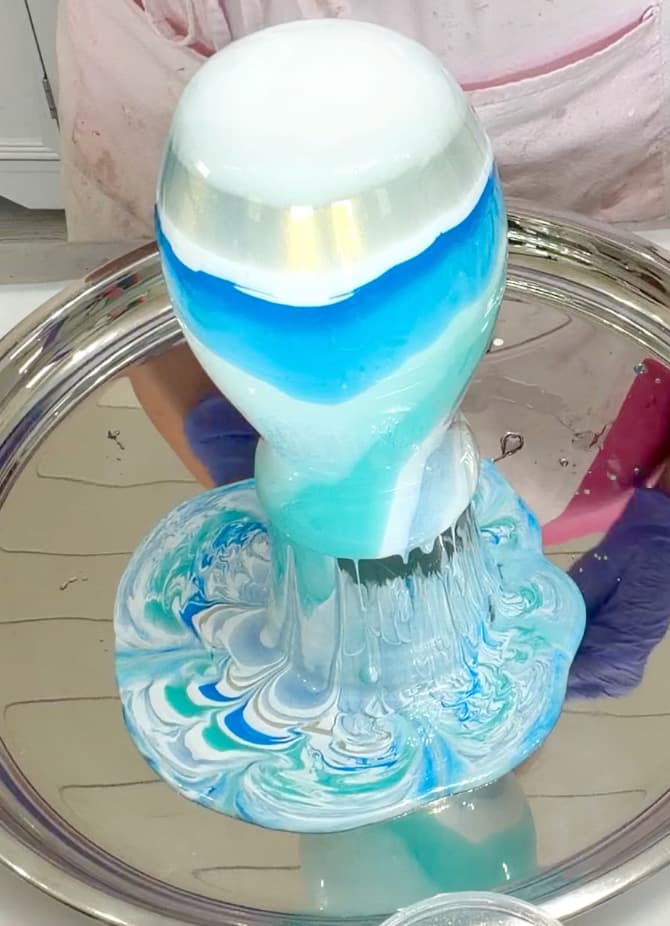
If you find sturdy trays while thrifting, grab them. They are perfect for a thrift flip like this one.
Step 6: How to Fix Sinking Turtles
Now for the reality moment.
When I placed my turtle into the tray, it sank more than expected.
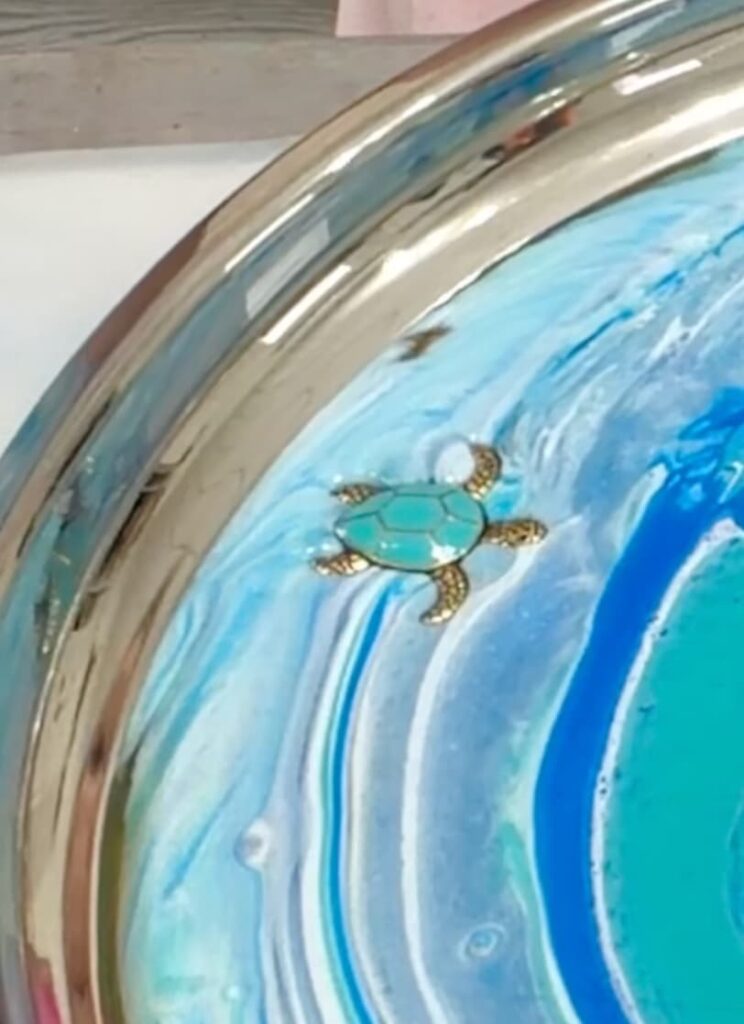
I had to quickly and carefully snatch it out of the resin and clean it off.
I frantically searched around my craft room to see what I could use to prop up my turtle and found small decorative stones that luckily were the perfect color!
I placed them into the resin, and they mostly sank, but just enough for me to prop up my little turtle.
Problem solved!
I dripped a little clear resin over the turtle, and it secured the turtle to the stone and the whole piece.
Step 7: Popping Bubbles
After placement, I randomly passed a lighter over the surface of the tray to pop bubbles. You can also use a torch or heat gun. Just remember to move quickly over the surface.
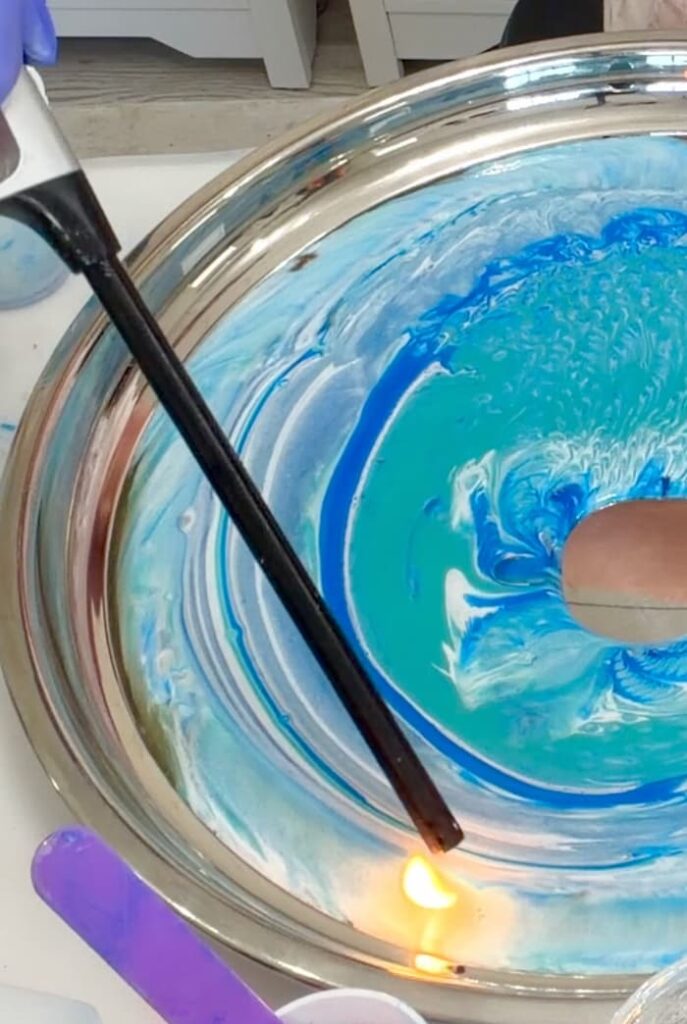
A quick spritz of rubbing alcohol helps eliminate surface bubbles as well.
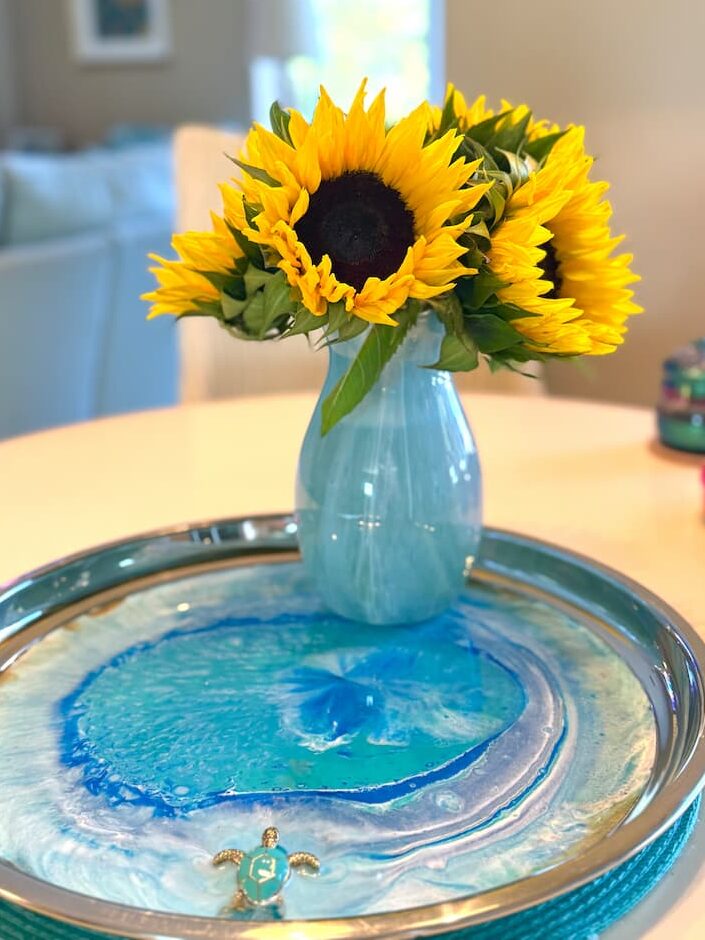
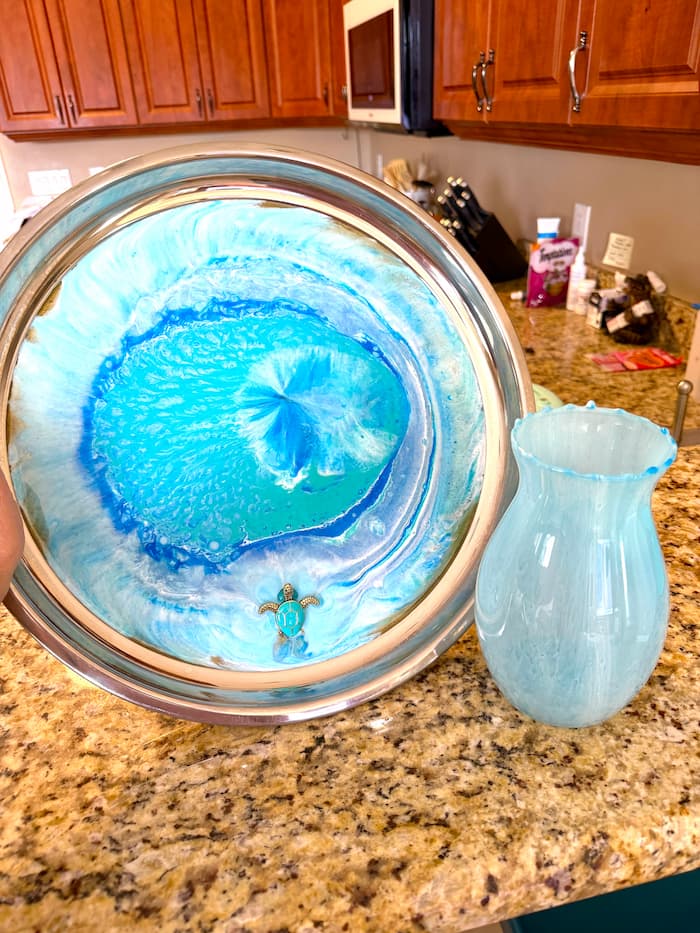
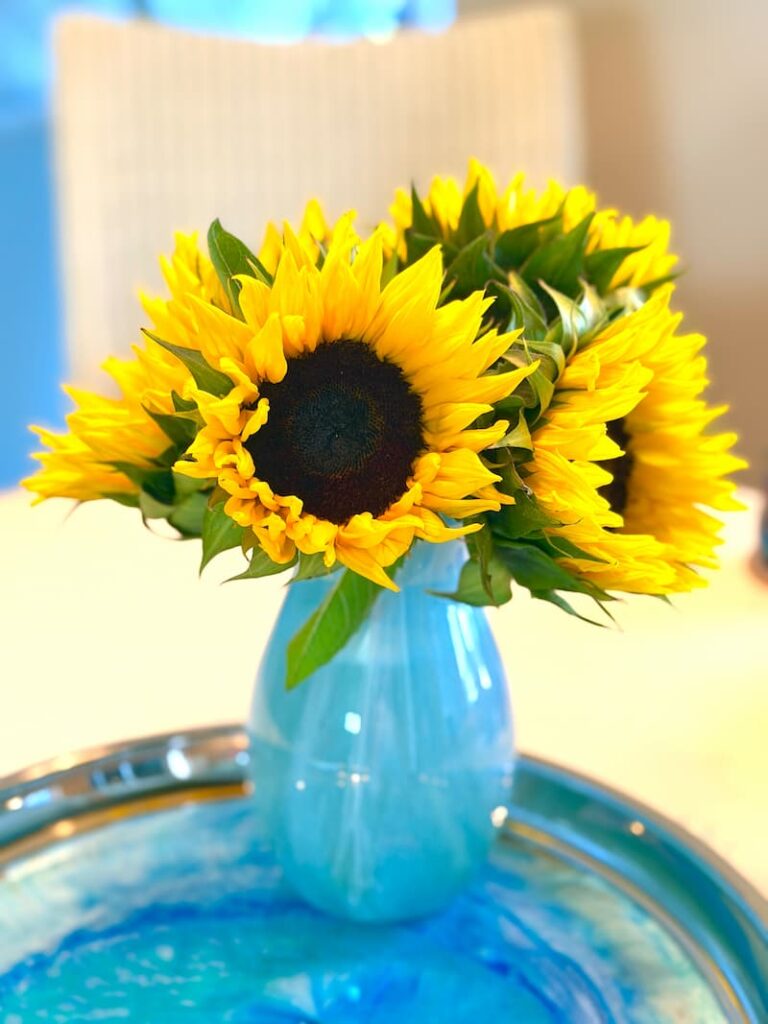
The Final Result: Coordinated Coastal Decor
Once cured, the vase had soft ocean streaks and muted tones that felt high-end. The tray complements it beautifully, with the turtle swimming toward the middle.
What I Learned
I feel like I learn something from every single project I do. Sometimes it’s a tiny tweak…and sometimes it’s a full well-that-didn’t-go-as-planned moment.
This one gave me a little extra education.
First, I was completely convinced the gold was going to take over the whole piece if I wasn’t careful. I had visions of it swallowing my beautiful ocean blues.
Spoiler: It did not.
If anything, I could have gone heavier. If I were to do this again, I would mix more gold and build it up around the edges to create an even stronger sandy shoreline effect.

Second – and this one makes me laugh – I actually measured how much resin I would need to cover the tray. I even filled the tray with water beforehand to test the depth to make sure my turtle wouldn’t sink and disappear into the abyss.
I felt confident.
It sank anyway.
Even with planning, resin likes to humble you. Next time, I would plan for backup support from the start. I got lucky that I to rescue him without disturbing the design. Thankfully, I had the perfect stones on hand.
But let’s just say, the turtle gave me a mild panic moment.
Ocean Art and Other Resin Stuff
That’s it for my resin ocean art project, but I have many, many resin projects you will love, and here are a few:
I love this Dollar Tree coastal decor project. It turned out to have an ocean art effect. It also proves that you don’t need a massive budget to create elegant home decor.
Let me know what you think of it in the comments!
Remember: Life’s too short not to shimmer, so grab your glue gun and your glitter!™
Mona