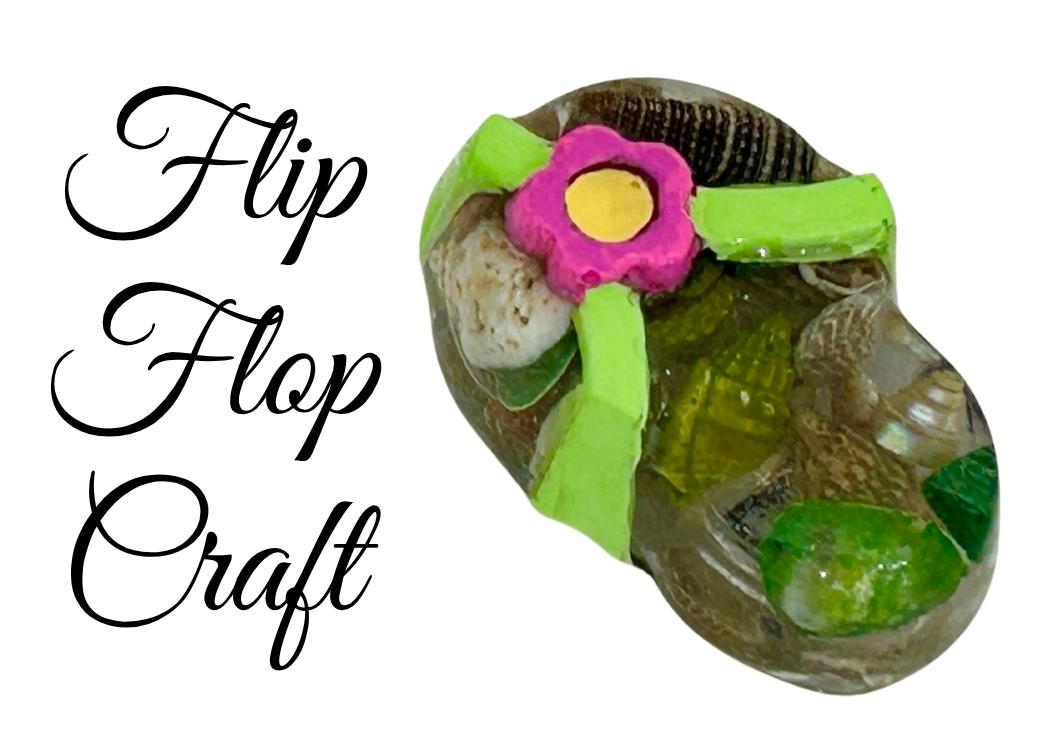
Turn leftover resin into a glossy, beachy flip flop craft magnet using tiny shells, paint, and UV resin for a quick and fun DIY project!
If you’ve ever finished a resin pour and found yourself with just a little resin left over, don’t toss it! This flip flip craft is the perfect way to use up those last drops while creating something super cute and functional – a beachy flip flop magnet.
I used a flip flop silicone mold…it was actually an old ice cube tray.
What You’ll Need
*Disclosure: This blog uses affiliate links from Amazon and other retailers. I earn a small amount from qualifying purchases at no additional cost to you.
- Flip flop mold
- Tiny shells
- Acrylic paint (yellow, pink, lime green)
- Rubbing alcohol in a spray bottle
- Small paintbrush
- Magnet
- Adhesive
- UV Resin
- Resin:
- When deciding on which resin to use, there are a lot of qualities that might be appealing, UV resistant, price, heat resistance, etc. Just make sure to select a resin that fits your needs.
- Use whatever brand you like:
- Easy Cast
- Art Resin
- Let’s Resin
- Promise Epoxy
- These are heat resistant resins:
- FX Poxy
- Stone Coat
Flip Flop Craft Video Tutorial
Here is the video so you can see exactly how I made this cute magnet. It’s so easy and a great way to make something with leftover resin.
Flip Flop Craft Directions
Step 1: Pour the Leftover Resin
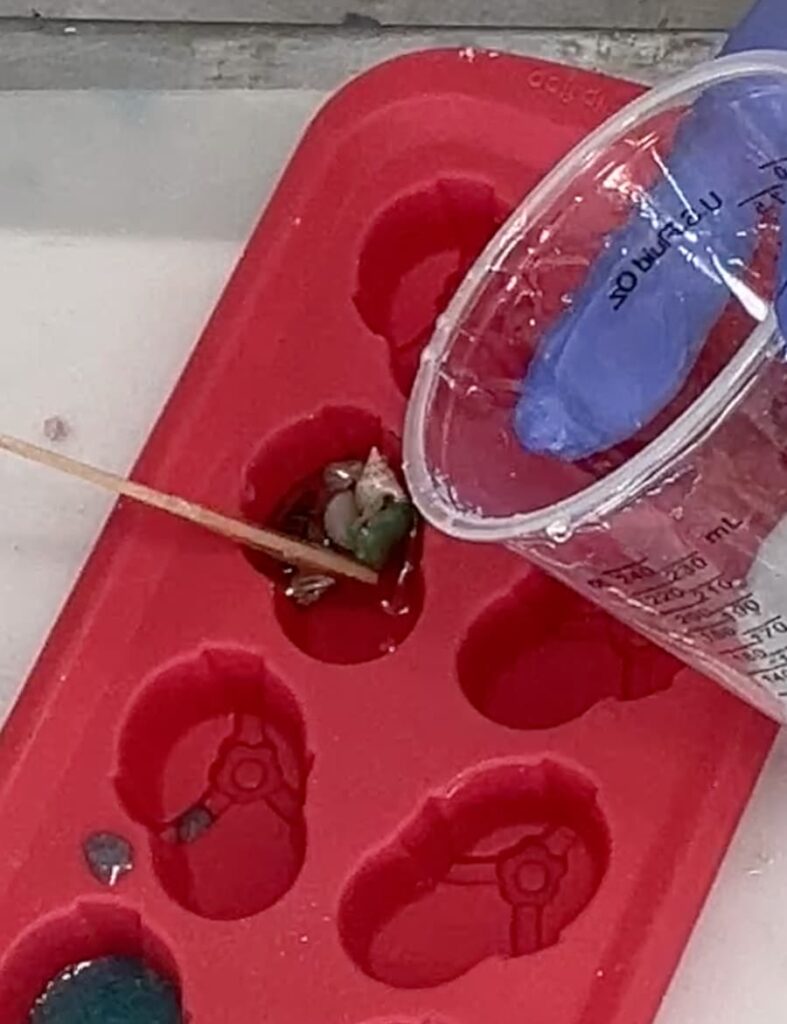
As I wrapped up another resin project, I had a small amount left in my cup. I grabbed the flip-flop-shaped silicone mold.
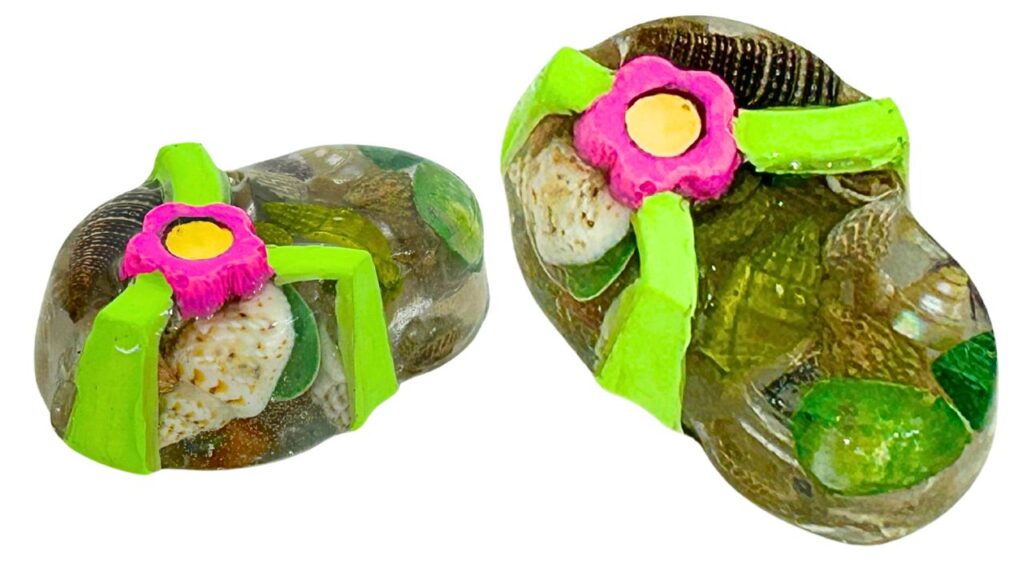
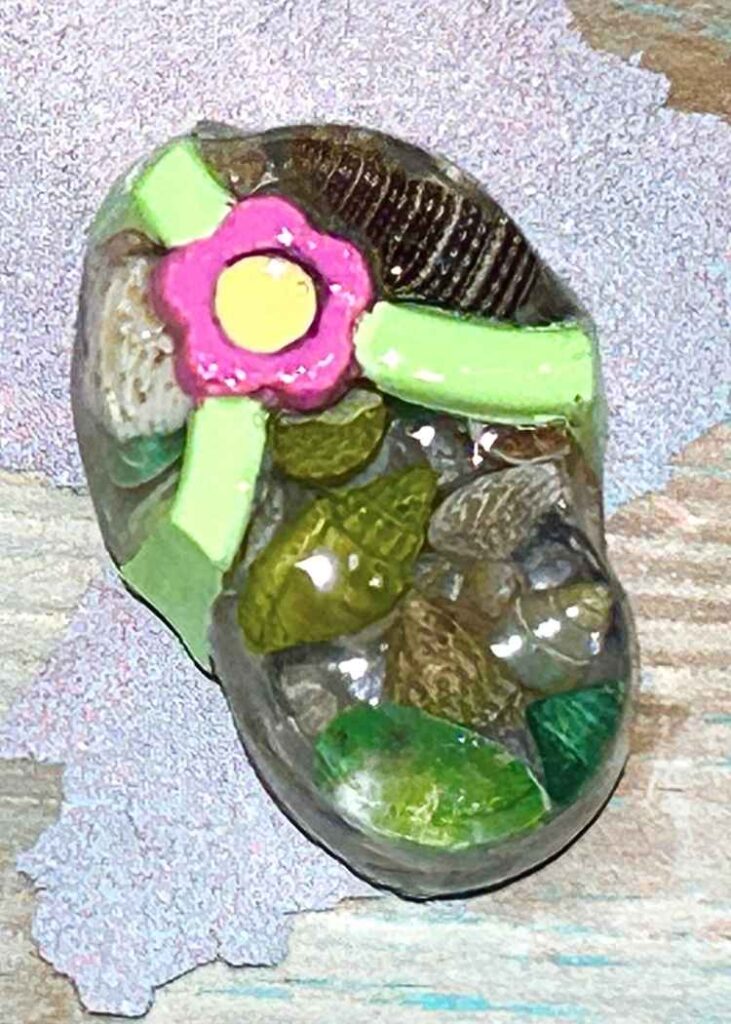
I added tiny shells to the leftover resin and poured it right into the mold. It’s a great way to avoid waste and make a mini project at the same time.
I gave it a quick spritz with some rubbing alcohol to pop the surface bubbles. Be careful not to overspray—just a fine mist will do the trick. Then, I let it cure for 12 hours.
*I used tiny shells but you can use sand, glitter, tiny pebbles, etc. for interesting effects too!
Step 2: Paint the Details
The flip-flop has some raised details that I wanted to paint. I painted the flower pink and yellow, and for the strap, I used lime green.
That was the color theme I went for, but you can make them with any colors.
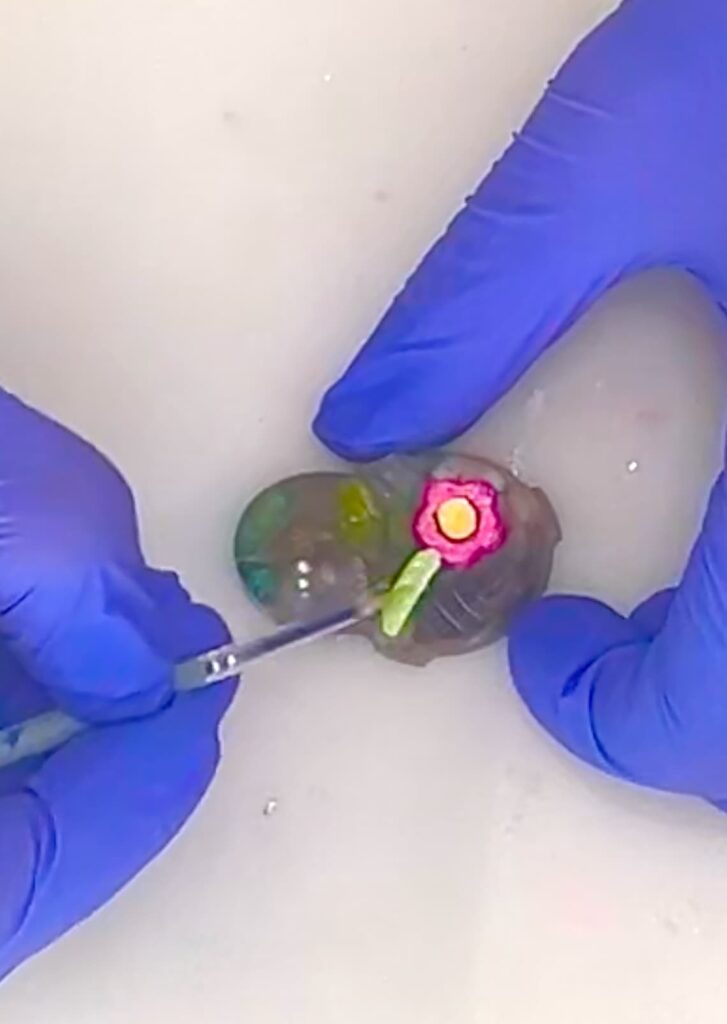
When the paint dried, I brushed on some UV resin to seal the paint and to bring out the beauty of the shells in the resin.
I brushed the UV resin on and used a UV light to cure it. When you look at it now, you can see all the beautiful shells inside!
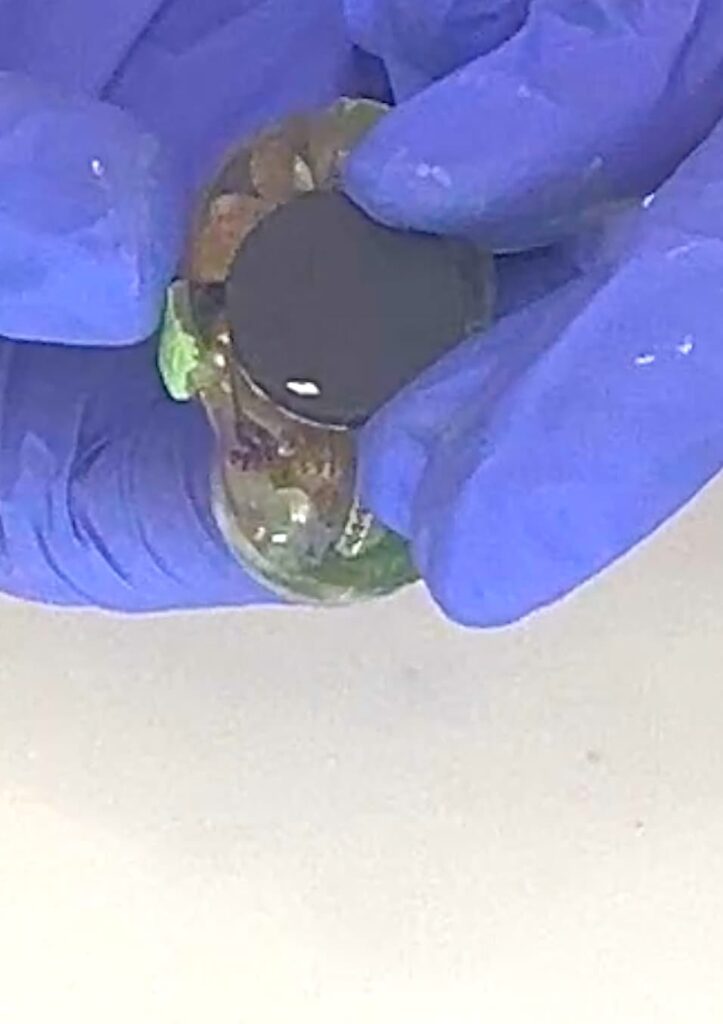
Step 3: Add a Magnet to the Flip Flop Craft
Once the flip flop is glossy and dry, glue a magnet to the back. You can find a self-adhesive magnet, or you can glue it on with E6000 or Gorilla Glue. Let it dry completely and then put it on the fridge!
Now you have a colorful beach-themed flip flop craft to brighten up your fridge, craft shed, or locker!
This is a great example of how to use every last bit of resin! I made it as a magnet but it could just as easily be a keychain or an ornament, too!
Check Out These Fun Beach-Themed Crafts
I have more flip-flop, beach, and fish-themed crafts that I think you will love!
Be sure to check them out below!
- Beach-Themed Resin Coaster
- Resin Seashell Paperweight
- DIY Flip Flop Coasters
- Fun Fish Coasters
- Easy School of Fish
- Beachy Resin Plaque
Thanks for stopping by! Remember: Life’s too short not to shimmer, so grab your glue gun and your glitter!™
Mona