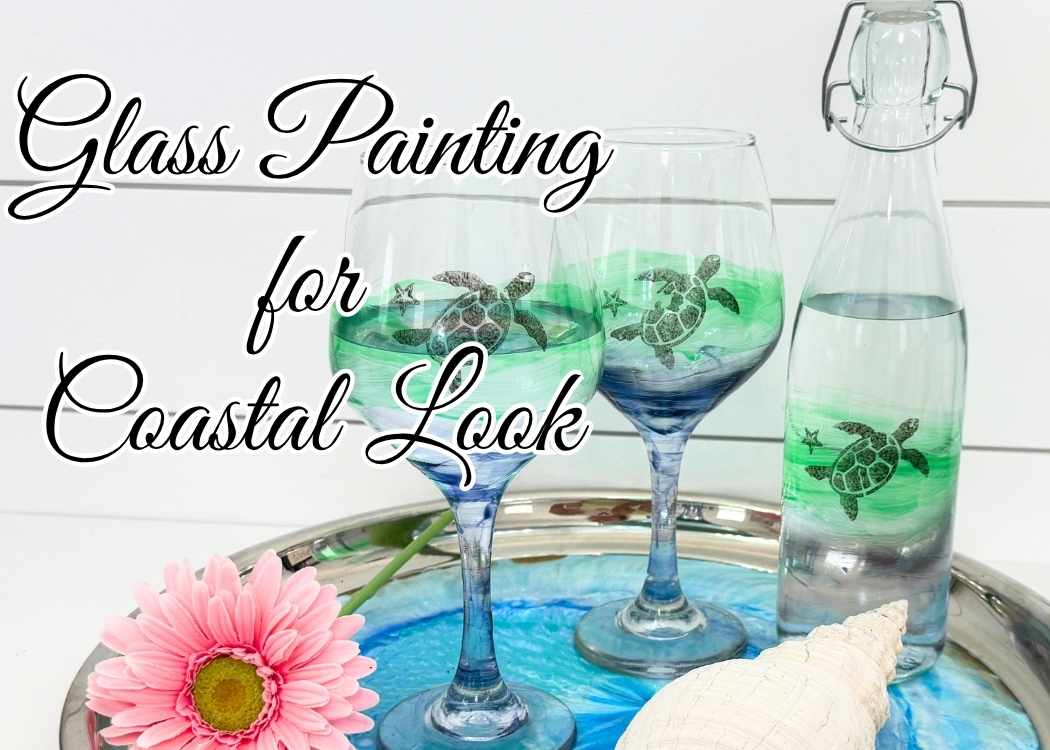
Learn glass painting techniques to create a high-end coastal beverage set from Dollar Tree finds using Cricut stencils and Murano paint.
It’s so easy!
If you love taking inexpensive finds and making them look high-end, this project is such a fun one to try!
For this $10 Craft Challenge, I turned Dollar Tree wine glasses and a bottle into a gorgeous coastal-inspired beverage set using easy glass painting techniques…no skill required.
I’ll let you know what paint I used and how I made the stencil using a Cricut.
The best part? This entire project cost less than $10 and looks like something you’d find in a boutique beach shop.
I also learned a few important lessons along the way about how to paint on glass successfully, including one mistake you definitely want to avoid!
Coastal Glass Painting Video
Here is the video where I show you my exact glass painting technique and my mistake too!
Don’t miss the fun!
Supplies Needed
*Disclosure: This blog uses affiliate links from Amazon and other retailers. I earn a small amount from qualifying purchases at no additional cost to you.
- Wine glasses
- More wine glass options
- Murano glass paint
- FolkArt Metallic Black Paint
- Paint brushes
- Rubbing alcohol
- Gloves (optional)
- Cricut Machine
- Black removable vinyl
- Transfer tape
Directions for the Glass Painting DIY
Step 1: Prep the Glass for Painting
The first step in any successful painting project is making sure the glass is completely clean.
I removed all the labels from the glasses and the bottle and then cleaned everything thoroughly with 91% rubbing alcohol. This step is super important. Painting on glass is a little trickier than painting on canvas or wood because glass is non-porous. So it’s extra important to have it clean because the oils from your hands won’t let the paint stick.
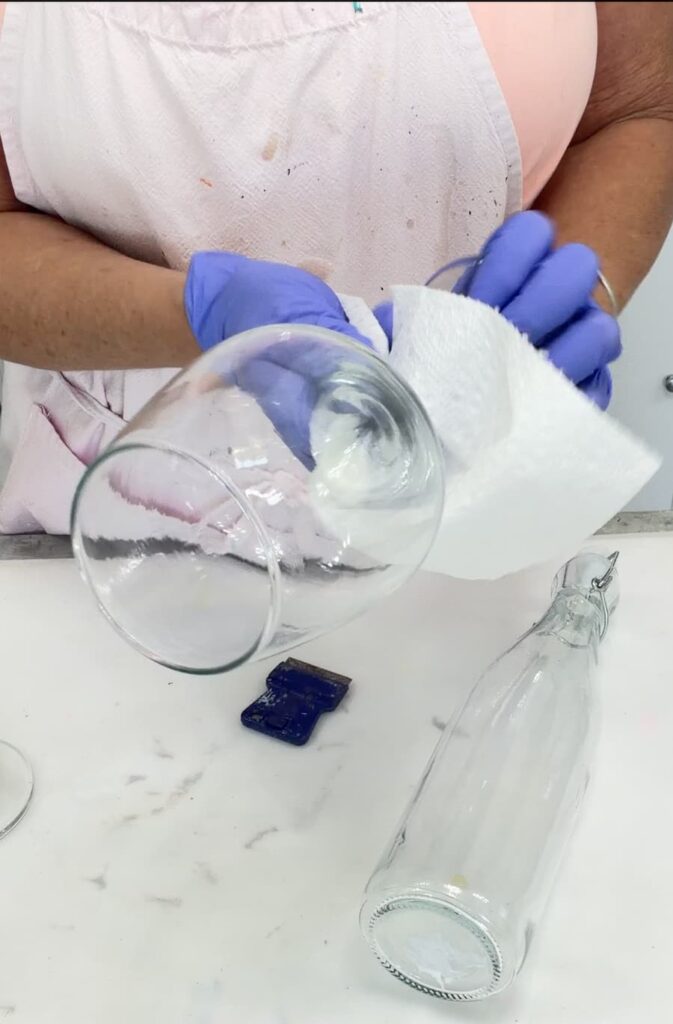
I wore gloves while cleaning my glass, and after, just so I wouldn’t be putting fresh oils back on right after I wiped them off.
This isn’t just for how to paint on a wine glass, but any glass surface.
Step 2: Paint the Coastal Glass Design
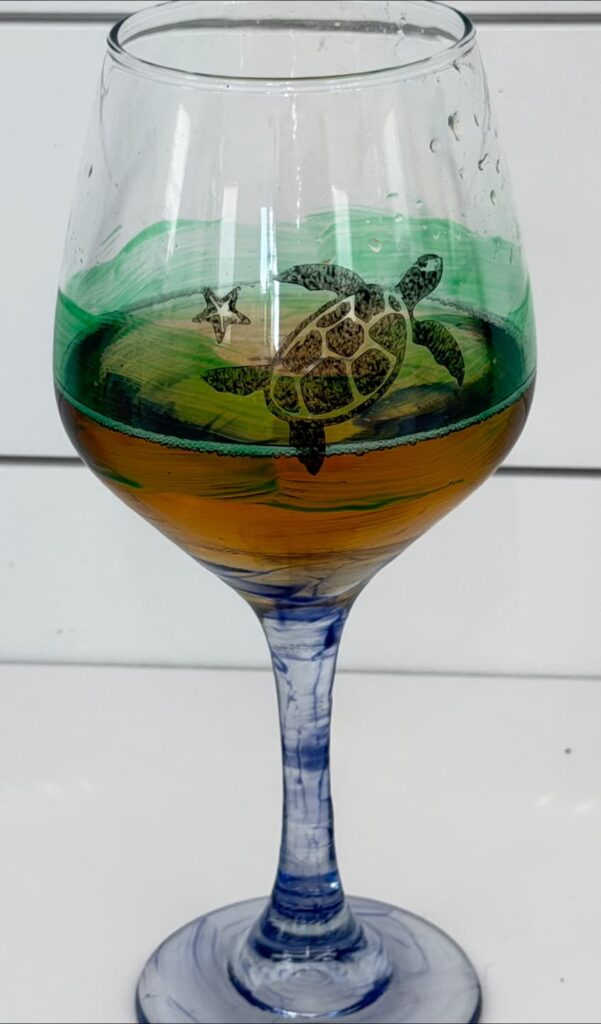
For this glass painting project, I used transparent Murano glass paints in violet and green. I liked the color combo, but I also like that this paint can be backed on and top rack dishwasher safe after.
I mean, if we are going to go through the trouble to make these, we are going to want them to last.
It also makes me more confident to give a project as a gift because I know it won’t accidentally wash right off.
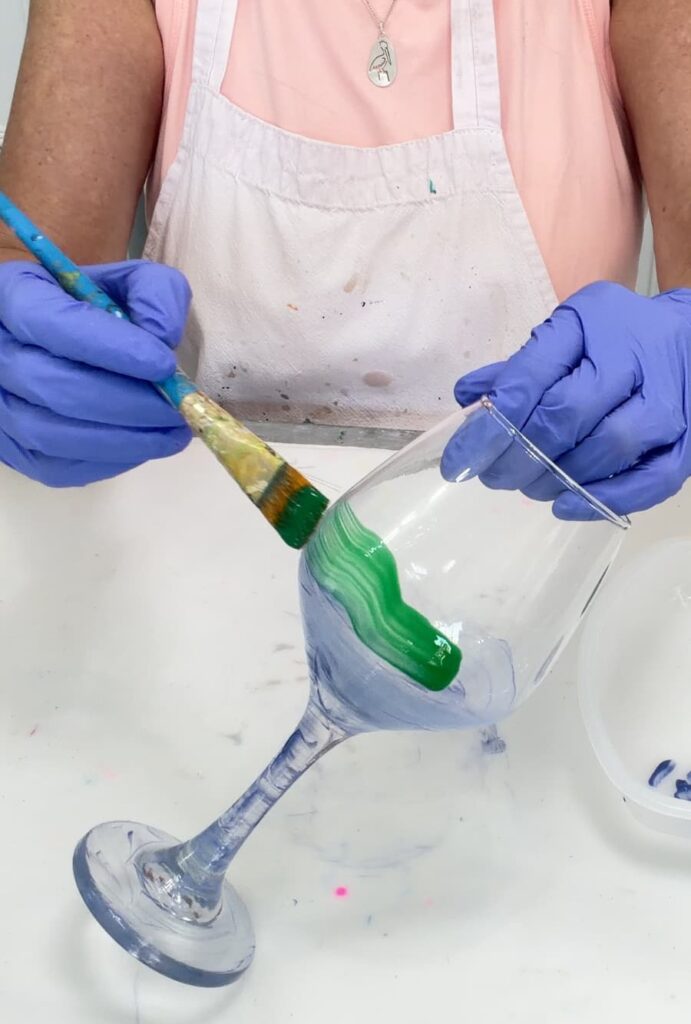
I started by painting the base of the wine glass with the violet paint and worked upward using loose brushstrokes. I did the stem and the bottom of the goblet.
Here’s a tip about this glass painting, and I actually love it: You might try really hard to brush the streaks out. First, it’s almost impossible. Second, what I love about this type of glass painting is that the streaks and unevenness actually create a beautiful hand-blown look.
Just wait…you’ll see…promise
Next, I added some green paint where the violet ended so the colors blended a bit. You can go straight or wavy like ocean waves. It’s your call.
I repeated the same process on the bottle and the second wine glass.
If you are learning how to paint on glass, don’t worry about making every stroke perfect. The organic look is what gives this project so much character.
Step 3: How to Make a Stencil with Cricut
While the paint dried, I created turtle and starfish stencils using my Cricut machine and removable black vinyl.
If you ever wanted to know how to make a stencil with Cricut, this is such an easy way to customize glassware for any season or theme.
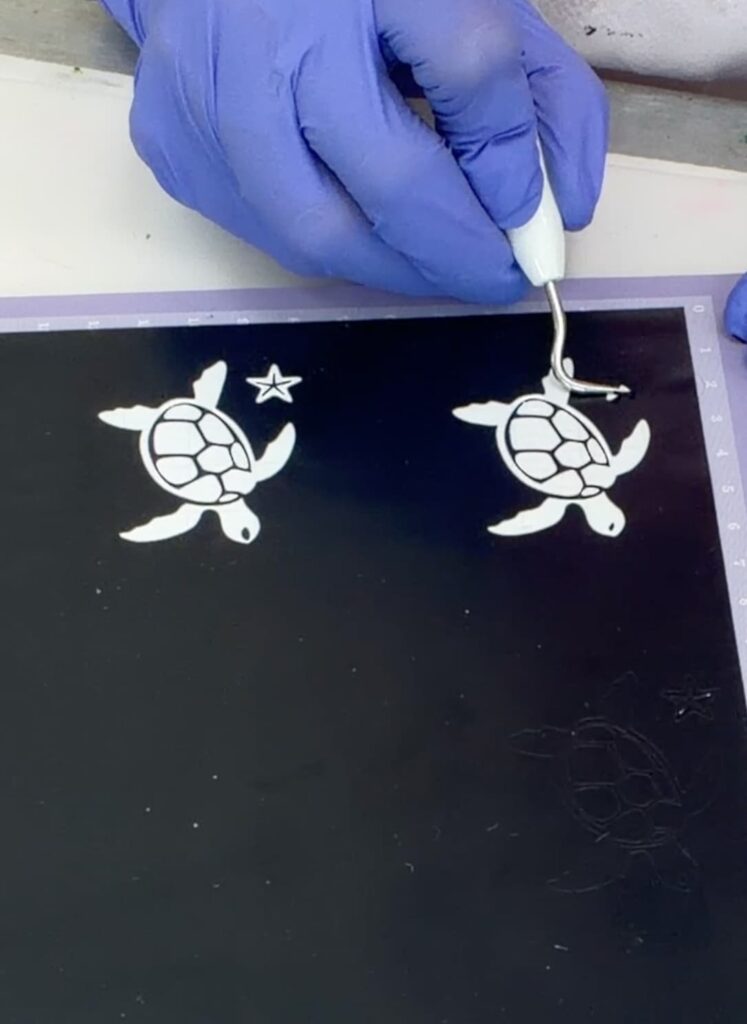
The key when weeding the vinyl for a project like this is remembering that the open areas are where the paint will go later.
I also learned a helpful trick for how to paint on glass with curved surfaces. I cut small relief slits into the vinyl so the stencil would conform to the curve of the wine glass much better.
Using transfer tape made it easy to position the stencil exactly where I wanted it.
Step 4: Bake the Painted Glass Before Stenciling
Okay…here’s the big lesson I learned from this project.
I originally tried applying the stencil before baking the painted glass first…big mistake!
The vinyl pulled some of the paint right off the surface. I thought I could bake the stenciled design on at the same time I baked the violet and green. I don’t know if stenciling may have softened some of the paint or if it just wasn’t on there strongly enough because it wasn’t baked yet.
So just work that into your timeline when you are planning the project. Always bake the layers first!
So if you are researching how to paint on a wine glass or how to paint on glass successfully, definitely don’t skip this step. Also, it seems like most paints that need to be oven-baked have the same directions, which you can see if you check out the Craft Lab, where I tested out glass paints.
Always double-check the directions for the paint that you are using, but this seems to be the most common process:
- Place the glasses and bottle into a cold oven
- Set the oven to 305º F
- Bake for 30 minutes once the oven reaches the temperature
- Turn the oven off and let everything cool completely inside
After baking, the transparent glass painting looked even prettier and almost appeared embedded in the glass itself.
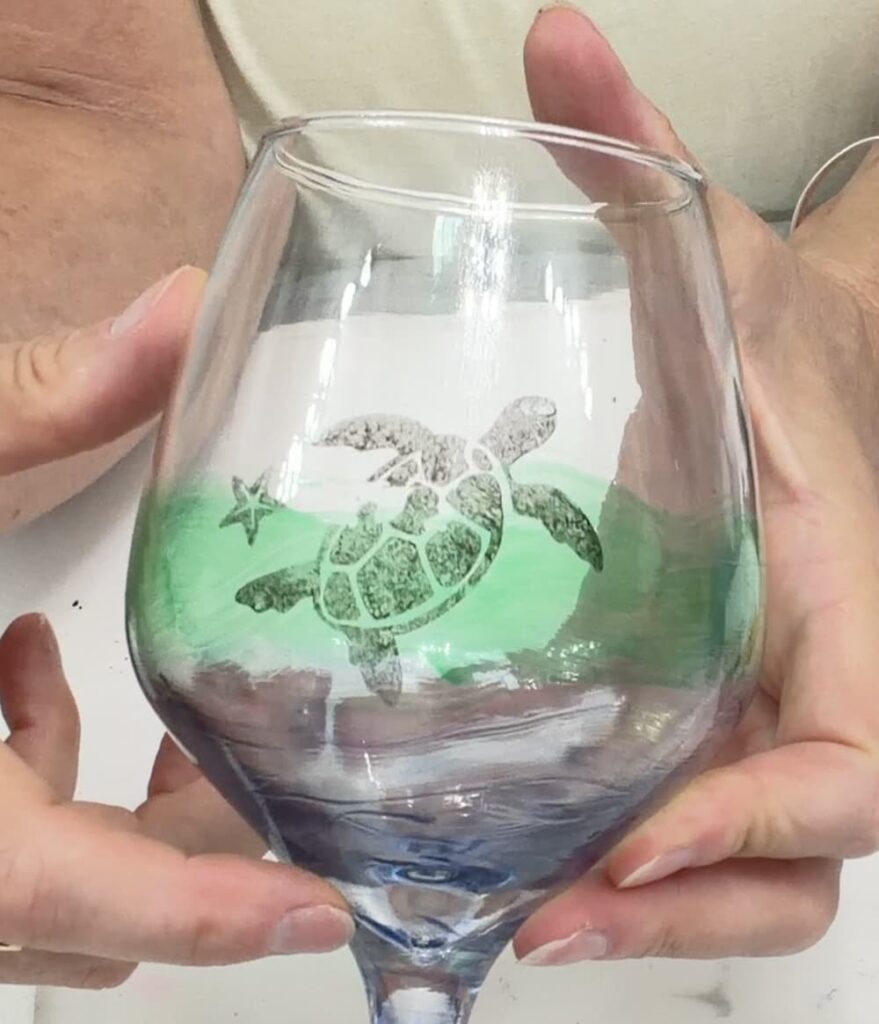
Once cooled, I applied the stencils and used FolkArt metallic black multi-surface paint to create the turtle silhouettes.
Instead of brushing normally, I used a pouncing motion to help prevent paint bleed under the stencil.
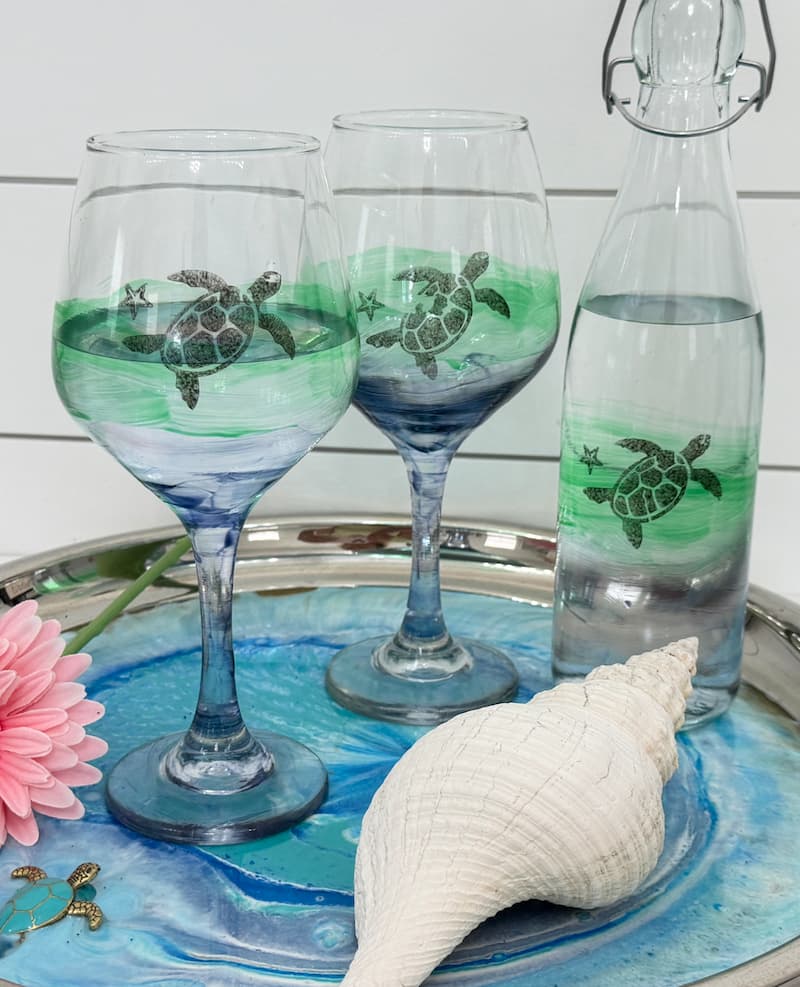
Step 5: Reveal the Finished Coastal Glass Painting Set
After removing the vinyl stencils, I baked the glasses one more time so the black paint could cure properly.
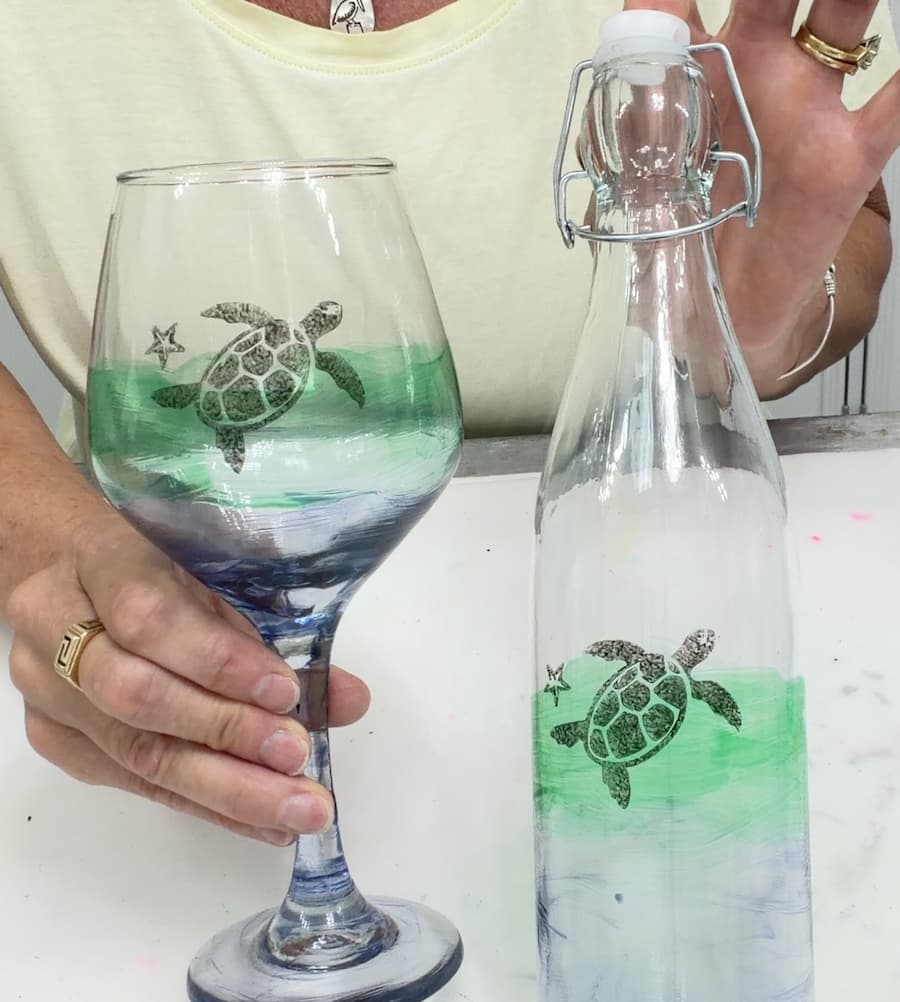
I absolutely love how this glass painting project turned out!
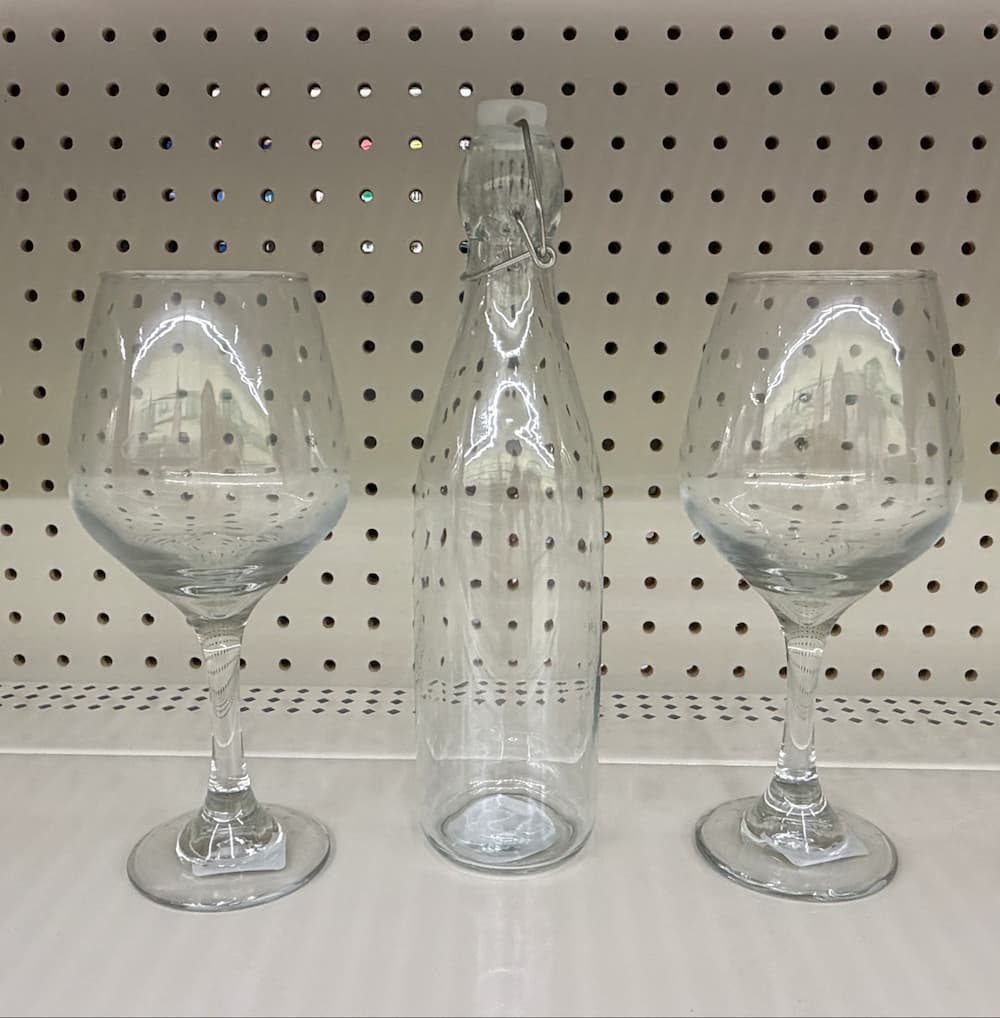
Let’s do a quick before and after! This is how I found them at Dollar Tree.
BEFORE
AFTER
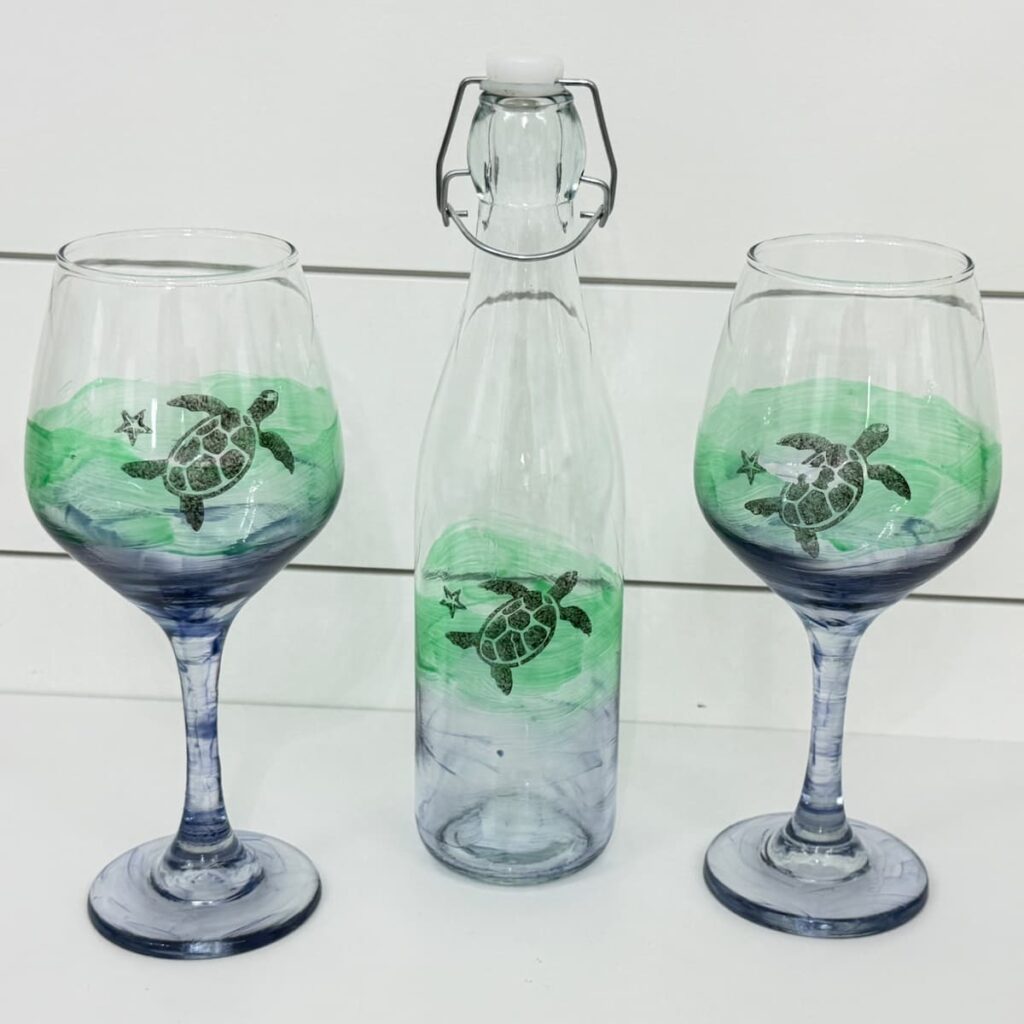
The transparent violet and green colors create such a pretty ocean-inspired look, and the turtle silhouettes give the whole set a high-end coastal vibe.
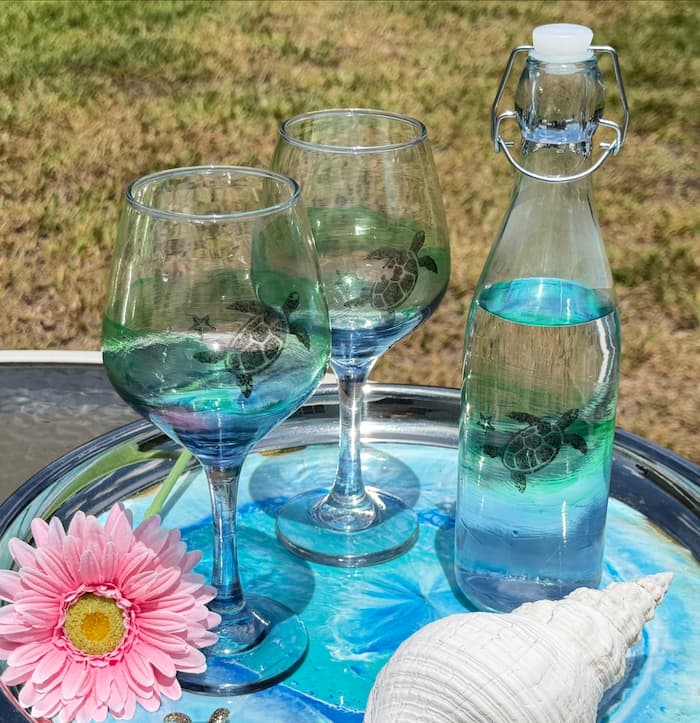
This project is a great example of how to paint on glass and turn simple Dollar Tree items into something that looks expensive and custom-made.
Now that this one is done, I already want to try it with different colors and seasonal designs!
Shimmer Scale
Now it’s time for the moment of truth! I want to know what you think.

It’s time for the Shimmer Scale, and for the $10 Craft Challenge, which means:
10 = Nailed it
1 = Failed it
Let me know in the comments whether I Nailed It or Failed It!
Other Coastal Projects
If you like coastal decor projects, you are going to love these:
- Easy Resin Ocean Art
- Cedar Chest Makeover from Victorian to Coastal
- Easy Coastal Decor Candleholder
- Amazing Before and After Coffee Bar Cabinet
Thanks for stopping by! Remember: Life’s too short not to shimmer, so grab your glue gun and your glitter!
Mona
10! I love beachy, nautical themes. My house is full of them. I want to try this to make matching glasses for my lighthouse dishes.
Thank you, Judi! That sounds PERFECT!