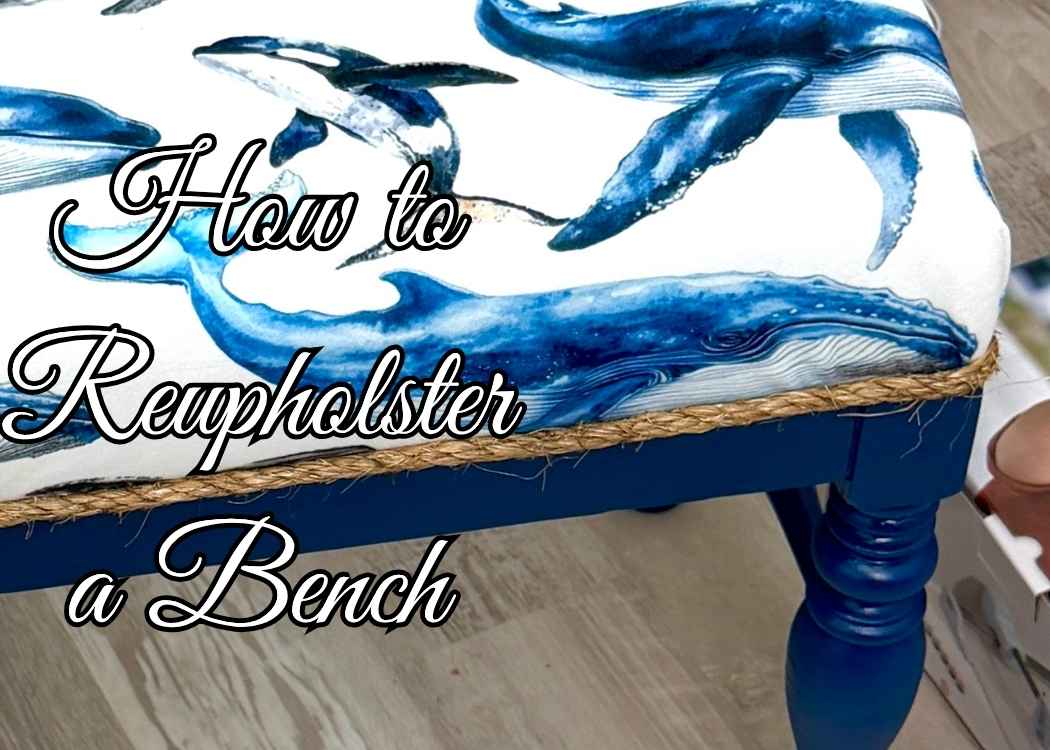
Learn how to reupholster a bench step by step and turn a curbside find into a stylic coastal piece with this easy DIY makeover.
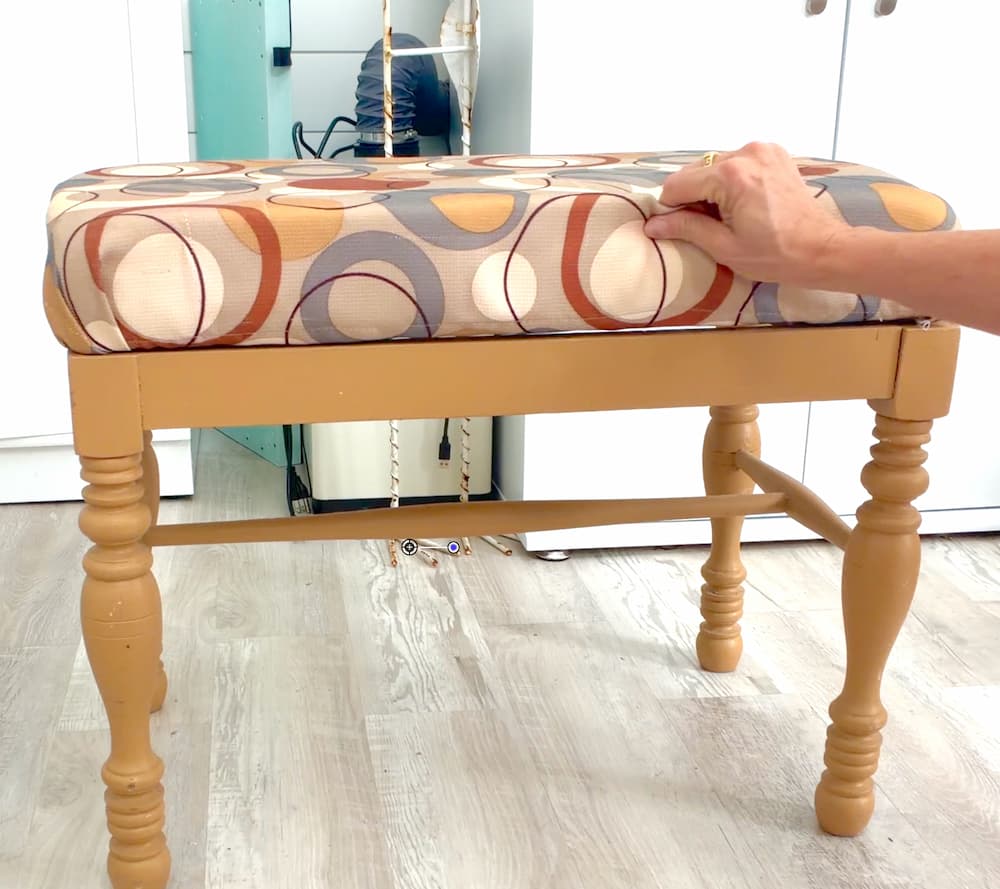
You know when you see something sitting on the curb and you just know it has potential? That was this bench.
I found it at my sister’s neighbor’s house (at the curb…on garbage day), brought it home…an then let it sit in my garage for about two years.
I know…but it happens.
But I finally decided it was time. I wanted something for our office, and this was the perfect chance to show how to reupholster a bench from start to finish.
This is not my first bench, I did one (dog themed) that has now been adopted by my niece’s cats. LOL. But it’s worth checking out HERE.
I find myself calling them benches, ottomans, and footstools interchangably.
I guess I can’t decide.
We better get started because this is a whale of a makeover!
How to Reupholster a Bench Video Tutorial
If you want to see exactly how I did it, you can watch this fun video!
Be sure to Follow me On Youtube!
Supplies for Bench Makeover
*Disclosure: This blog uses affiliate links from Amazon and other retailers. I earn a small amount from qualifying purchases at no additional cost to you.
Directions on How to Reupholster a Bench
Step 1: Strip Off the Old Fabric
First things first, everything had to go, except the bones.
If you are learning how to reupholster, this is always where you start and this is a great beginner project!
In my case, the fabrick was attached with upholster tacks instead of staples, which was totally unexpected.
Weird choice but it actully made it really easy to remove. So all in all…a win.
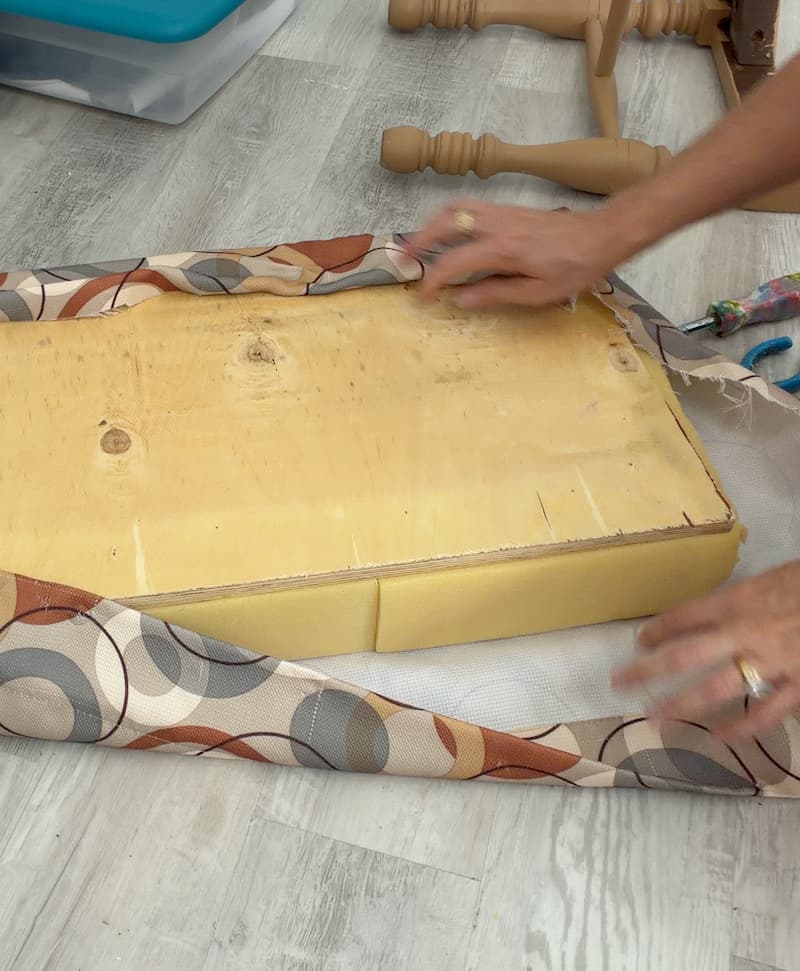
Once I pulled everything off, I could finally see what I was working with underneath.
As I suspected, the wood cushion base was solid, the foam…not so much. It was still firm but smelled musty and was yellowed enough for me to toss it along with the fabric.
And there may of may not have been a dried-up spider involved.
Step 2: Clean the Wood (Really Well)
Before doing anything, I gave the cushion base a deep clean.
I used hyrdrogen peroxide first, then bleanc just to be safe. And once that dried, I rinsed everything off to make sure it was ready for paint.
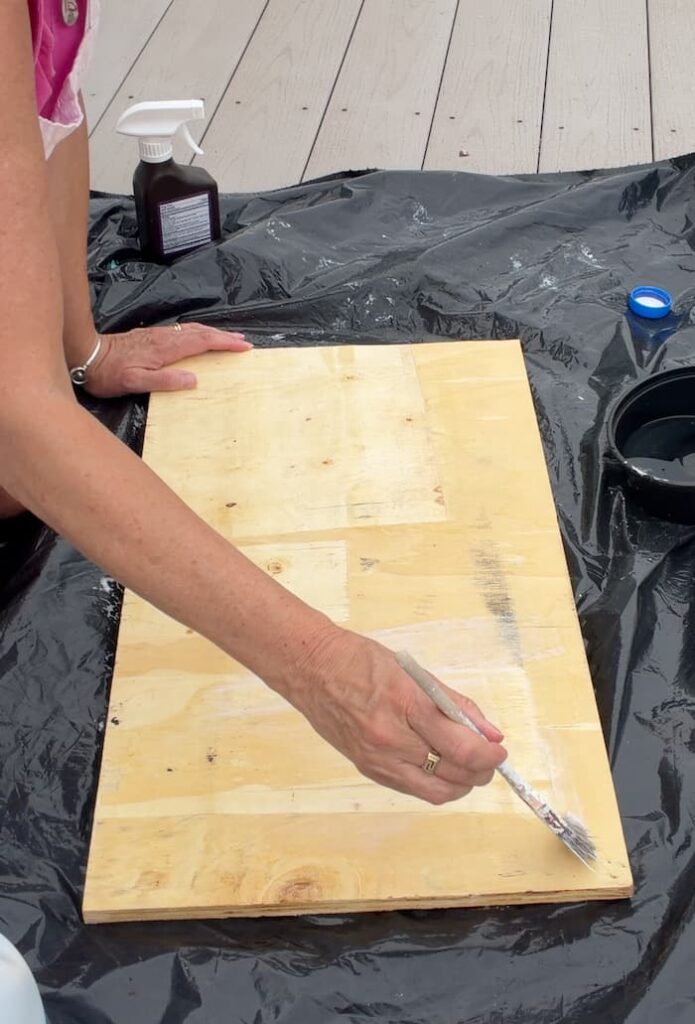
I know it sounds like overkill, but when you are working with a curbside find, it’s worth it.
This is one of those behind-the-scenes part of how to reupholster furniture that makes a difference in the long run and quite frankly puts my mind at ease.
Step 3: Fix Any Structural Issues
Before making it pretty, you’ve got to make sure it’s sturdy.
Or in my case, have Greg make it sturdy.
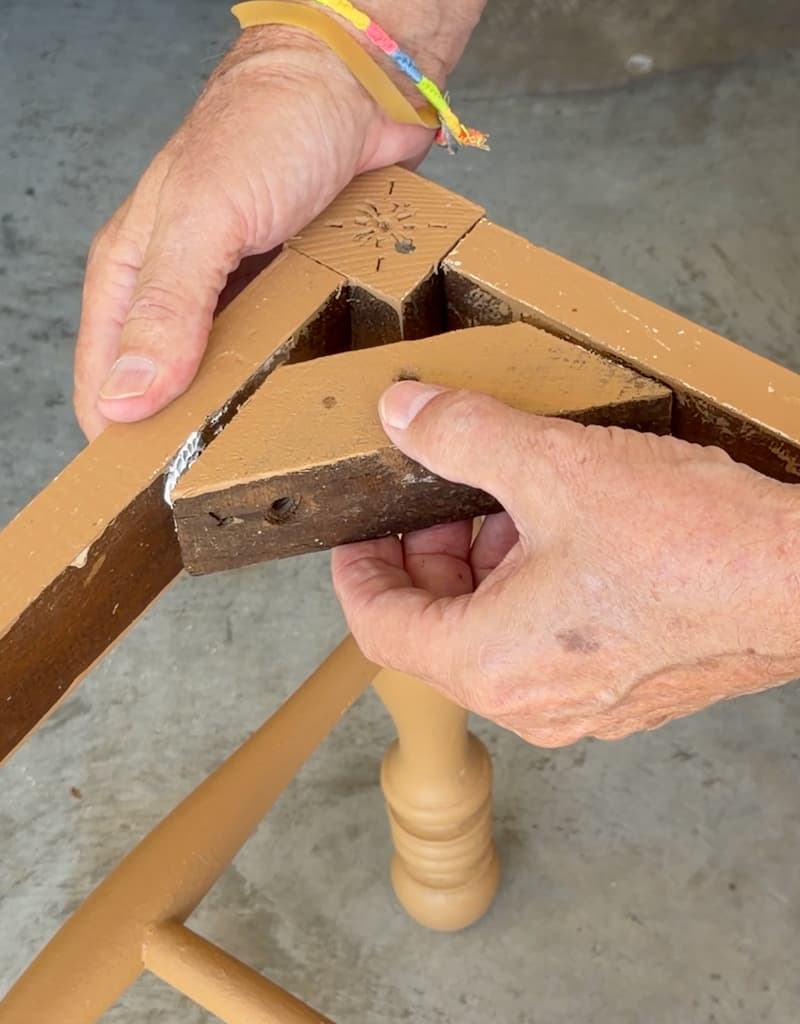
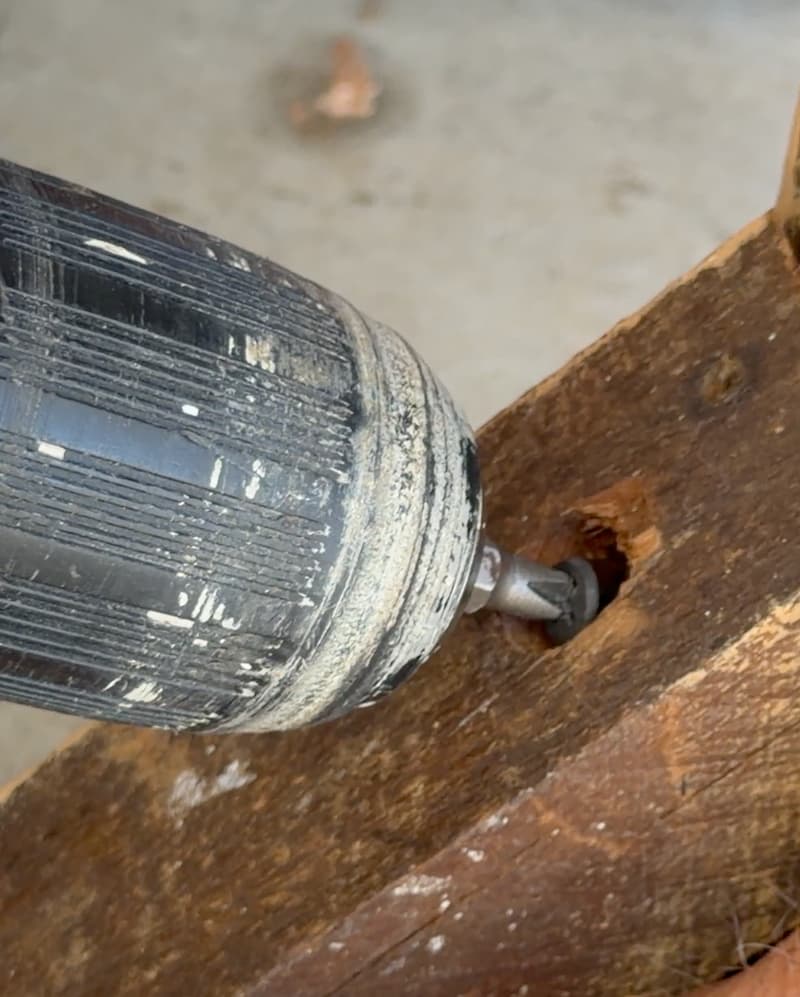
There were a few loose joints that were making the base wobbly. Greg removed some of the older screws that were too short and replaced them with more apporpriately sized screws.
Before putting it all back together, we glued everything so hopefully it’ll never be wobbly again.
I also filled in some gaps with caulk so everything would look more finished once it was painted.
If you skip this step when learning how to reupholster, you might end up with something that looks nice but still wobbles. You’ll end up pretty disappointed after all that hard work and nobody wants that.
Step 4: Sand and Paint the Base
Once everything was solid and dry, I sanded down any rough spots and loose paint and wiped it clean,
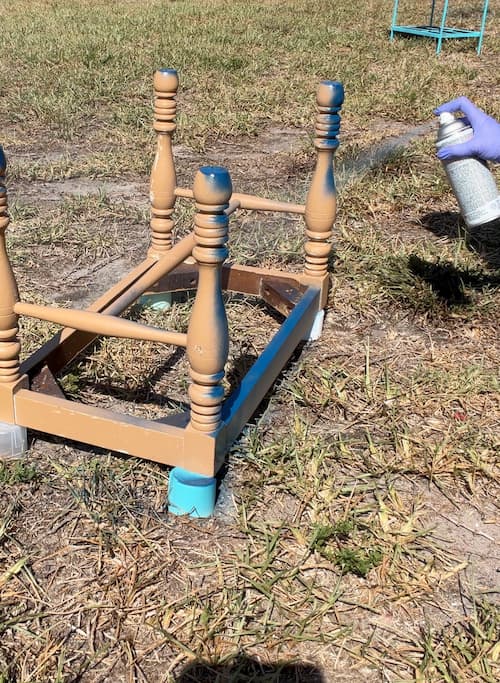
Then, I went at it with a paint + primer combo to freshen it up and cover that dated tan color. I chose something that would work with the new fabric I had in mind.
Quick Tip: Spray paint with light even coats. I know…easier said than done. But it really does make a difference.
Step 5: Replace the Foam
The old foam had to go. It just wasn’t worth saving.
If you’re figuring out how to reupholster a bench, this is where comfort comes in. I added new foam, but since I couldn’t find exactly what I wanted in one piece, I trimned what I had to size.
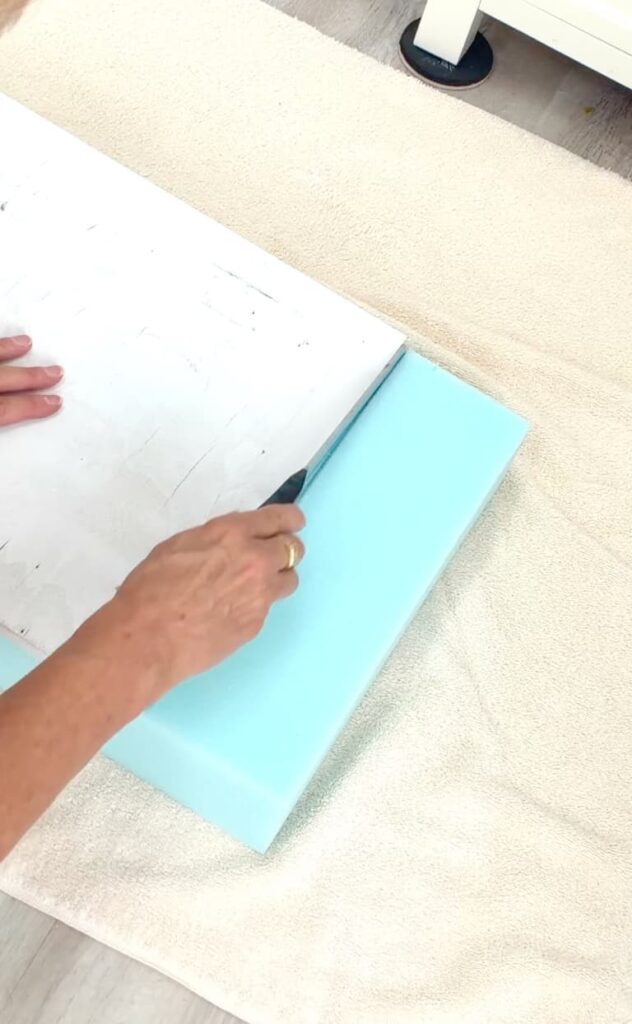
I used a serrated bread knife (nothing fancy) and used the wood as a guide to keep the cut as straight as possible. It doesn’t have to be perfect, close is good enough here.
I tacked the pieces down lightly with a bit of hot glue just to keep it from shifting.
Step 6: Add Quilt Batting
Don’t skip this. Seriously.
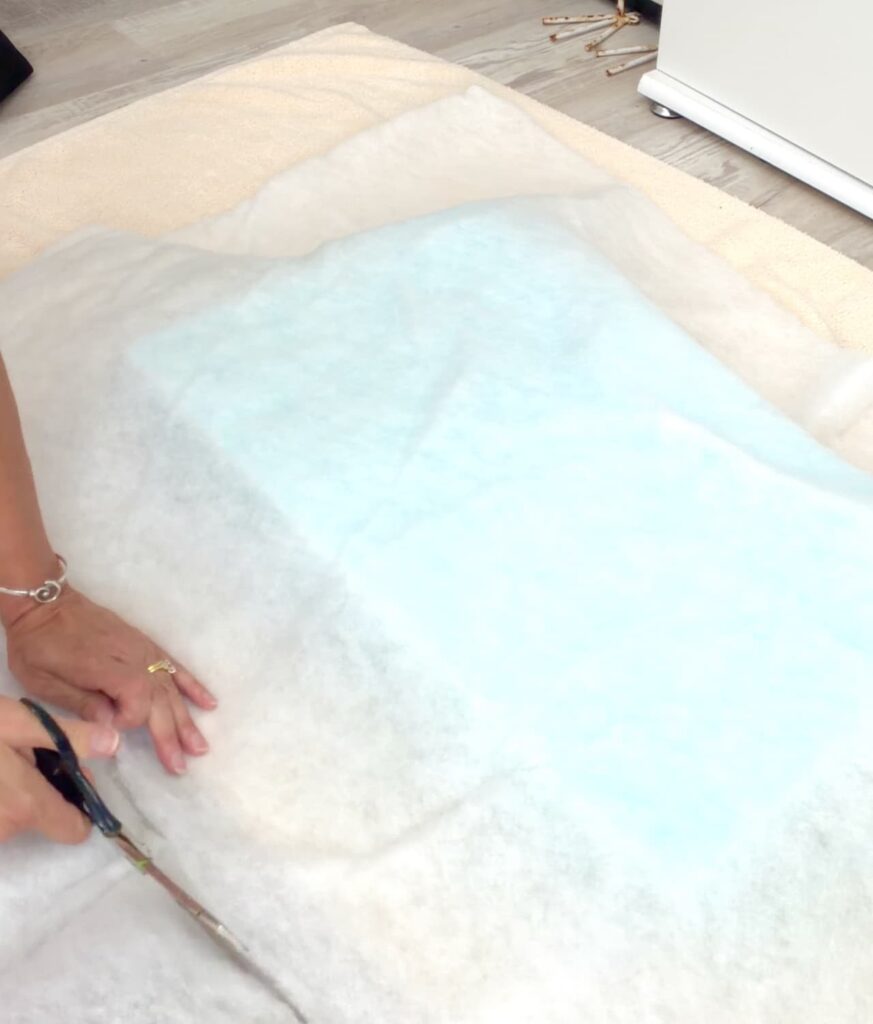
Adding quilt batting over the foam smooths everything out and helps your fabric look clean and smooth instead of lumpy. It’s one of those small steps in how to reupholster that makes a big difference in the final result.
Step 7: Attach the Fabric
Now for the fun part.
I picked this whale fabric that gives off a fun coastal, nautical vibe, and before stapling anything down, I made sure the pattern was centered the way I wanted.
I also check while stapling to peek and make sure the fabric hasn’t shifted. You’d hate to finish attaching the fabric, flip over the cushion, and find it all lopsided or running on a diagonal.
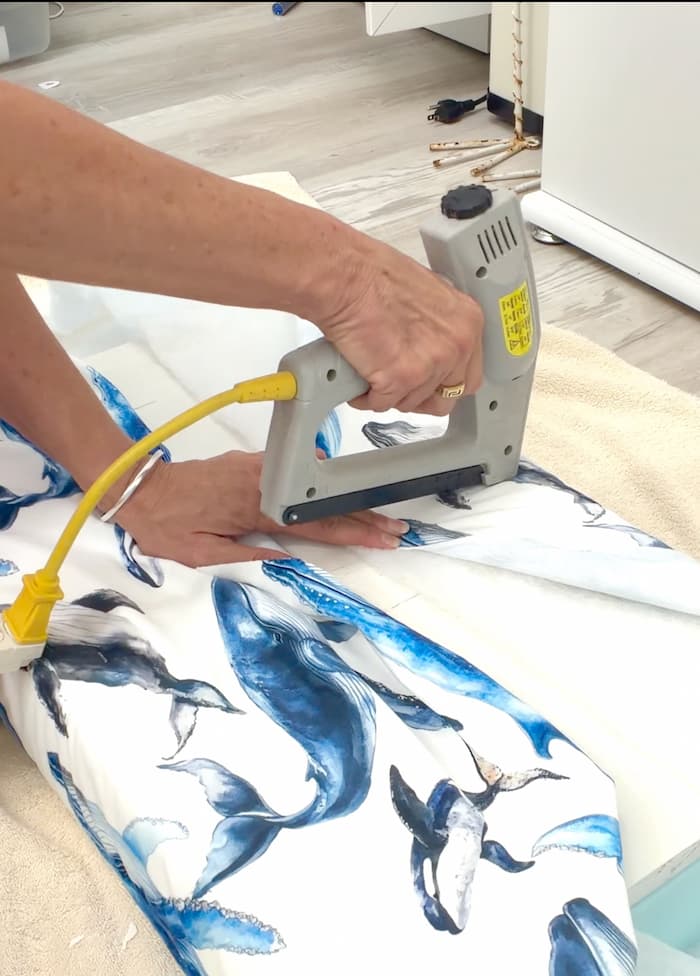
When working through how to reupholster furniture, it’s a good trick to start stapling in the center of each side. Then, work your way out. That helps keep the tension even.
The corners take a little patience. I just took my time folding and adjusting until they looked clean. No rushing here. It’s worth it.
Step 8: Reattach the Cushion
Once the fabric was secure, I screwed the cushion back onto the base.
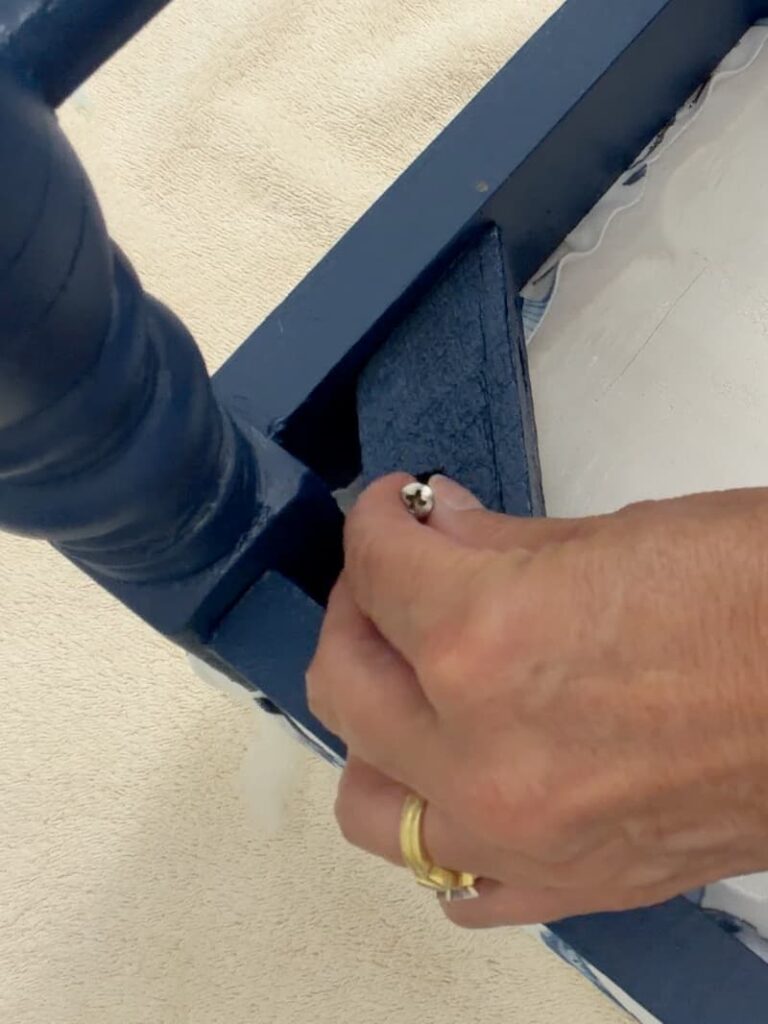
At this point, it already looked like a completely different piece, which is always my favorite part of these projects.
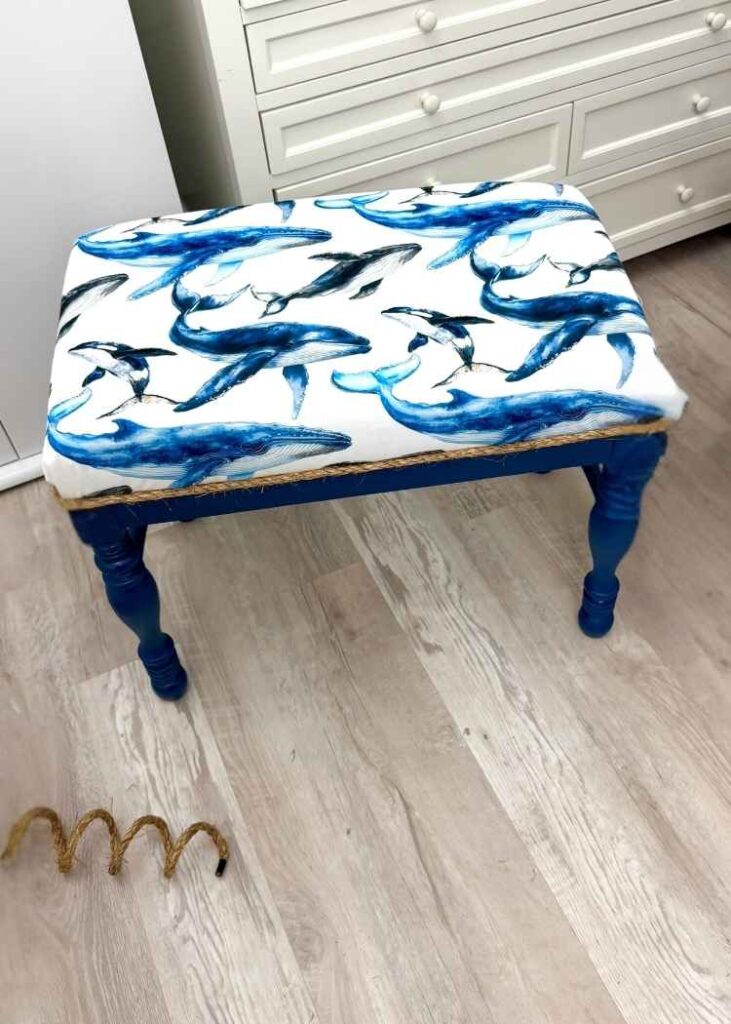
Step 9: Add Trim for a Finished Look
I wanted to take it one step further, so i added rope trim where the cushion meets the base.
It hides any little imprefections and give it that polished coastal look. Exactly what I was going for!
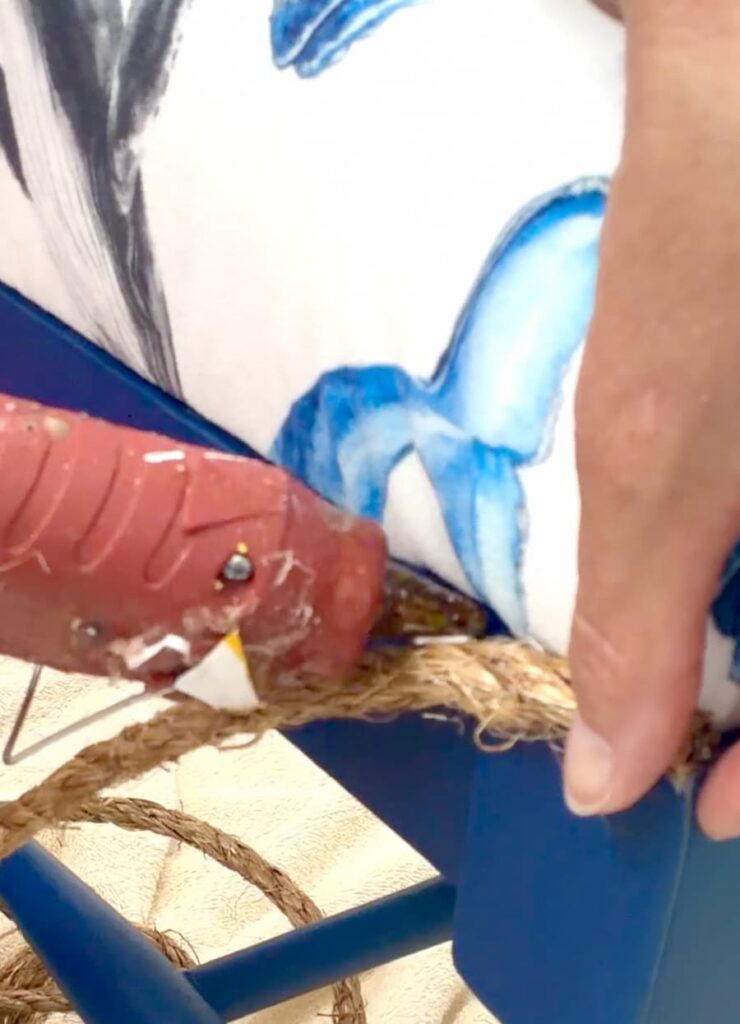
The rope was pretty thick, so I used my Dremel to cut it cleanly.
Quick Tip: If you are using a rope that will unravel, you can put a piece of tape around the end or where you plan on cutting to keep it from coming apart. That works great, but I don’t want to keep tape on it, on my bench. I find if you use some super glue and a bit of hot glue, and plan ahead a little for it to dry, it keeps to together beautifully.
And That’s It!
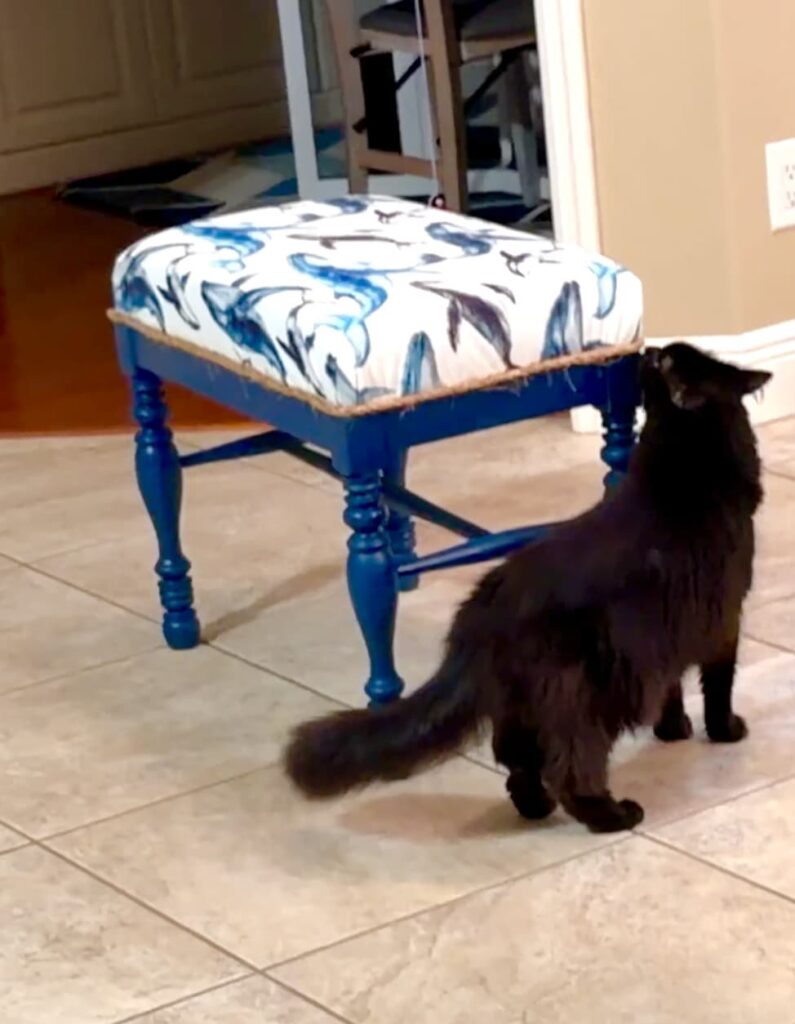
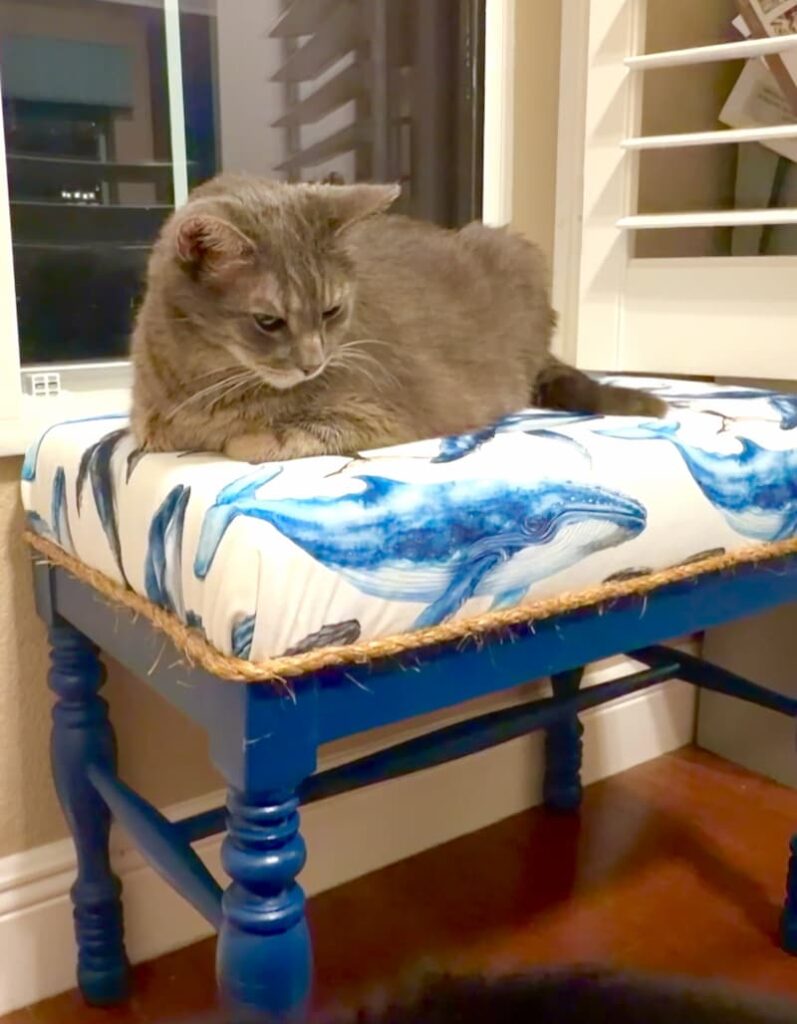
This bench went from outdated and forgotten, from retro bad and what where you thinking to something I actually love and am proud to put in my home. The cats claimed it immediately before it even made it into the office.
That’s the thing about learning to reupholster…once you do it, you start seeing the potential everywhere!
Pieces that look like trash suddenly feel like your next project!
What Do You Think?
Alright, Shimmer Squad…it’s time for the Shimmer Scale!
On a scale of 1 to 10:
- 1 = Still Garbage
- 10 = Gorgeous

Let me know what you think in the comments!
Have You Seen These?
Here are a few Garbage to Gorgeous projects from the past
- Glam Resin Table Makeover: Garbage to Gorgeous
- Outdoor Christmas Decorations Idea DIY
- Coastal Lamp Makeover | Beach Decor
- Gumball Lamp DIY Idea
And remember: Life’s too short not to shimmer, so grab your glue gun and your glitter!™
Mona
It seems that the cats have already decided, so what else matters? But, still, I say a 10.
You are right! Nothing else really matters! 😉
I think that turned out fantastic!
Thank you so much, Ellen!
Excellent job. I also really like the fabric!
Thank you so much, Susan! I feel in love with the fabric when I saw it!