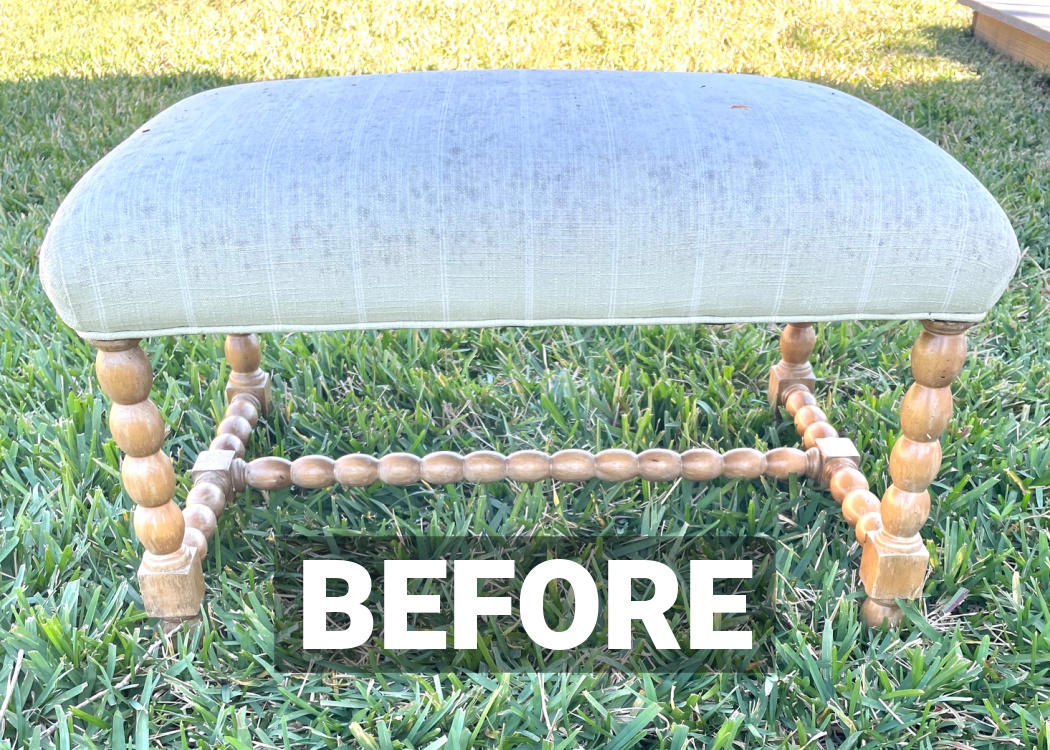
After the hurricane, people were throwing stuff out left and right…I mean piles of stuff…the entire contents of their homes…their lives. I came across this ottoman furniture piece and immediately knew I wanted to do a Black Dog Salvage DIY!
*This post is sponsored by Black Dog Salvage. The ideas and opinions are all my own.
Black Dog Salvage had reached out to me and wanted me to try their paint. This was the PERFECT project!
When I found this ottoman, it had been sitting on the curb for weeks and it had gotten moldy and disgusting….but…
…it was sturdy and I love the shape of the legs!
I had to save it!
Saving the Ottoman
When I see something on the side of the road, I get excited. Greg doesn’t understand it and often rolls his eyes…but it’s a force bigger than myself.
I think I need a bumper sticker that says:
Will stop for things on the side of the road that my husband thinks is crap…but I know better!
Or…
Saving the world, one garbage pick at a time!
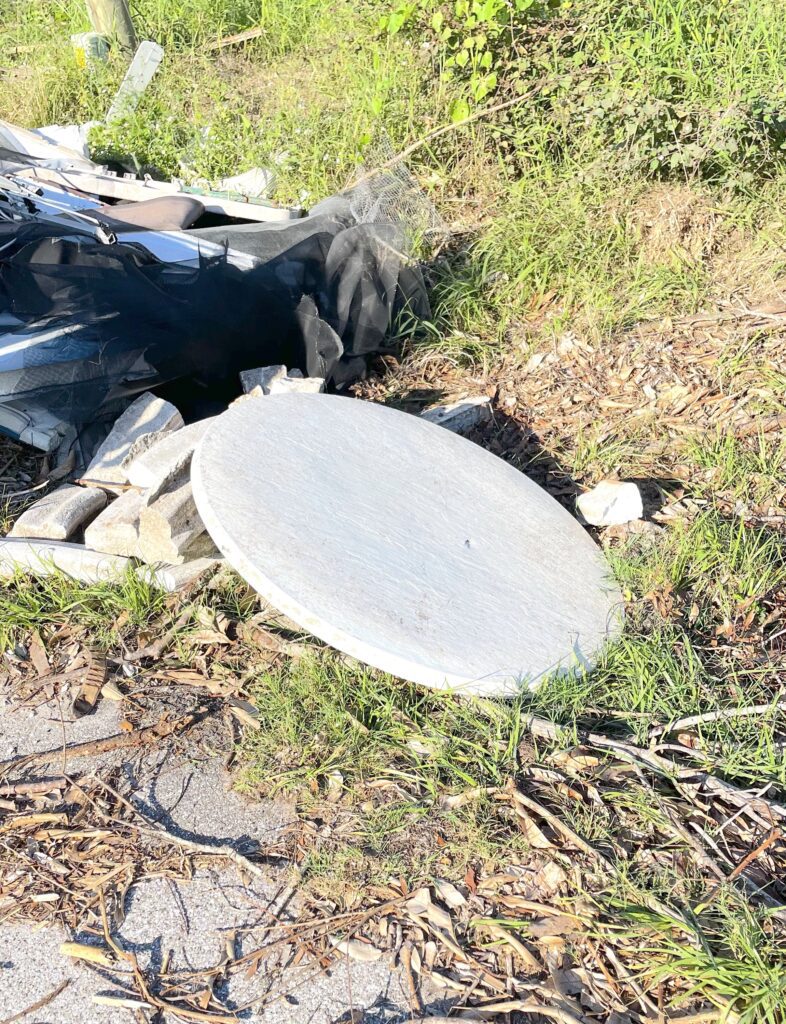
After all, he didn’t believe me when I saw that damaged, dirty, and discarded tabletop at the side of the road. I proved him wrong by turning it into a huge Christmas Ornament for our front yard.
We all have our flaws but who wants to be abandoned on the side of the road?
NOT ME!
Look past the flaws!
I knew this was going to be a fun project and with Black Dog Salvage at my side, I knew this sad ottoman would be a piece of furniture that would shine once again!
Ottoman Furniture Makeover – Black Dog Salvage DIY Video
Be sure to watch the video if you want to see me make this project. All the written directions are below so you have all the details you need!
I need to warn you, I LOVE this makeover!
Materials Needed
*Disclosure: This blog uses affiliate links from Amazon and other retailers. I earn a small amount from qualifying purchases at no additional cost to you.
- Appalachian Sunset Paint
- Show Dog Finish in satin
- Dog fabric
- Quilt batting
- Hot glue
- Cording
- Staple gun
- Staple remover
- Padding
- Black ribbon
- Paw ribbon in black
- Paw ribbon in white
- TSP cleaner
Directions for the Ottoman Furniture Makeover
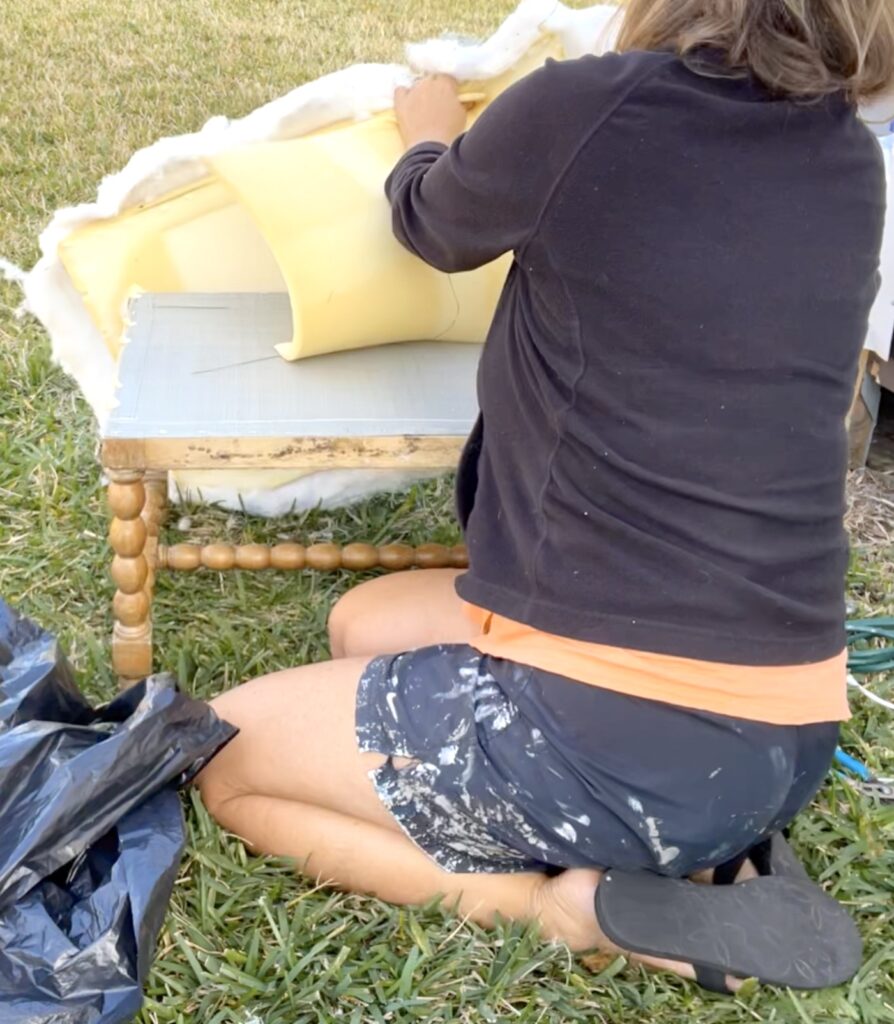
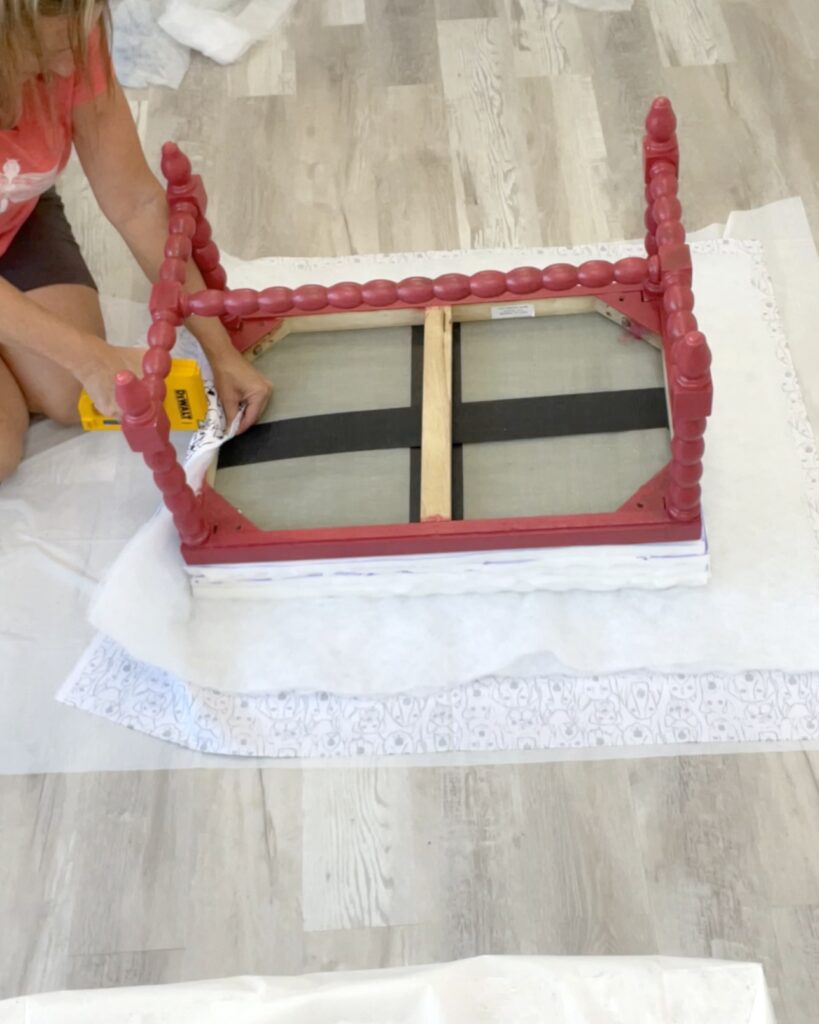
Step 1: Remove all the Fabric
I do this to any piece of furniture with fabric, not just the ottoman. If I find it curbside or don’t know anything about the home it came from, the fabric and padding MUST go!
No questions asked, just get rid of it.
I don’t know where it’s been stored or what it’s been through. Maybe it was stored in a garage, a wet basement, or a musty attic. Maybe it’s in perfect condition and was in someone’s home and nobody ever sat on it, but there is no way for me to know, so it MUST go.
The Staple Struggle is Real!
Usually, it’s a pretty easy process to remove the fabric but whoever upholstered this ottoman was a staple enthusiast! That fabric was meant NEVER to come off!
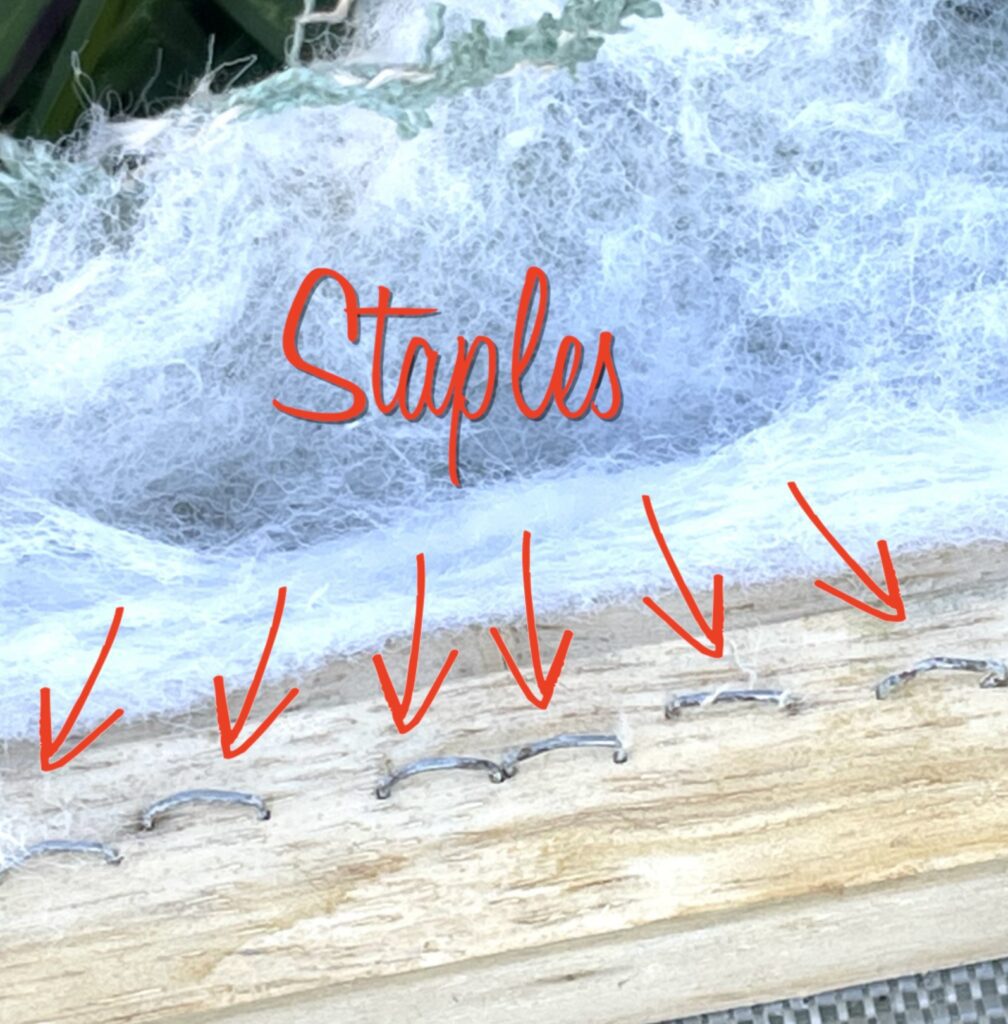
The staples were long and super hard to pry out. I’m not a baby about prying out staples but if ever there was a piece of furniture that was going to make me cry, this ottoman would have been it!
I tried EVERYTHING to speed up the process. I started with pliers and a screwdriver. Then, I brought out scissors to just cut the fabric out.
…the scissors were useless…
I got creative with an angle grinder to grind the staples down and cut the fabric…
…Nope…
I broke out my Dremel with the cutting disc…
…all I created were sparks that would more likely set the ottoman on fire rather than remove the fabric…
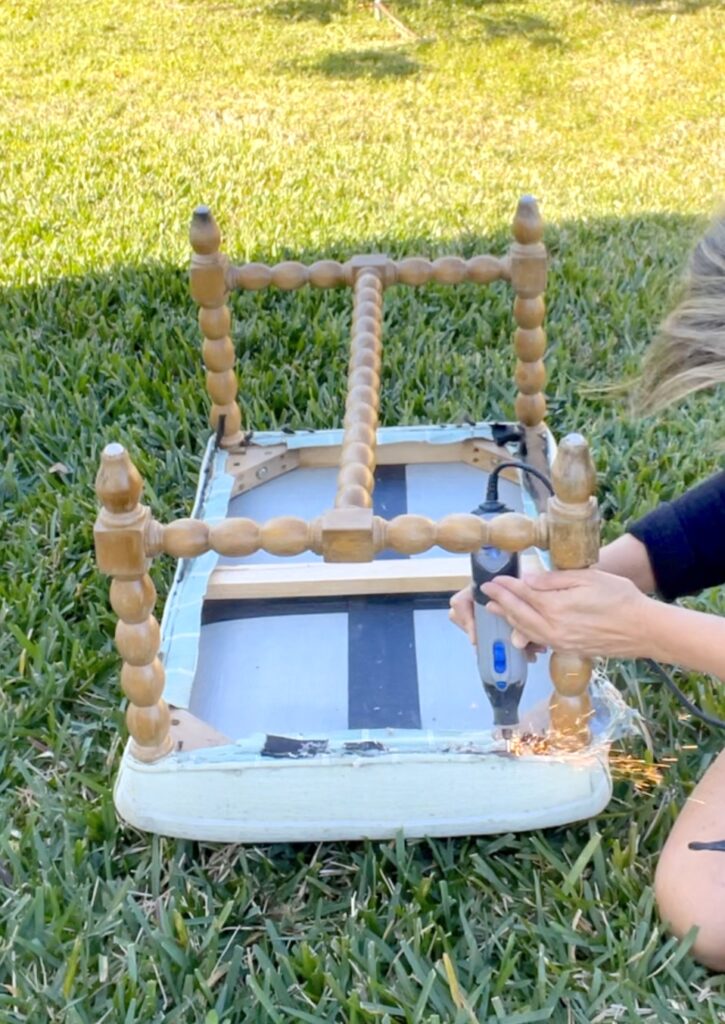
I had to call in backup…Greg to the rescue.
We both bitched and moaned…A…LOT…while getting that fabric off. It took us hours of working together.
At one point, I climbed on the ottoman to hold it down while Greg tried to rip the fabric off.
…It was a big no go…
No matter how we pulled, tugged, and pried the fabric and staples would not give. We had to remove one staple at a time.
So we did.
Finally, off came the fabric and the padding!
Step 2: Clean the Ottoman Frame
I did not mention this before, but when I had originally found the ottoman, a month or so ago, I sprayed it down with a mold control product. I didn’t want anything to grow further while in my possession and I hoped it would kill what was there.
Also, I’d rather over-clean than under-clean a piece of furniture that will end up in my house or someone else’s.
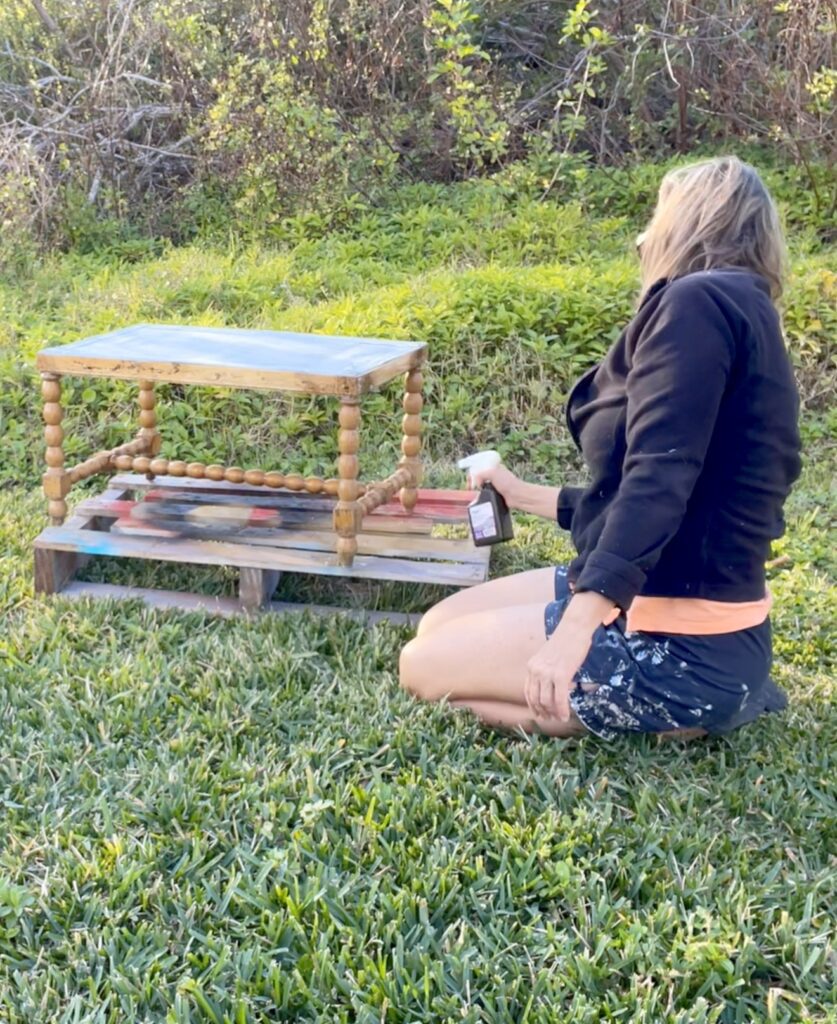
Once the fabric and padding were off, I did my final thorough cleaning:
- Sprayed it with hydrogen peroxide (multiple times) because from my research and talking to mold remediation people, hydrogen peroxide can soak into wood to kill mold, whereas bleach cannot. I did that a couple of times.
- Cleaned any remaining stains with bleach so it would be the best surface possible to paint over.
- Did a final clean with TSP, to prep it for painting (Thanks Swooz for the tip!)
By this time, it was probably cleaner than anything in my house!
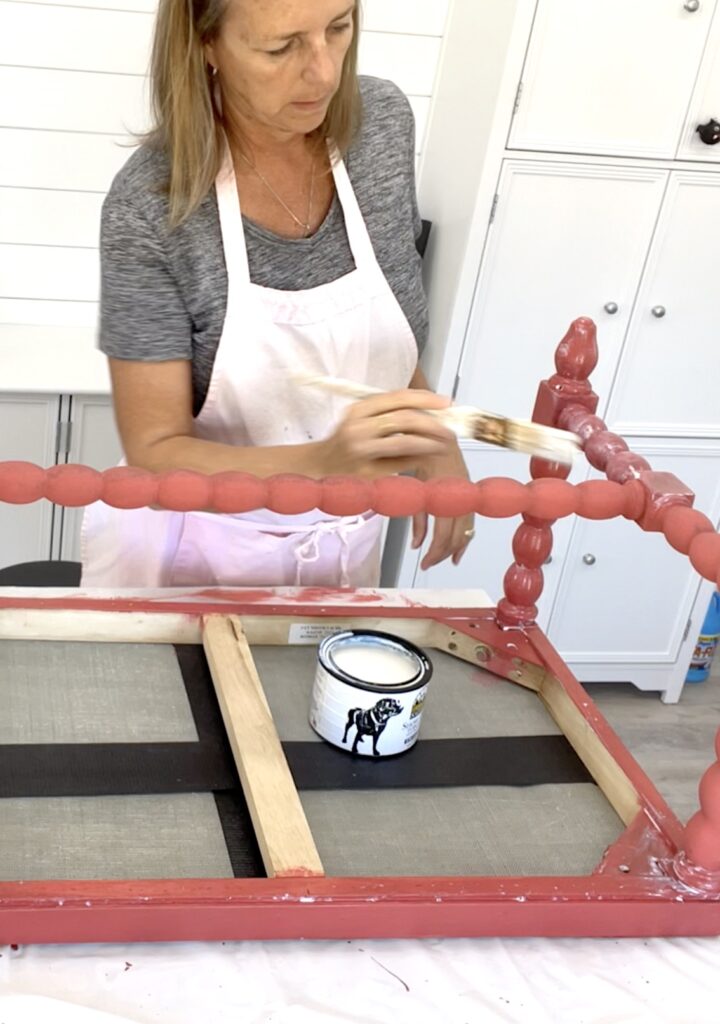
Step 3: Time to Paint the Ottoman
The best part of a furniture makeover is when you get to start painting! Nothing changes a piece of furniture more than paint!
And this ottoman was the perfect candidate for a Black Dog Salvage DIY.
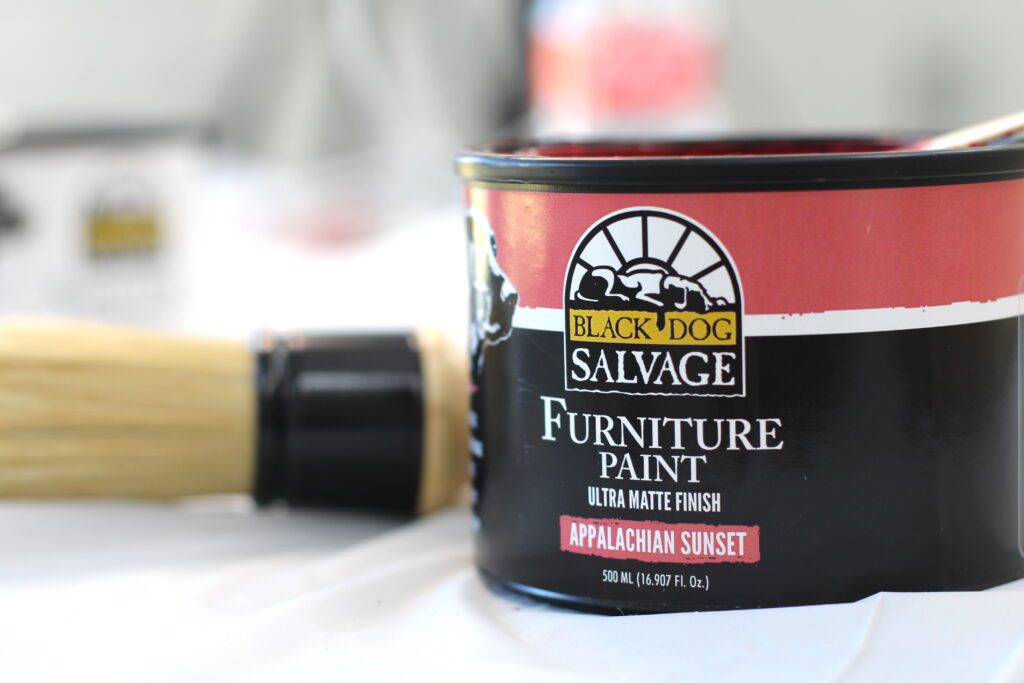
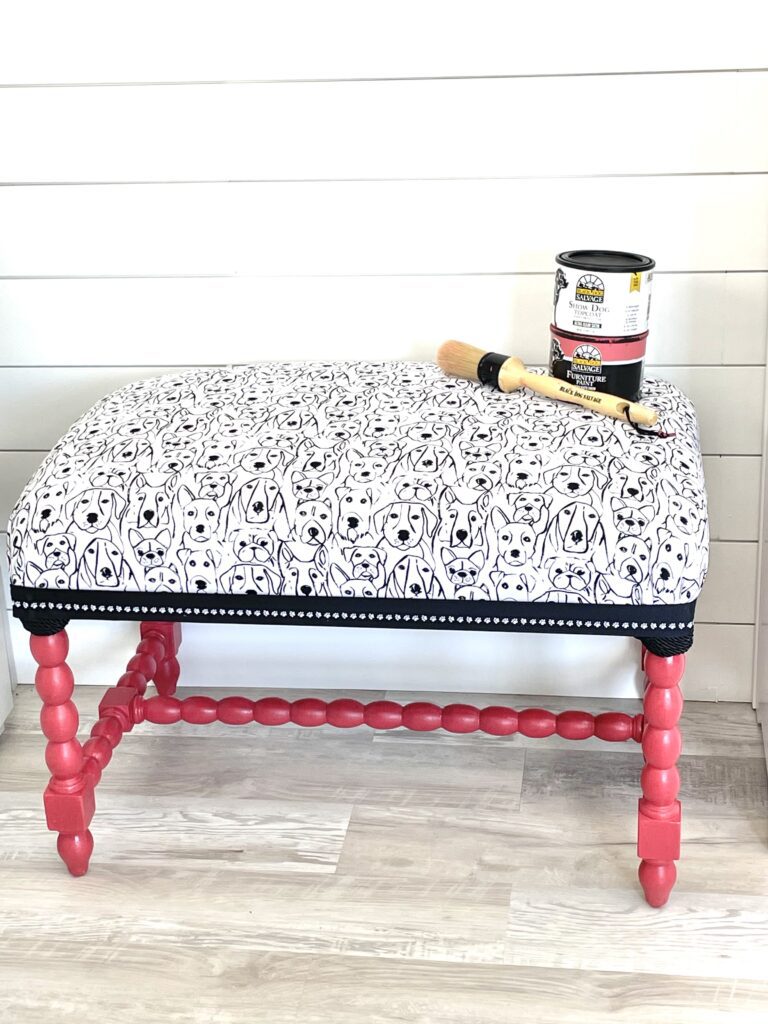
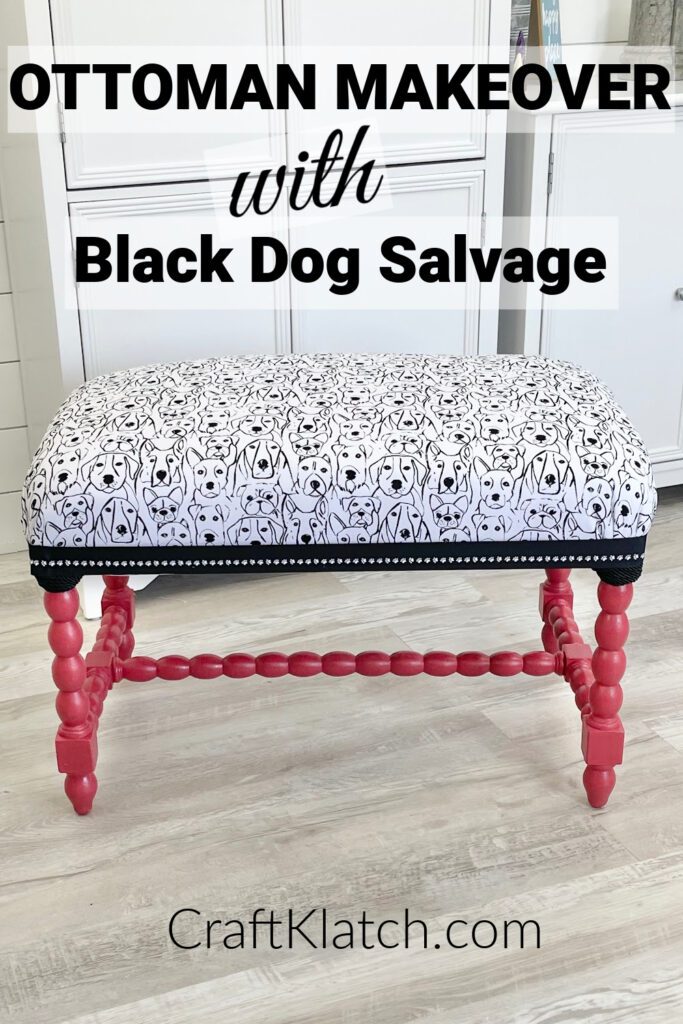
I’m using their Appalachian Sunset paint color.
It’s a warm color and provided a nice contrast to the fun fabric I selected!
Did I mention that the fabric might be the cutest…EVER?
I’m going to make you wait a little longer to see it!
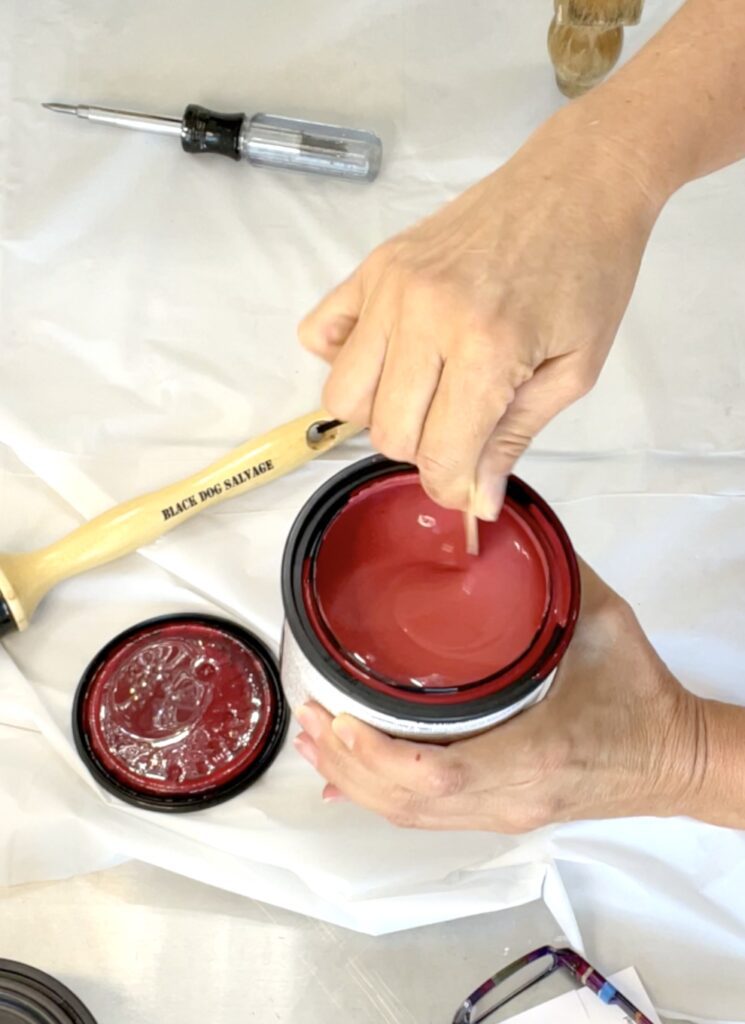
I flipped the ottoman over and started painting from the bottom. Then, I flipped it over to make sure there weren’t any drips and that I covered everything with the paint.
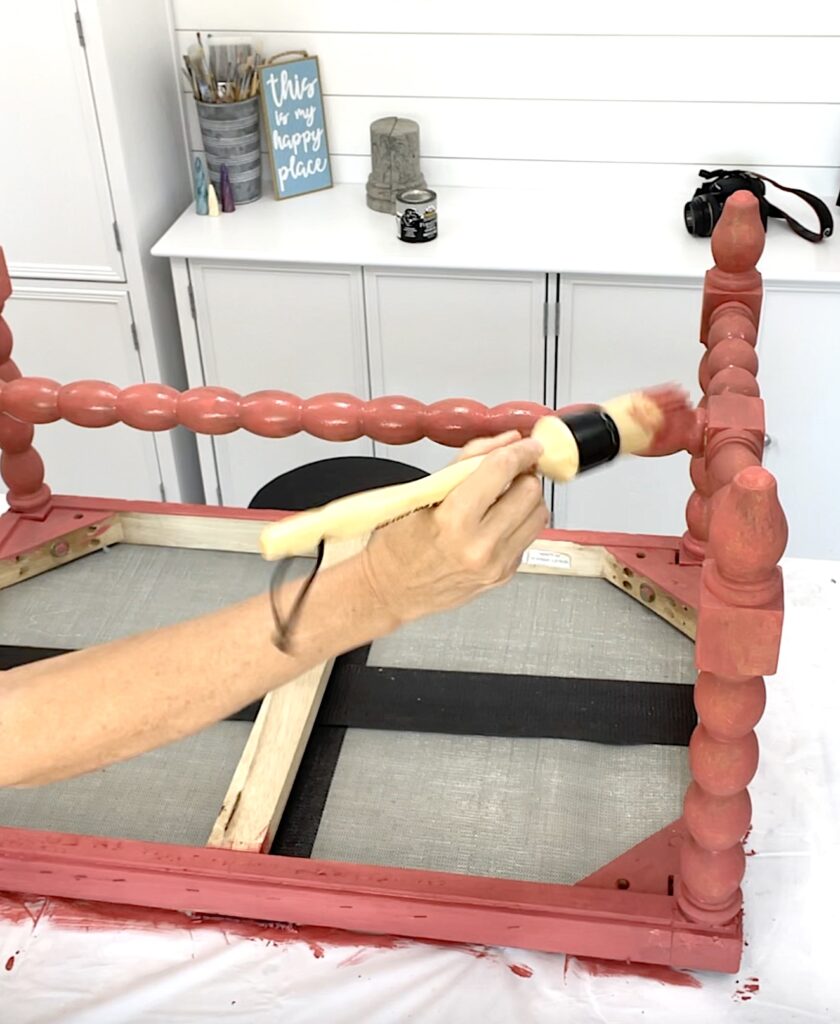
I did two coats. The paint went on beautifully, is self-leveling and if your furniture piece is well-cleaned, you don’t need to prime it!
That’s right, I did NOT need to strip it or prime it!
Talk about a double win!
I should mention that the Black Dog Salvage paint can also be sprayed with a paint sprayer. I almost went that route but the ottoman furniture piece wasn’t that big.
In hindsight, it was a lot like painting stair spindles, which is always a pain. Luckily, the quality of the paint made the whole process easier.
Step 4: Topcoat
I used the Show Dog Topcoat for the finish, in satin.
It went on as nicely as the paint and it is also self-leveling.
I ended up with a beautiful finish and a beautiful color!
Step 5: The Padding
If you have ever replaced padding on a piece of furniture, you know how expensive it is. I saw a tip from Making It With Abby where she suggested buying an inexpensive foam mattress topper instead.
Brilliant!
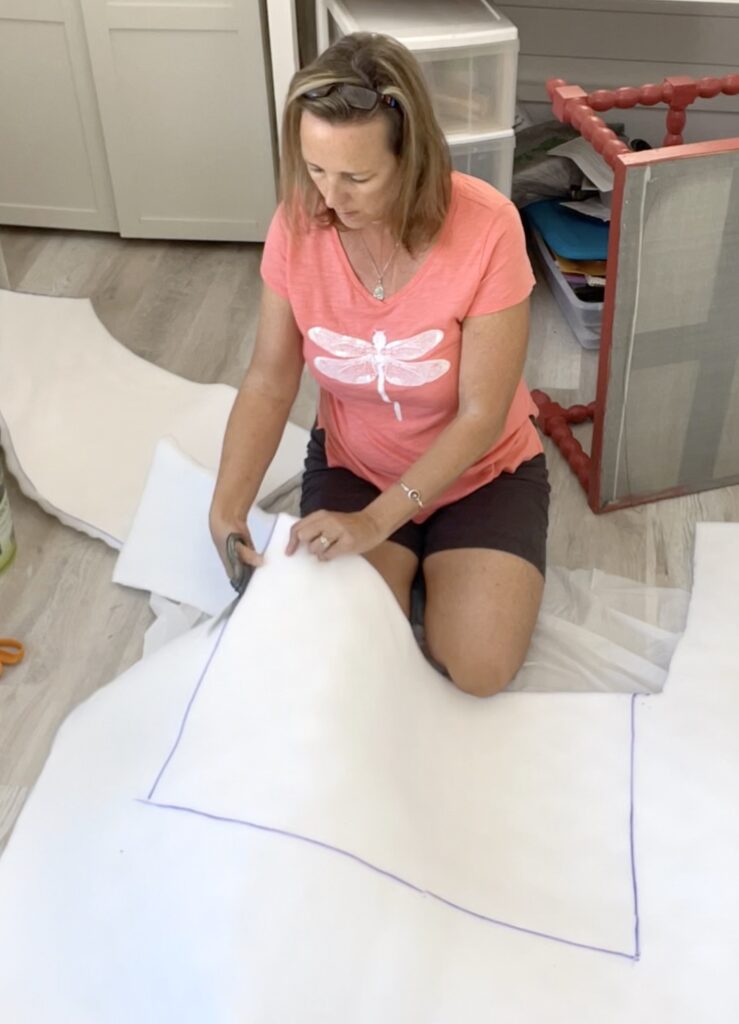
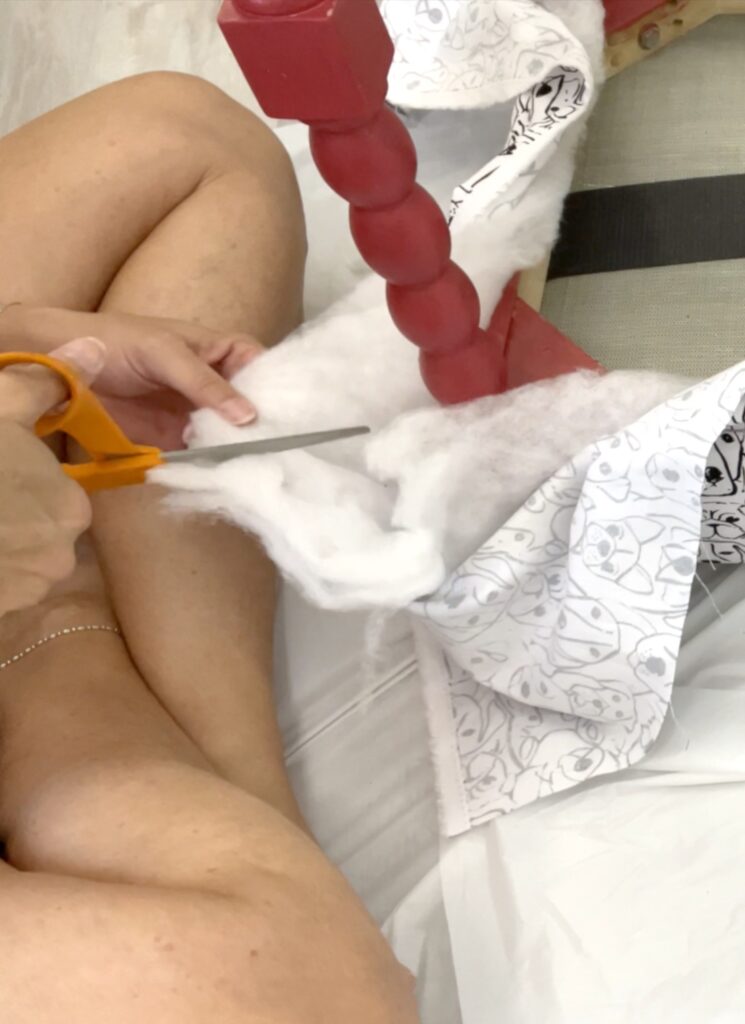
I traced the ottoman on the padding and cut it out.
I did that until it was as plush as I wanted, which ended up being 4 layers.
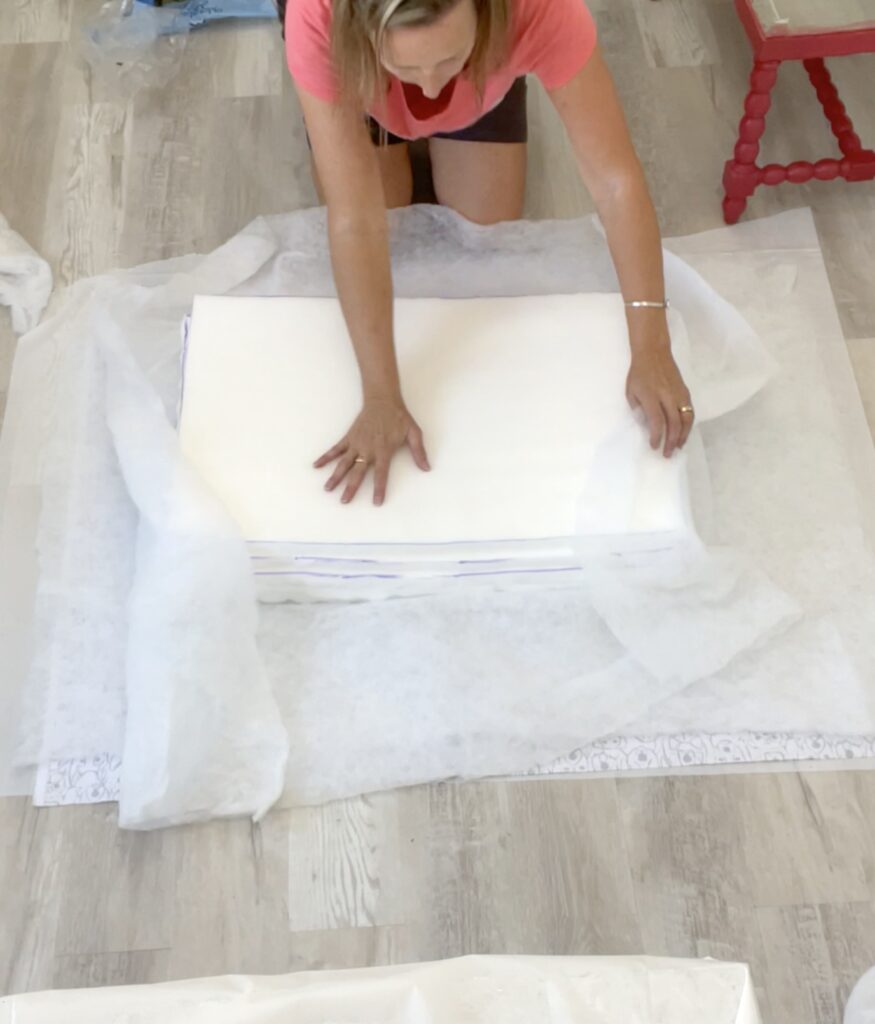
Step 6: Putting it together
I created a layer for the cushion. It is stacked like this – from floor to top:
- Fabric – face down
- Two layers of quilt batting
- Foam layers
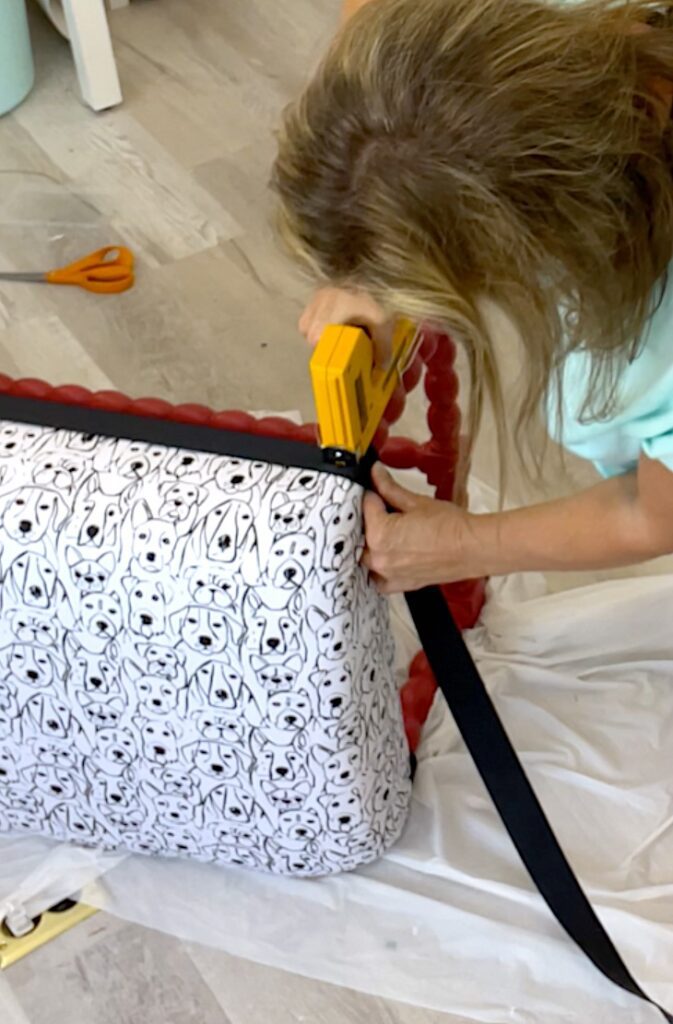
Step 7: Staple it on
I stapled on the fabric. I used a fair amount of staples but it didn’t compare to what we had to pry out when taking the original fabric off.
Stapling fabric onto the ottoman or any piece of furniture can be tricky, especially when there is a pattern. The last thing you want is for the pattern to get all wonky. That just looks terrible.
My process for stapling fabric onto furniture (you can see me do it in the video above):
- Put one staple in the middle of a side
- Go directly across, pull the fabric tight, and add one staple
- Then, go to the perpendicular side, pull the fabric tight, and add one staple
- Go across from the last staple, pull the fabric tight, and add one staple
- Flip it over to make sure the pattern is straight
- Pick one side and staple the entire side, all the while pulling the fabric tight
- Go directly across and staple the entire side, while pulling the fabric tight
- Repeat with the remaining sides, remembering to pull the fabric tight
If you follow that guide, you won’t end up with a wavy pattern that should have been straight.
Step 8: The corners
Then, I finished the corners.
When it comes to the corners, you want to make those as neat as possible. Take your time and think it through before starting to staple.
TIP: All the fabric and quilt batting gathers at the corners and creates a thick mess. Carefully, cut out the excess quilt batting and it will make it much easier to make a neat corner.
When you are doing the corners, make pleats and pull really tight before stapling.
Step 9: Cleaning up the bottom
I trimmed off the excess fabric on the bottom to clean it up.
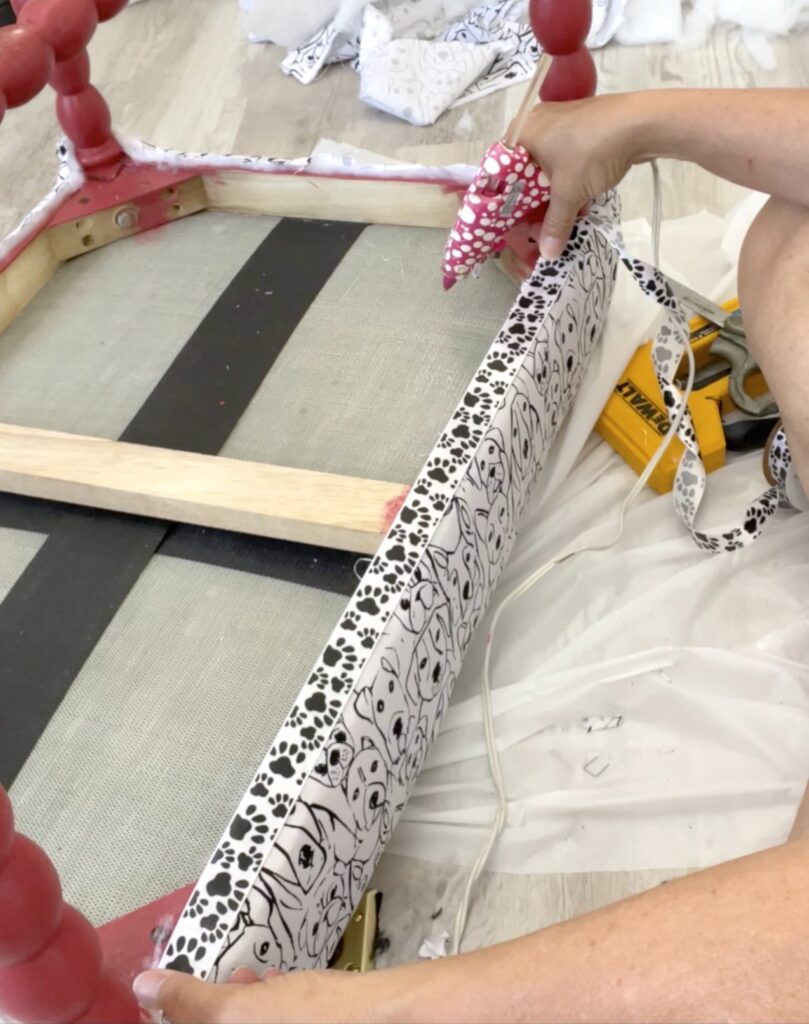
It still didn’t look neat and finished, so I took a cute paw print ribbon and stapled it at the ends to give it a cleaner look.
I tacked the ribbon on with some hot glue and I can add some fabric glue later.
Step 10: The Cording
Normally, you don’t need to add cording, but the way this ottoman was originally upholstered, the fabric came down onto the legs. It was kinda weird but since it was full of staple holes from the happy stapler, I felt I had to go that far down too.
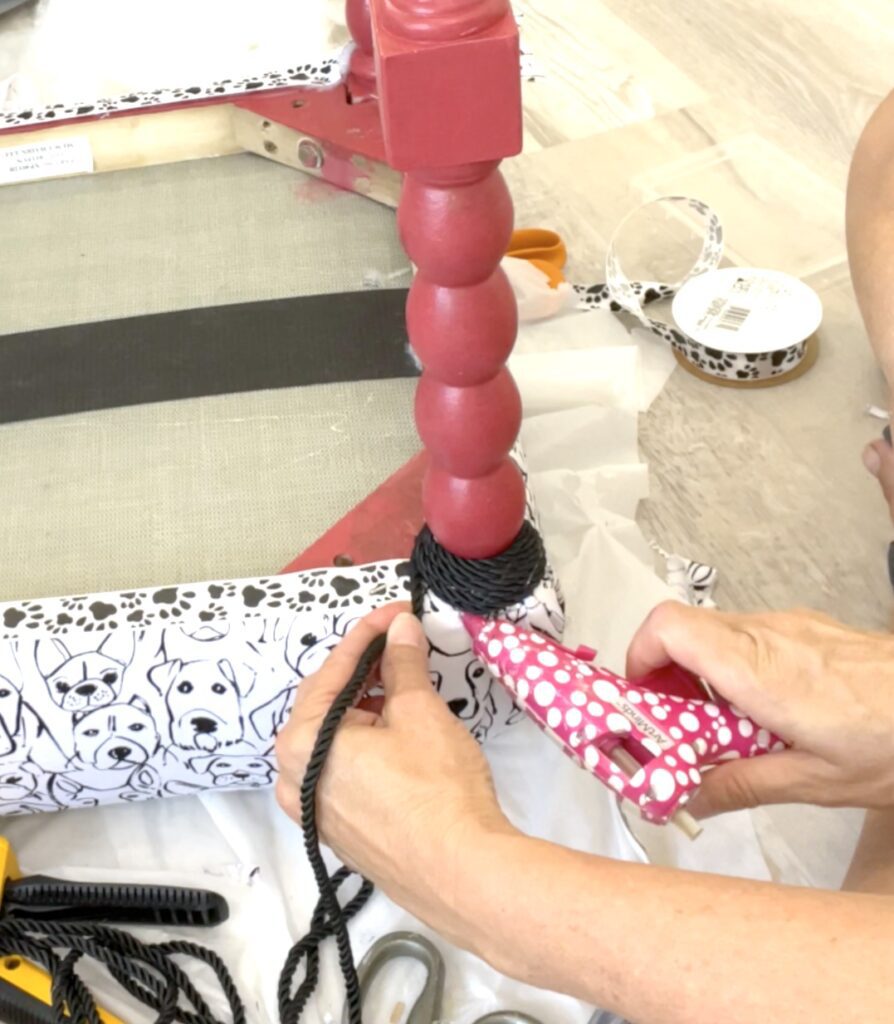
It left me with a weird edge but I realized I could clean it up with some cording. I simply wrapped the cording around the leg from the indent until I covered the edge of the fabric. I used hot glue to keep it in place but you could use a stronger glue if you prefer.
TIP: Cording comes with a taped end. It is taped because otherwise it will unravel. Keep that in mind when you get ready to cut the cording…be sure to first wrap a piece of tape around it. Then cut.
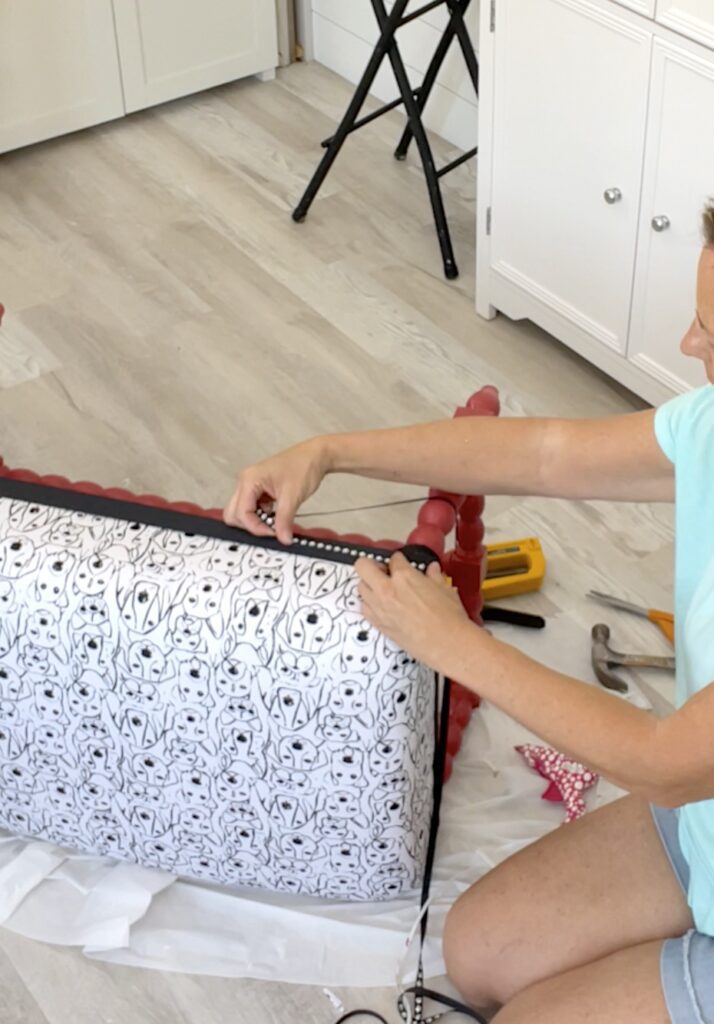
Step 11: Trim
Okay…let me first say…
How CUTE is that fabric?!?!
It was not lost on me that this is a DIY project with Black Dog Salvage but that’s purely coincidence…or maybe kismet that I found this amazing fabric!
As cute as it was, I wanted to add a little decorative trim to the side edges.
I first stapled a black grosgrain ribbon around it. I made sure the staples were going horizontal. Then, I had a thinner black ribbon with white paw prints and glued it over the grosgrain ribbon.
That was the finishing touch!
It hides the staples and looks extra cute!
The cushion is plush enough to pass the butt test and I think it looks great!
I love the Black Dog Salvage Appalachian Sunset but there are so many colors to choose from and recipes to create even more!
Be sure to check them out at Black Dog Salvage!
Now, let’s talk a little about reupholstering furniture.
Let me answer some of the most common questions about reupholstering furniture. This goes beyond the ottoman furniture piece I just did.
Is it hard to reupholster?
Yes and no. It depends on what you want to reupholster. I like reupholstering chairs with cushions, ottomans, benches, and even a headboard but I’m not so sure I want to tackle a couch. That would take a lot of time and is a different skill set for me. The other ones are super easy!
Is furniture worth reupholstering?
I’m going to give that question a resounding yes!
I’ll tell you why.
Take this ottoman for example, the frame of the piece was good and sturdy. It wasn’t even damaged. It just needed to be cleaned up and reupholstered.
The other upside to this is that this ottoman will give someone joy and be a fully functional piece of furniture rather than rotting in a landfill.
If you have an opportunity for a furniture salvage and the chance to breathe new life into old furniture, do it!
So absolutely, YES!
Other Great Makeovers
I have done lots of makeovers and here are just a few:
- Christmas Tree Stand from What?
- Stenciling on Wood Table Makeover
- 5 Garbage Pick Items You Should Always Grab
- How to Get Rust off of Metal (You Won’t Believe the Makeover!)
- Emoji Table
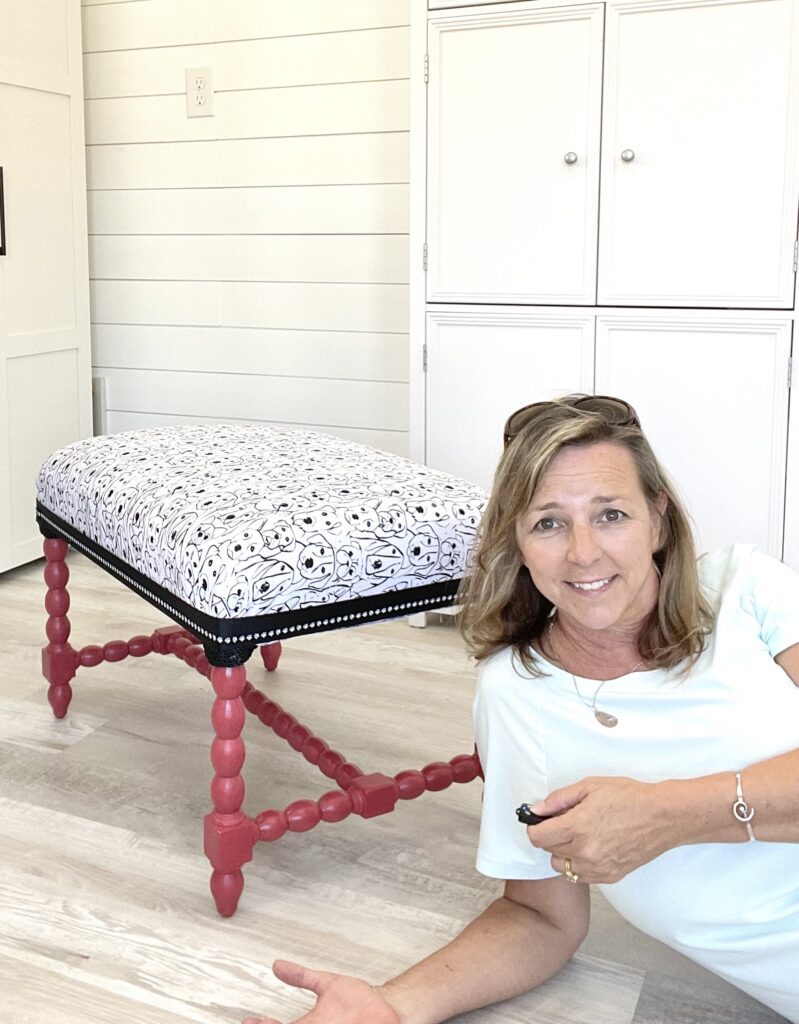
Thanks for checking out this Garbage to Gorgeous project!
This was my first of hopefully many DIY Black Dog Salvage projects to come!
*How exciting! The ottoman was featured on The House On Silverado blog!*
Remember: Life’s too short not to shimmer, so grab your glue gun and your glitter!™ Stay safe!
Mona
Be sure to PIN IT for later!

I love it! Cutest I’ve seen in a while!
Thank you! I was very happy with how it turned out!