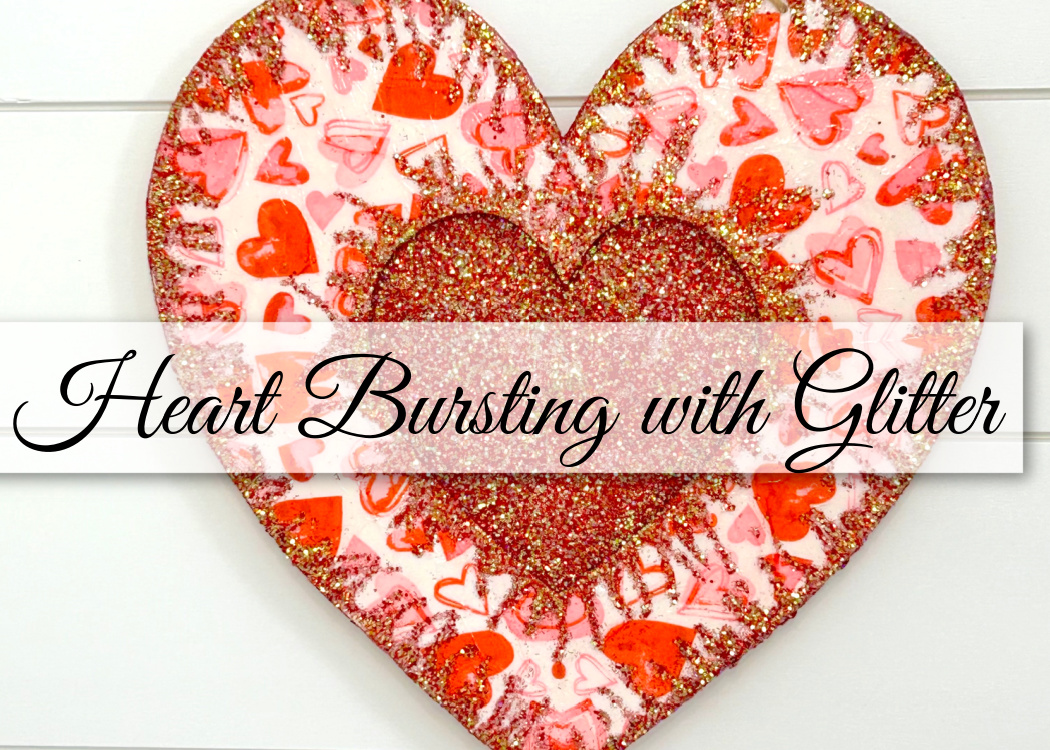
I love a good Dollar Tree heart DIY because there are so many things you can do, like today’s project which is bursting with glitter!
Oh…
Did I mention you need two hearts for this project?
I recently picked up a few hearts at Dollar Tree, which you can see in this Dollar Tree Haul, along with a few other Valentine’s Day related items.
If you enjoy these heart projects, I have done a few other fun versions of the Dollar Tree heart, including one that looks like a Bubble Gum Heart. Then, I did a Distressed Heart and one that looks like a Valentine’s Mail Drop!
So, let’s jump into today’s that is bursting with glitter!
Supplies needed for the Dollar Tree Heart DIY
*This blog uses affiliate links. As an Amazon Associate I earn from qualifying purchases, at no additional cost to you.
- Wood hearts
- Red fine glitter
- Pink chunky glitter
- Pink fine glitter
- Red chunky glitter
- White paint
- Satin Mod Podge
- UV Resin
- Valentine tissue paper
- Valentine napkins
- Glue
- Laser Cutting Machine
Here is a Video Tutorial of the Dollar Tree Heart DIY
Be sure to check out the video for the heart project right here:
Directions
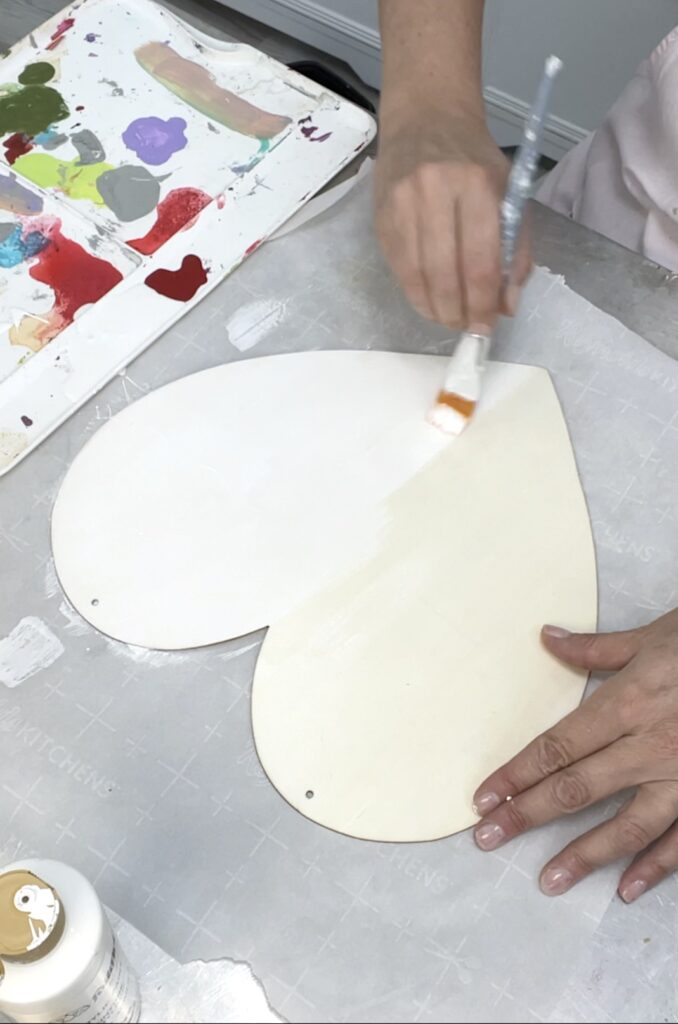
Step 1: Prep the Heart
To begin with, I started by painting the hearts white. I did this so I would have a nice clean background. When I start decoupaging, the background might bleed through napkins or tissue paper. If I paint the hearts white first, the colors from the napkin and tissue paper will stay crisp.
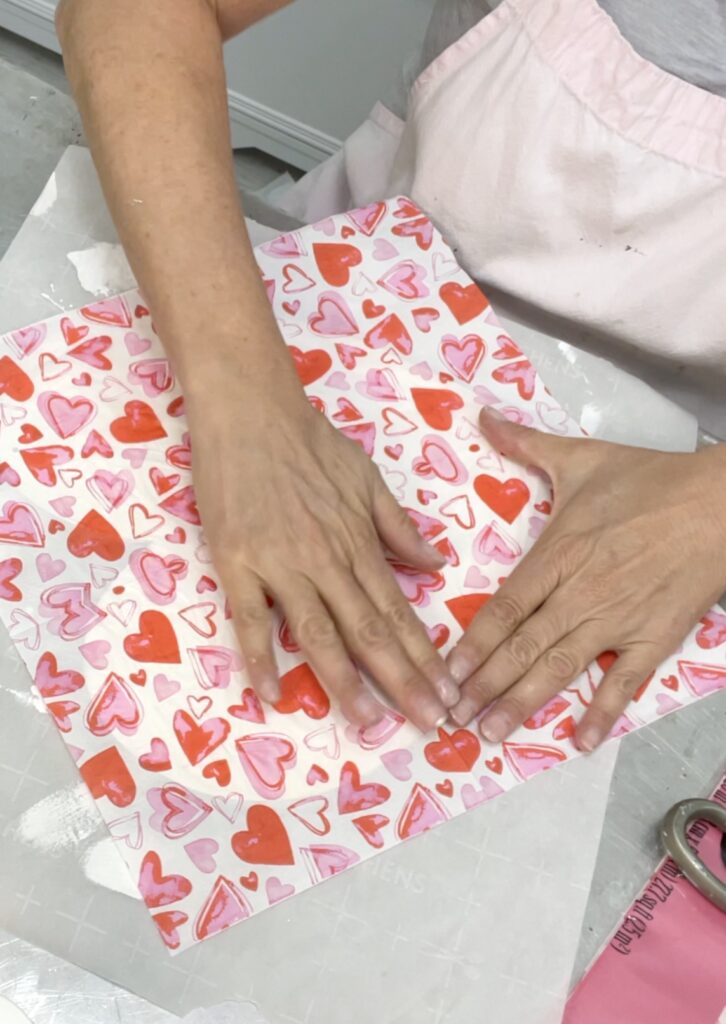
Step 2: Decoupage Time!
I used heart tissue paper on one heart and a heart napkin on the other. Both were purchased from Dollar Tree with this Dollar Tree Heart in mind.
When I unfolded the napkin, I was happy to find the heart print was printed on the ENTIRE napkin!
Oftentimes, the print is only on the front quarter that is showing when the napkin is folded.
This was a total win!
I brushed my Mod Podge onto one side of each heart. On one, I applied the napkin. Then, on the second, I applied the tissue paper.
I have some helpful decoupage tips on my Decoupaged Ornament project. Be sure to check it out!
I smoothed them down and let them dry.
In case I wasn’t clear, I only decoupaged on one side of each heart. You will only see one side, so there is no need to do the other side.
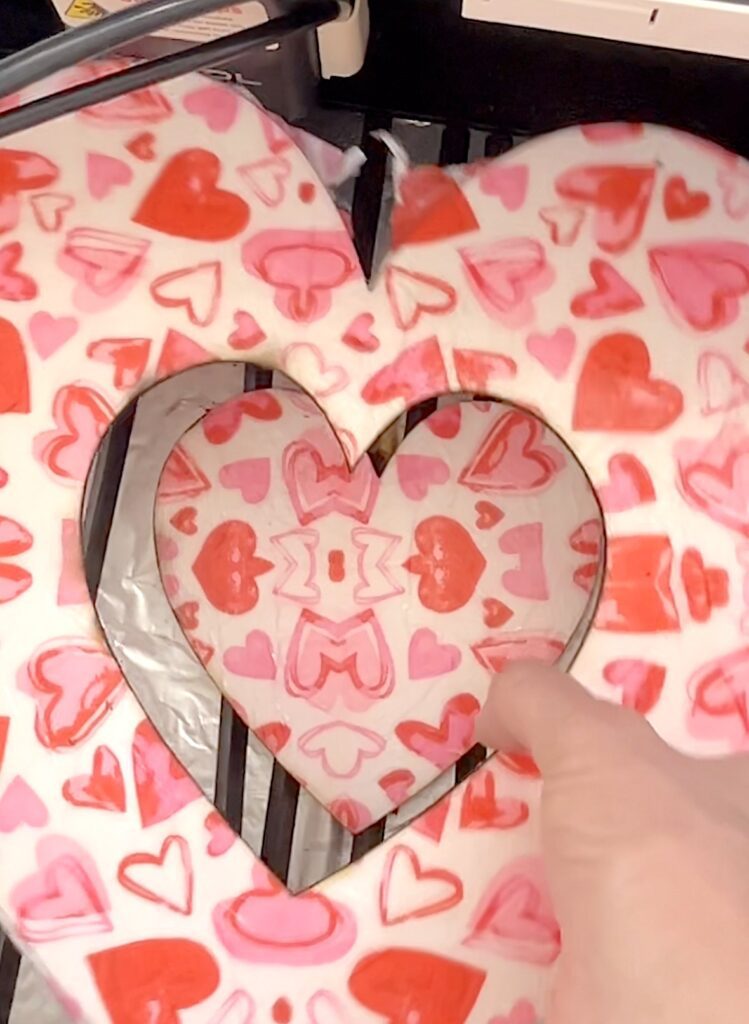
Step 3: Clean Up. Cut Out.
Once they completely dried, I trimmed off the excess tissue and napkin, then took an emery board to give the edges a crisp, clean edge.
Upon selecting which heart would be the front, I traced the onto a piece of posterboard, took a picture of it, put it into my laser cutting program, and cut a smaller version of the same shaped heart out of the top/front heart.
Step 4: Glitter and Glue Time
You totally know how I feel about glitter, right?
In case you don’t, I think it is so beautiful!
I sandwiched the two hearts together and traced the inside heart onto the white side of the other heart. Then, I used Mod Podge and a mix of glitters in pink and red and chunky and fine. By the way, you can use one plain color or go crazy with any color combo!
I brushed Mod Podge onto the heart where I traced it. Then, I sprinkled it with my glitter mixture.
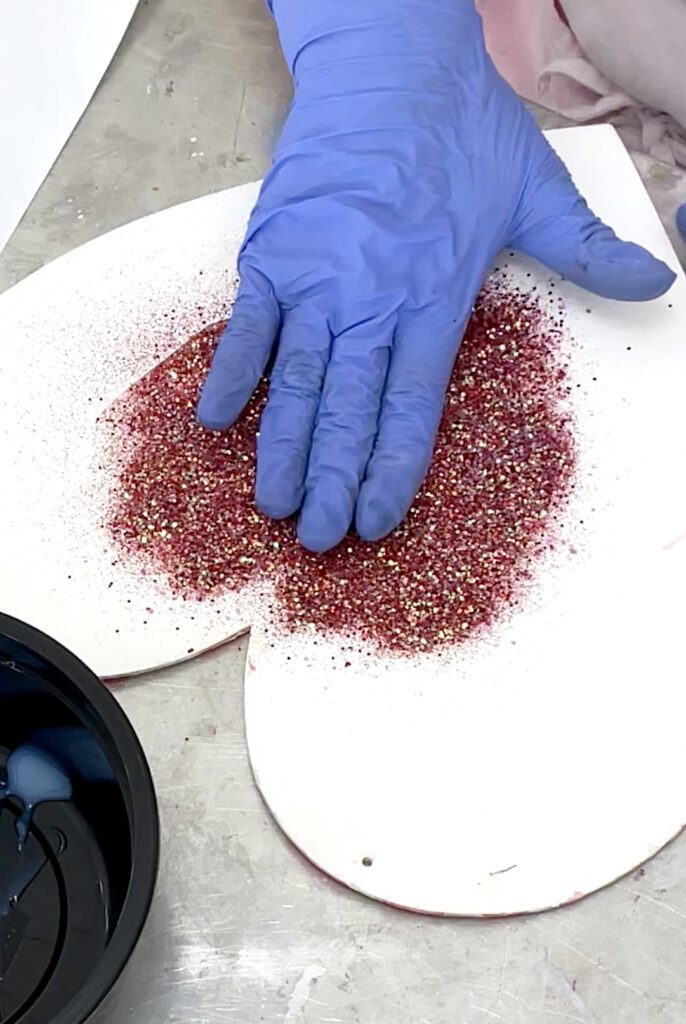
I tapped off the excess and let it dry.
Then, I glued the two hearts together. After applying the glue, I put heavy stuff on top so the hearts would dry flat.
I let them dry overnight.
Step 5: Time to finish this Dollar Tree Heart DIY
When the hearts were securely glued together, I broke out the UV resin. I’m still a bit new to UV resin. Truthfully, I was apprehensive to use it for many years.
Now, I love it!
Because glitter can go a little crazy and end up all over the place, I added UV resin over the glitter area and cured it with the UV lamp.
Yes, I could have used regular epoxy resin for that part of the project. However, I wanted it to look like the glitter bursting out of the smaller heart.
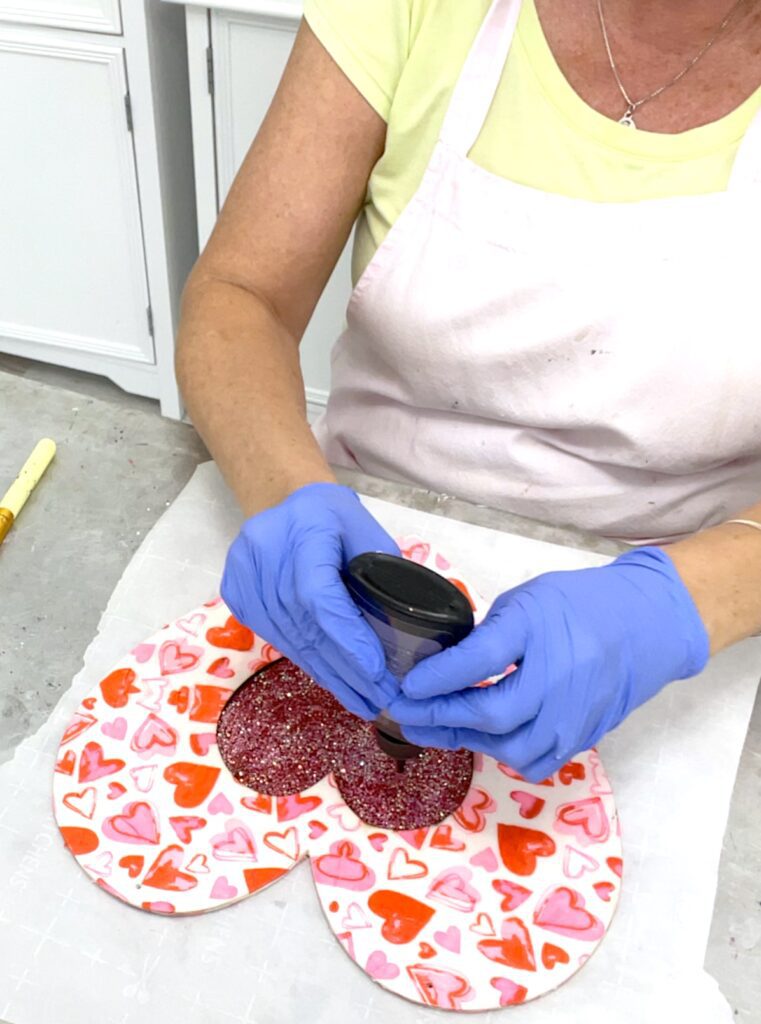
The UV resin gives me more control. Once the UV resin was in place (I did a section at a time), I sprinkled glitter over it and put it under the UV lamp to cure. It cures quickly with the UV lamp, so it does not continue to spread like regular resin.
I did the same thing on the edges. That way, I don’t have to worry about constant glitter shedding and Greg yelling!
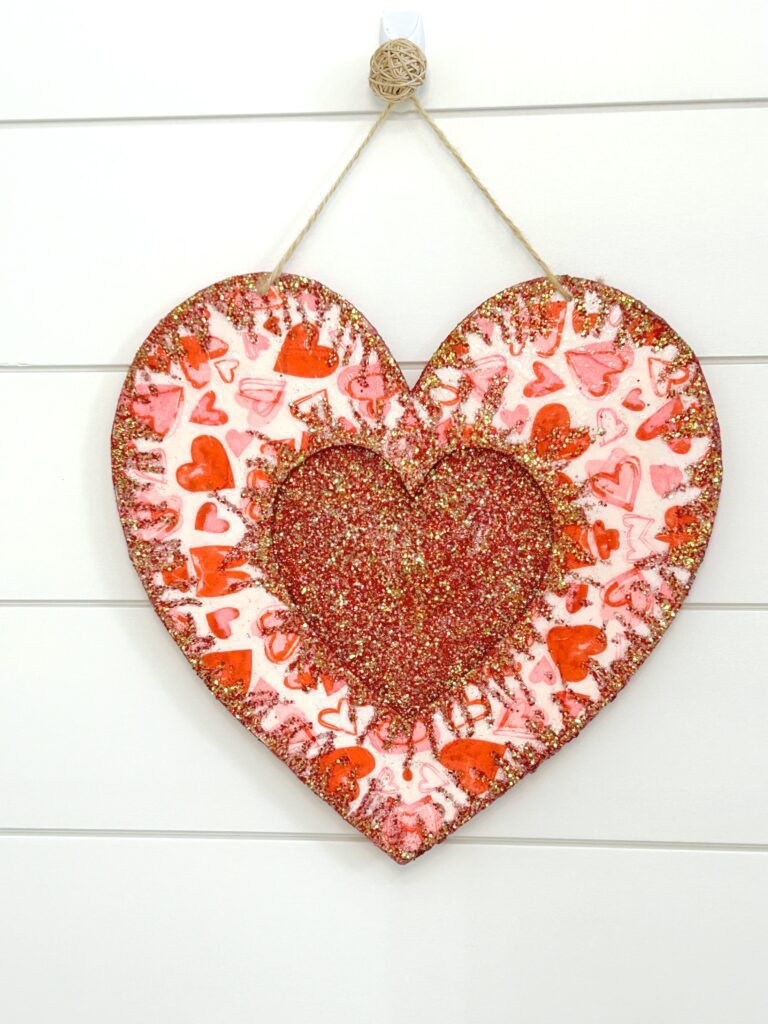
Finally, I put the string back on the heart and hung it up!
Be sure to PIN IT for later!
Thanks for stopping by! Remember: Life’s too short not to shimmer, so grab your glue gun and your glitter!™ Stay safe!
Mona