Have you ever thought to decoupage napkins?
Every holiday season, I open the special drawer that is the keeper of my Christmas napkins. The napkins are adorned with Christmas trees, cute angels, cheerful snowmen and many more festive images. They are the napkin leftovers from Christmas past…like 15 years of Christmases past.
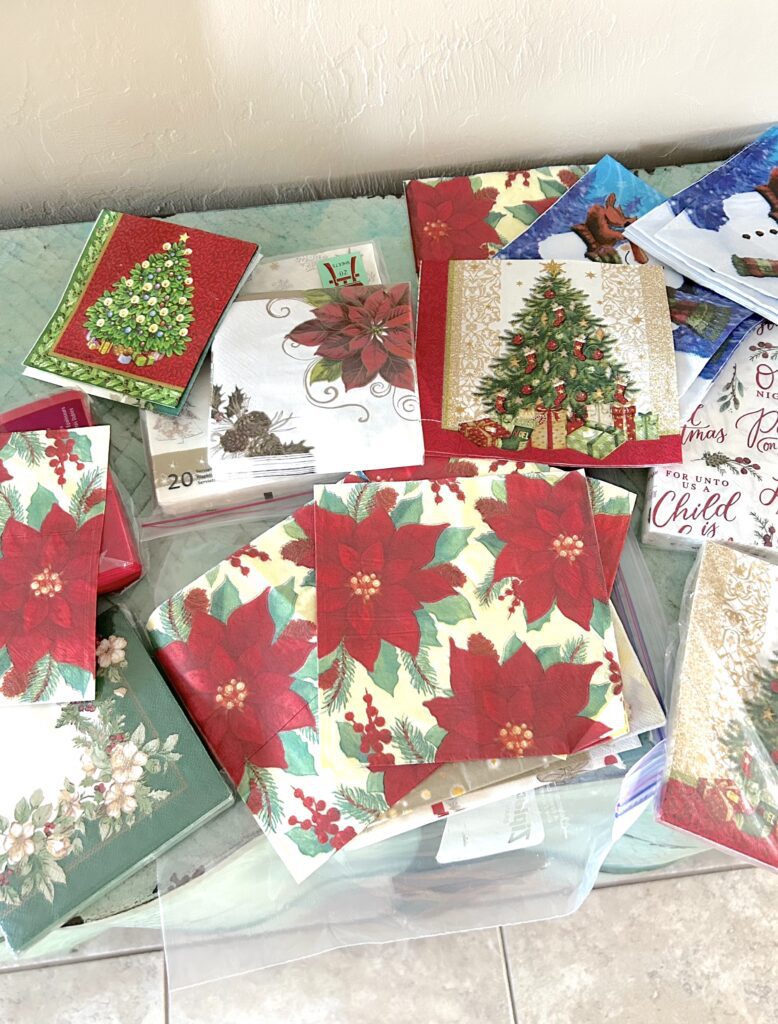
They are the holiday remnants I have been saving but I never knew what I was saving them for…
UNTIL TODAY!
Today we are going to take those leftover onesies and twosies and put them to work!
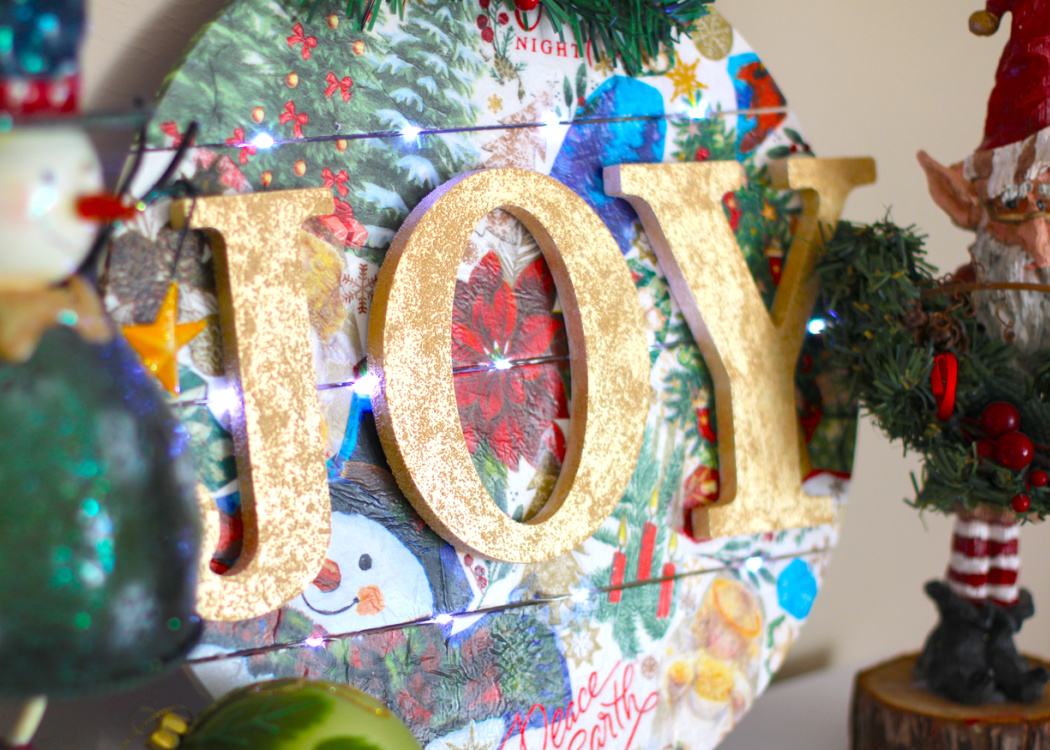
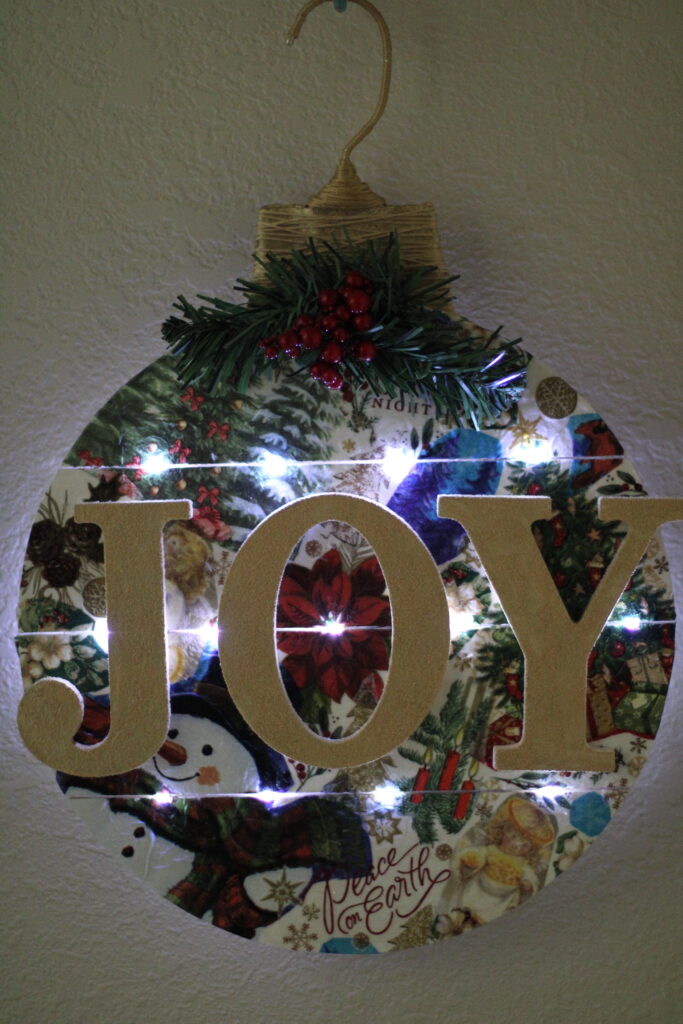
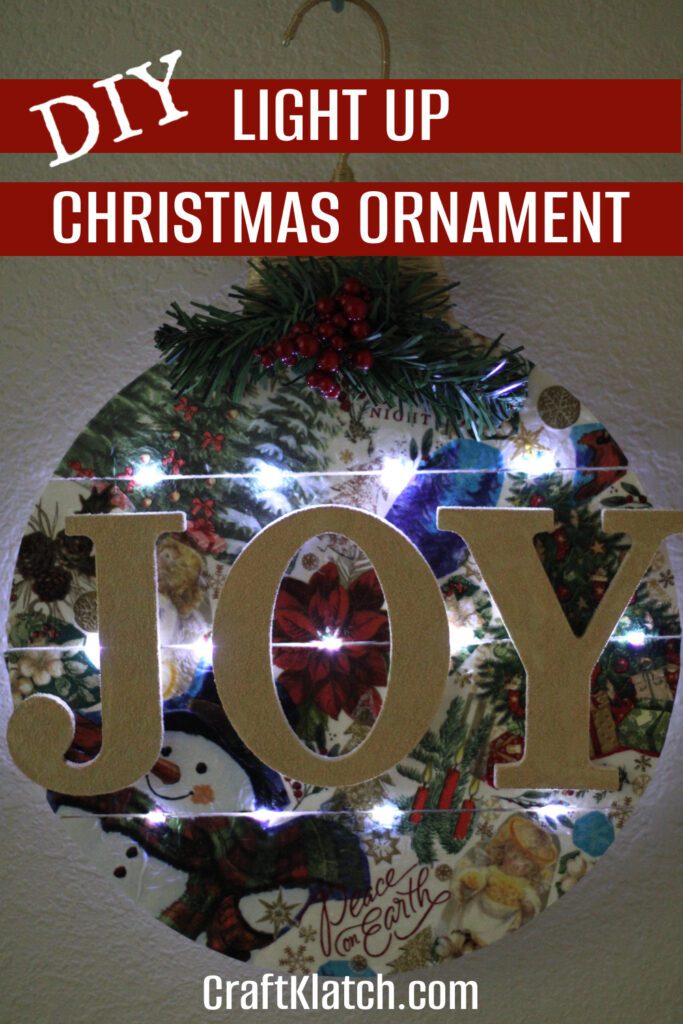
Join me on a creative journey to decoupage these orphaned Christmas napkins and transform them into a spectacular giant Christmas ornament!
Before we jump into the crafting, I have a question:
How often does your craft project end up the way you thought it would when you first started?
This one took a big turn from my original vision and I’m so glad it did!
Onto the crafting!
*This post is sponsored by Plaid. The ideas and opinions are all my own.
Be sure to stick around until the end for a special coupon exclusive to Craft Klatch!
Plaid has come out with these amazing letters, if you didn’t catch my Fall Letters project, be sure to check it out!
This time, instead of an autumnal theme, we are going bring a little JOY to the world and go all Christmas!
Materials You Will Need
*This blog uses affiliate links. I earn from qualifying purchases at no additional cost to you.
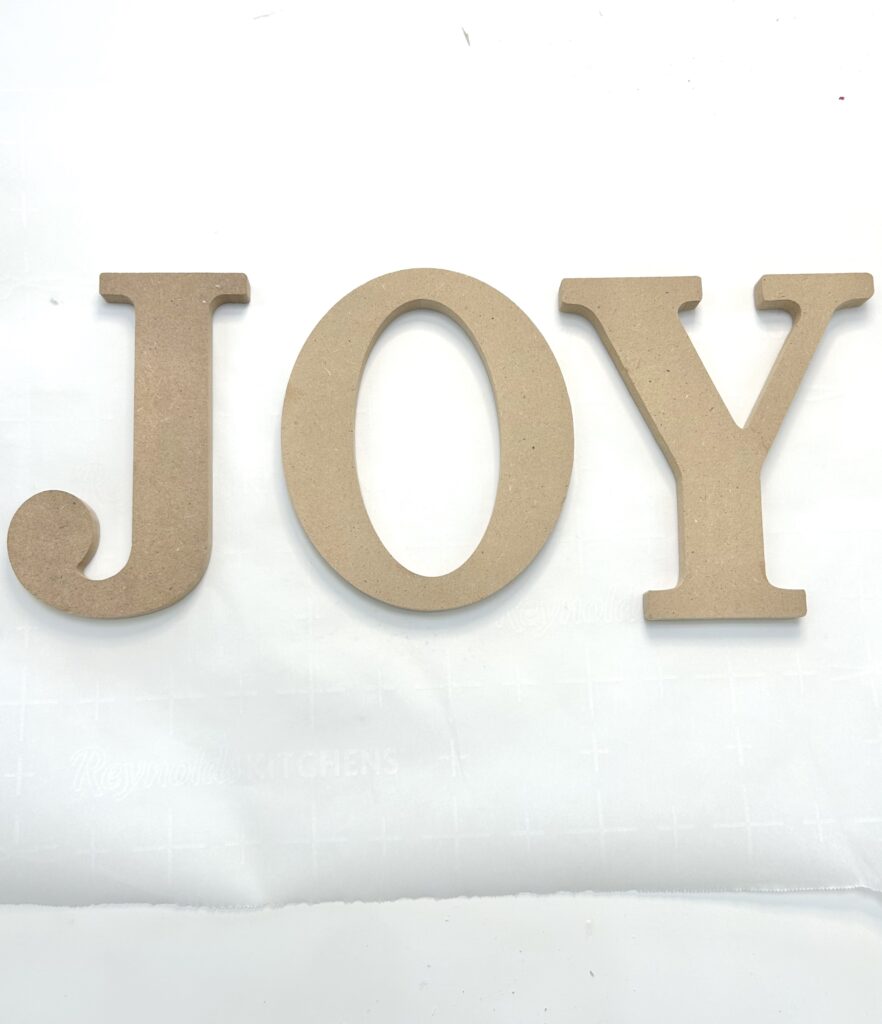
- Plaid 5″ Wood Letters
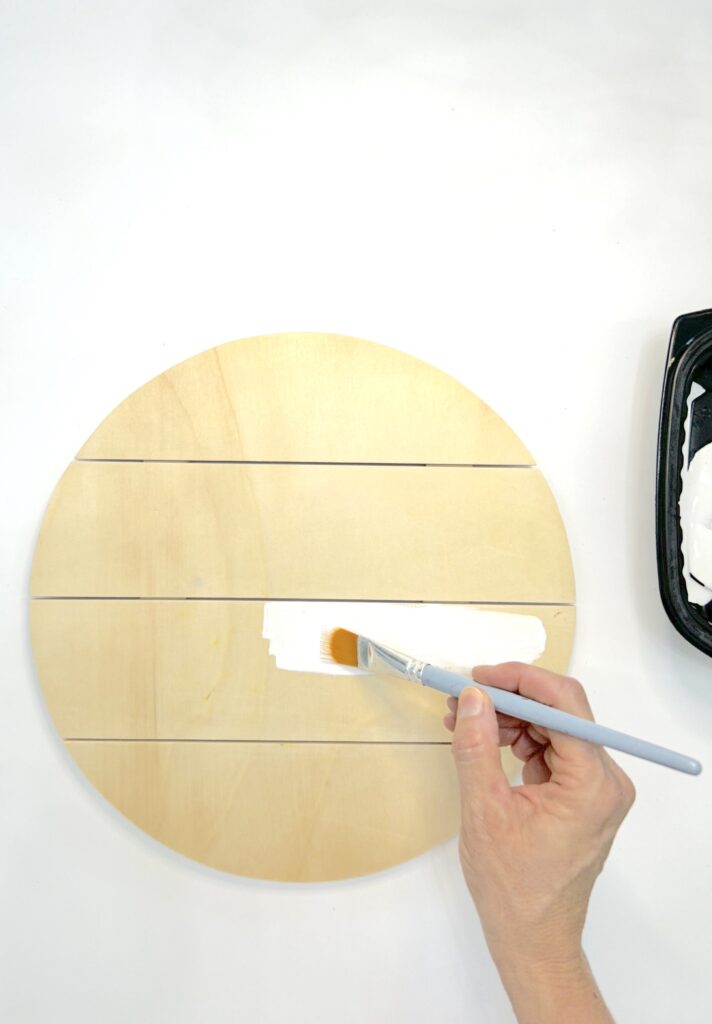
- Plaid 12″ Pallet Circle
- Sugar Metallic Paint in Golden Light
- FolkArt Wicker White Paint
- Holiday Napkins
- Matte Mod Podge
- Scrap greenery and berries
- Hot Glue
- Old hanger
- Scrap piece of cardboard
- Gold embroidery floss
- Spray Ultra Matte Mod Podge (optional)
- Spray Gloss Mod Podge (optional)
Directions
Step 1: Fresh Background
The pallet circle is the base for this project. I wanted to make sure to give it a nice fresh coat of white paint. The napkins are thin and the background color will bleed through on some of them. White makes all of the colors pop.
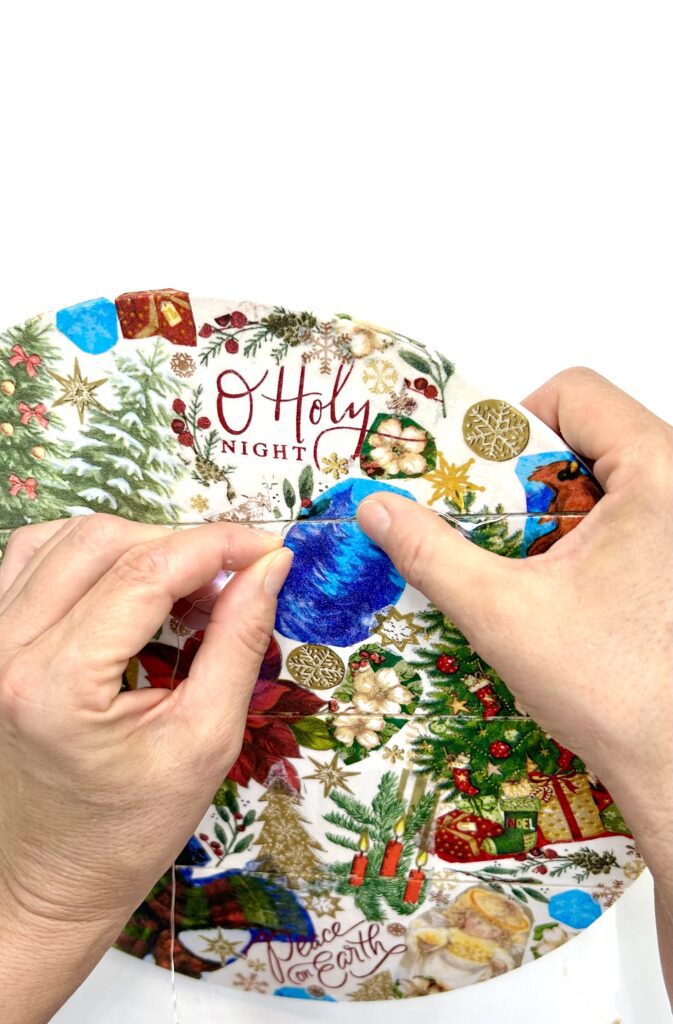
Step 2: Decoupage Napkins
I started with a menagerie of napkins and started cutting out pieces. My original thought was to do each slat with one napkin but I forgot, all napkins are not made alike.
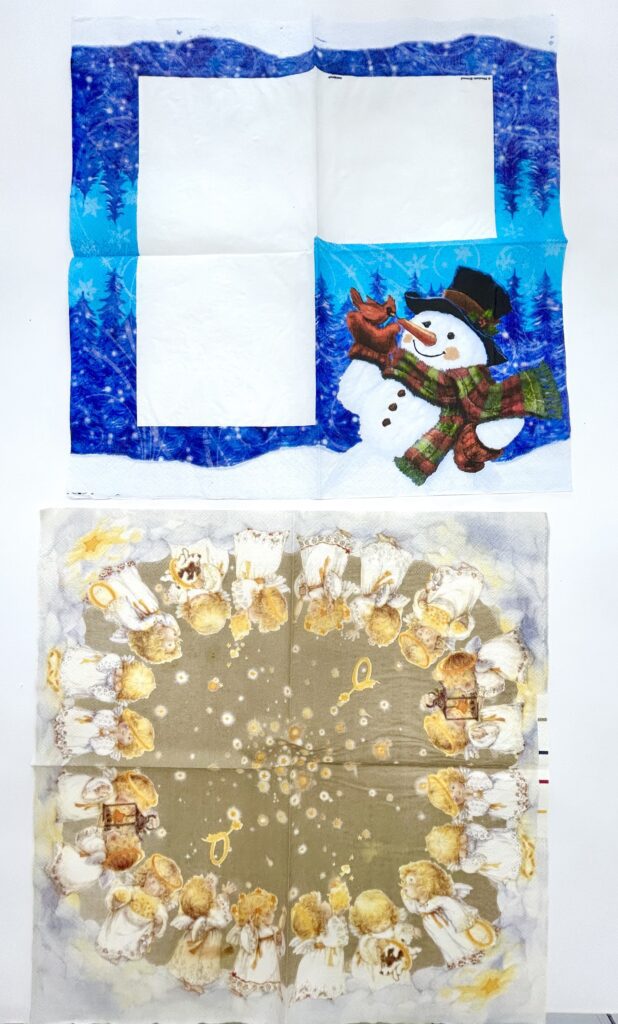
Note: The angel napkins have the image on all four panels.
The snowman napkin has the image on only one.
You can’t tell before opening the napkins but here is where I pivoted and went a collage theme instead.
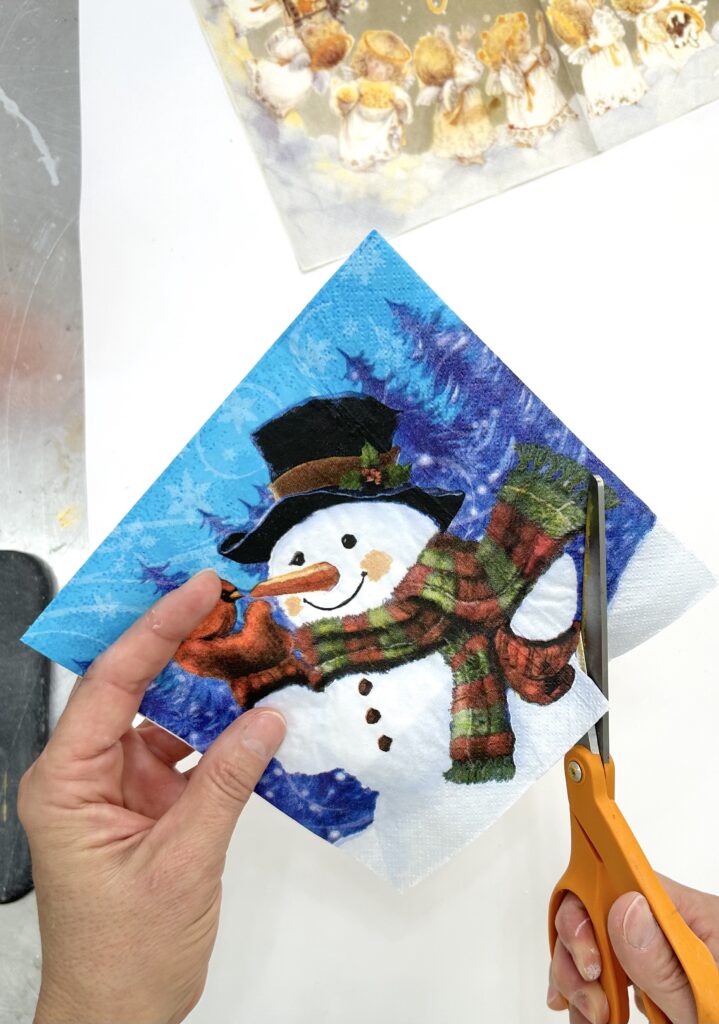
I carefully cut out the napkin pieces I intended to use for the decoupage collage and arranged them on the pallet circle. Placing the letters on top, I checked to ensure I was okay with what would eventually be covered.

TIP: Napkins have layers. Some have two layers and some have three. You want to get down to the final layer before you decoupage the napkins. If another layer remains sometimes it will separate while you are brushing and make a big mess.
Then, I started to decoupage. I started with the bottom layer first.
To decoupage, brush some Mod Podge onto the pallet circle where you want to apply the napkin piece and carefully place the napkin piece onto the Mod Podge. Put a little Mod Podge on your finger and use it to rub the Christmas napkin flat.
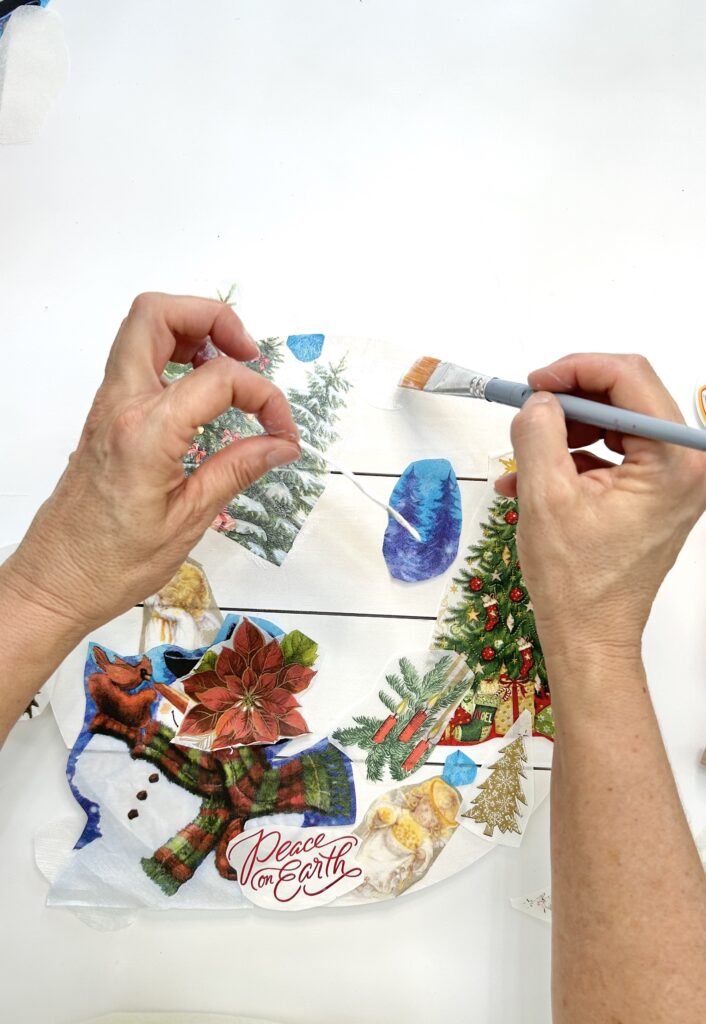
It’s hard to get all of the wrinkles out of the napkins. Just do your best. The remaining wrinkles just add character…just like they do on us.
A Few Tips
While the napkins were still wet, I took my craft knife and gently cut the napkins where the slats were so they would not be covered. The napkins are so thin it was very easy. Don’t drag the knife along the slat or it will pull the napkin with it. Poke down with the blade.
Once dry, I had scraggly edges. I took an emery board and gave it a quick sand and it cleaned the decoupaged napkin edges right up.
After I decoupaged all the pieces and it dried, I decided to use the Mod Podge Ultra Matte Spray to give it a final seal. You can brush the Mod Podge on if you would rather. Both work great!
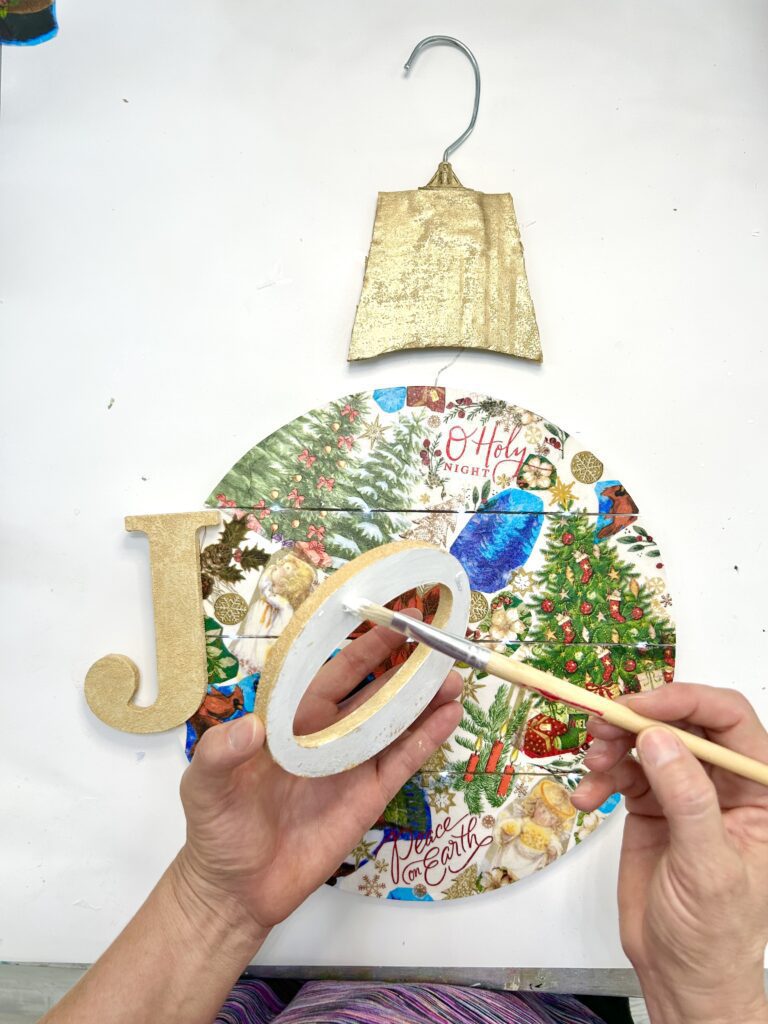
Step 3: Golden Light
I painted the letters white, to also give it a fresh background. Then, I used the Sugar Metallic Paint in Golden Light to give the letters some texture with a metallic sheen.
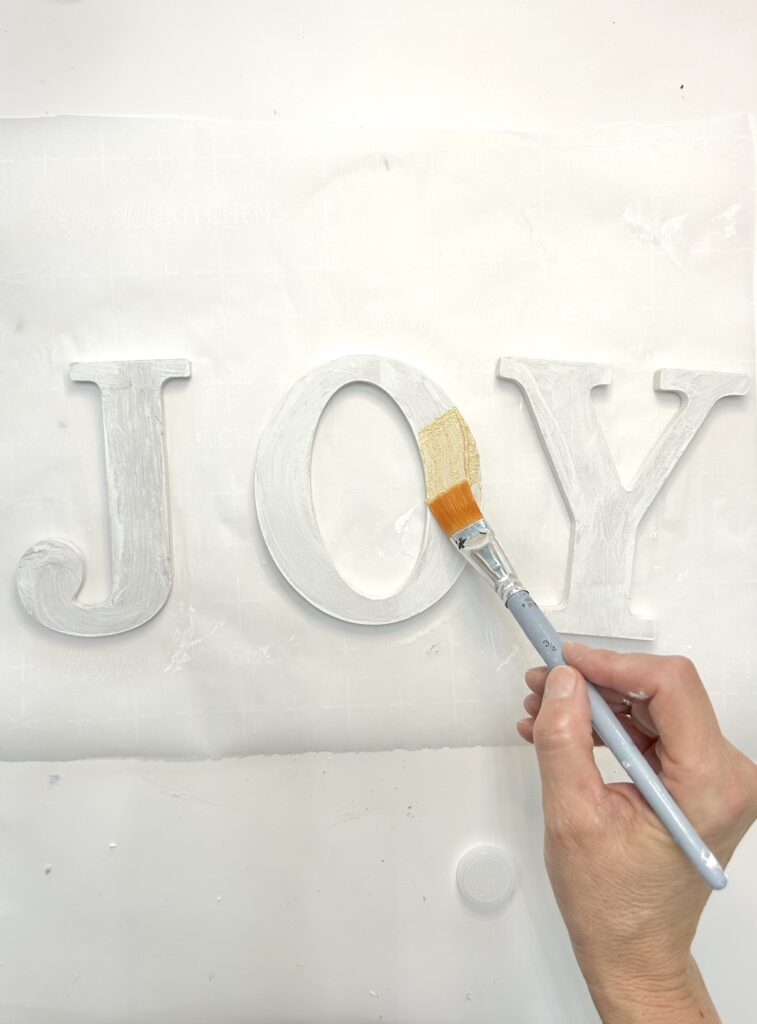
I did two coats and then finished it off with the Mod Podge Ultra Gloss Spray because it’s so easy. You can brush a sealer on if you would rather.
Step 4: Fairy Lights
Christmas decorations to me are all about sparkle, glitter, and shine and I don’t have any glitter on this project (surprise, surprise), but that doesn’t mean it can’t shine!
Here was my second pivot from the original project idea. Originally, I was going to drill holes in the letters and feed lights through there. But that seemed a little showy for this project so I opted for a more subtle but still effective light-up option…fairy lights!
The wires fit through the slat gaps perfectly! I fed the wires through and used tape to secure them on the back.
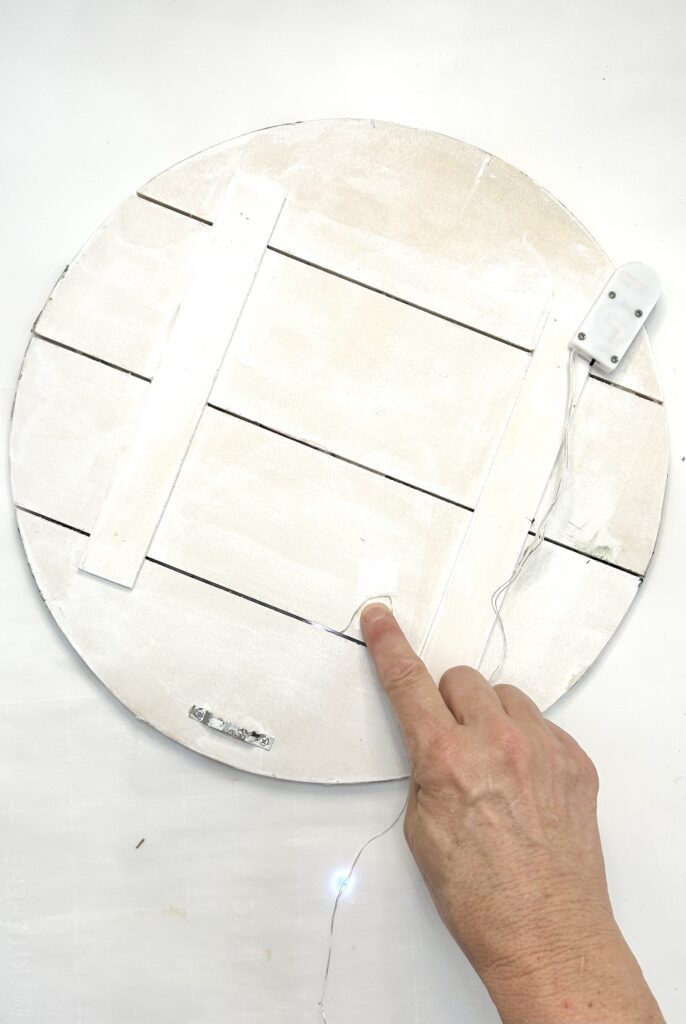
Now it lights up! Yay!
Step 5: Secure the Letters to the Decoupaged Napkins
I glued the letters on with an all-purpose glue that dries clear. I centered the “O” and went from there.
Step 6: And then there was another pivot…
That was going to be it but as I looked at it, I thought:
That’s pretty, but it could be better…
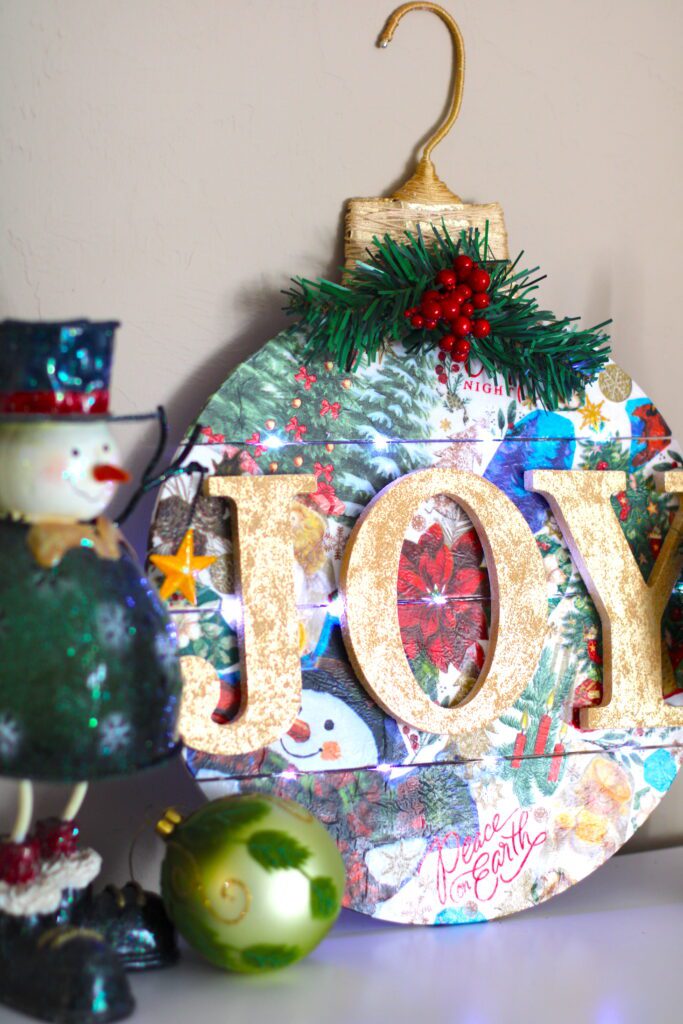
I thought it would look amazing as a vintage Christmas ornament.
The Christmas napkins already gave it a vintage feel and making it an ornament really makes it Christmas!
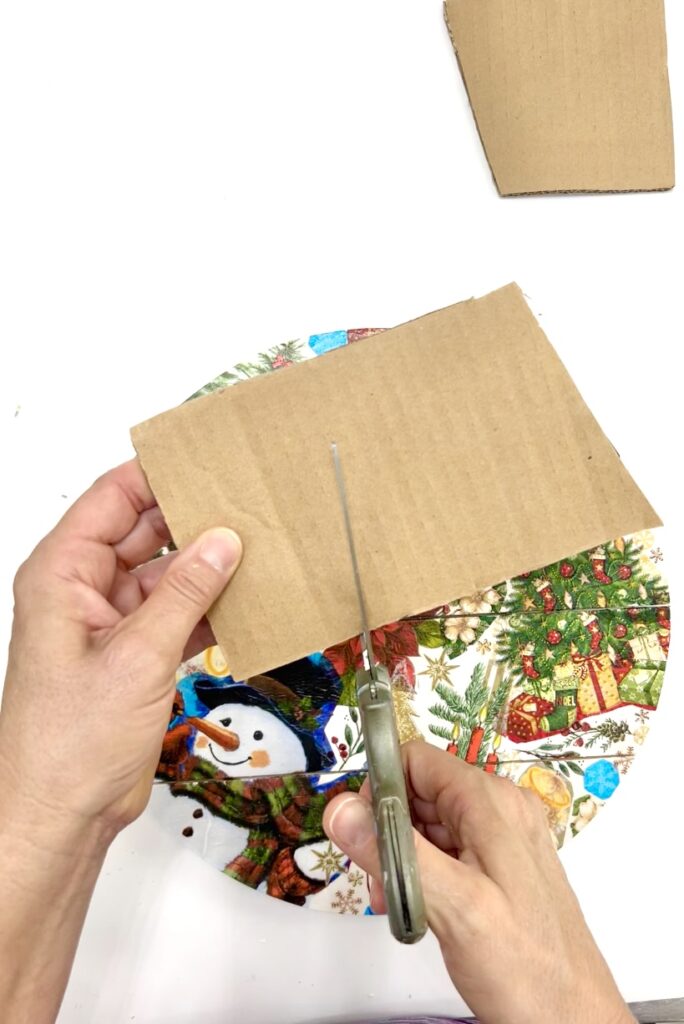
So, I cut a Christmas topper from the flap of the cardboard box that my Plaid supplies came in. I inserted and glued the hook from a broken hanger. Finally, I painted the cardboard with the sugar metallic paints (2 coats).
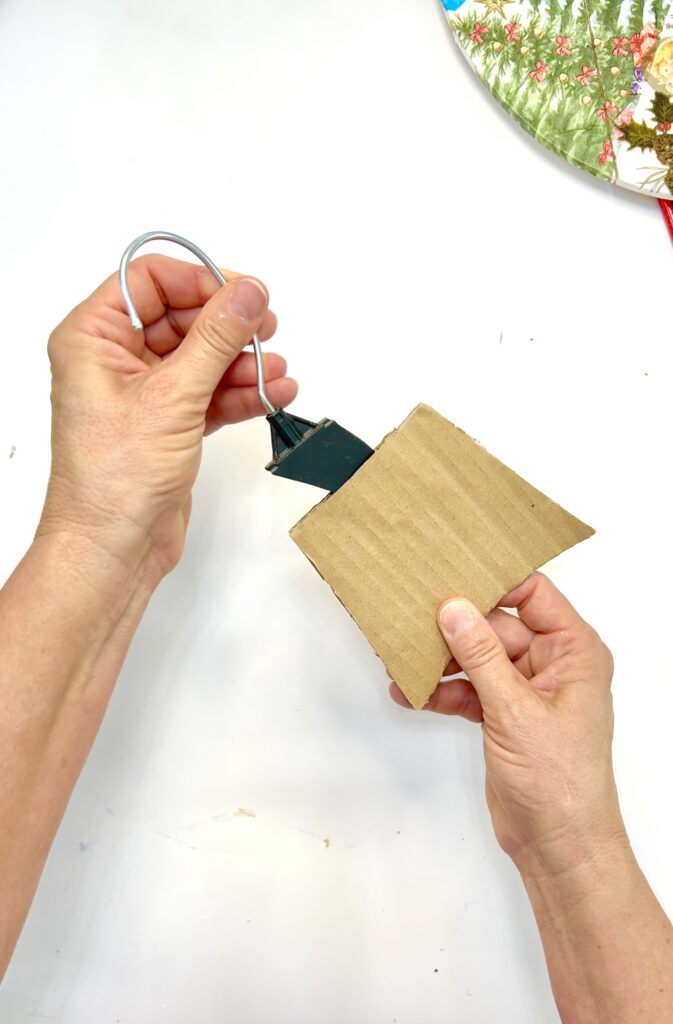
When the paint was dry, I scrounged my embroidery floss and came up with two little gold bunches. I proceeded to wrap it around the cardboard for interest.
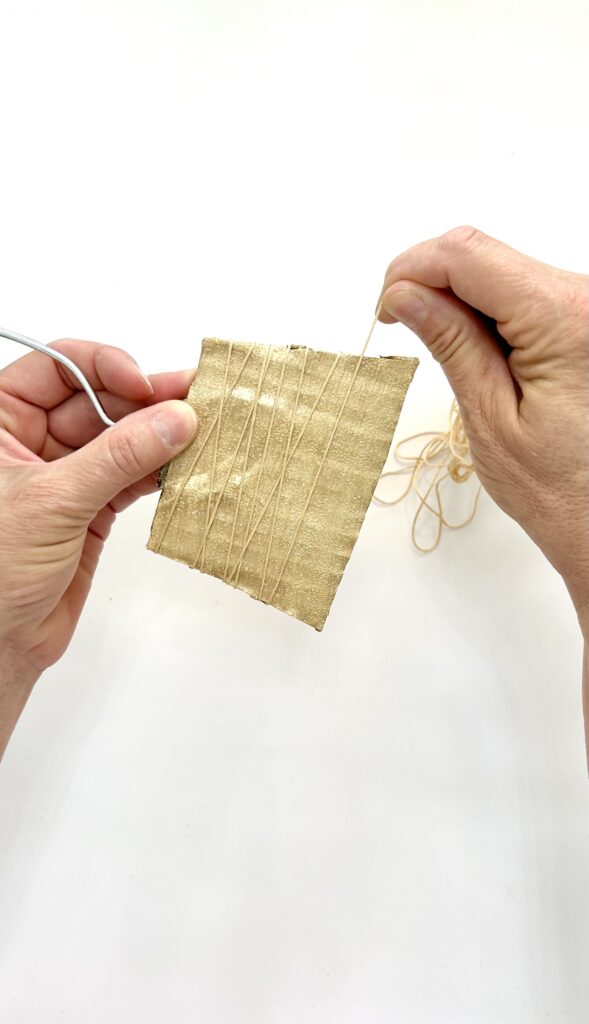
Then, I decided to also wrap the hanger hook, so it didn’t look so much like a clothing hanger.
Step 7: The Final Touch
The ornament looked great but it needed a little something extra.
I bought inexpensive floral picks and dissected the parts I wanted to use. I glued them up by the ornament topper.
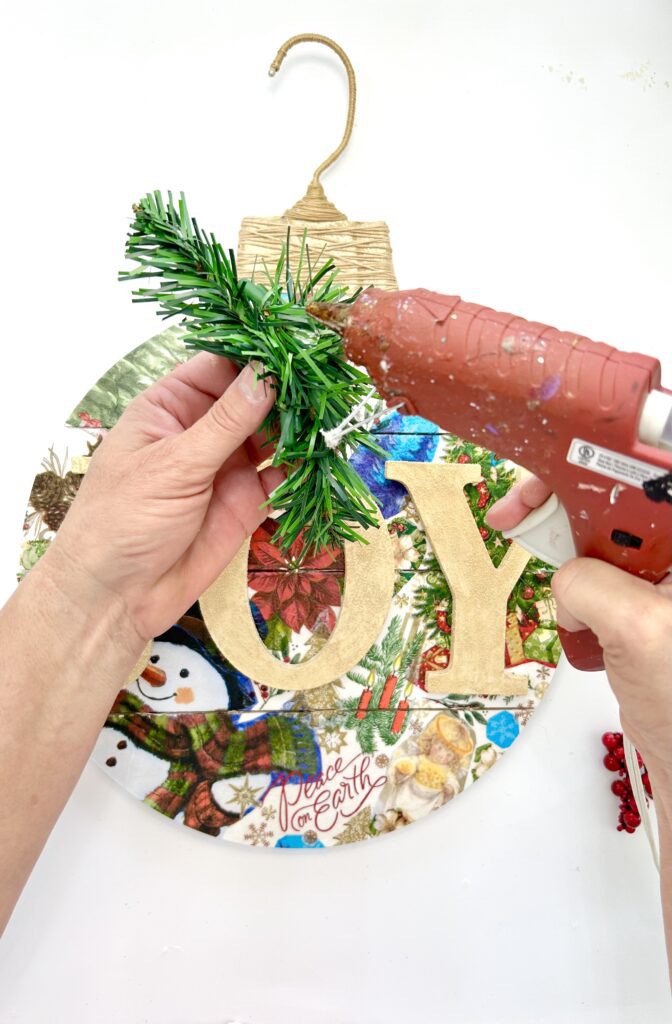
The greens and the berries are the perfect touch!
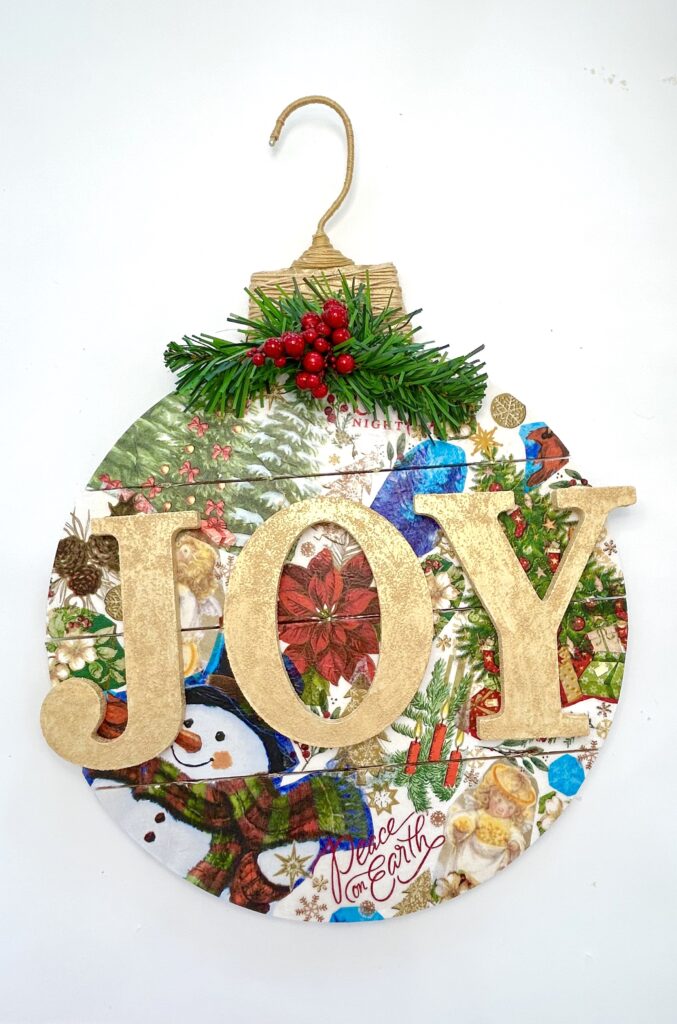
Now it is time to enjoy the grand ornament and light it up!
I did this project by decoupaging Christmas napkins but you can give it a different twist. Instead of decoupaging napkins, use family Christmas photos, or Christmas cards. So many fun ways to make it your own!

Are You Ready for Savings?
When you go to Plaid to purchase your supplies for this and other great projects, be sure to use the exclusive Coupon Code: MONA123 for a 15% savings!
Other Great Christmas Projects
While you are here, check out these Christmas projects you are sure to love!
- Yes! I made an ornament out of a tabletop I found on the side of the road HERE!
- I put my Christmas tree in a THIS!
- THIS project lights up too!
- A beautiful WREATH made out of stuff from your backyard!
Thanks for stopping by! Now get out there and start to decoupage napkins like a boss! Remember: Life’s too short not to shimmer, so grab your glue gun and your glitter!™ Stay safe!
Mona
Be sure to PIN IT for later!
Such a great idea think I will give it a try. Happy Christmas to all.