Sometimes it’s hard to find crafts to involve the kids, but this one is PERFECT! It’s hard to compete with the creativity of children because they have great imaginations and total freedom in their thinking. This craft can become a piece you pull out year after year on Easter and is a perfect way to exhibit their art.
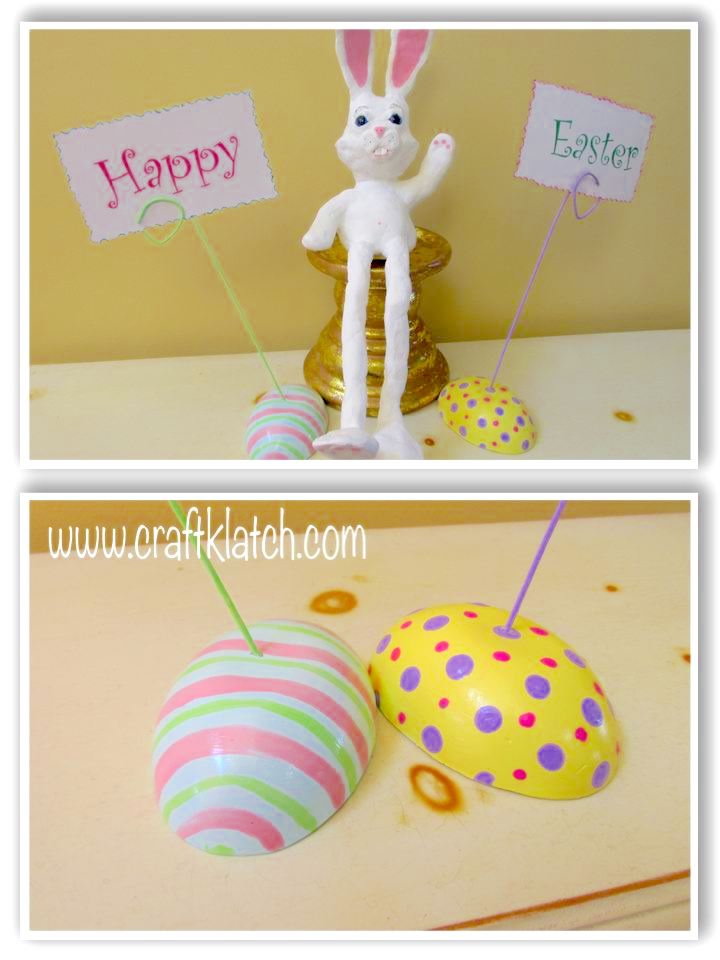
I happened to make these eggs into a sign for my centerpiece, but you can just have them scattered about, or what would be super fun is if you put a wire on the back, while the plaster was setting. Then, you could hang them on the wall!
5 Easter Crafts You Will Love
Incase you want other Easter craft inspirations, here are some craft projects to check out!
- Easter Bunny Art DIY
- Easter Eggshell Resin Coasters
- DIY Easter Confetti Cross Coaster
- Easter Egg Coaster
- DIY Golf Ball Easter Bunny Recycling Craft
Supplies You Will Need:
*This blog uses affiliate links. As an Amazon Associate I earn from qualifying purchases, at no additional cost to you.
- Easter Egg Mold ~ the one I used isn’t available, but these are much better: https://amzn.to/30Uzmi6
- You can find plaster of Paris here: https://amzn.to/3eQrdDe
- Acrylic paint: https://amzn.to/3bWtf2R
- Satin finish: https://amzn.to/38TFN9g
If you want to turn them into a centerpiece, you will also need:
- Wire hanger
- Drill with a small bit
- Cardstock
- Glue stick
- Markers
- Pliers
- Wire cutters
Here is the Video Tutorial
Directions:
1. Prepare your plaster according to the directions on your plaster. I used one part water to two parts plaster.
2. Pour into mold.
3. Allow to set.
4. Remove from mold and let it dry a little longer.
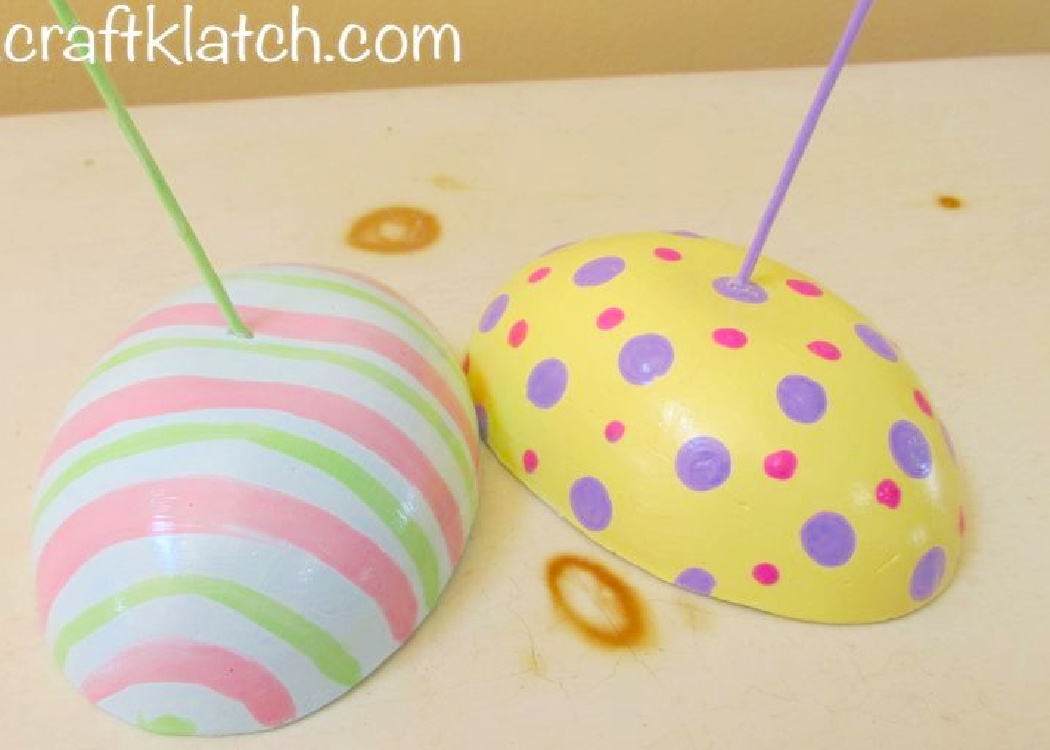
5. Choose your colors of acrylic paint and paint your eggs accordingly. Go simple or go wild.
6. Allow to dry.
7. If you want to add the wire to have a sign, drill a hole into the top of each egg. Go in on a diagonal. It does not need to be too deep. See video for a demonstration.
8. Cut the wires to the length you want.
9. Take a pair of pliers and create a loop.
10. Paint the wires a color to match your egg.
11. Print out Happy Easter, or whatever message you want to convey. Print it on card stock. You want to print two sets.
12. Line them up and glue them together – this is easier, if you cut them down a little first. Make sure you put the Happy on the back of an Easter. Don’t put Easter on the back of another Easter (that’s what I did!). That way it will read Happy Easter on both the front and the back. If you did it like I did, it will be Happy Easter on the front and Easter Happy on the back. Oops!
13. Use a satin finish to protect the eggs. Also, you want to make sure you paint or at least put the satin finish on the bottom of the eggs, to seal them. You can also have the kids sign and date them!
That’s it!
Here are some fun alternative Easter Egg Decorations

Happy Easter!
Remember: Life’s too short not to shimmer, so grab your glue gun and your glitter!™ Stay safe!
Mona