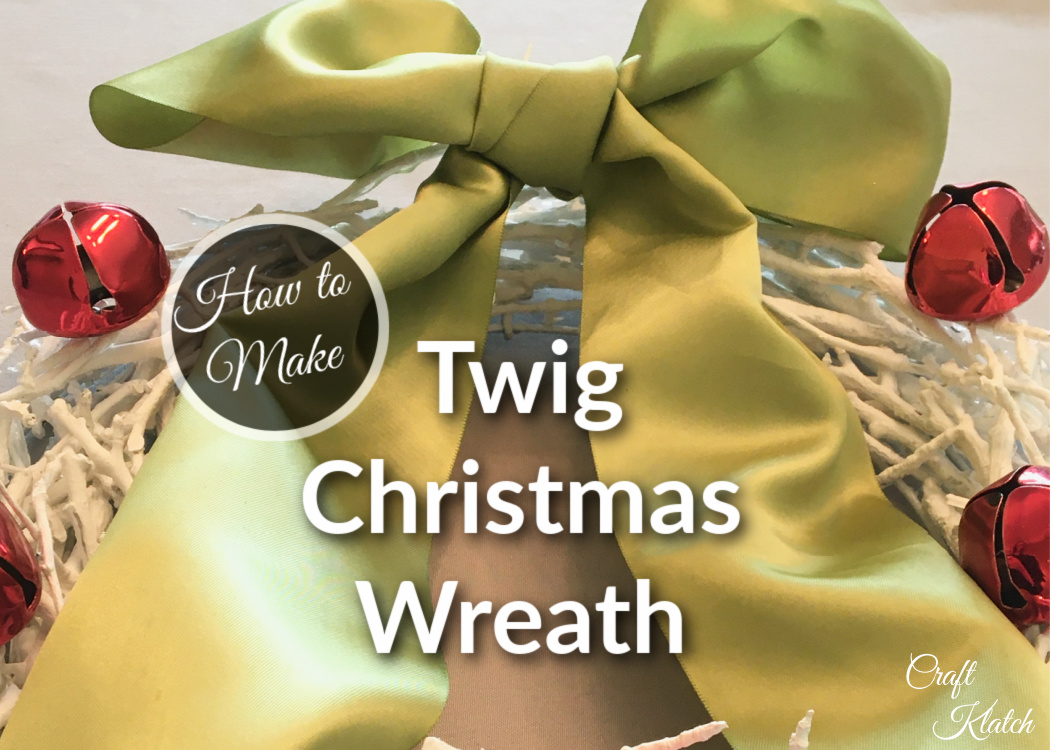
Here are DIY instructions for wreath making! I’ll show you how to make a twig Christmas wreath that is actually perfect for all seasons!
First, I have something I want to share with you all. I have fallen in love…
…with a book!
The Book
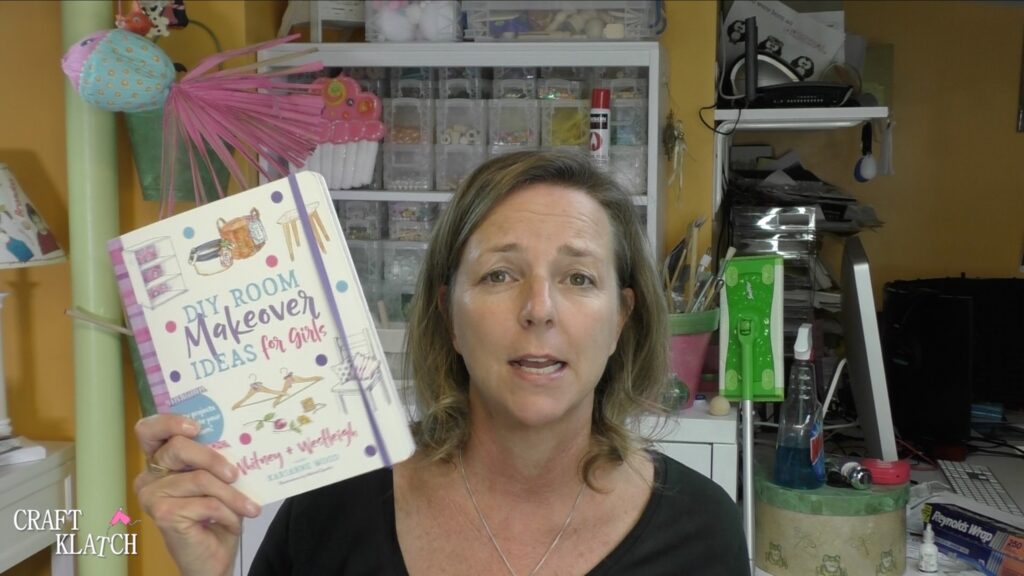
I was sent this book, with no obligation to review or do anything with it, but I FELL IN LOVE and had to share!!
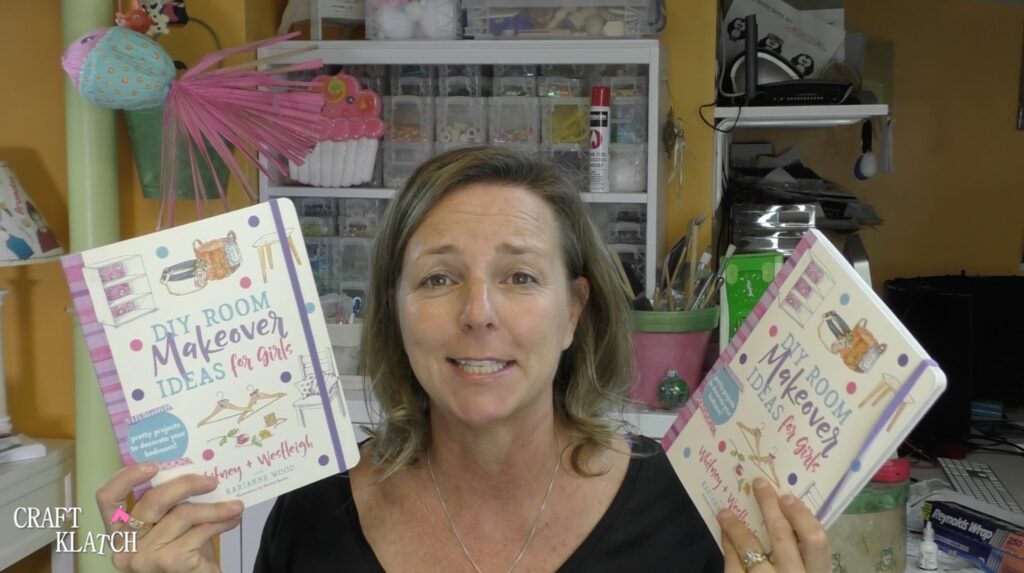
I loved it so much I immediately ordered a second copy, so I could give them to my granddaughters!
I’d be a bad Oma if I caused a fight to break out!
The book is called DIY Room Makeover Ideas for Girls, written by Whitney and Westleigh Wood!
It has a bunch of craft, organization, and makeover ideas for girls and their bedrooms.
What girl wouldn’t love that?
The projects are well explained and illustrated. Every skill level is covered. There are some projects that can be done with young kids, but also plenty of projects that are very appealing to teenagers and adults…
…ahem…ME!
What kind of projects?
Here is a very, very small sampling of projects in the book:
- Pencil holders for desk organization
- Ways to organize hair ties
- How to make a twig Christmas wreath
- Flower mirror
- and so many more amazing projects!
The book is not only crafts but really a room makeover book because the girls go so far as to help you pick out a room color!
So what does all this have to do with how to make a Christmas twig wreath?
Well, it’s one of the projects in the book and not only perfect for girls room decor but also for my front porch!
How to Make a Twig Christmas Wreath Video Tutorial
So you can see exactly how I made it!
Wreath Making Supplies
*This blog uses affiliate links. As an Amazon Associate I earn from qualifying purchases, at no additional cost to you.
Here are the 6 Essential items you will need to make the wreath:
Here are a few optional items to help you decorate:
Directions on How To Make a Twig Christmas Wreath
Step 1: Gather the twigs
I rallied the troops, which consists of Greg and yours truly. It was a beautiful fall day and we headed out to gather twigs for the wreath.
This is not my first twig rodeo. I used twigs to make some Twig Resin Coasters, which go with any home decor and I used twigs to make small Wreath Ornaments perfect for your Christmas tree!

For a major twist on the twig theme, I embedded and sanded twigs down in resin for the Beauty Of Nature Coaster and the Glam Resin Table Makeover! That was one of my most favorite table makeovers!
You won’t believe the 5 Ornaments I made out of toilet paper rolls HERE!
While we were out there, Grayson came running behind with an enthusiastic “Meow! Meow! Meow!”, like he wanted to help.

He was a big help rolling around in the dirt…
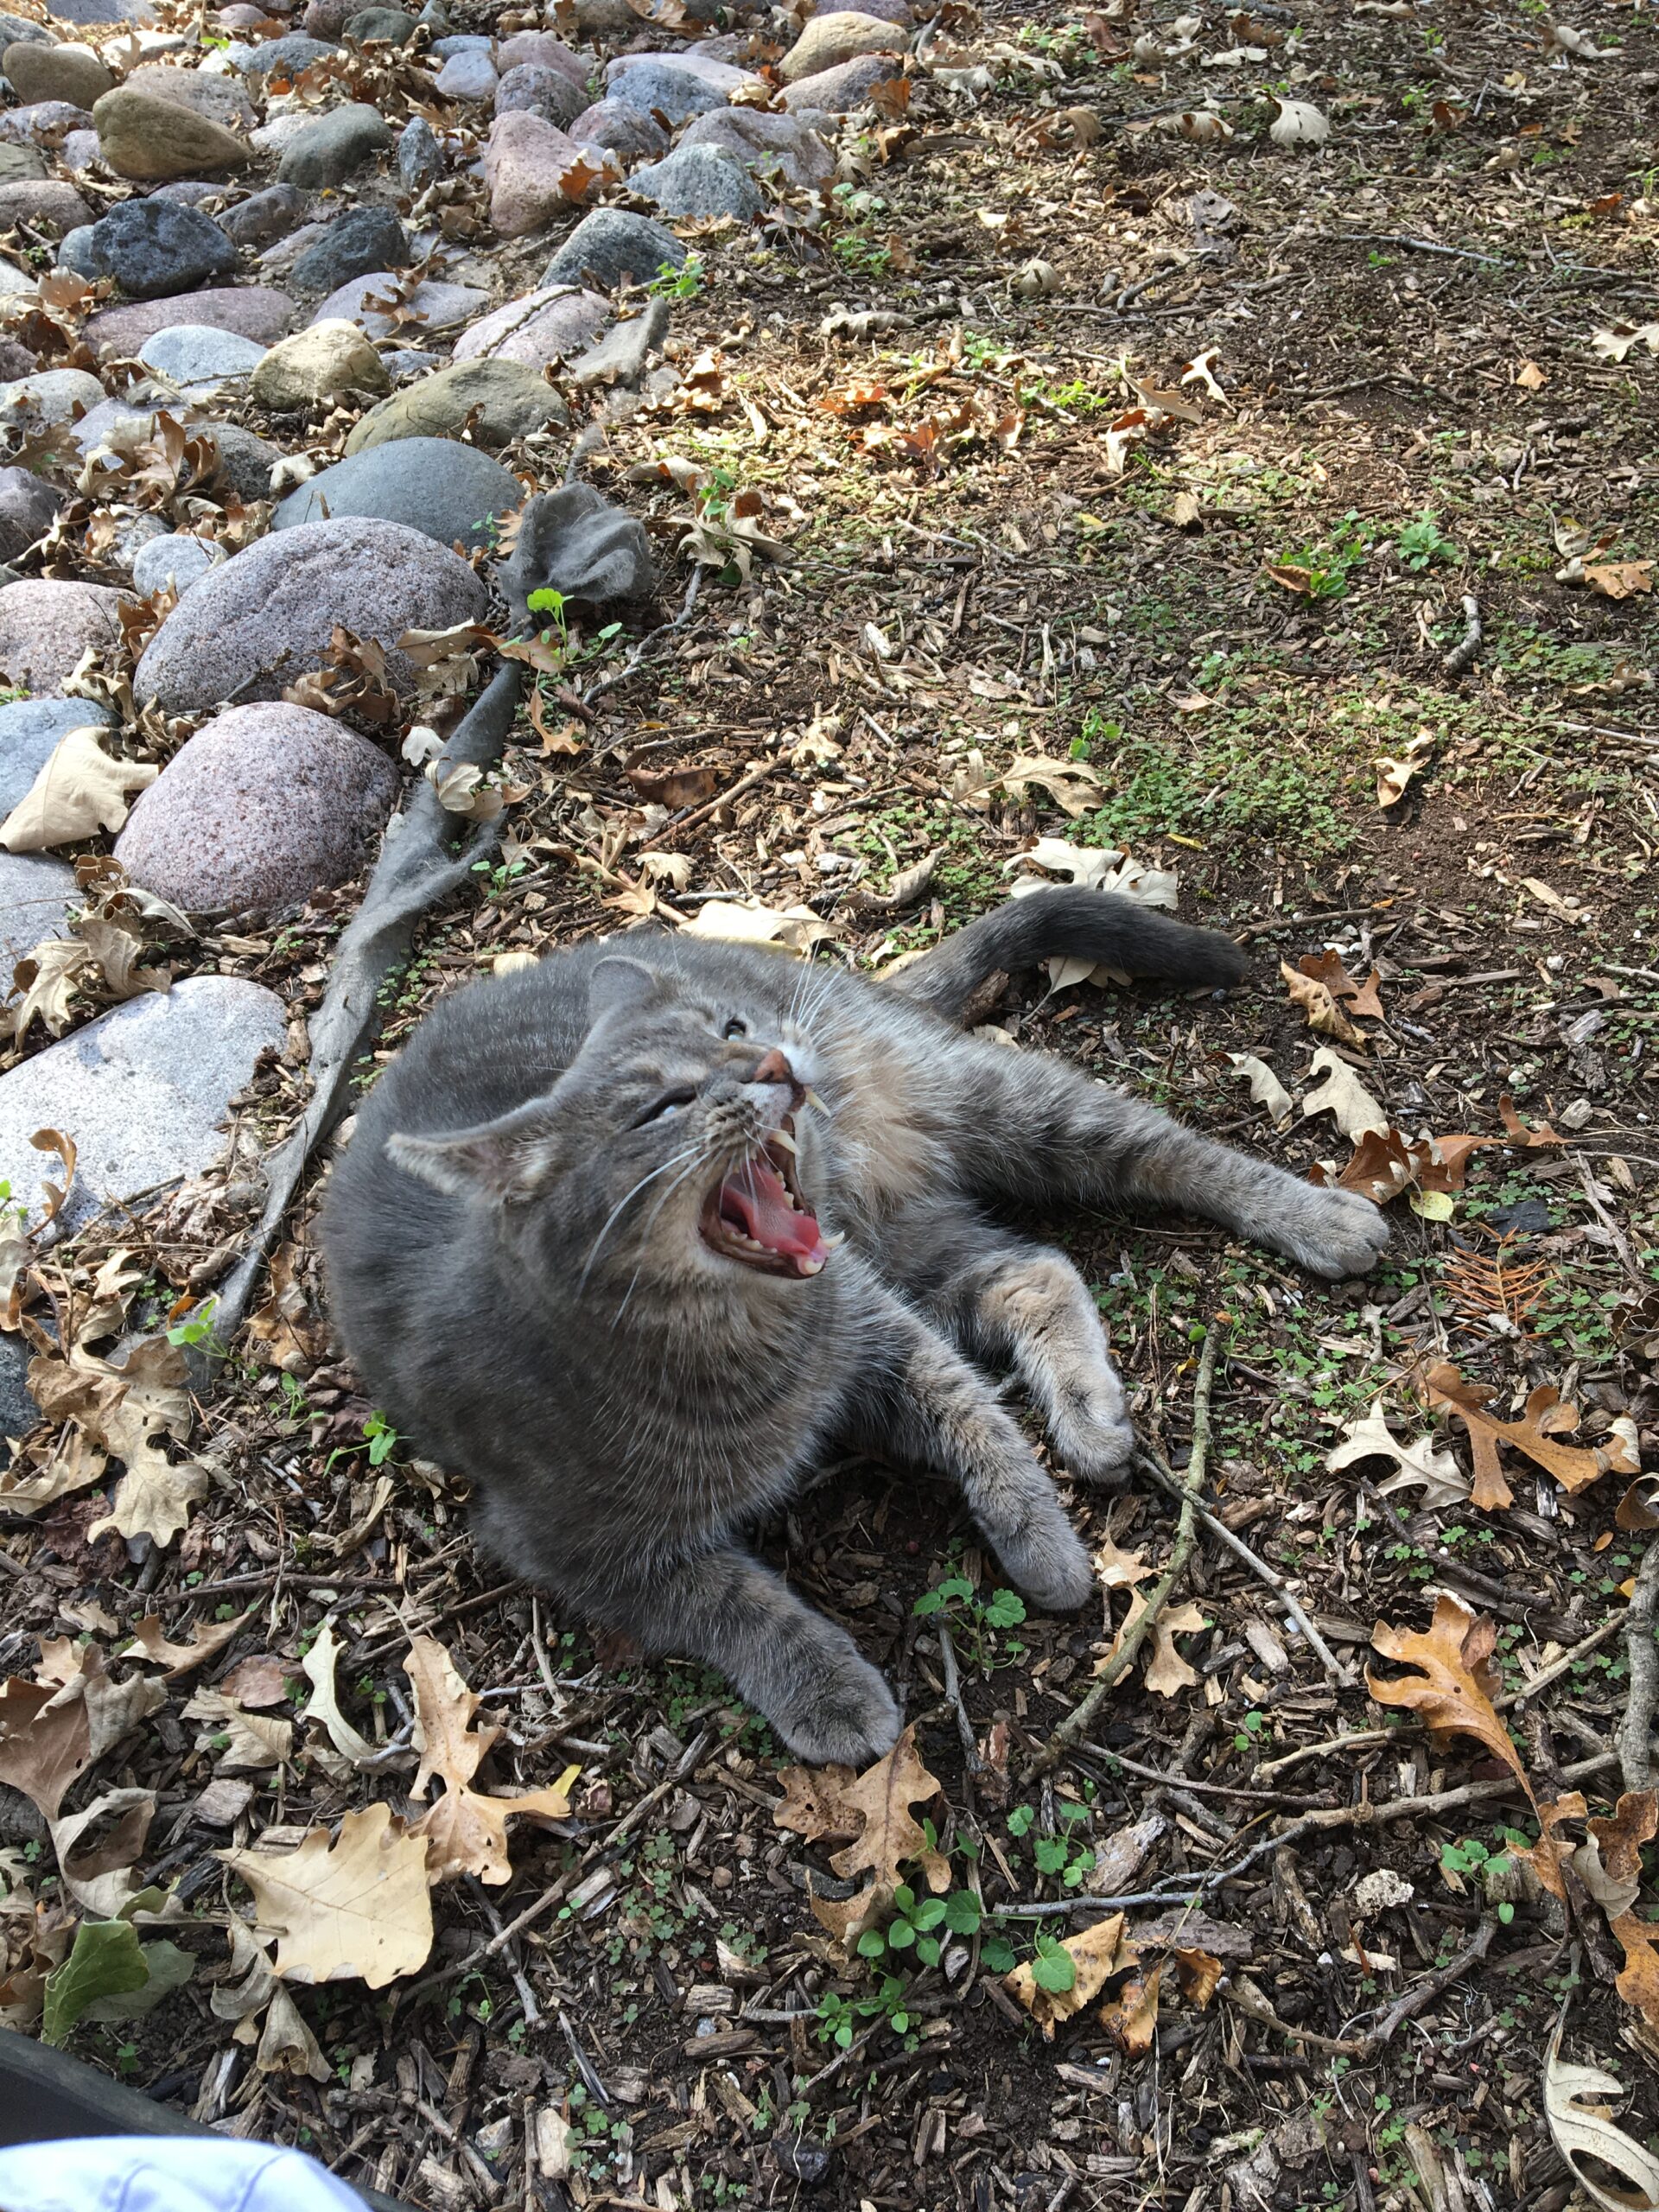
…then he just got bored.
Nonetheless, Greg and I were able to gather two big bags of twigs. Way more than I needed!
Just call me the twig hoarder.
Don’t you just love free crafting supplies?
Step 2: Paint the form
Before I started working with the twigs, I painted the wire wreath form.
It came green, but I painted it white because I didn’t want the green wire to show through and compete with my white twigs.
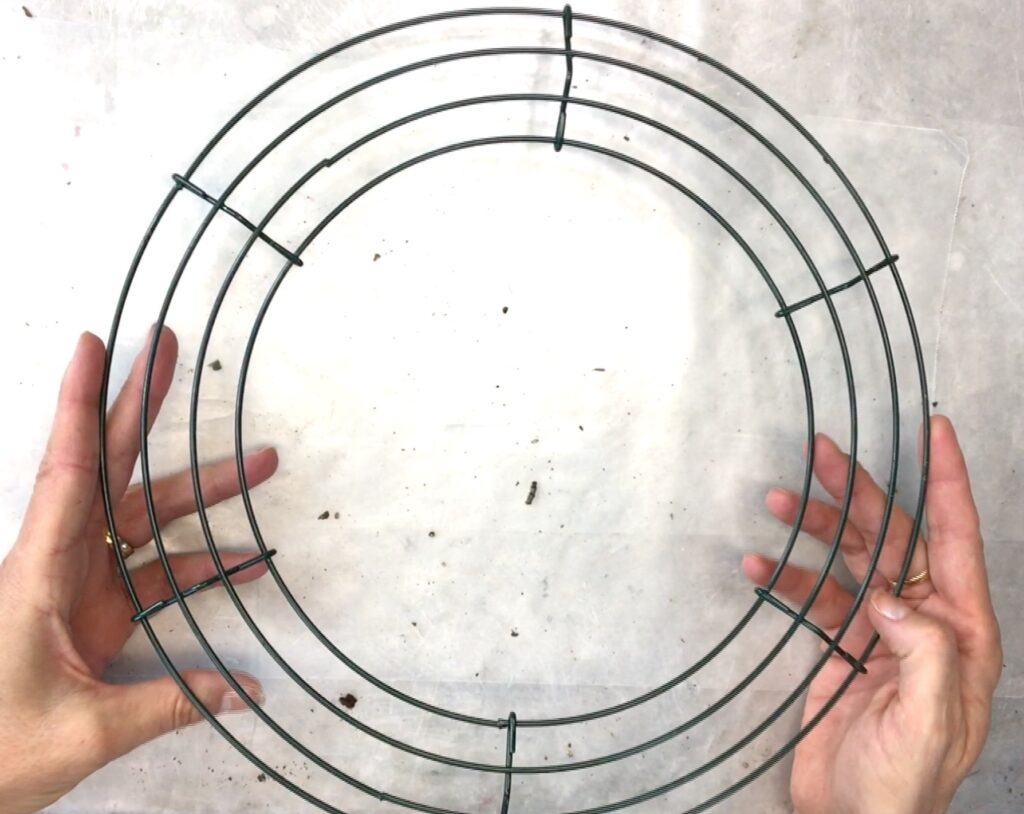
I chose to go with a wire form because I was going to hang this outside on my front porch.
The girls do suggest doing a cardboard or wood wreath form. The cardboard is budget friendly because it’s free if you have cardboard lying around! And it’s perfect if you are planning on having the wreath be indoor only.
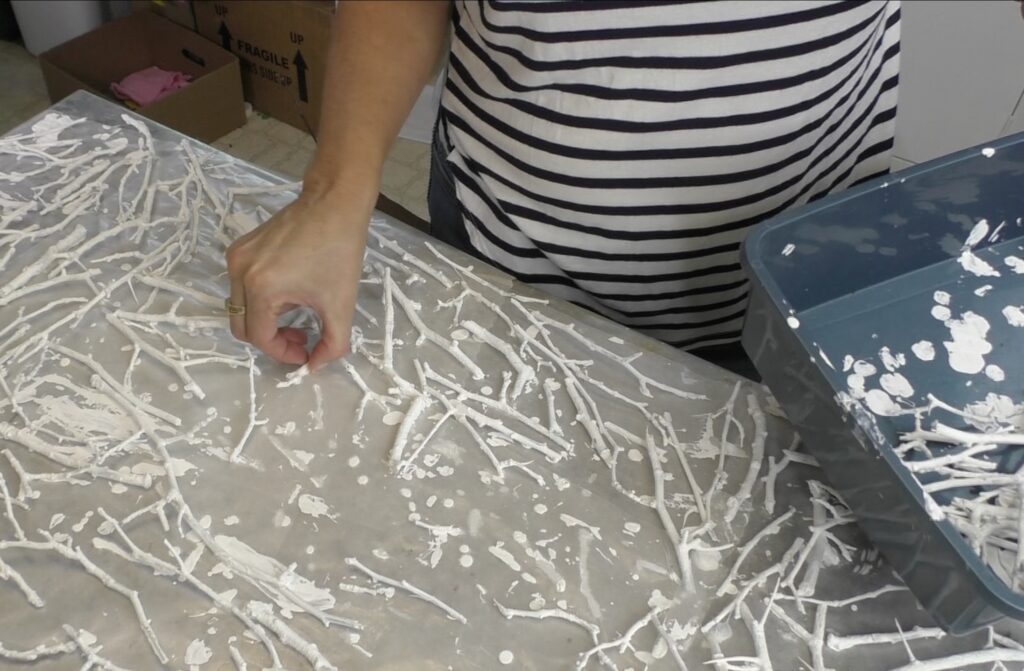
Step 3: Break your twigs
Before getting started on the wreath making, I needed to break my twigs to a manageable size. The girls suggest six inches or less, which makes perfect sense!
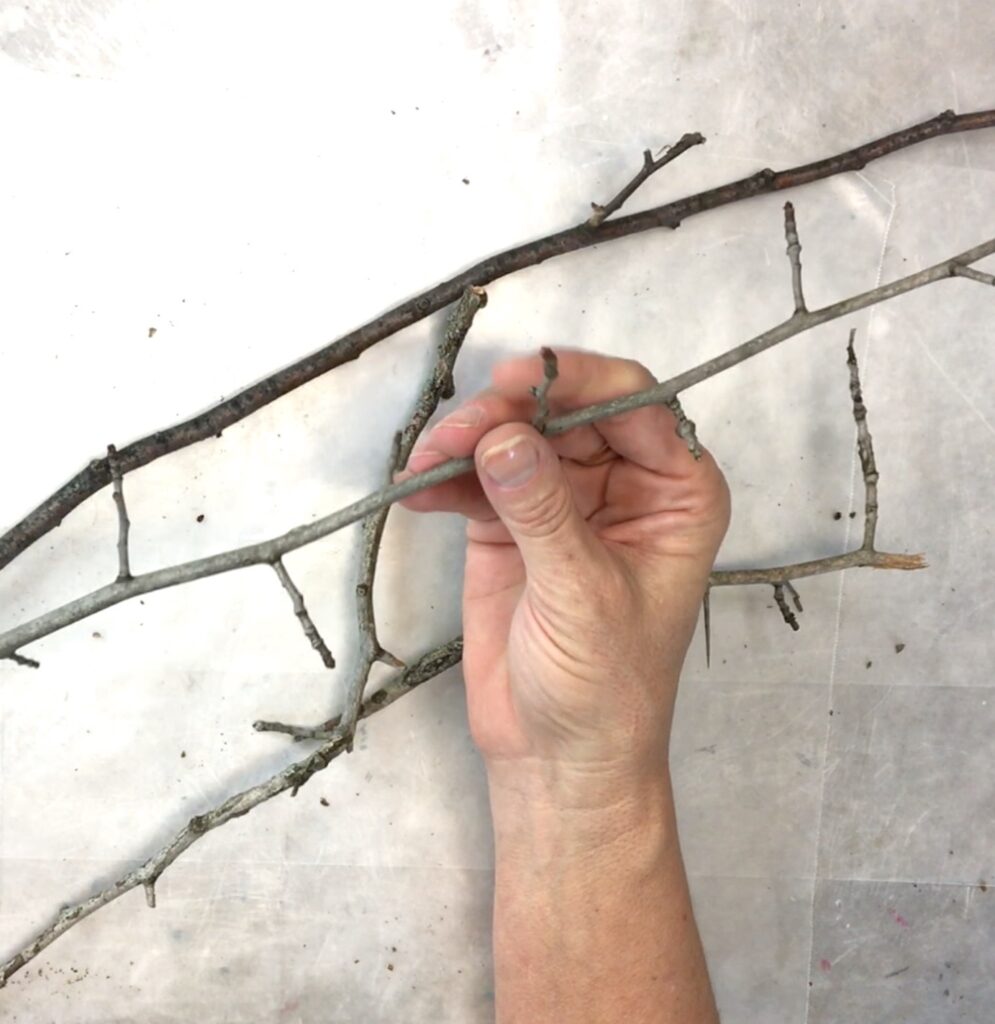
You are making a round wreath, so you don’t want them to be too long, unless they have a natural curve to them.
I wasn’t sure how many twigs I would need, so I did a trial run and just laid the twigs on the wreath form.
You don’t need to do a trial run, but I didn’t want to get caught short or make way too many.
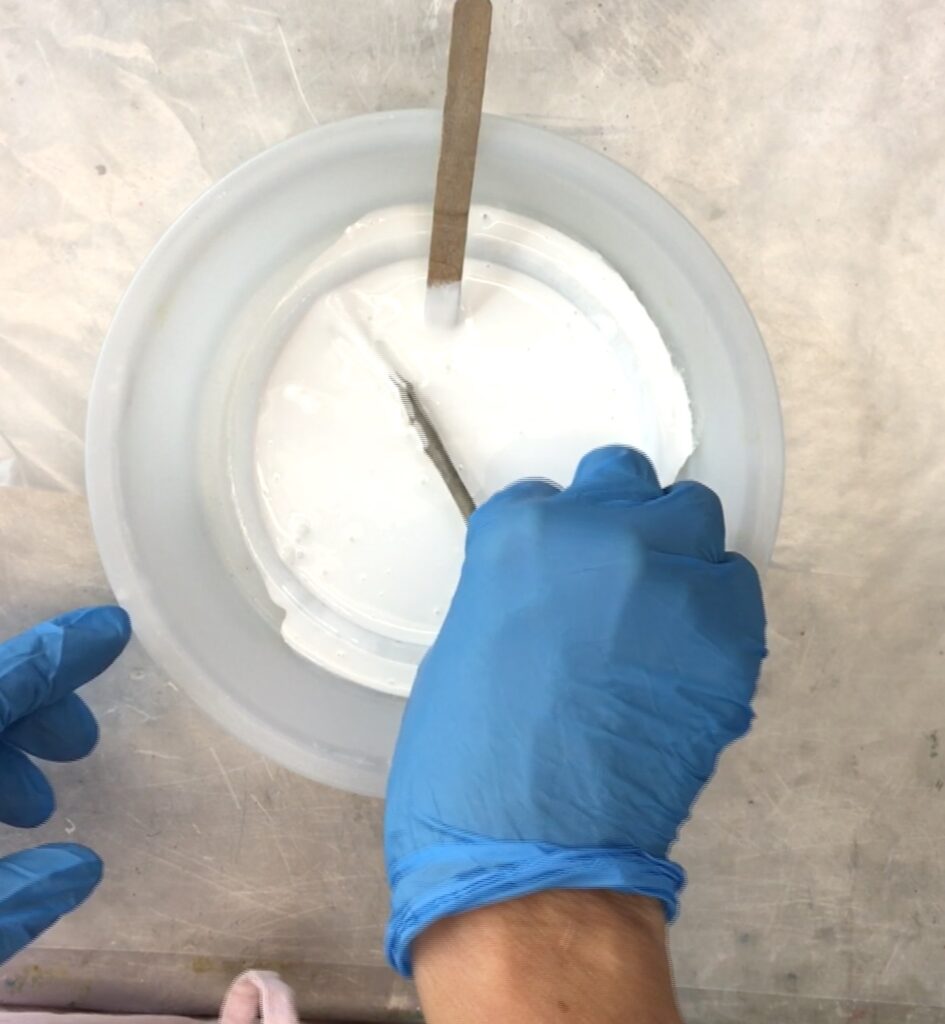
Step 3: Start dipping!
I put the white acrylic paint in a bowl and added some water. If you have a wider bowl or container, it works better than a round one.
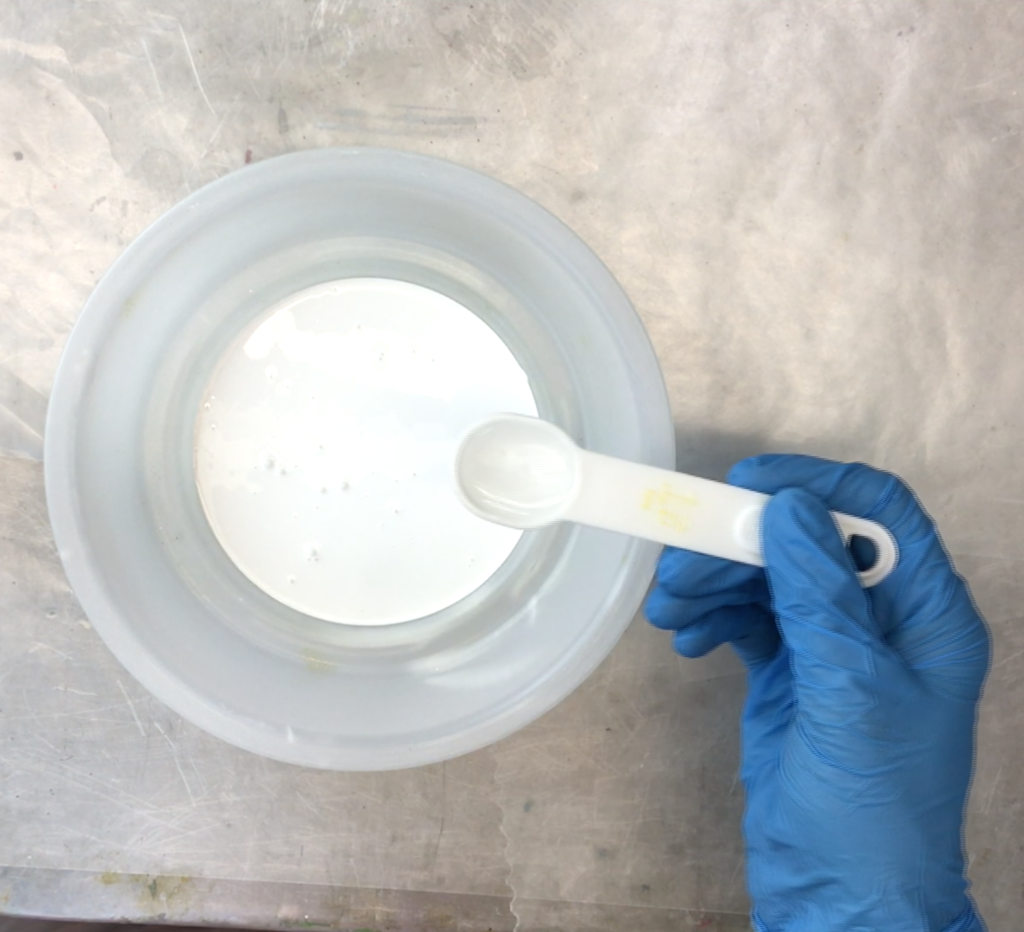
I dipped the twigs in the white paint.
And laid them out on the wax paper.
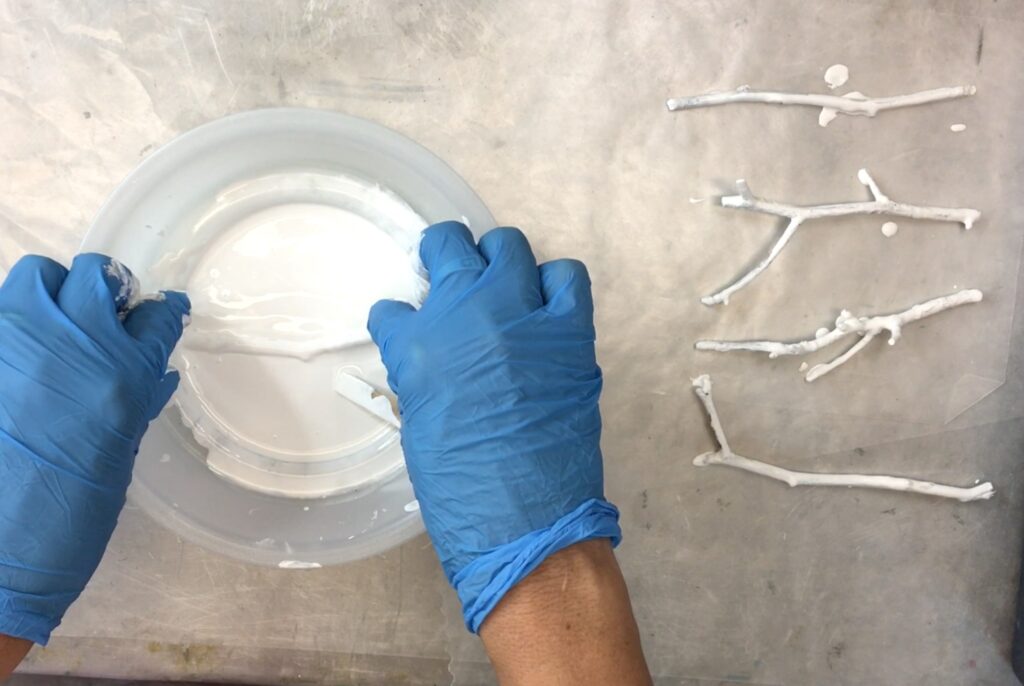
Step 4: Pick them off the wax paper
I let mine dry overnight. I picked them off the wax paper. You should be able to pull them right off.
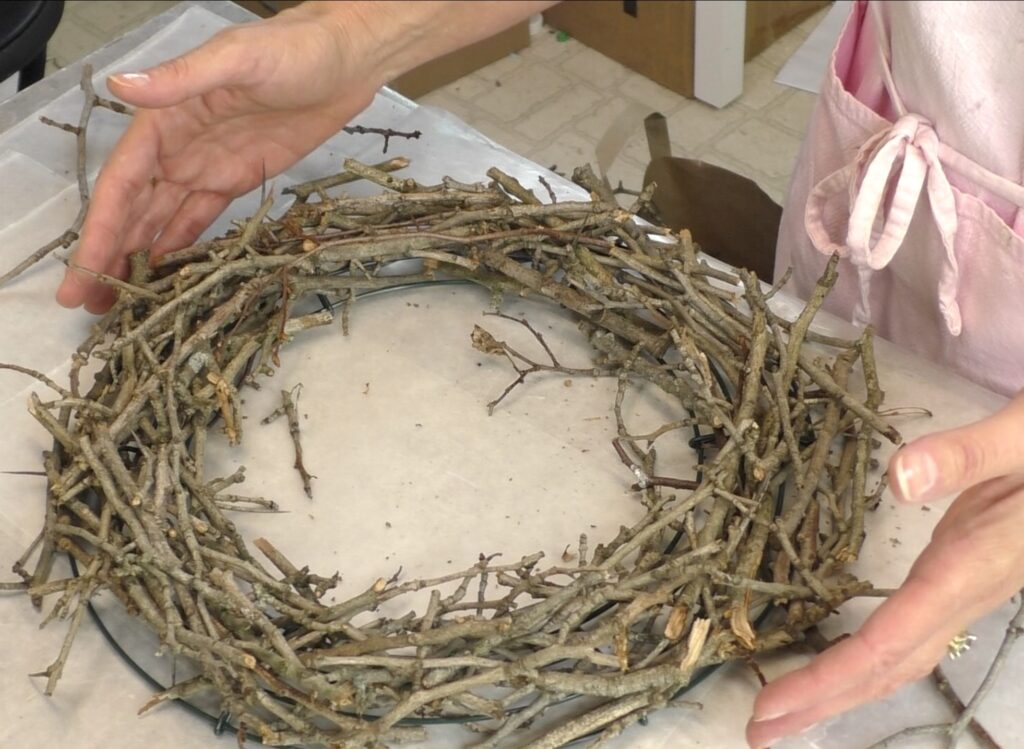
Step 5: This is where the how to make a Christmas twig wreath magic starts to happen!
I started gluing the twigs onto the wreath form using my clear drying glue.

One at a time, I made my way around.
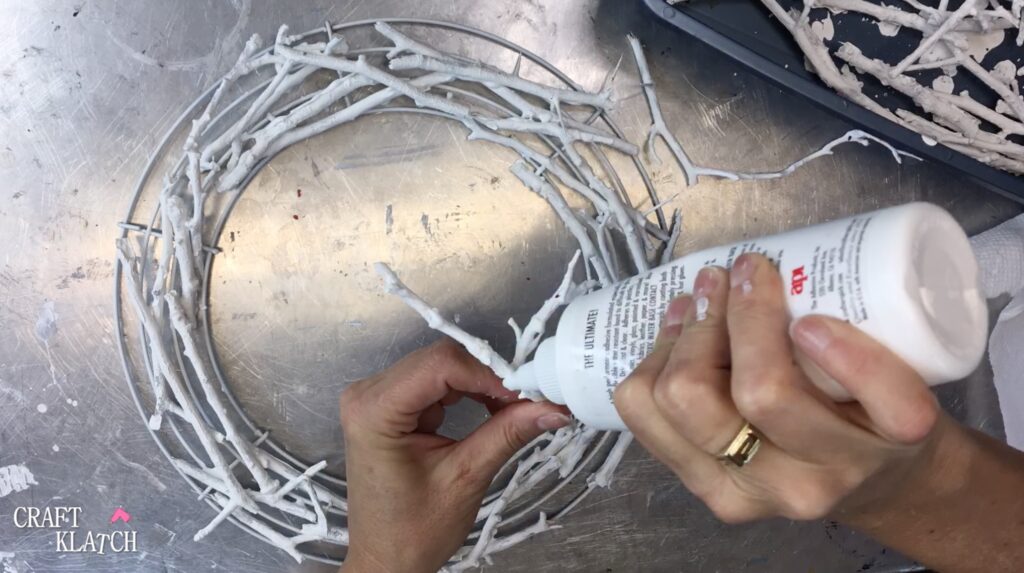
It took multiple layers, but goes quicker than you might think!

I let the wreath dry overnight.
I’m impatient, so waiting to decorate was harder than you might think.
Step 6: Decorate your wreath!
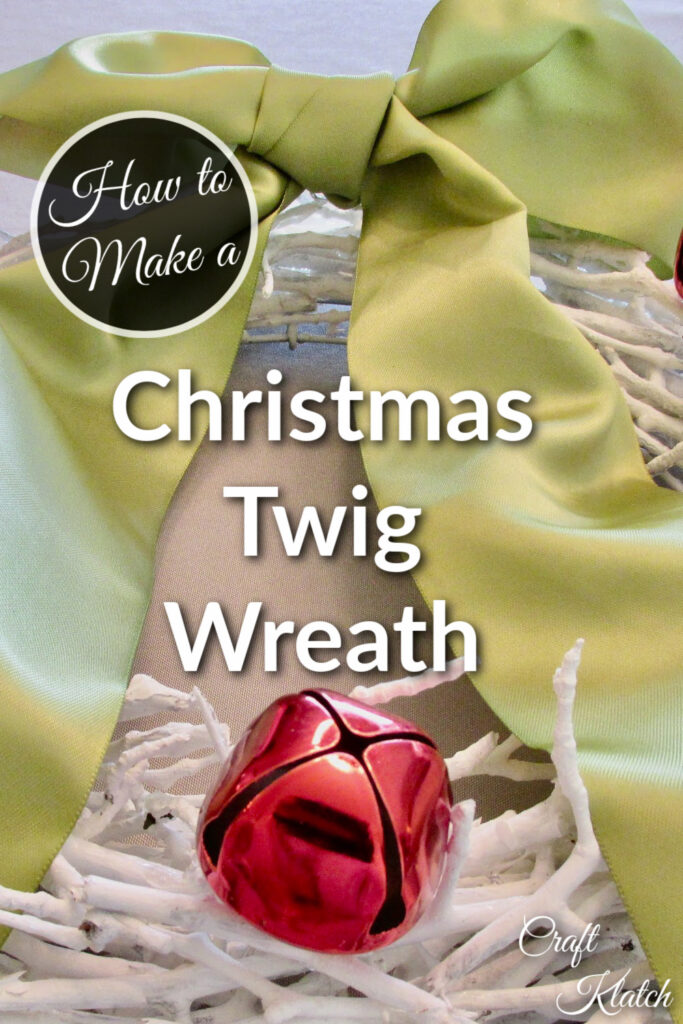
The most obvious way to start to decorate the wreath is with a bow.
Any bow will do! Sheer, satin, or how about a burlap bow? I have a great source for How To Make A Burlap Bow HERE!
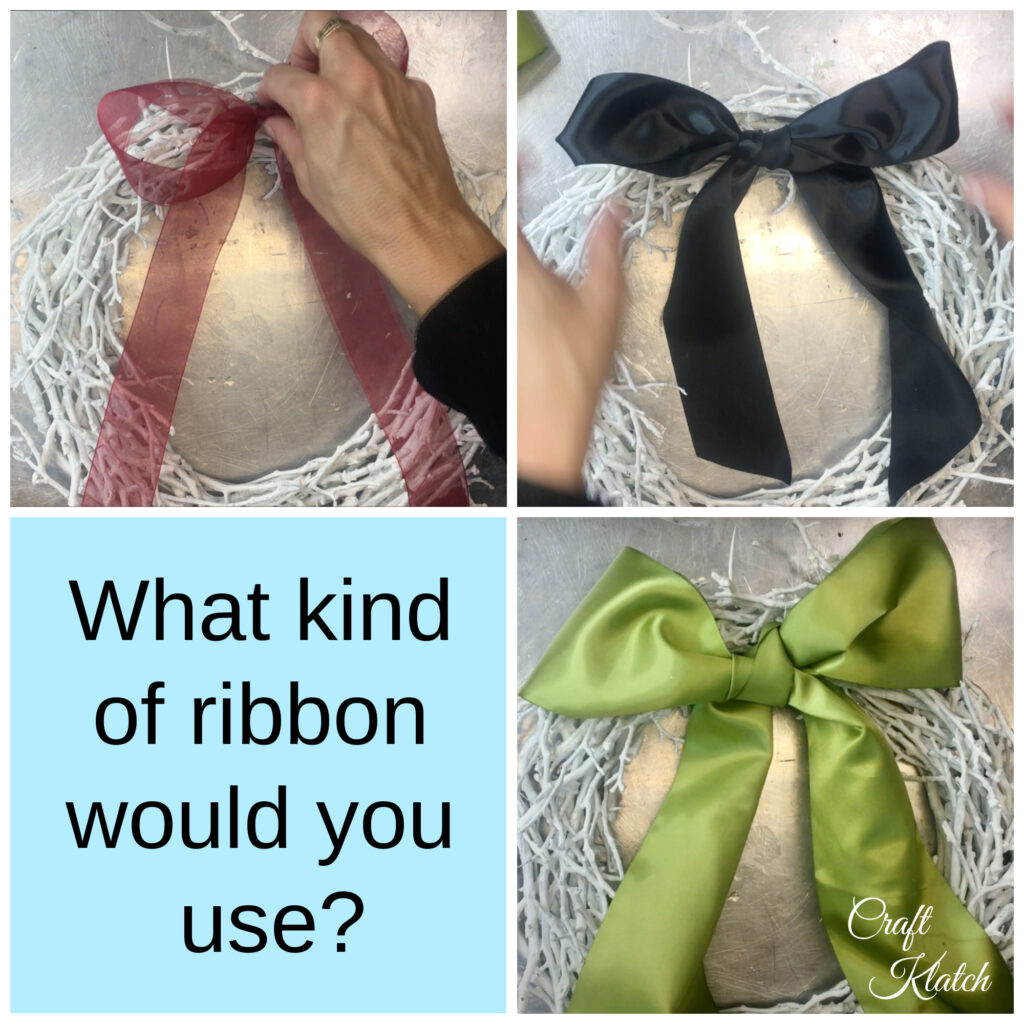
Don’t stop at the bow!
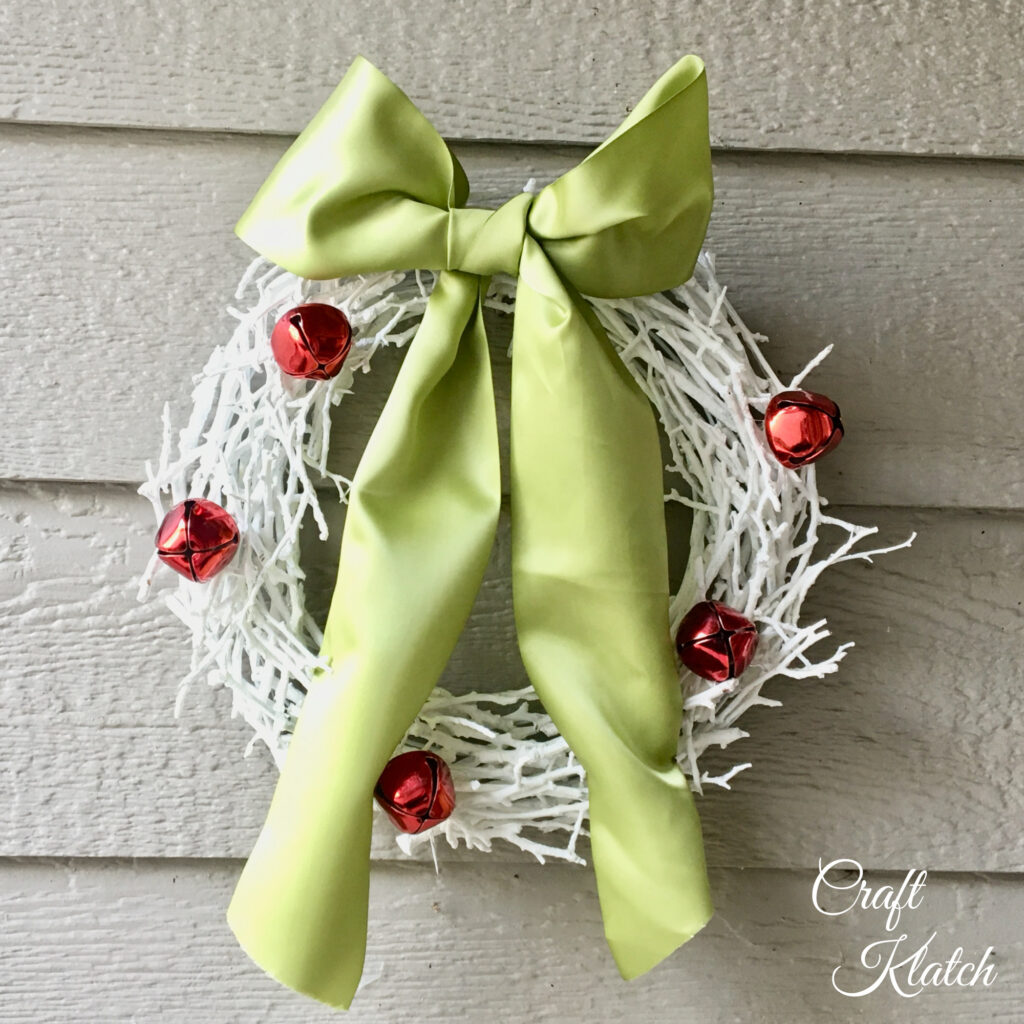
This is a Christmas wreath project…BUT…it is perfect for other holidays too!
TIP: Use a thin wire to attach the different decorations and then you can easily change them out!
Here is my final twig Christmas wreath, with some fun red jingle bells.
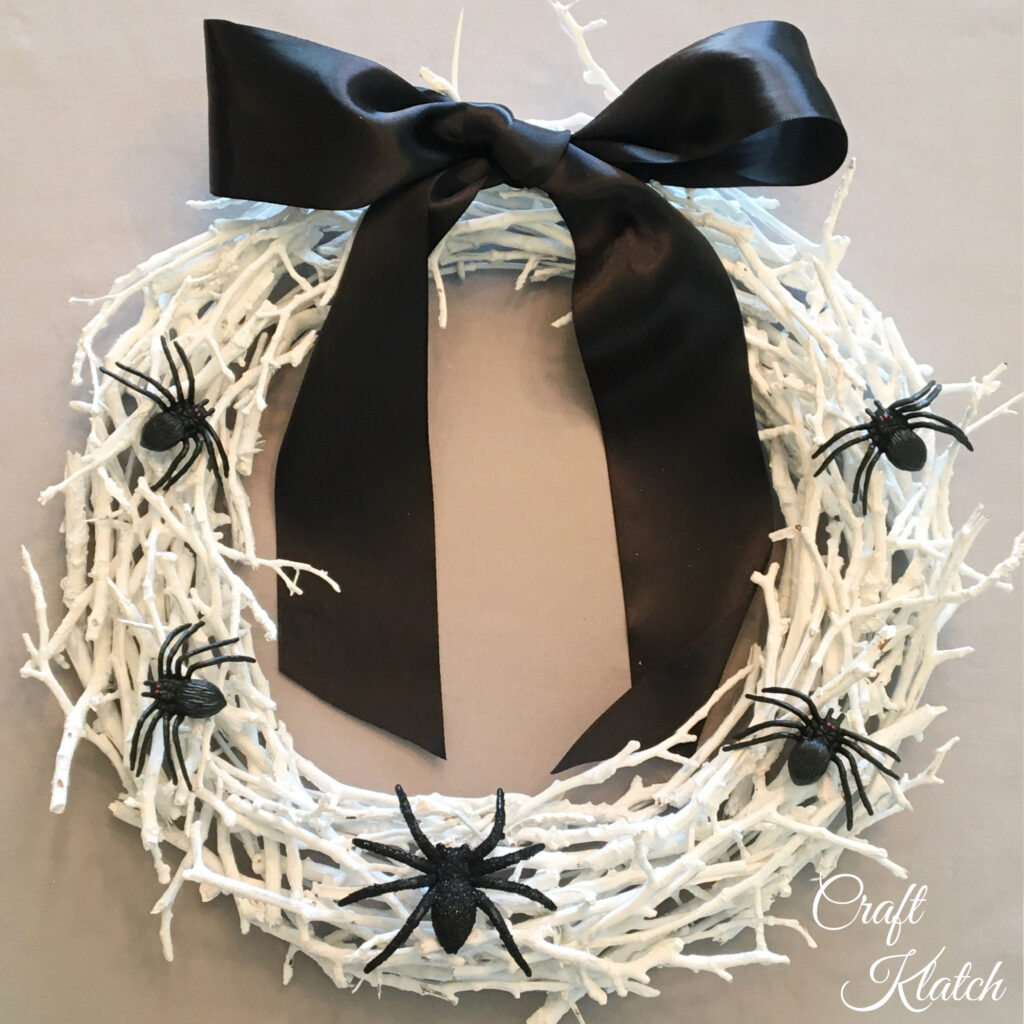
With the quick change of the bow and the addition of some spiders, Viola!
You have a Halloween wreath!
Sticking with the black bow and changing the spiders to shamrocks, you have a St. Patricks Day wreath!
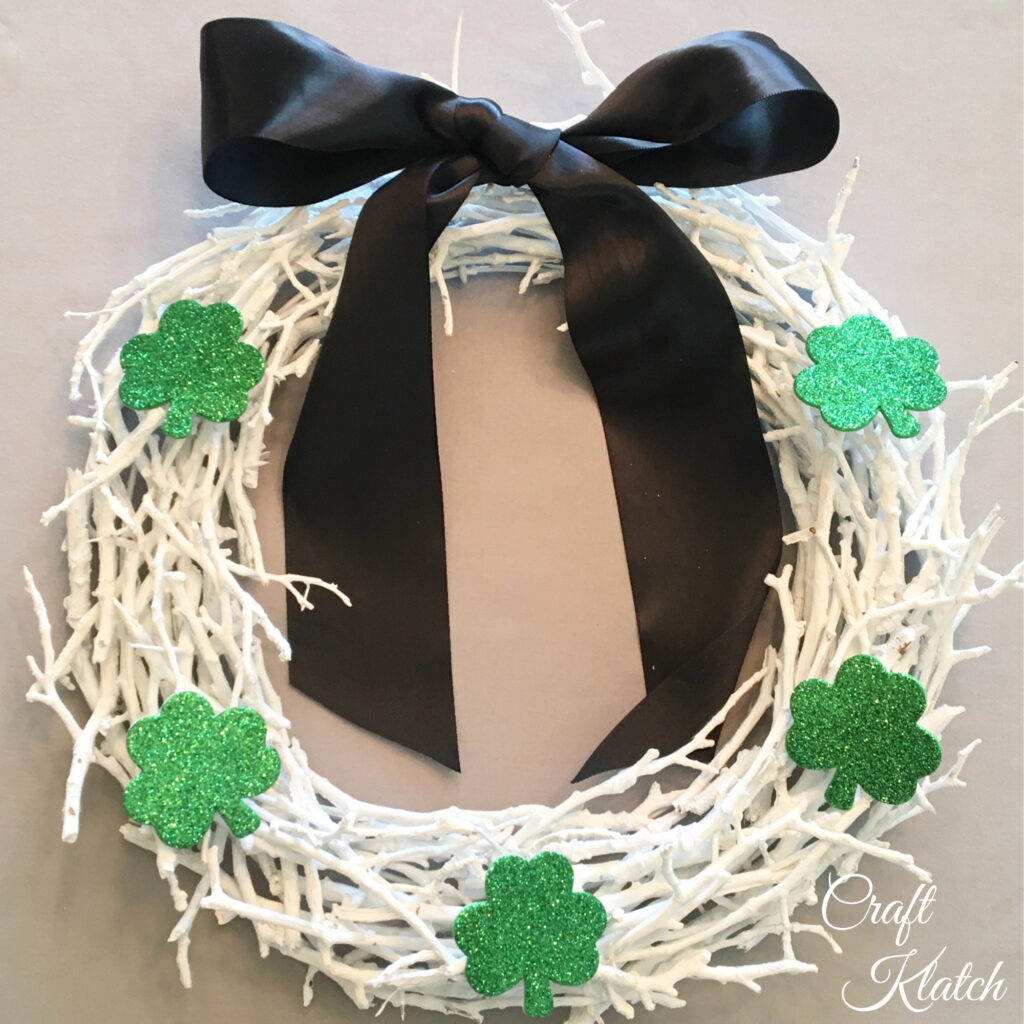
Those were just a few with items I had on hand, to show you how easy it is to change up the wreath!
But seriously, think of leaving the black ribbon and adding red hearts for Valentines Day.
Put a pastel polka dot ribbon and little eggs for Easter.
Spring can also be pastel ribbon and butterflies or flowers.
You already have the white base for an amazing red, white and blue 4th of July wreath!
Let’s talk through some of the basics!
What glue should I use?
Easy! Lots of glues will work, as long as they are clear drying. That is a must!
If your wreath is indoor only, you can even use hot glue, or any craft glue, school glue, etc.
If your wreath is indoor and/or outdoor (and I would recommend outdoor only in a sheltered area, like a covered porch) you need to give a little more thought to your glue. Hot glue will melt in the summer heat and you will come home to a pile of twigs on your porch.
Use a glue that can handle the outdoors. I like the Ultimate glue, but Wellbond is also a good quality glue!

What if you can’t find any good twigs?
My first thought is to tell you to try a little harder, but you might live out in the desert and I’d hate for you to get heatstroke because I didn’t believe you. Luckily, they sell twigs online and you won’t even have to bend down to pick up a single twig…unless you drop one.
Back to THE BOOK!
Let’s revisit the book that got us started on this twig wreath journey DIY Room Makeover Ideas for Girls.
I cannot wait to give it to my granddaughters, who are already crafty as can be!
If you need a gift for the girl in your life, or an excuse to bond with your kids or grandkids, get this book! Before you know it, you might find yourself embarking on a room makeover!
My porch looks better already!
Wreath Alternatives
If you aren’t up for making the wreath, you can use these wreath alternatives as a base and decorate from there!
Thanks for stopping by!
Remember: Life’s too short not to shimmer, so grab your glue gun and your glitter!™ Stay safe!
Mona
This is a fantastic project. You’ve given me some ideas! Thanks for sharing.
This is super cute and great step-by-step! Thank you for sharing such an easy to follow how-to!
Thank you, Amanda!
Love this! Great tutorial. I love all things that you can change for the seasons. Thanks so much for sharing. Pinned!
Thank you, Denise!
The fangs on that cat though😂
I know! He looks like a little saber-toothed tiger but is afraid of squirrels.