I’ll show you how to make a shadowbox with lights using a WeCreat laser. Perfect for Valentine’s Day, weddings, or anniversary gifts.
This wood cutting laser project is one of those builds that makes me stop and smile every time I turn it on, because…
I nailed it!
Some projects turn out okay, and some surpass your expectations, and this one definitely did.
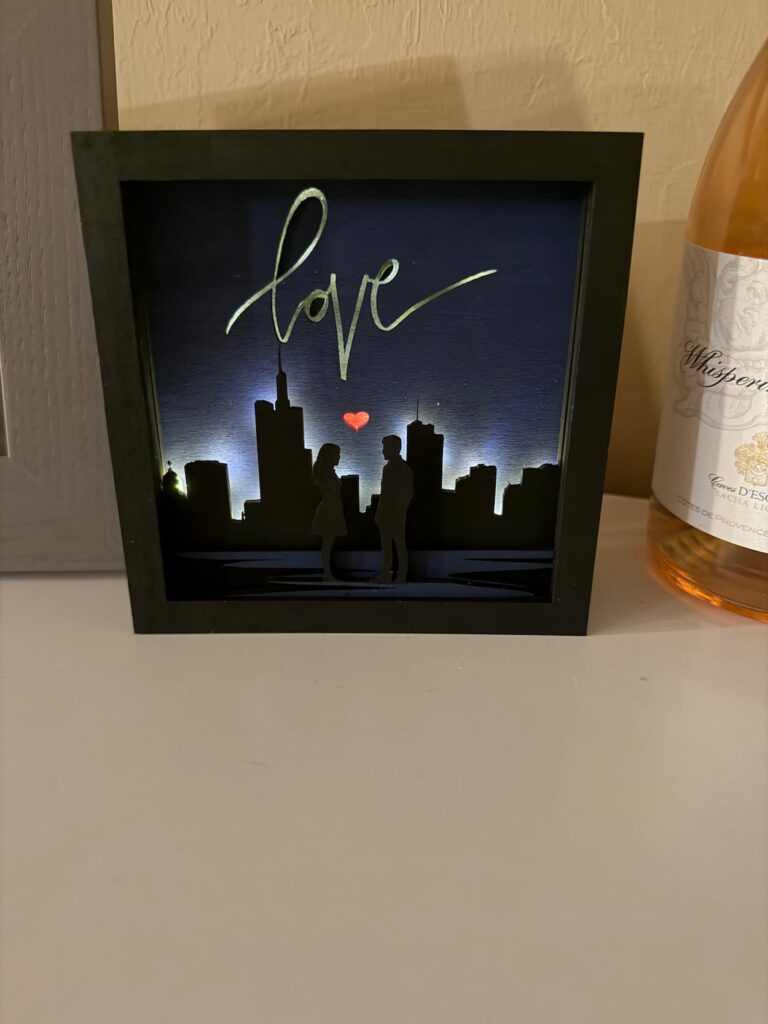
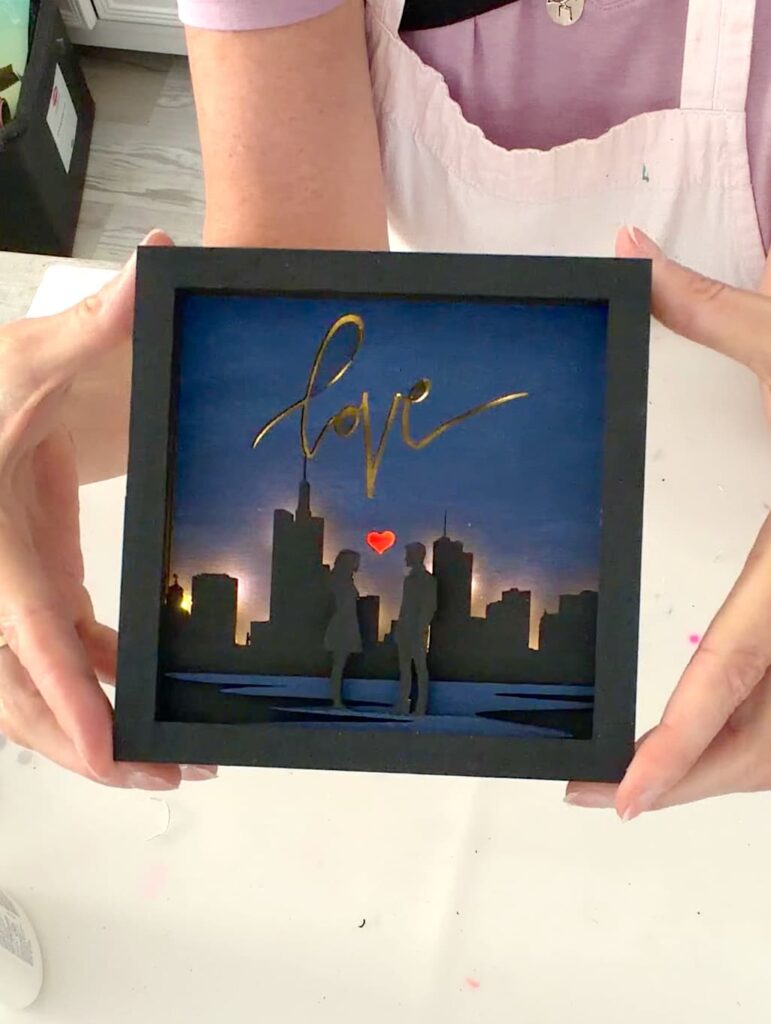
Between the depth, the lighting, and the romantic silhouette, it has just the right amount of drama.
I cut everything out of 1/8″ basswood, so it’s lightweight, and I added fairy lights to make the design glow.
I made the shadowbox, but you could easily buy a premade shadowbox and size/design your layers to fit right in.
Supplies I Used
*Disclosure: This blog uses affiliate links from Amazon and other retailers. I earn a small amount from qualifying purchases at no additional cost to you.
- 1/8″ basswood sheets
- WeCreat Vision Laser
- Fairy lights
- Acrylic paint (black, blue, and red)
- Paint brushes
- How glue
- Clamps (optional but helpful)
- Shadowbox (if you don’t want to build a frame)
How to Make a Shadowbox Video Tutorial Quickie
Be sure to follow me on YouTube!
Directions
Step 1: How to Make a Shadowbox Design Images
You can draw your layers yourself, or do what I did and use Canva to create the design. I used Canva images and arranged them into individual layers that would stack cleanly.

To make sure they stacked correctly, I gave every layer the same outer frame. Each layer is cut as a single piece, so everything lines up perfectly during assembly.
Step 2: Cut All Layers Using a Wood Cutting Laser
I put all of the images for my layers into the WeCreat Make It app and sized them all to be 5″ x 5″. Remember: you can make them any size you want! You want to keep that in mind when you are planning how to make a shadowbox for your project.
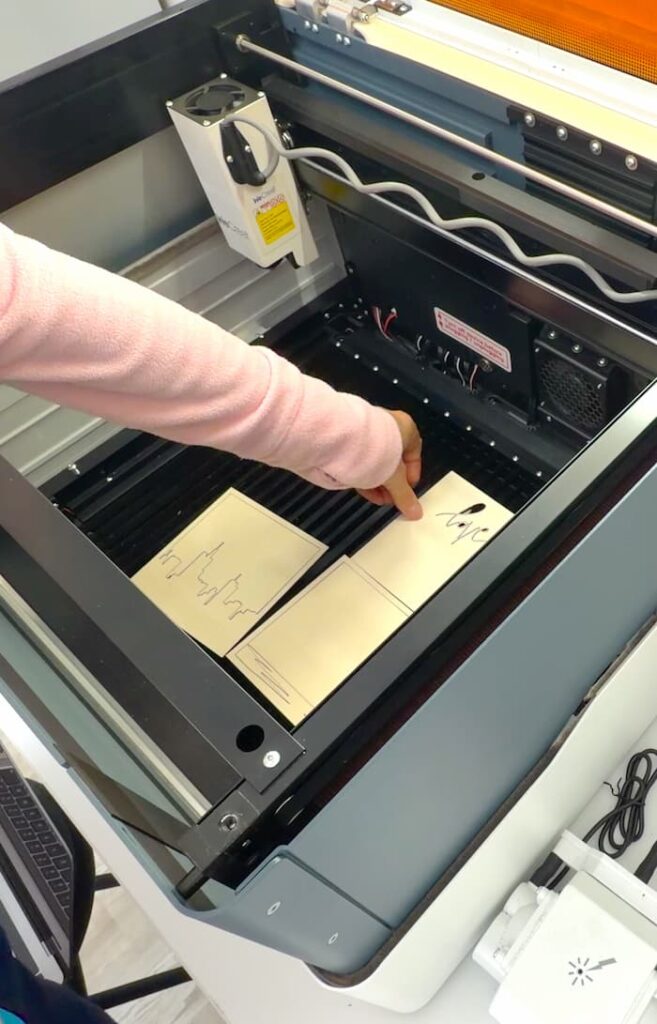
Cut all eight layers from 1/8″ basswood using your wood cutting laser. I used my WeCreat laser engraver, which gives clean cuts and handles the details beautifully.
I’m always amazed at how easy it is to use.
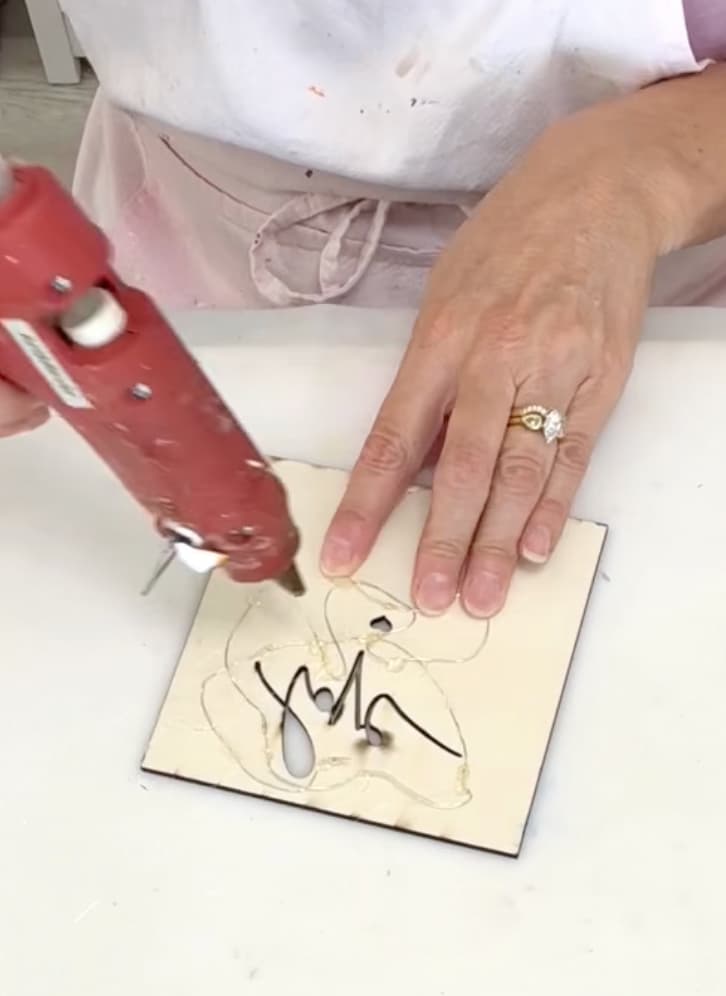
Be gentle when removing the pieces. Some of the cutouts are delicate. I broke off the antennas on my skyline twice before I figured it out.
Step 3: Paint the Layers
An important part of how to make a shadowbox is that you are going to want to paint each of the layers before assembling, because it would be impossible to do it after.
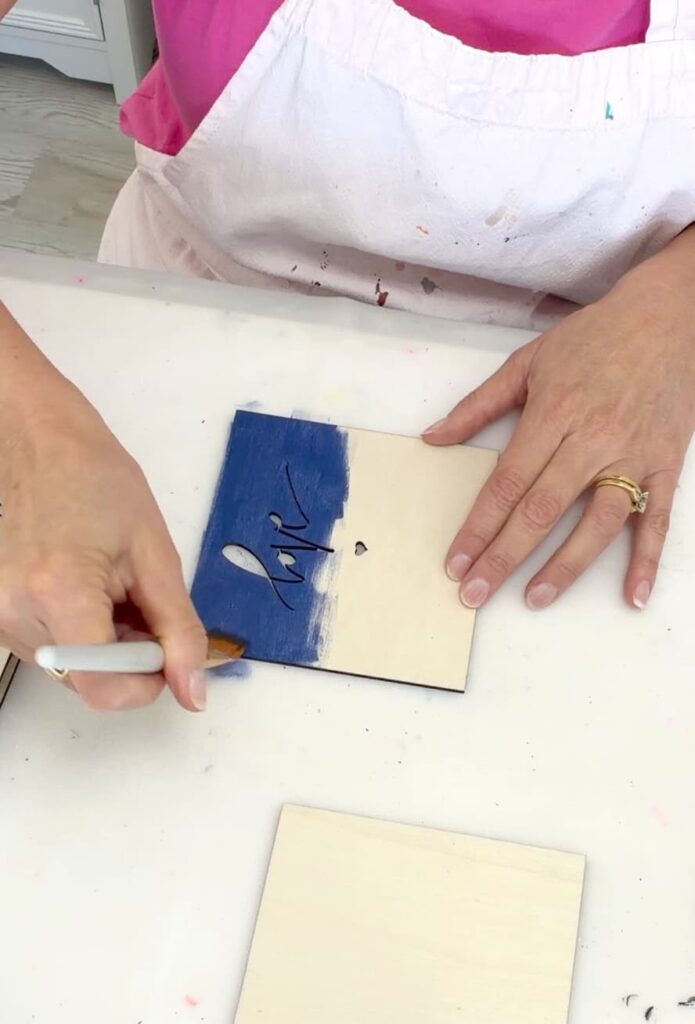
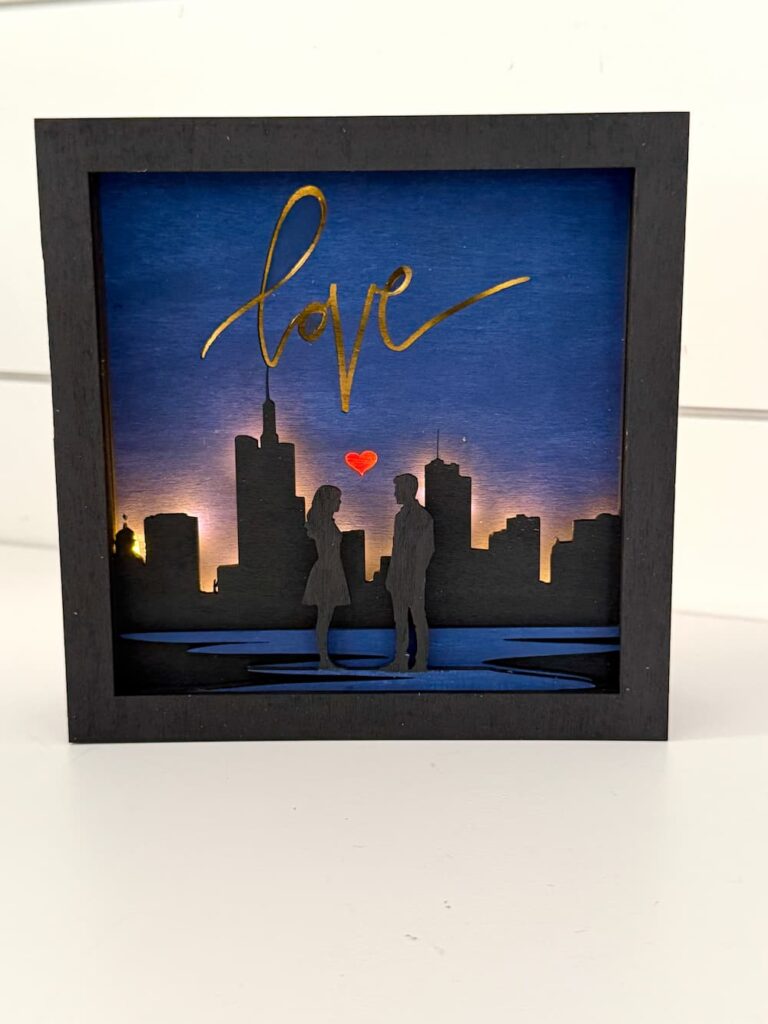
I’m going to list each layer (front to back) with the paint colors.
- Layer 1: Silhouette of a couple with water at their feet
- Couple and outer frame: painted black
- Water: painted blue
- Layer 2: Spacer layer
- Black
- Layer 3: Water Layer
- Blue
- Layer 4: City skyline
- Black
- Lights will be added behind this layer
- Layer 5: Spacer layer
- Black
- Layer 6: Sky layer with heart and the word “love” cut out
- Blue
- Lights will be added behind this layer
- Layer 7: Spacer layer
- Black
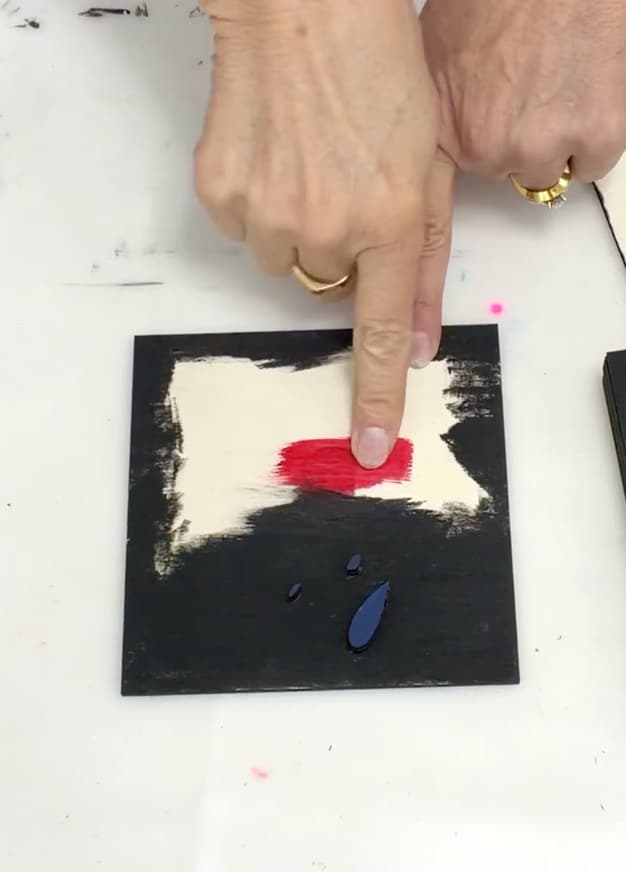
- Layer 8: Back Plate
- Black where the word love will glow
- Red where the heart will glow
Important Back Plate Detail
Save the small cutout pieces from the word love:
- Inner loop of the L
- Inside of the O
- Inside of the E
Paint these pieces blue and glue them onto the back plate in their correct positions so they align perfectly behind the cutouts. I cut out the sky layer twice so I could elevate the inner pieces and they would be correctly placed.
Let all the paint dry completely before moving on.
Step 4: How to Make a Shadowbox By Adding Fairy Lights
Lighting is what really elevates this laser engraving wood project and let’s be honest…elevates almost all projects!
I carefully hot glued the fairy lights behind the skyline layer and the sky layer, making sure no wires or bulbs were visible from the front. I ended up using a total of two fairy light strings.
It can help to turn them on while you are gluing, so you can see how well spread out they need to be.
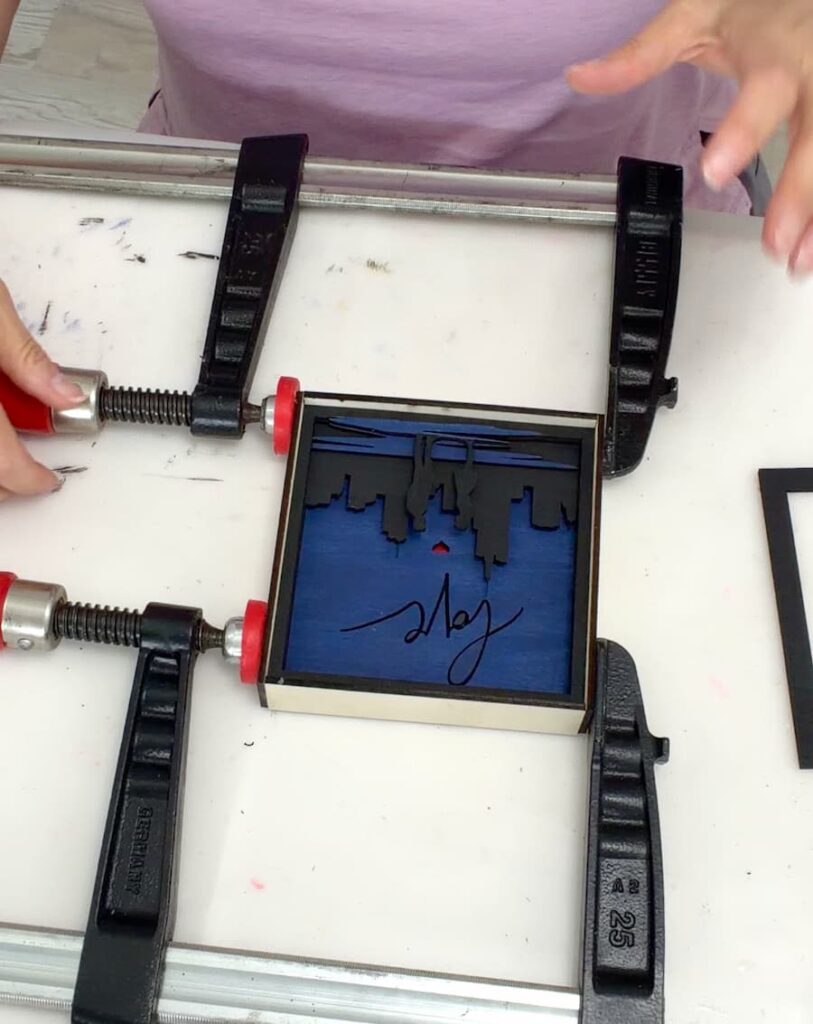
Step 5: Build the Wood Frame Shadowbox
When you are thinking about how to make a shadowbox, don’t overthink it.
I built a very simple box just slightly larger than the 5″ x 5″ layers. It was snug but good.
Remember, you can use a premade shadowbox, but be sure to make that decision before you design and cut.
I glued my box together, but finishing nails would have made it more sturdy. Clamps also come in handy when trying to make the box square and keep it square while the glue dries.
Two hands just aren’t enough!
Step 6: Assemble the Layers
Now for the exciting part…watching it all come together!
I loaded the layers into the frame/shadowbox from the back and loaded the layers in, starting with layer one.
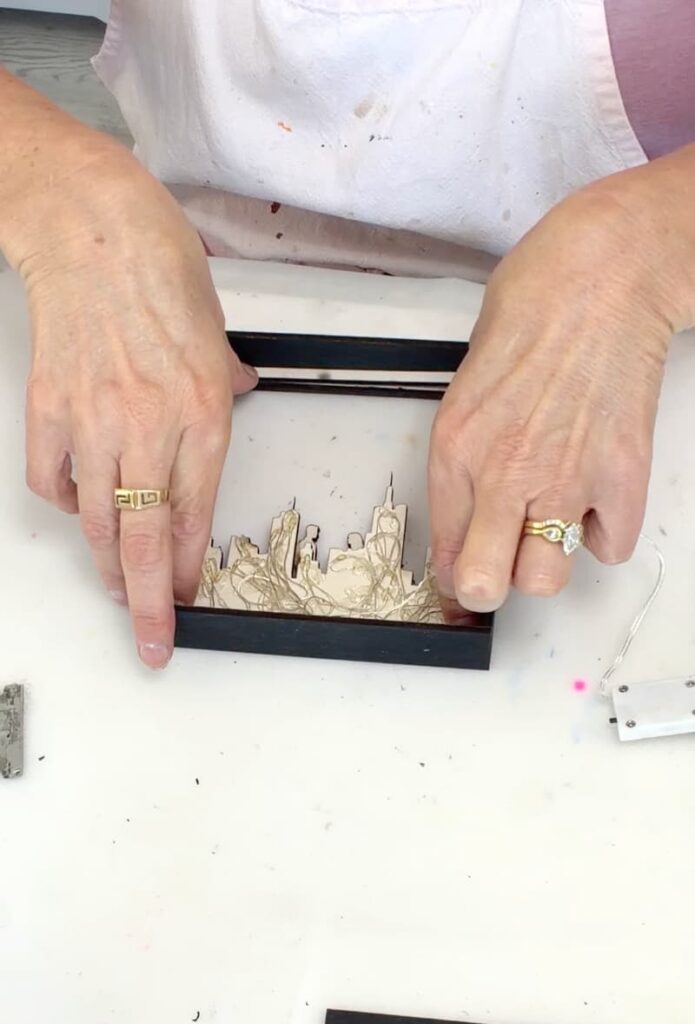
Make sure you cut channels into the necessary layers, such as in the spacers, so the wires can come out to the back.
Step 7: Secure the Lights and the Back
Glue the switches to the back of the piece, so it can sit flush on a shelf or hang flat on the wall.
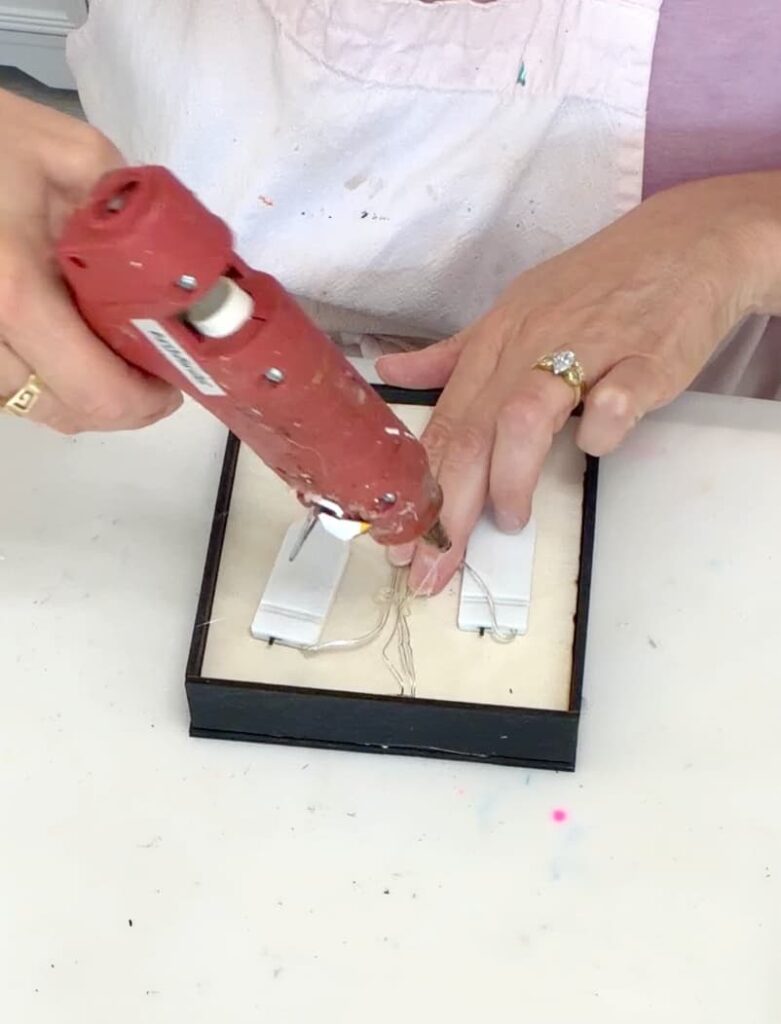
Depending on how tight the fit is, you may need to add a dab of glue to the back plate to hold it in place.
Step 8: Light It Up and Enjoy!
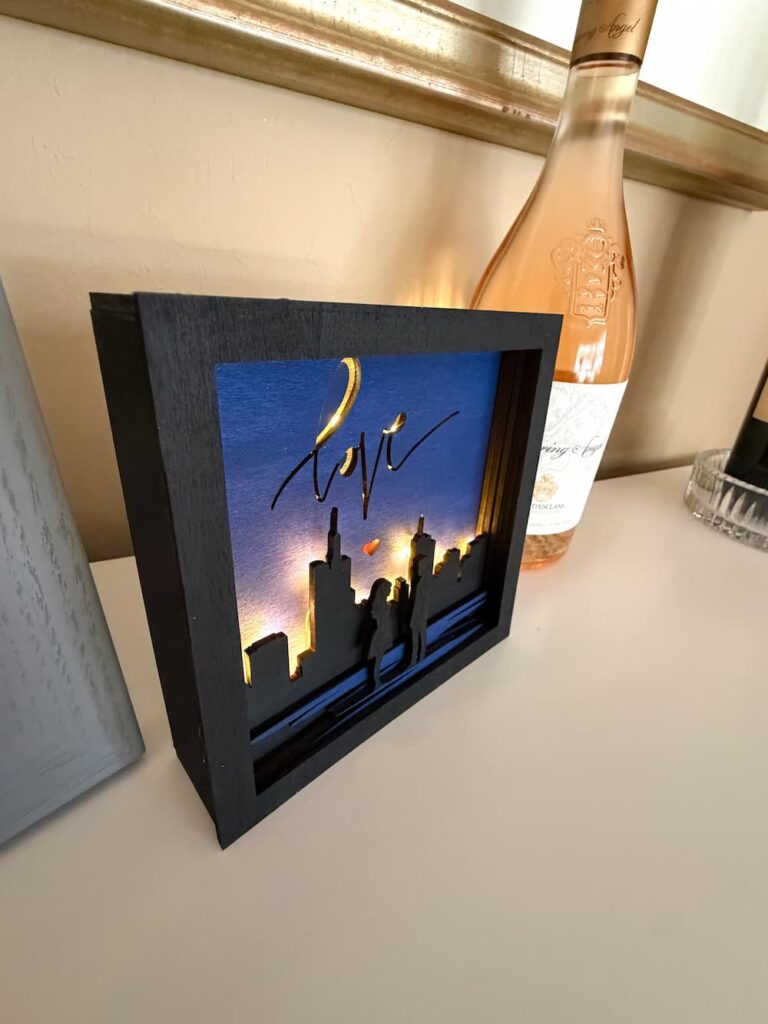
Now that you know how to make a shadowbox, turn on the lights, dim the room, and admire your work! The layered depth, glowing skyline, and illuminated heart give it a pop of color that really feels special.
I love using the Wecreat laser is a great wood cutting laser for projects like this, because it is so easy to use! It has a built-in camera and is about as no-brainer as you can get!
It makes a beautiful Valentine’s Day gift, wedding gift, or anniversary gift, especially when you personalize the skyline to the city where the couple met.
That’s it! I can’t tell you how thrilled I am about this project and would love to hear what you think about it.
Other Fun Laser Projects!
There are so many ways to use a laser aside from figuring out how to make a shadowbox. Here are a few projects I think you will love!
- Easy Laser and Resin Snowman Decor
- DIY Engraved Candy Jar
- Laser Engraving on Glass DIY
- How to Craft Signs
Thanks for stopping by!
Remember: Life’s too short not to shimmer, so grab your glue gun and your glitter!™
Mona