Learn metal laser engraving a photo on stainless steel. Step-by-step tutorial with Lumos settings for beautiful laser engraved pictures.
We all have so many great photos, but sometimes you have one that you would like to carry with you.
I’m going to show you how you can do that!
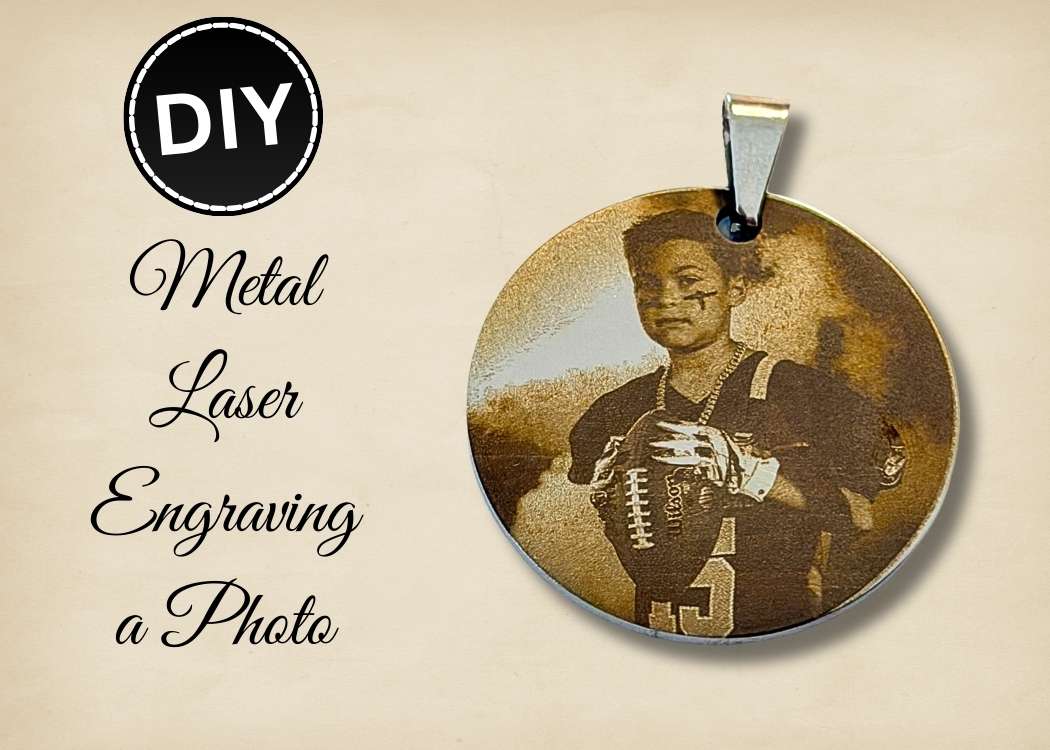
I’m sharing how I did a metal laser engraving on a stainless steel charm blank using a photo.
I know laser engraving can seem overwhelming, but I’ll walk you through the steps.
It’s so easy!
There is just something so special about laser engraved pictures on metal. They feel meaningful, permanent, and completely custom.
Whether you are making a keepsake, a memorial charm, a pet tag, or a gift, photo laser engraving takes your project to the next level.
Let’s get started!
What You Need for Metal Laser Engraving
*Disclosure: This blog uses affiliate links from Amazon and other retailers. I earn a small amount from qualifying purchases at no additional cost to you.
- Stainless steel charm blank
- Lumos laser machine
- Photo for engraving
- Rubbing alcohol
- Lint-free cloth
- Scrap piece of wood (optional)
- Aluminum foil (optional)
Watch the Quick Video Tutorial
To see the metal laser engraving process, be sure to watch this quick video.
Be sure to follow me on YouTube!
Directions on Metal Laser Engraving a Photo
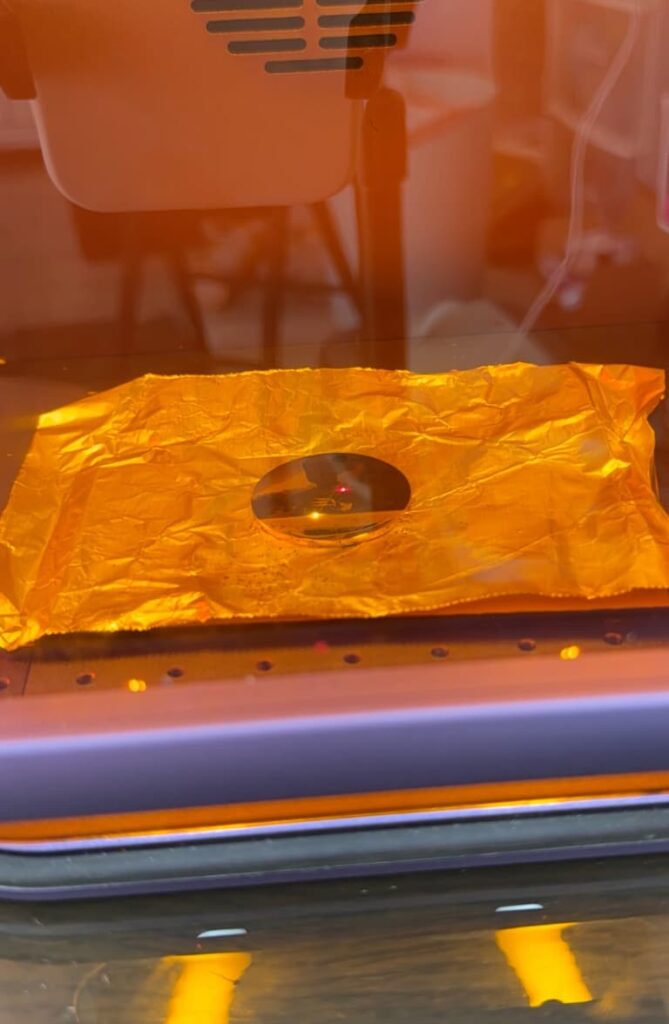
Step 1: Prep and Protect Your Laser Bed
Because I wanted my engraving to go right to the edge of the metal, I actually sized my image slightly larger than the metal charm blank.
Anytime you extend beyond the edge during metal laser engraving, or any laser engraving, you need to protect your machine.
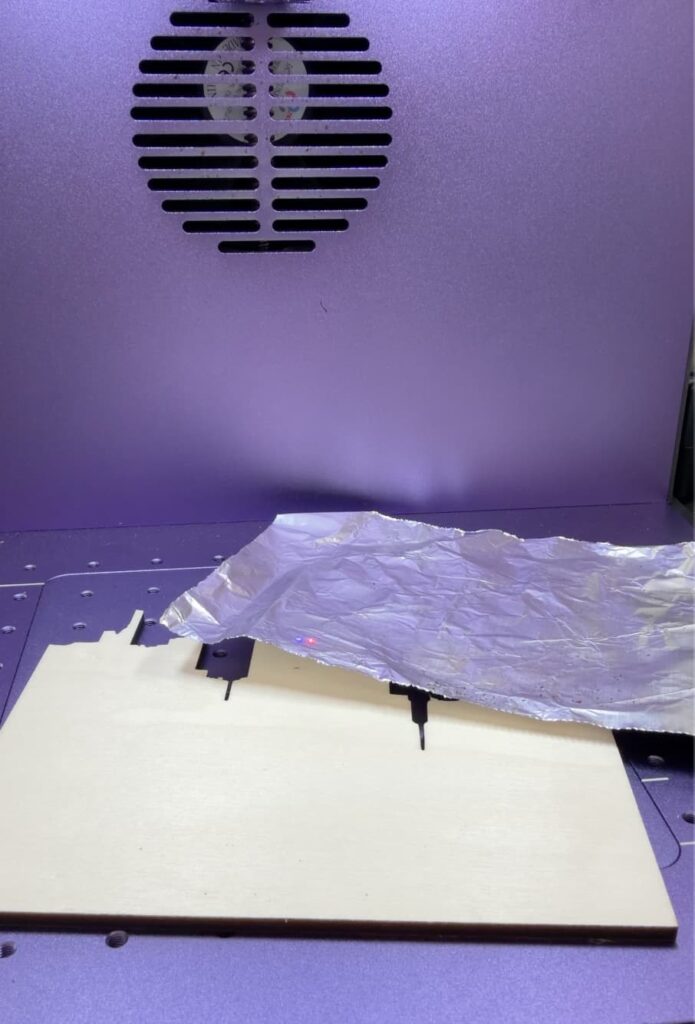
To keep my laser bed safe, I placed a scrap piece of wood, covered it with aluminum foil, and then placed the stainless steel charm on top.
This prevents the laser from accidentally etching the base of your engraver.
Don’t skip this step, especially if you plan on going edge to edge, like I did.
Step 2: Clean Your Metal Charm Blank
Before starting any metal laser engraving, clean your surface.
Even if it looks spotless, oils from your fingers can affect your engraving quality.
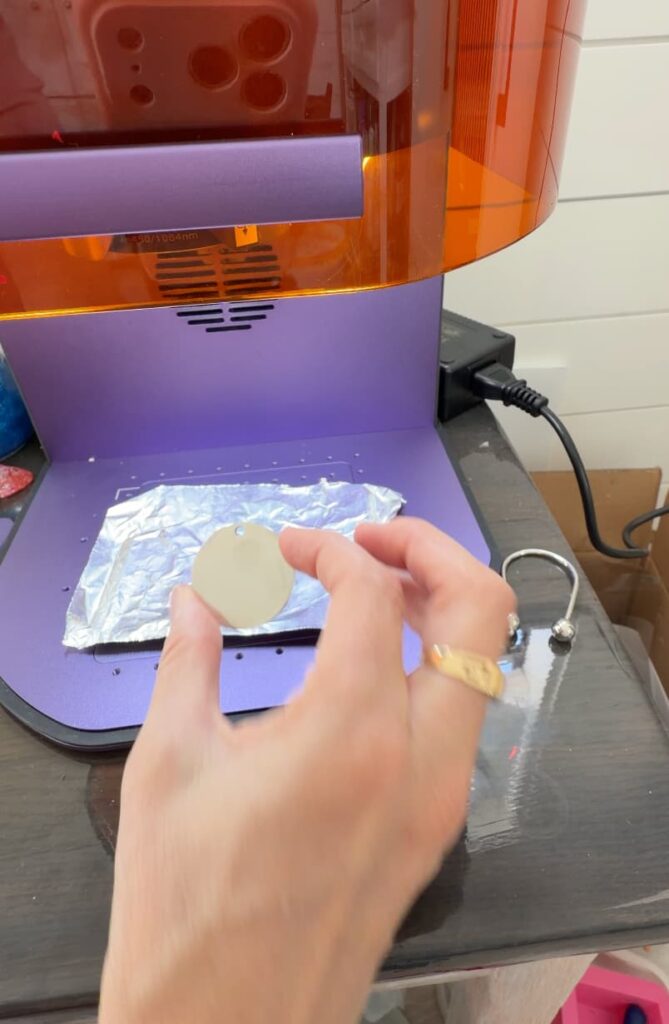
I wiped mine down with rubbing alcohol and let it dry completely before placing it in the laser.
It only takes a minute, and it makes a difference, especially with detailed laser engraving photo projects.
Step 3: Adjust Your Image
When you decide which photo you want to use, you can upload it to the WeCreat Make It app. Click on the image processing button, where you can fine tune the brightness, sharpness, etc.
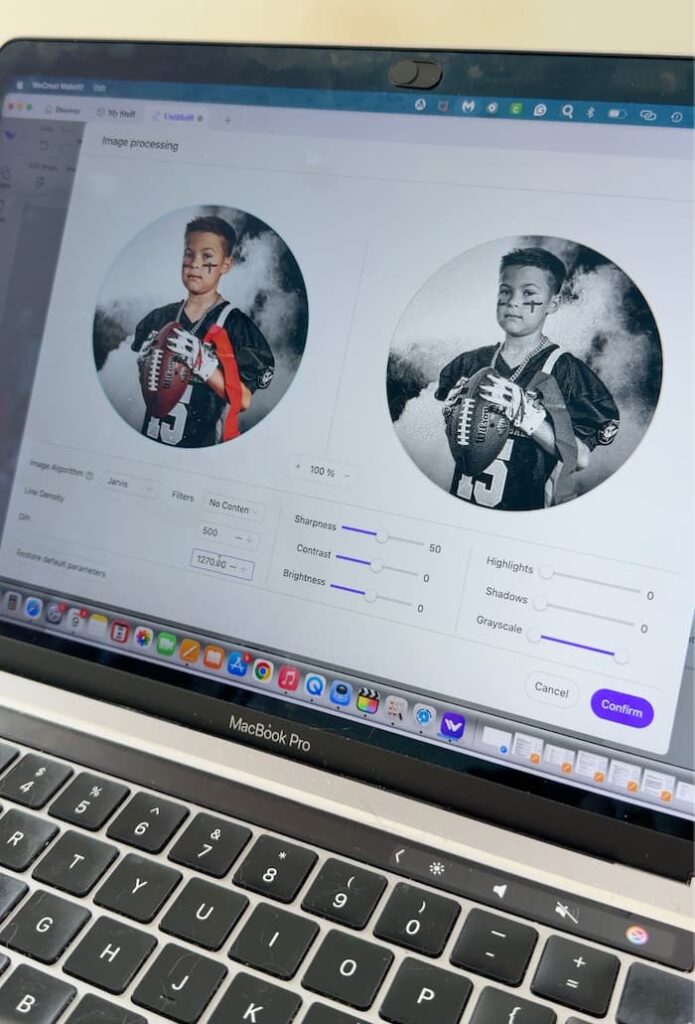
I adjusted the Line Density (LD) to 500 and the Dots Per Inch (DPI) to 1270.
Tweaking the LD and DPI is key to good photo engraving results. This is where you control the details and shading.
Step 4: Set Your Laser Settings
Here are my exact Lumos settings for this metal laser engraving project:
Make sure you select Red Light
- Mode: Bitmap Engraving
- Power: 55%
- Passes: 1
Time: 30:31
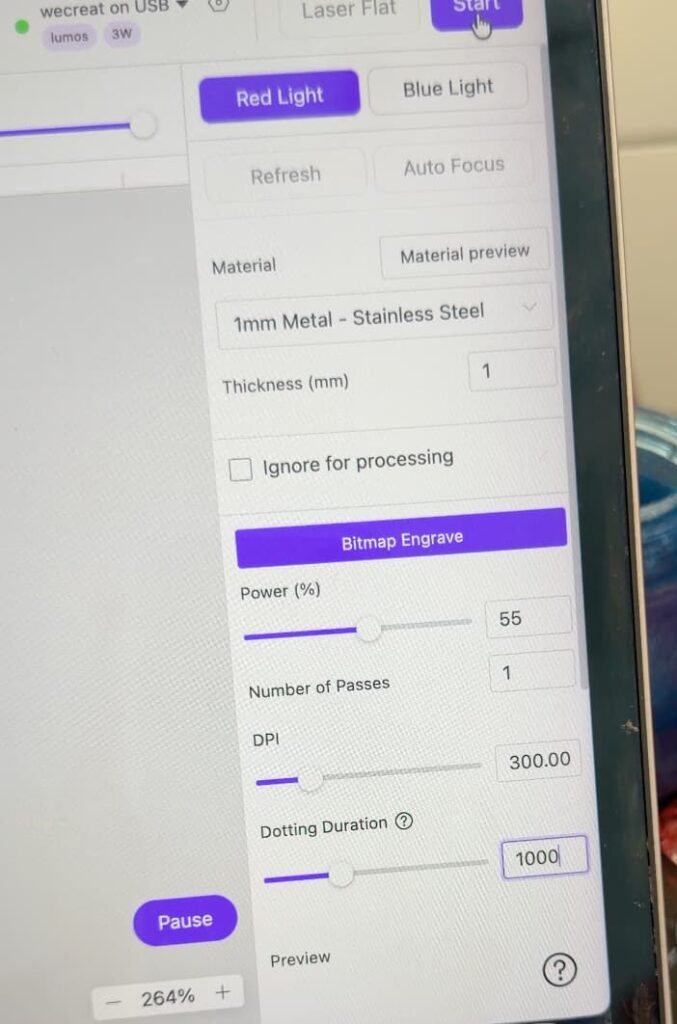
Bitmap engraving works beautifully for laser engraving a photo because it captures the tonal variations needed for the image.
If you have scrap material, definitely do a test first.
Step 5: Frame, Engrave, and Reveal
Once everything was protected and aligned, I turned on the red light and carefully framed the design.
Because I extended the image slightly beyond the charm, I made sure placement was exact before starting.
Then, I hit start and let the laser do its thing.
Watching photo laser engraving appear on the metal is just magical. It’s slow but super satisfying.
After engraving, I removed the charm and wiped it down with rubbing alcohol. Then, I buffed it with a soft cloth and…
I…LOVE…IT!
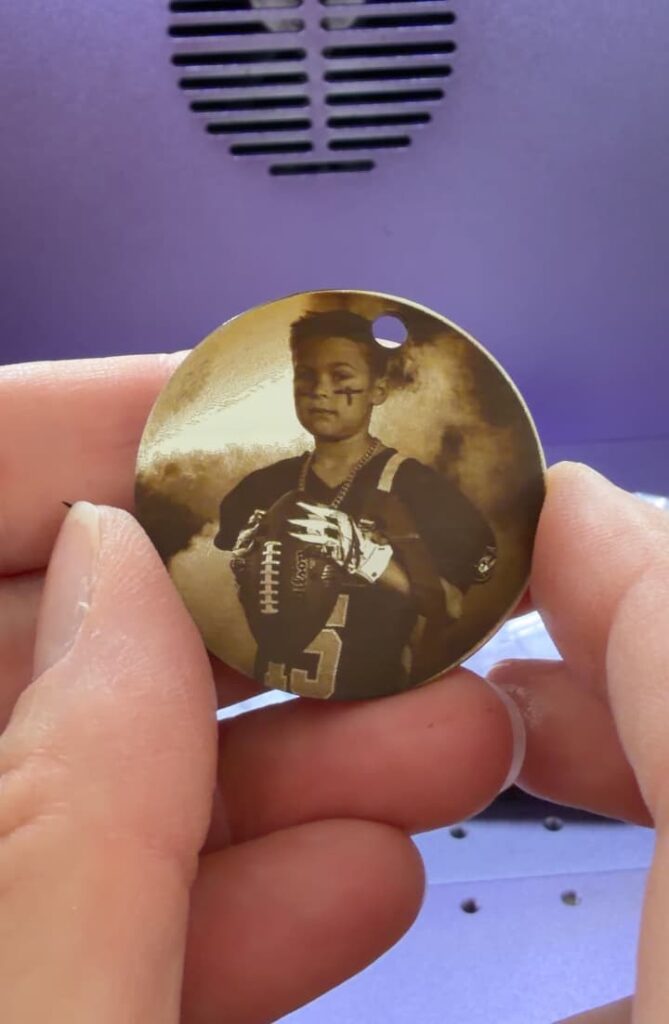
That’s it! Now you have a beautiful piece created with metal laser engraving that will last for years.
Laser Engraving Ideas
Now that you see how cool the photo engraving is and how easy it is, you might need to think about fun ways to work that into your projects. In the meantime, here are some other projects you might enjoy:
- How to Make a Love Shadowbox
- Engraved Candy Jar
- Wedding Guest Book Alternative
- Front Porch Decor DIY
There are so many laser engraving ideas once you start working with your machine. The ideas will start flowing!
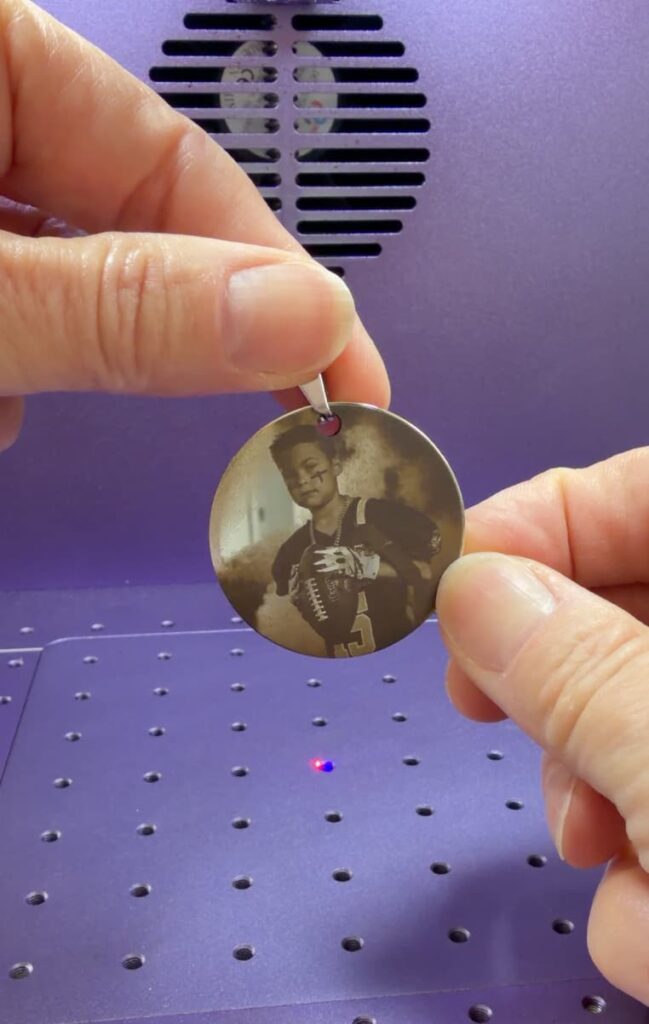
If you’ve been wanting to try metal laser engraving, engraving a photo is a great project to try!
Going edge-to-edge gives it well well-finished look.
Have you tried laser engraving a photo yet? I’d love to know what you would engrave!
Thanks for stopping by! Remember: Life’s too short not to shimmer, so grab your glue gun and your glitter!
Mona