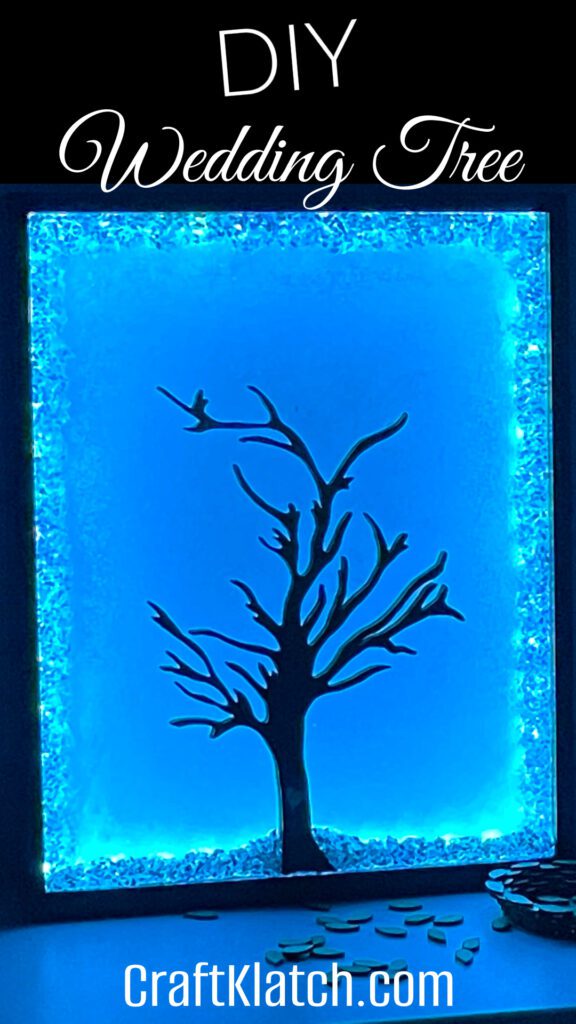
Are you looking for wedding guest book alternative ideas? I’ll show you how to make a wedding tree that will knock your garter belt right off!
*This post is sponsored by XTool. The ideas and opinions are all my own.
Weddings are romantic and amazing and the perfect opportunity to get creative.
My pet peeve about weddings is all the things you accumulate because of traditions but you never use or even look at again.
Luckily, weddings today are letting go of a lot traditions that don’t make sense anymore and people are coming up with unique ideas including the wedding guest book alternative!
That’s what we are doing today!
Wedding Tree Back Story
Real quick, my niece is getting married on December 31st. Instead of a blah and uninspired guest book, we decided a piece of art they can enjoy in their home would be the perfect wedding guest book alternative!
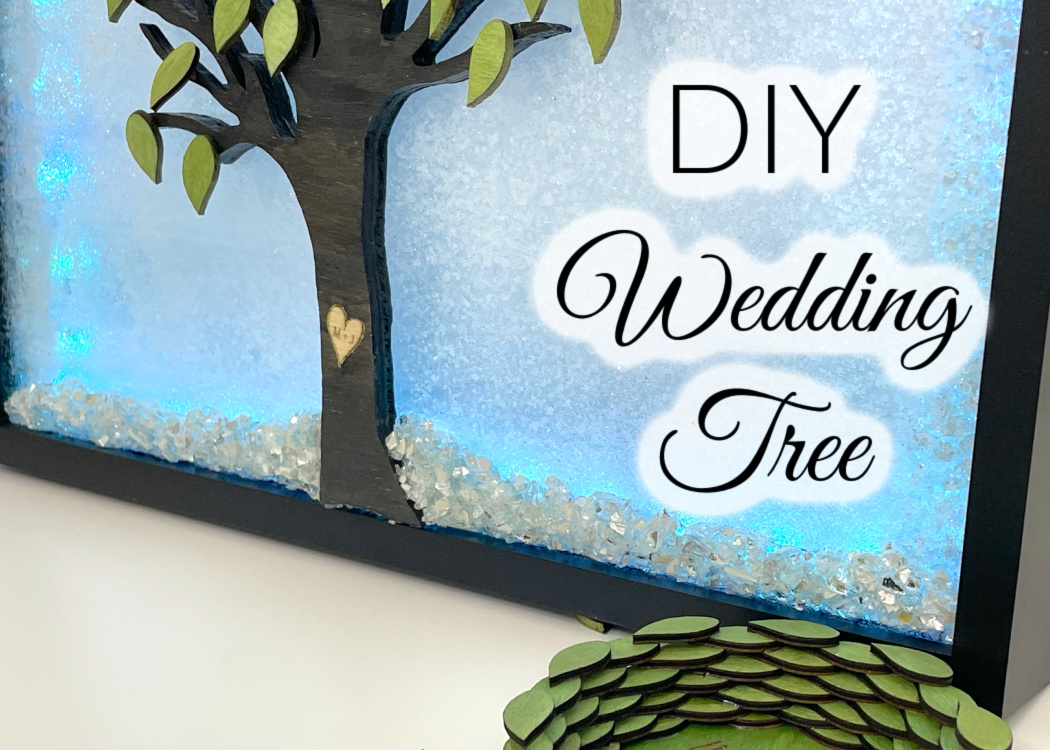
It will be a wedding tree.
The wedding tree idea stems from when she was a little girl, she found a stick and stuck it in the ground.
To everyone’s surprise, it grew roots, sprouted, and became a tree.
That tree has been a symbol in her life so much so that she had it tattooed on her ankle.
In a way to honor the tree, her tree of life, I used it to create a wedding guest book alternative.
*I made this in place of the wedding guest book, but you can make a family tree out of it too!
DIY Wedding Tree Video Tutorial
So you can see exactly how I made it, here is the wedding tree video tutorial. I take you through all the steps. For my niece, the tree had meaning, but pick something that speaks to you and reflects who you and your spouse to be!
It may be easier to make a wedding guest book alternative than you think!
Be sure to follow me on Instagram!
Materials for Wedding Tree
*Disclosure: This blog uses affiliate links from Amazon and other retailers. I earn a small amount from qualifying purchases at no additional cost to you.
- XTool
- Plywood
- Green paint
- Shadowbox
- Glitter
- Microbeads
- Glamour dust
- Mod Podge
- LED light strip
- Wood squares
- Plexiglass: cheapest I could find was at Hobby Lobby
Wedding Tree Directions
Step 1
Draw the tree. I had my sister trace or draw the tree that Mindy has on her ankle because I wanted it to be based on that specific tree. You could easily find or draw an image of a tree instead.
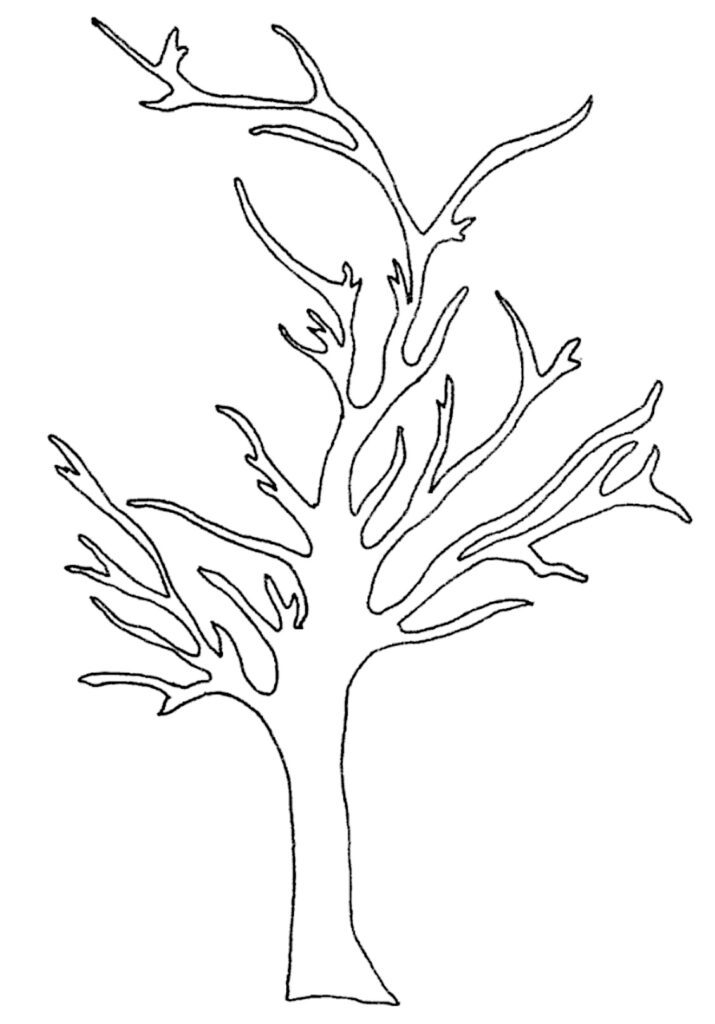
Then, my sister took a photograph of the image and sent it to me.
Step 2
I easily imported it into the XTool Creative Space app. In the video, I show you how I remove the background and cut.
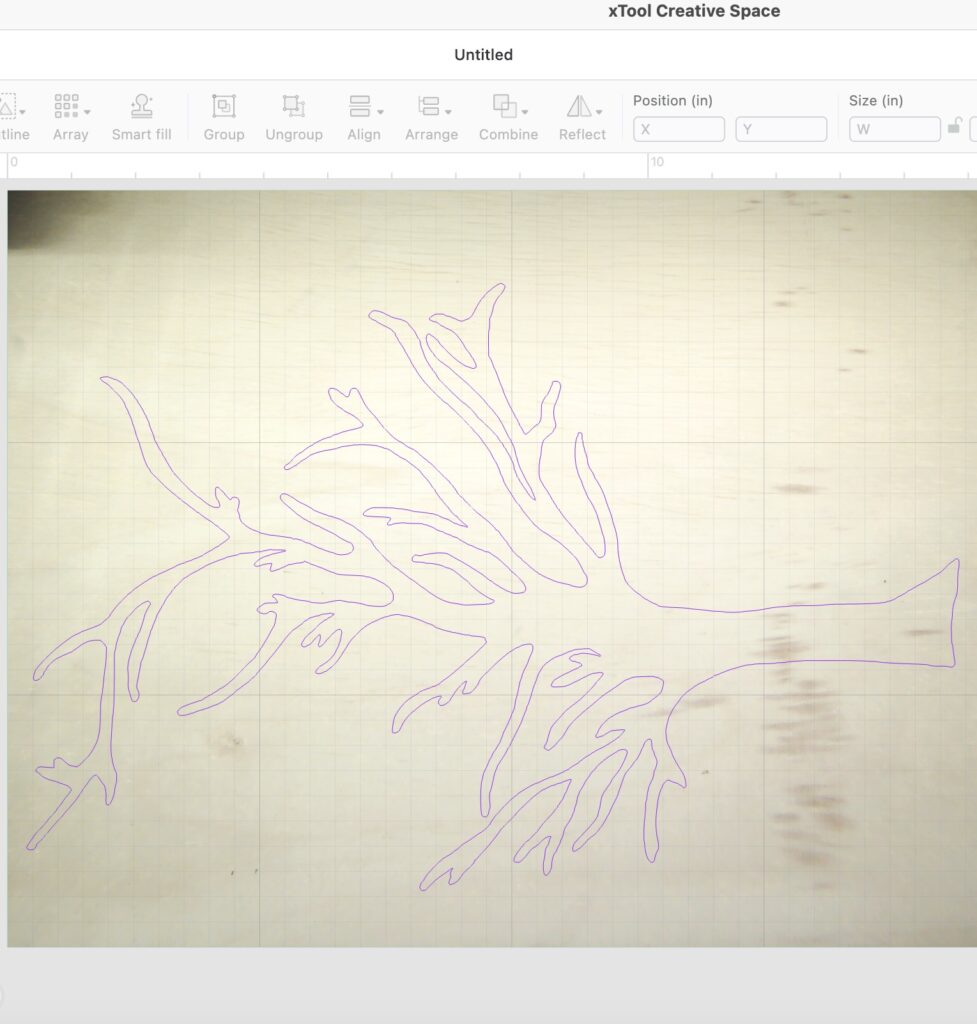
I am using the XTool M1 to cut out the tree. A few quick things about the M1:
- It’s a laser engraver
- It’s a laser cutter
- In fact, it’s a hybrid and is also a blade-cutting machine for vinyl, paper, fabric, etc.
Here is a link to the M1, so you can learn more. It is a great machine to get started with because it is so easy and you can do so much with it.
Did I mention you can engrave tumblers too? And as laser cutters go, the price is really affordable!
I bought 1/4″ plywood from the home improvement store and did some test cuts to make sure I could cut the tree out.
I ended up cutting out multiple trees.
Step 3
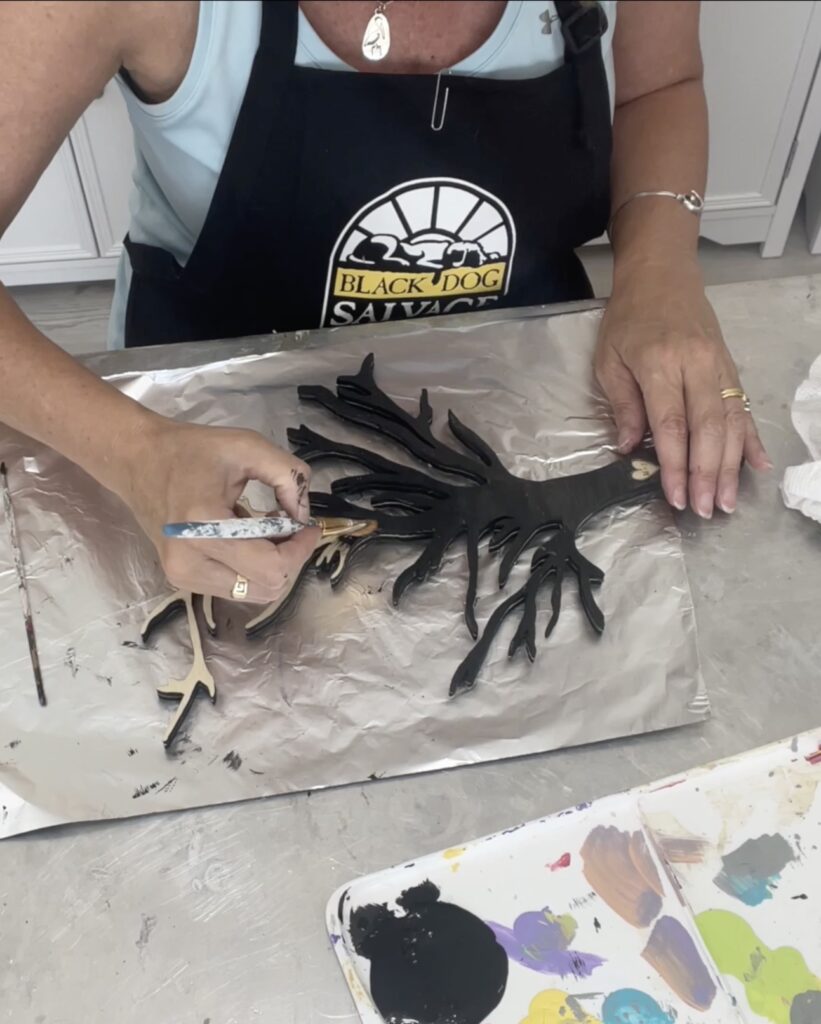
The tree turned out to be pretty delicate, so I wanted to strengthen it. I glued two trees together. I love that the laser cutter is so exact that the trees matched up perfectly!
Then, I painted the trees with black acrylic paint and wiped off any excess with a paper towel, so it was more of a wash.
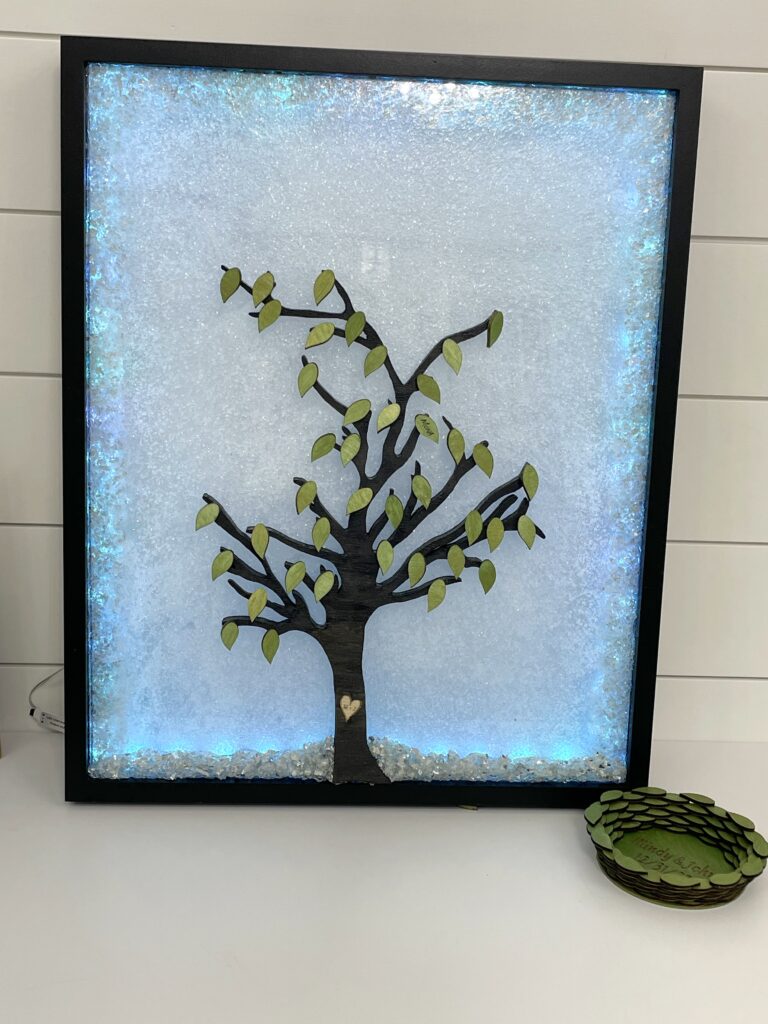
I should mention that the wedding colors are black, green, and silver. In talking with Mindy, she wanted the wedding tree to look like a silhouette.
I forgot to mention, I also engraved their initials and a heart into the tree. I was careful to avoid getting any of the black paint on it.
Step 4
So, I had the tree, which is the basis of the whole project. Then, I needed approximately 40 leaves because that is where people will sign their names and attach the leaves to the tree.
I painted two unfinished wood coasters green and put them in the M1.
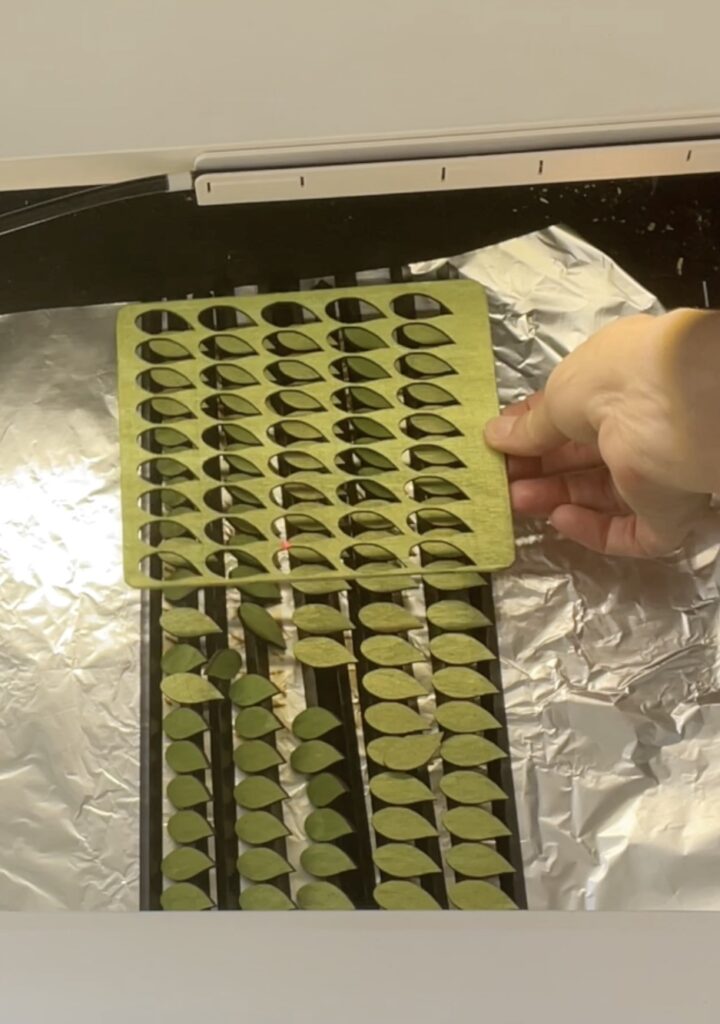
I drew a very simple leaf and again imported it into the XTool Creative Space app and cut out 40 of them. They are all exactly alike!
Step 5
My intention was to put the tree in a shadowbox. I needed the extra depth of the shadowbox because I wanted to light it up.
I took the shadowbox apart and bought three sheets of very thin plexiglass.
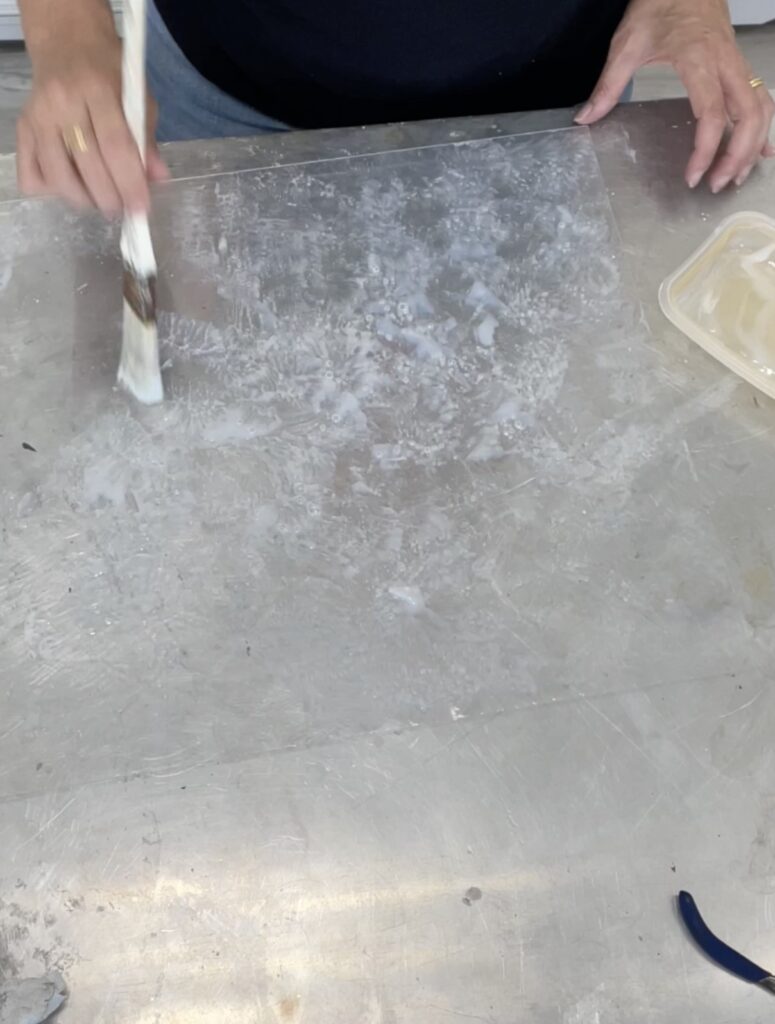
On one side of the plexiglass, I used a combination of Mod Podge and various glitters and microbeads to give it a frosty look.
It was the perfect background for the wedding tree silhouette!
Step 6
I used a little super glue and glued the tree to the smooth side of the plexiglass that I had glittered.
However, before I did that, I did put the plexiglass in the frame because I knew there was a small lip and if I put the tree too far down, it would not fit flush.
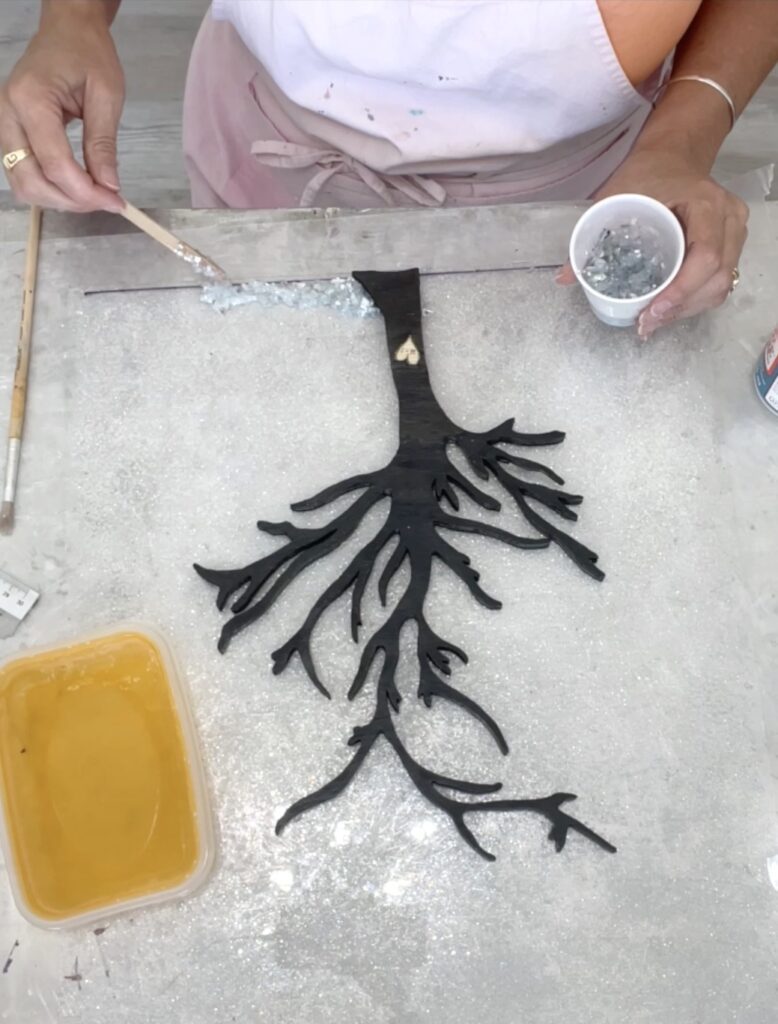
When I put the plexiglass in the shadowbox frame, I drew a line for reference so I could place the tree properly and added a combination of broken glass and Mod-Podge to that line. It was kind of a landscape line. The broken glass/mirror mixture brought in the silver wedding color.
Step 7
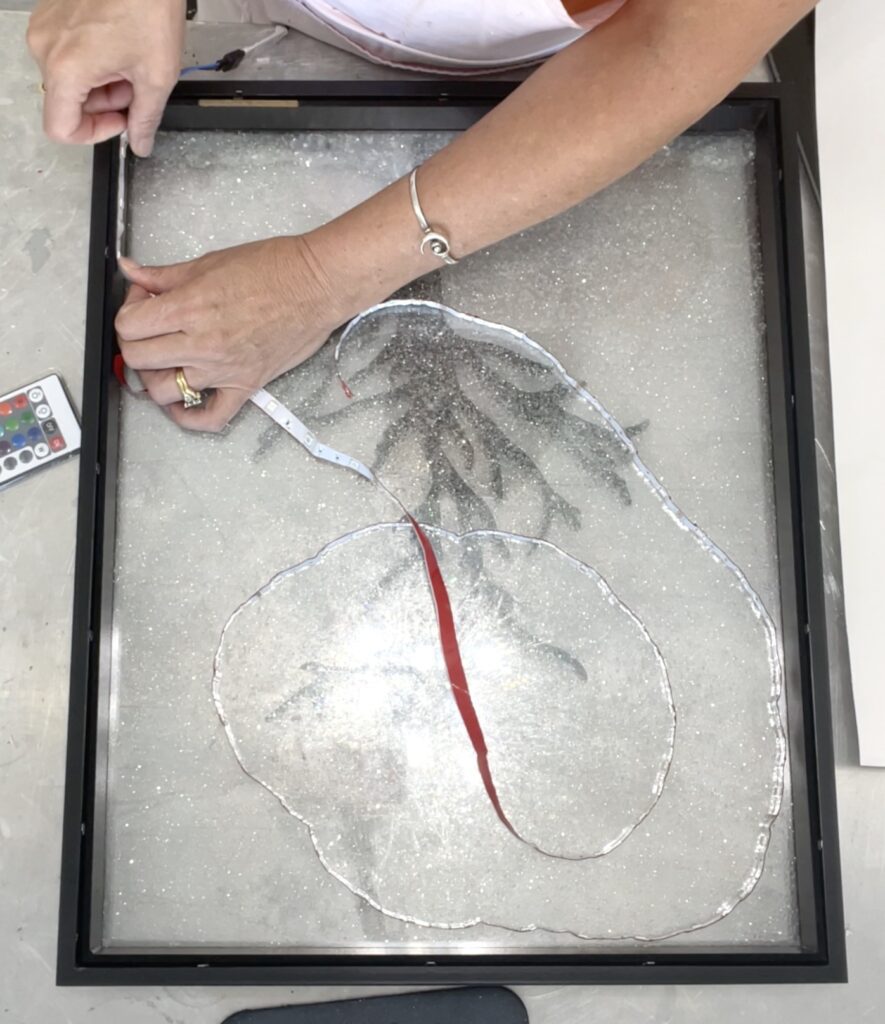
I was ready to put the wedding tree together and tried fairy lights but they did not work that well. The best product I found was a short LED strip light. I was able to layer it all into the shadowbox.
*It’s worth mentioning, I originally only had the broken glass/mirror pieces along the bottom of the project. However, when I added the lights, you could see the dots from the bulbs.
My solution was to add another layer of plexiglass behind the tree layer and in front of the light layer. I added the broken glass and mirrors on three sides of the plexiglass. I put it in the shadowbox right behind the plexiglass that had the wedding tree attached to it.
Step 8
I stuck the light strip onto the inside edge of the filler piece that came with the shadowbox. I cut a small corner off of the bottom of the back of the shadowbox, so the electrical cord and battery pack could come out of the frame.
A piece of white posterboard was cut down to size because the back panel of the shadowbox was black and the tree would blend right into the background then.
I attached the battery to the back of the frame and lit it up!
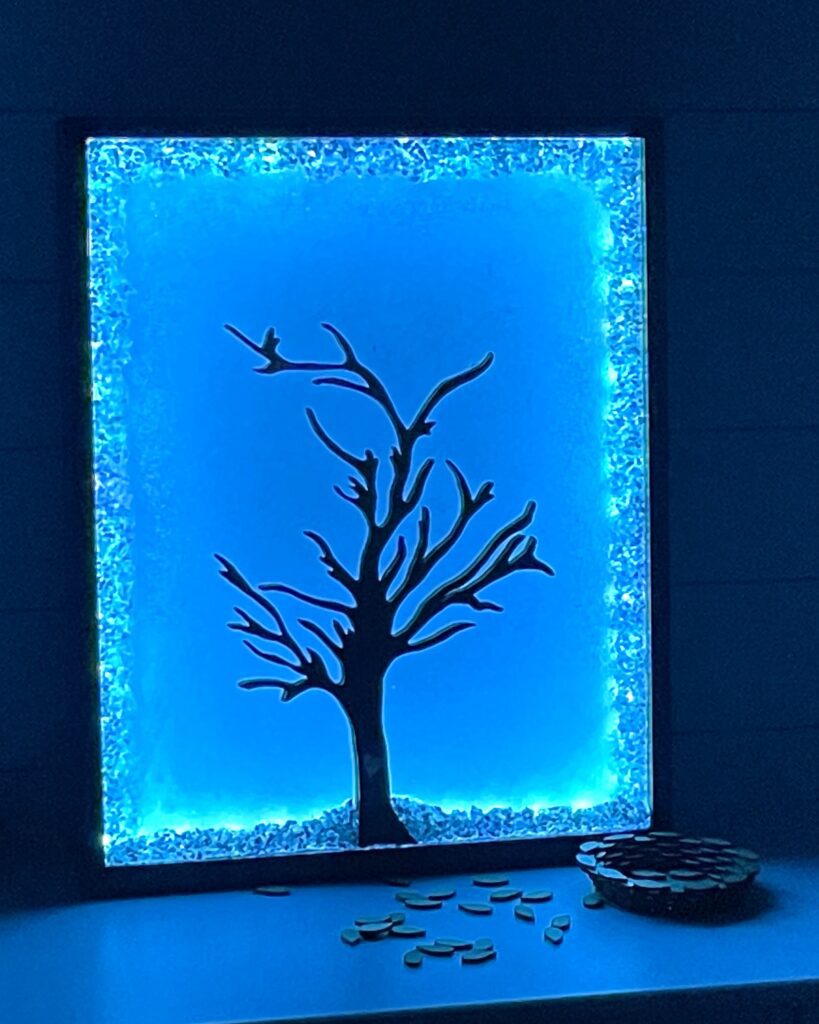
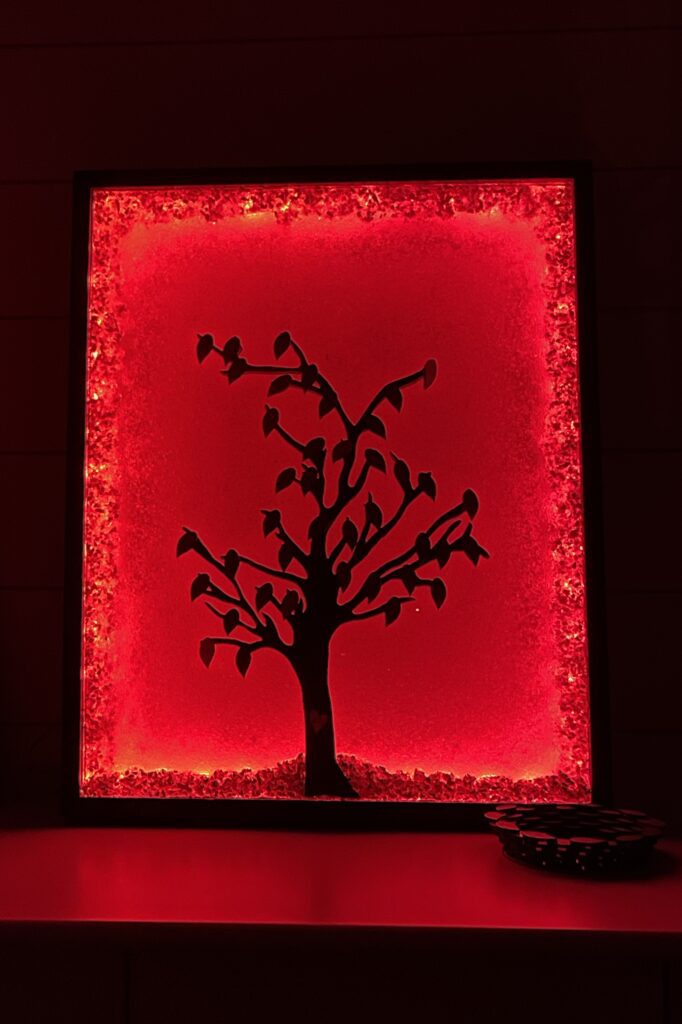
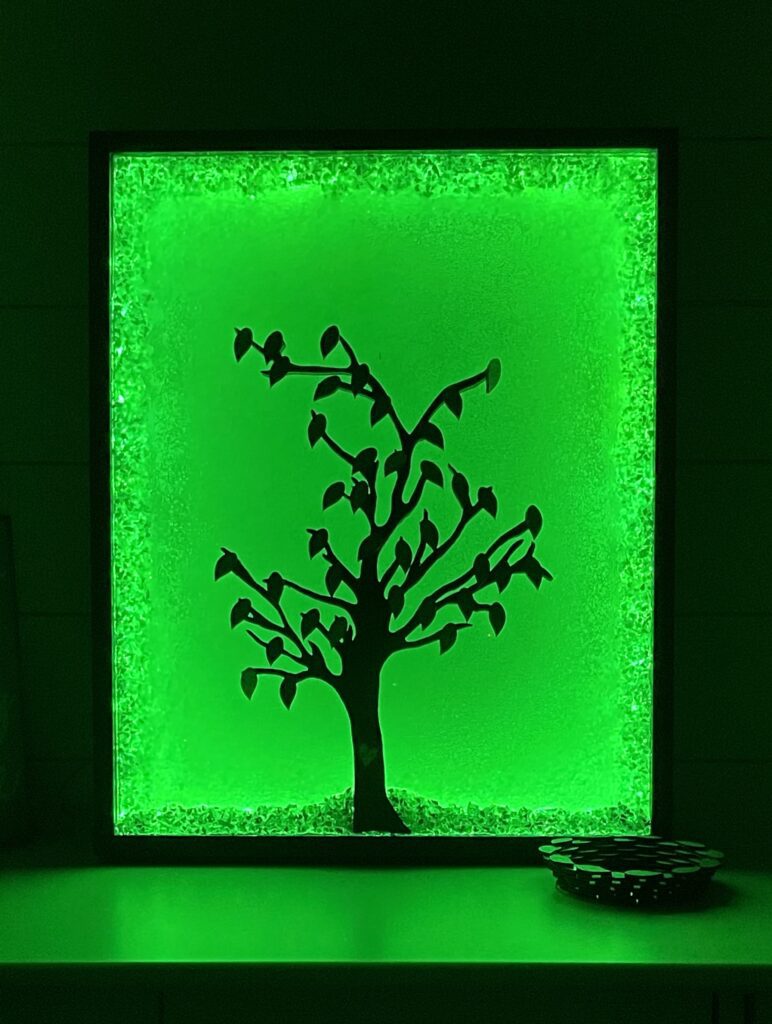
The fun part about the LED light strip is you can change the colors to go with your mood or the season!
That is it! At the wedding, all of the guests can sign a leaf and attach it to the tree!
Let me know what you think and which color you like the best!
Here is the wedding tree lit up red
Now we have some green.
And then there is blue.
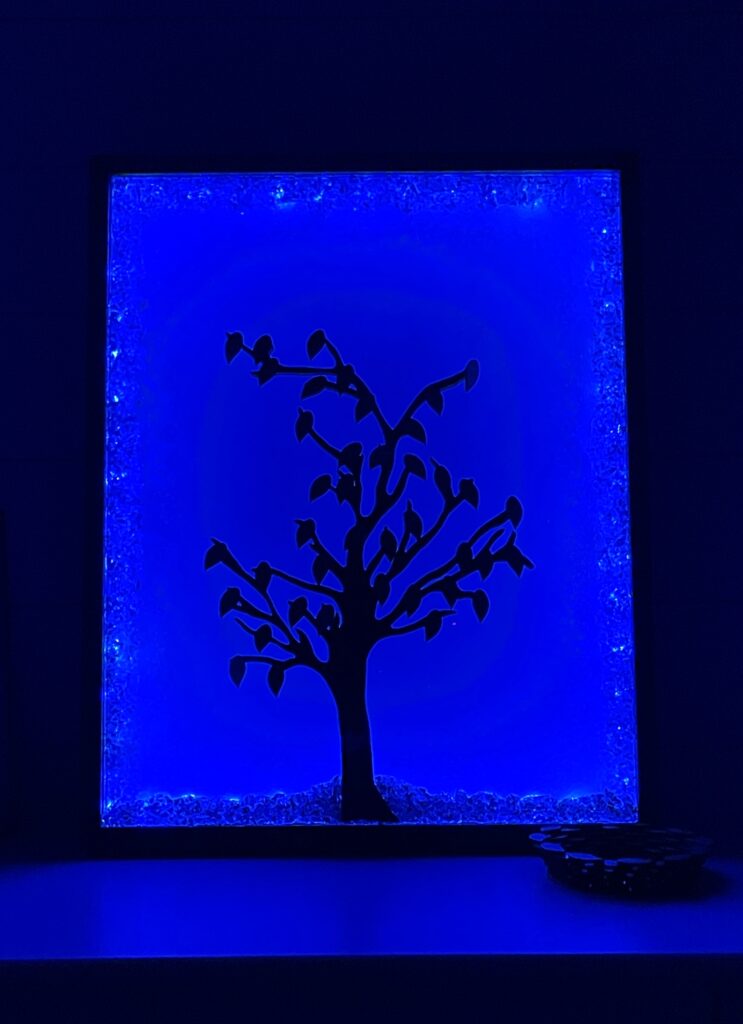
If you want to see the M1 in action as a blade-cutting machine, you can find that post HERE!
Other Wedding Ideas
Wedding Guest Book Alternative
If you are looking for a wedding guest book alternative, but don’t want to make it, here are some great options to consider.

Thanks for stopping by! Remember: Life’s too short not to shimmer, so grab your glue gun and your glitter™ Stay safe!
Mona
What a wonderful idea, such a unique and thoughtful gift. This would be a fantastic idea as well for a Family tree as a person who is working on their genealogy. 3 dimensional is so much better than having all the names on a flat piece of paper even as a tree.
Thank you, Shirley! ❤️ Yes! I think it would work great as a family tree as well!
You are just so creative. What a wonderful and thoughtful gift! It looks amazing.
Thank you so much, Lynn! ❤️