Discover how to make a mold for resin with this step-by-step guide! Perfect your resin casting and resin molding skills for stunning DIY creations.
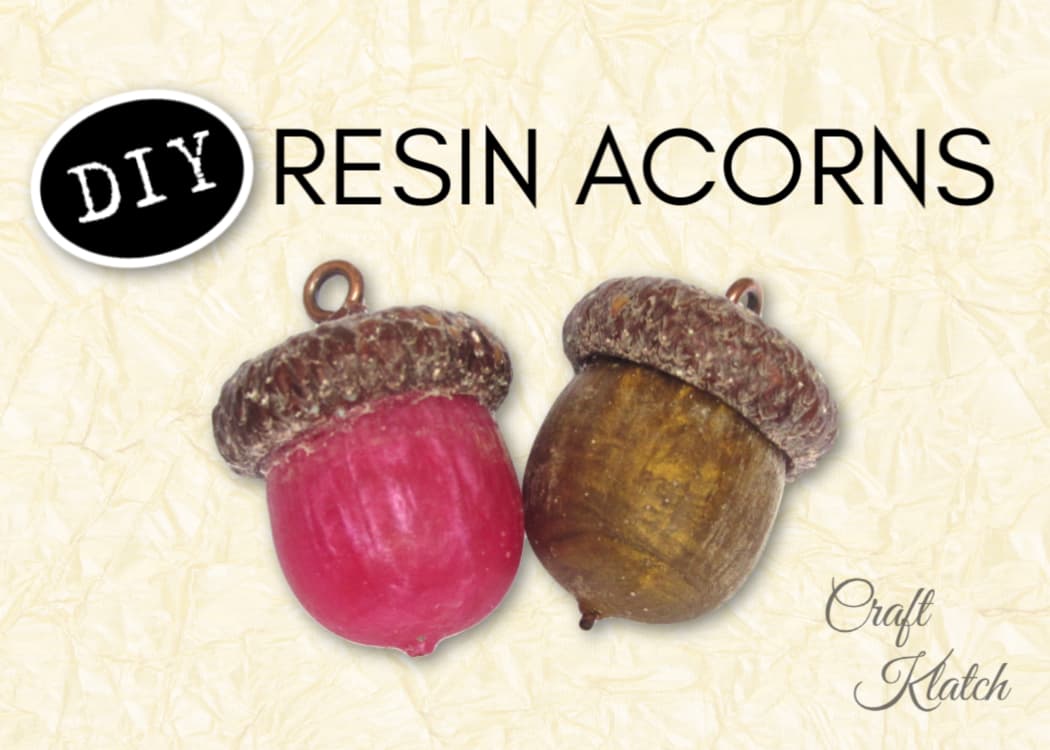
We were at the lake and I found these big and beautiful acorns!
I thought, Wouldn’t they make a beautiful necklace or keychain?
Creating custom molds for resin opens up endless possibilities for unique designs. In this tutorial, you’ll learn the basics of how to make a mold for resin, along with tips for resin molding and resin casting.
How to Make a Mold for Resin Video Tutorial
You can see how to make these resin acorns from start to finish, including the resin mold and resin casting of the acorns. And you’ll see how you can turn them into pendants and/or a keychain.
Materials You Will Need for Resin Casting and Resin Molding
*Disclosure: This blog uses affiliate links from Amazon and other retailers. I earn a small amount from qualifying purchases at no additional cost to you.
- Silicone mold-making material
- An object to mold – I used acorns
- Pigment powders
- Jump rings
- Keychain blanks
- Eyescrews
- Rotary tool or drill with 1/16″ bit
- Glue
- Disposable cups
- Hot glue gun
- Sandpaper or emery board
- Resin:
- When deciding on which resin to use, there are a lot of qualities that might be appealing, UV resistant, price, heat resistance, etc. Just make sure to select a resin that fits your needs.
- Use whatever brand you like:
- Easy Cast
- Art Resin
- Let’s Resin
- Promise Epoxy
- These are heat resistant resins:
- FX Poxy
- Stone Coat
How to Make a Mold for Resin Directions
Here are step-by-step instructions on how to make a resin mold and how to use it for resin molding and resin casting. A tip before getting started, I cleaned my acorns and let the completely dry before doing this project, so you don’t have any unnecessary imperfections.
Step 1: Prepare the Molding Cups
I used paper cups for the resin mold-making step. Trimming the cups makes them easier to work with. There is no reason to use a deep cup for a small piece.
Separate the acorn from the acorn caps.
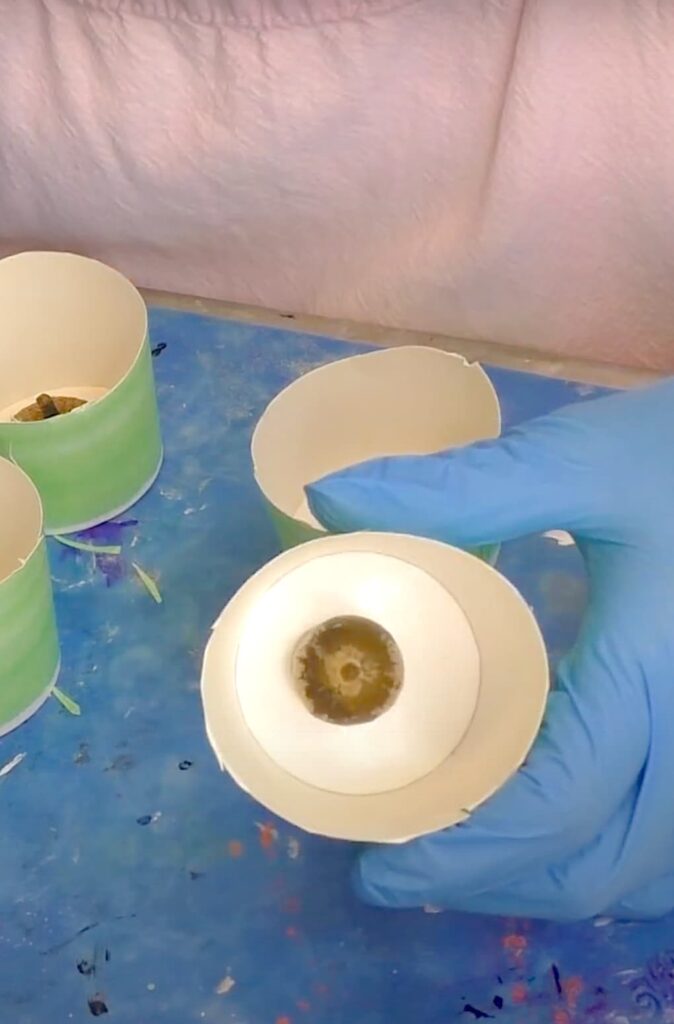
Apply hot glue to the tops of the acorns, securing them to the bottom of each cup – bottoms up. Repeat with the acorn caps. For the acorn caps, put the hot glue on the undersides of the acorn caps and put it into the cups – glue side down.
Step 2: How to Make a Resin Mold
The best molds to use with resin are silicone molds and that is what we are using.
Follow the directions that come with your silicone mold-making kits – in case they differ from the directions I used for mine.
Mix equal parts of the silicone mold-making kit thoroughly to avoid streaks. I mixed a total of six ounces for this project.

Slowly pour the silicone mixture over the acorns and caps, ensuring they are submerged.
Tap the cups gently to release any trapped air bubbles. Allow the molds to cure for 12 hours or as recommended by the manufacturer.
*This step is the foundation of how to make a mold for resin, a crucial part of the resin molding process.
Step 3: Remove the Originals
After curing, gently remove the silicone molds from the cups.
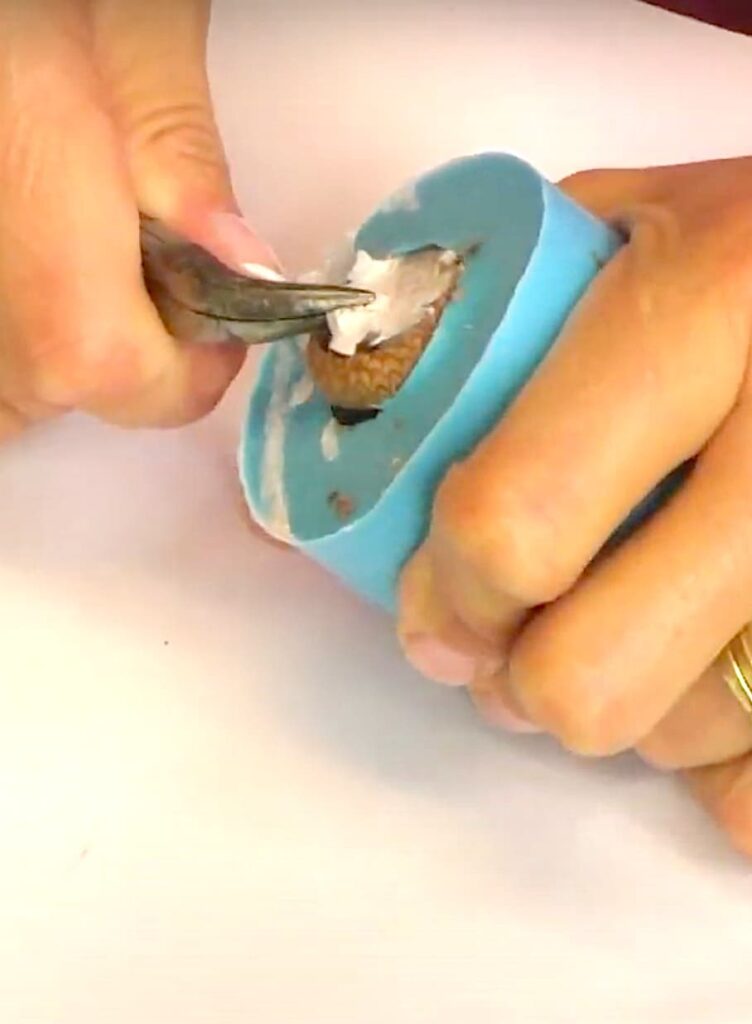
Carefully extract the original acorns and caps from the molds to make sure you preserve the details.
Step 4: Pour the Resin
Mix resin and hardener according to the directions that came with your resin and add pigment powder in any color you would like.
Slowly pour the resin into the molds, filling them completely.

Use a toothpick to help the resin flow into the intricate details and remove air bubbles.
Allow the resin to cure for a minimum of 12 hours. Again, refer to the directions of your resin.
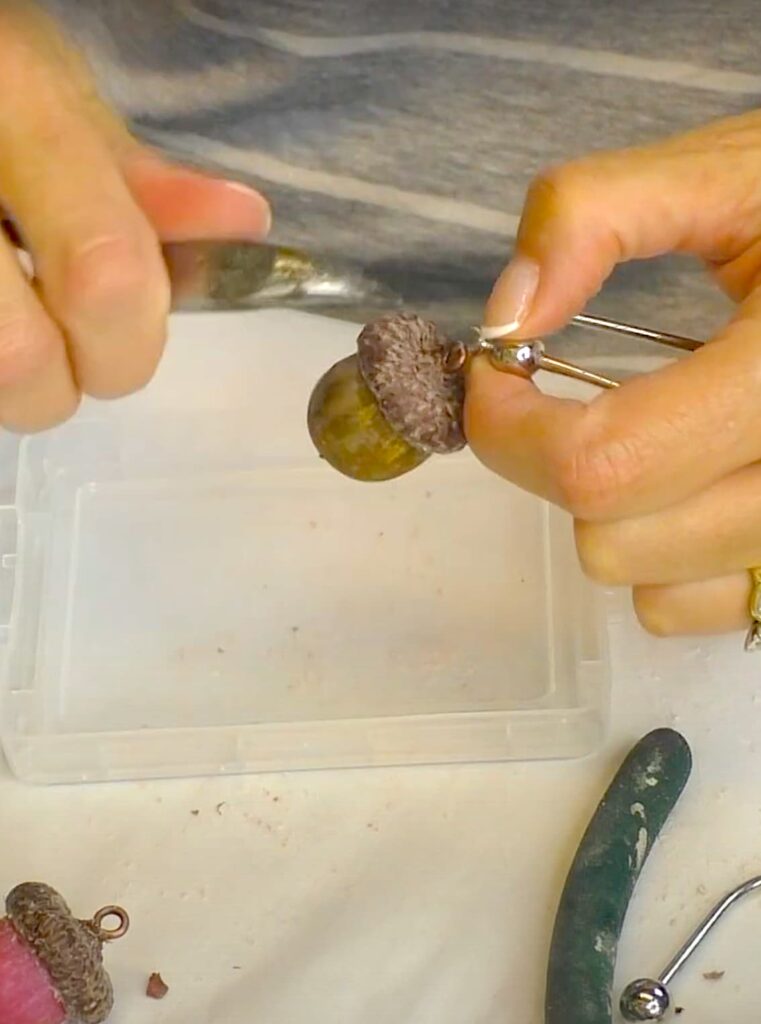
Step 5: Assemble the Resin Acorns
After the resin cures, remove the resin castings from the molds.
Use sandpaper or an emery board to smooth any spots as necessary.
Glue the resin acorn caps onto the corresponding resin bottoms.
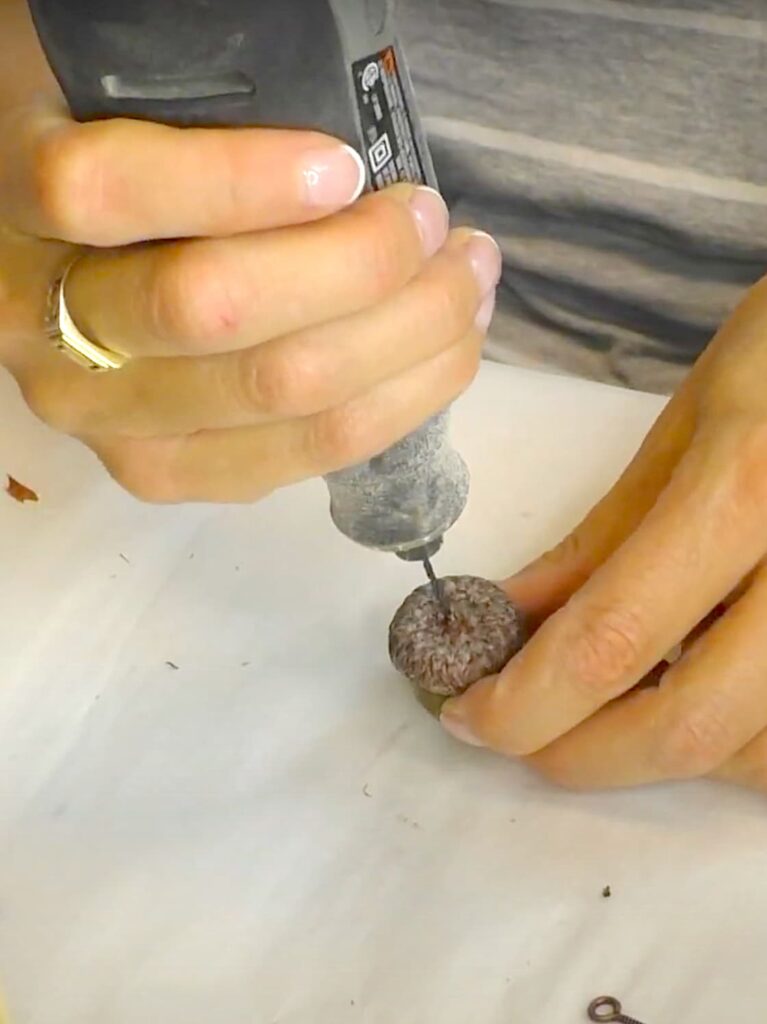
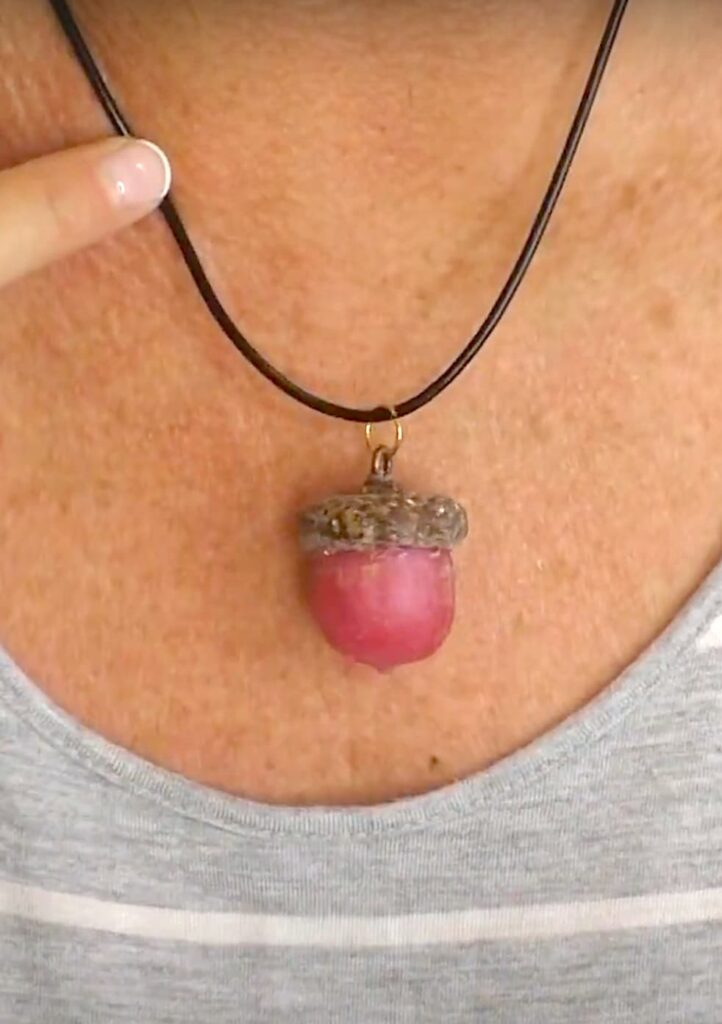
Drill a small hole into the top of each acorn and insert an eye screw. Attach a jump ring and connect to a keychain or necklace.
There are a lot of different keychain blanks available.
I also turned one into a necklace.
Tips for Resin Molding and Casting
- Always follow safety guidelines when working with resin or any chemicals.
- Experiment with colors to customize your acorns.
- Practice makes perfect when learning how to make a resin mold or how to cast resin! By following this guide on how to make a mold for resin, you’ll master resin molding and resin casting techniques to create beautiful and functional crafts!
More Resin Casting Projects
Now that you know how to make a mold for resin, here are some fun resin casting projects you are sure to love!
Be sure to follow me on INSTAGRAM!
Remember: Life’s too short not to shimmer, so grab your glue gun and your glitter!™
Mona