
Make a cute axolotl pet with resin and chameleon powder! This shimmering DIY is fun, easy, and perfect for any resin lover.
Get ready to fall in love with this cute axolotl pet resin project! This is a must-try resin craft!
Axolotls are all the rage right now. I feel like I was the only one who had never heard of them, and now, I see them…
EVERYWHERE!
OH...in case you are clueless like me, an axolotl is an endangered salamander that lives in water.
*Let’s Resin sent me the mold, chameleon powder, resin, and pigment paste to try, but the ideas and opinions are all my own.
Find me on YouTube and Instagram!
Materials You Will Need
*This blog uses affiliate links. As an Amazon Associate I earn from qualifying purchases, at no additional cost to you.
- Axolotl mold
- Resin
- Black pigment paste
- Chameleon powder (I use teal, but use any color you love!)
- Stir stick
- Plastic cup
- Lighter or heat gun for bubbles
- Multi-surface black paint
- Thin brush
Cute Axolotl Pet Craft Video
If you want to see me in action making this project, check out the video!
Directions for the Cute Axolotl Pet
The axolotl life expectancy is about 5-7 years in the wild, but this resin axolotl can last just about forever!
Step 1: Prepping the Mold with Chameleon Powder
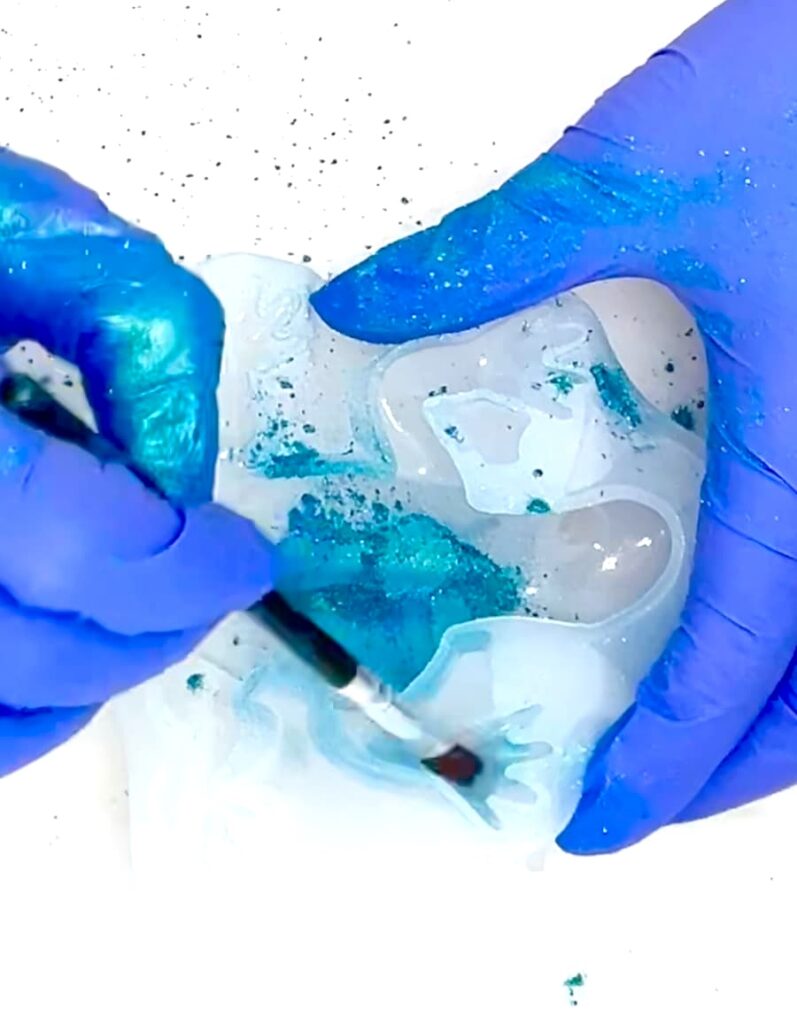
Before mixing any resin, I brushed the entire inside of the axolotl mold with teal chameleon powder. I made sure to get into all of the nooks and crannies – the fingers, the head spikes, under the lip, etc.
The mold is translucent, which makes it easy to spot areas you may have missed. I used the small brush that came with the powder, but any soft brush will work just fine.
Tip: Be gentle when opening the chameleon powder – mine popped open when I pressed the seal, and it went everywhere!
I just want to mention that I had a really hard time deciding on which beautiful color I should use. Ultimately, I zeroed in on the teal but not without a bunch of hemming and hawing!
Step 2: Mixing and Coloring the Resin

This mold has how much resin you will need, right on the mold. It’s so helpful!
The mold needs 4.5 ounces, but I like to have extra because I always have an extra project going on the side.
So, I mixed 3 ounces of Part A and 3 ounces of Part B.
Mix thoroughly, scraping the sides and the bottom of your cup to avoid any soft spots. Then, I added black pigment paste and stirred until fully blended.
TIP: I used the black pigment paste because the black background makes the chameleon powders POP! The Let’s Resin pigment paste mixed in smoothly and easily.
Step 3: Pouring and Perfecting the Cute Axolotl
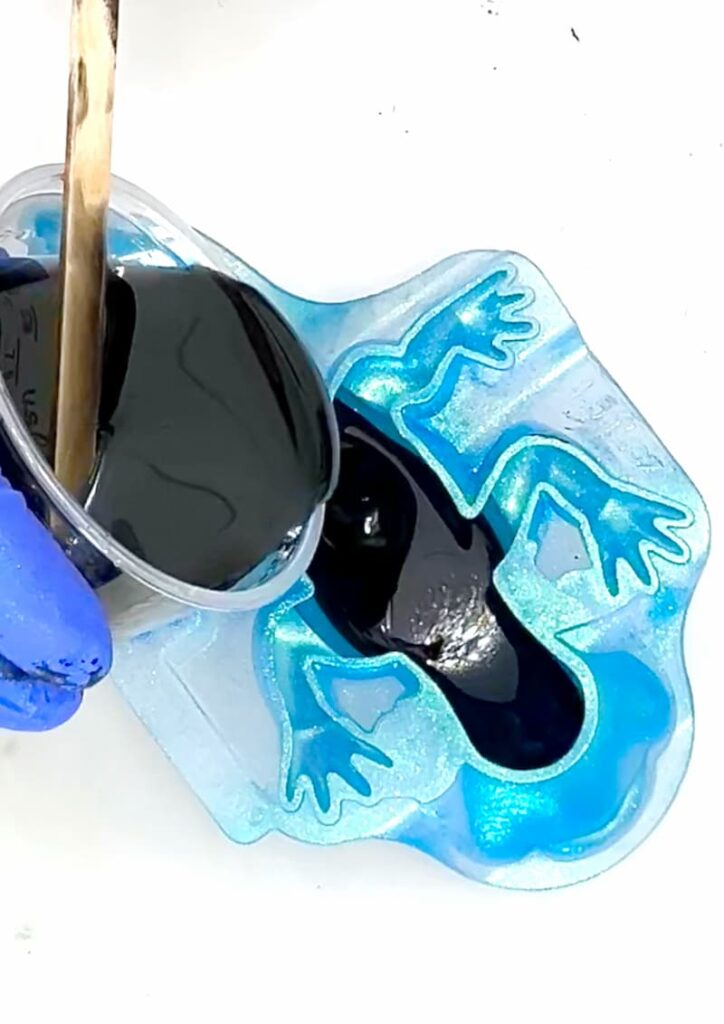
Slowly, pour the resin into the mold. Take your time, especially around the small details like the fingers and the spikes. Use a stir stick or a toothpick to help push the resin into the tight spots.
Tap the mold gently to help the bubbles rise to the top and use a lighter to pop them. Just move the flame quickly because you don’t want to damage your mold.
Let your axolotl pet cure for at least 12 hours for the best results.
Step 4: The Big Reveal
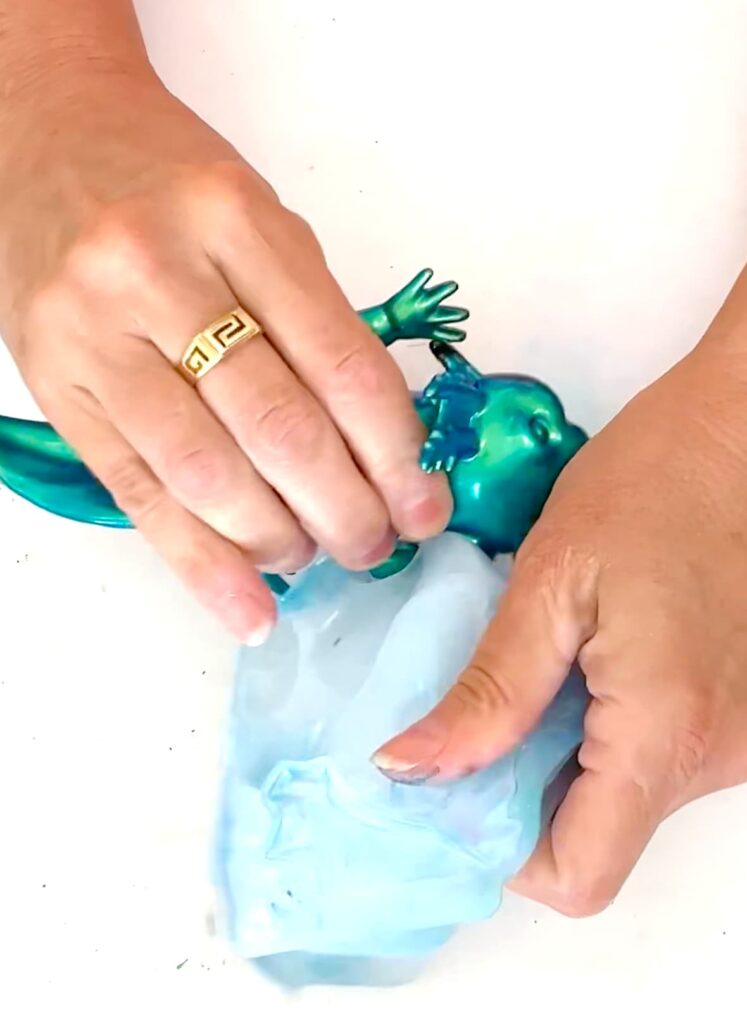
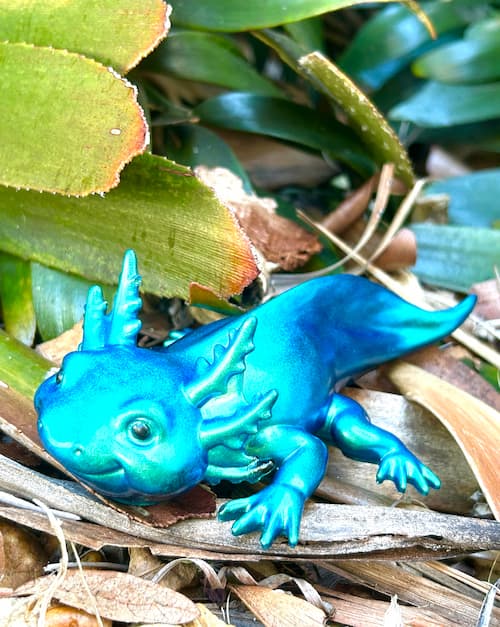
Once cured, I gently broke the seal around the edges of the mold before unmolding. It helps everything come out more smoothly. I pulled the head out first and WOW – look at that sweet face!
The chameleon powder shifts from green to teal in the light and is absolutely breathtaking!
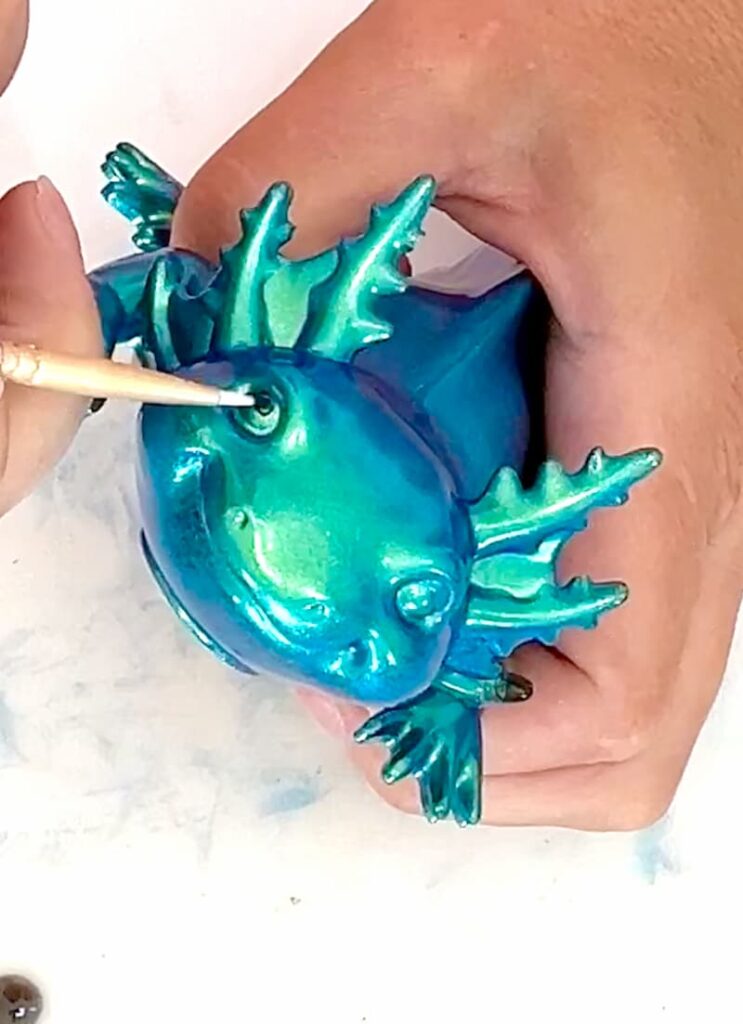
To finish, I used a fine brush and black multi-surface paint to add detail to the eyes – this really brought the axolotl pet to life…okay visually to life…not really to life.
Axolotl Pet Display Ideas
I’m torn – should I place this cute axolotl on a shelf or mount him on a wall? Or maybe peeking out of a flower pot? Either way, it’s a conversation starter.
I brought it outside to snap a pic of him in sunlight and he just sparkles when the light hits him!

Vote for the Next Chameleon Color!
I had so much fun with this mold, I want to try it again in another color! Let me know in the comments which of these chameleon powders I should use next:
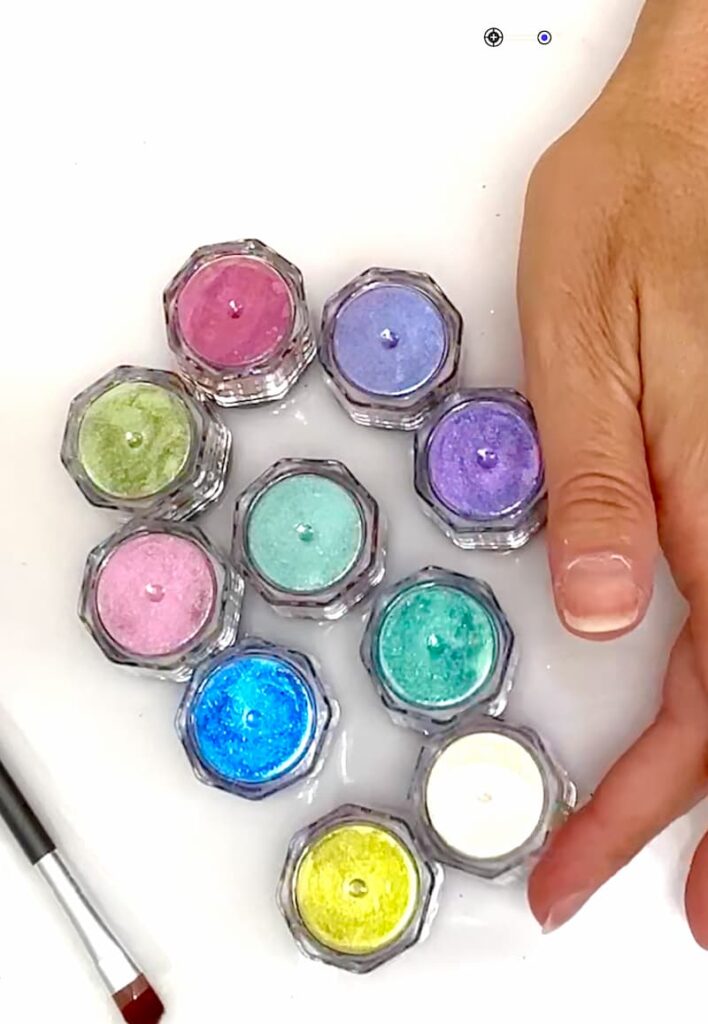
- Grape
- Galaxy
- Champagne
- Gold
- Mint
- Olive
- Blue
- Magenta
- Plum
They are all stunning and I can’t decide, so I need your help! I have used Let’s Resin products for years. Have you seen the Tooth Fairy Jars I made with one of their other molds?

Be sure the check out my other Resin Crafts for endless inspiration!
This cute axolotl pet resin project was so fun to make! I’d love to make one in each color. The mold was easy to work with, the details are adorable, and the chameleon powder adds that extra wow factor!
If you are looking for a magical project, definitely give this one a try!

If you are like me and new to learning of their existence, have one standing around and see how many people comment on it, and know exactly what it is!
Get to work and start creating, and if you haven’t grabbed my FREE Resin Guide, be sure you grab that too!
Remember: Life’s too short not to shimmer, so grab your glue gun and your glitter!™
Mona