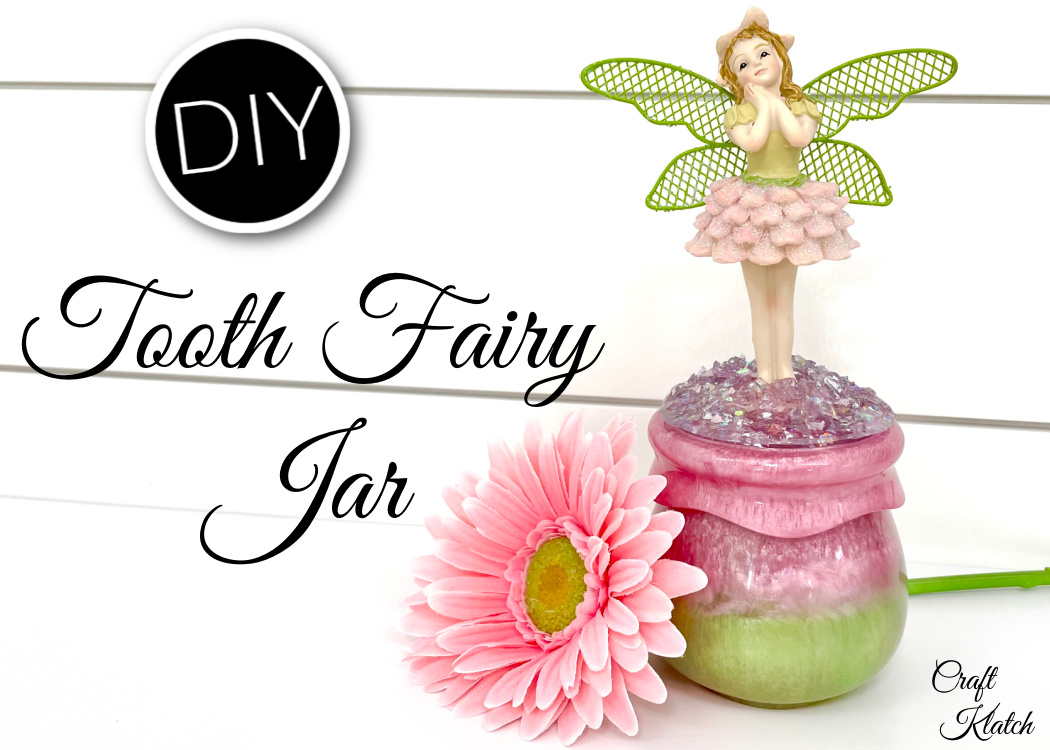
The tooth fairy is the most magical creature ever! She comes to your house at night, takes care of your tooth, and leaves you a gift. I have a tooth fairy idea to make her life a little easier!
It’s a Magical Tooth Fairy Jar!
*This post is sponsored by Let’s Resin. The ideas and opinions are my own.
So there isn’t really any magic in the jar. It simply looks rather magical!
Growing up, I always thought there was only one tooth fairy. Last week, my granddaughter schooled me and her mom that there are multiple tooth fairies.
Her idea of the tooth fairy is that every child gets their own tooth fairy and that is why there are differences in what every kid gets for their teeth.
Ok…
I’m open to it.
I really want to know, what is your belief about the tooth fairy…one or many?
Onto the tooth fairy jar idea!
I was really excited to use this mold from Let’s Resin! I’ve had my eye on it for a while!
Check out the Let’s Resin Instagram account!
I am also trying out their resin and their beautiful pigment powders!
Magical Tooth Fairy Jar Idea Video Tutorial
Materials You Will Need for the Tooth Fairy Jar
*This blog uses affiliate links. As an Amazon associate I may earn from qualifying purchases, as well as others.
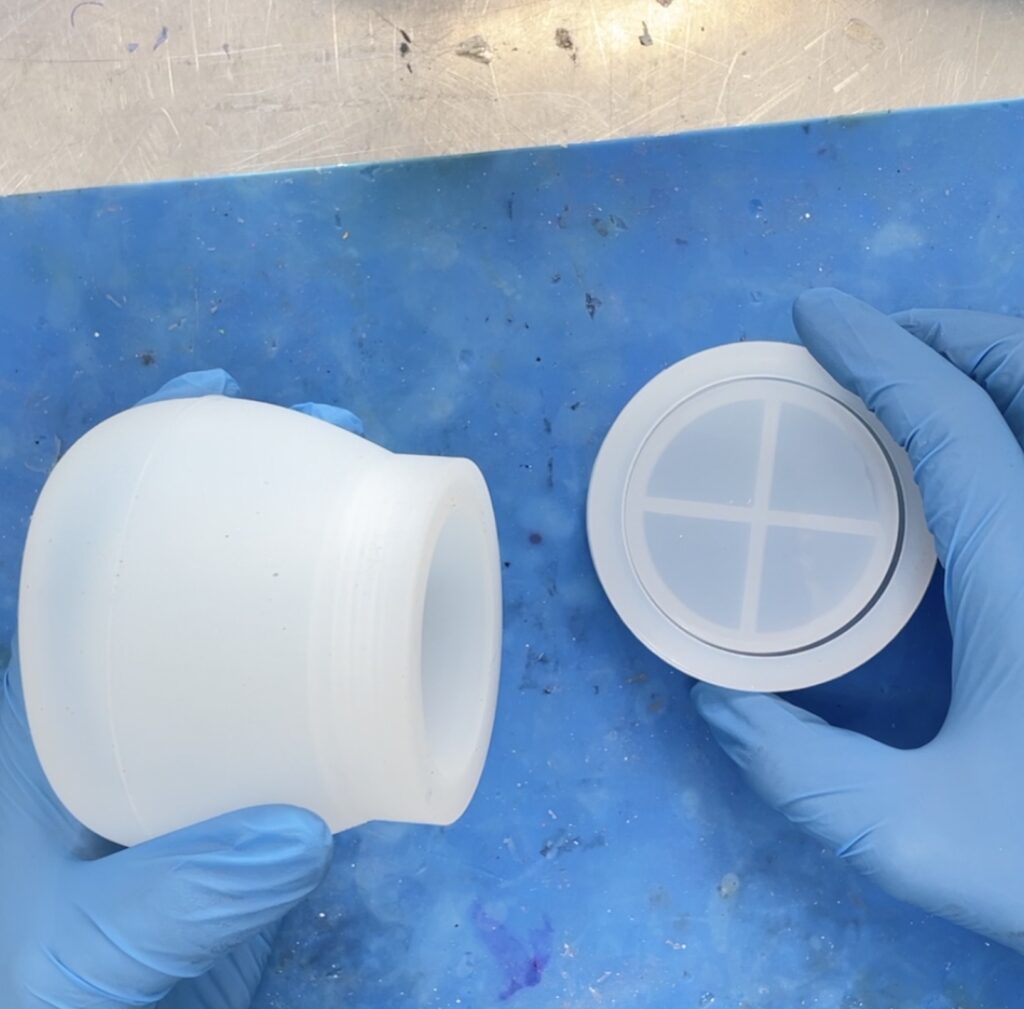
- Silicone Jar Mold
- Resin
- Pigment powders
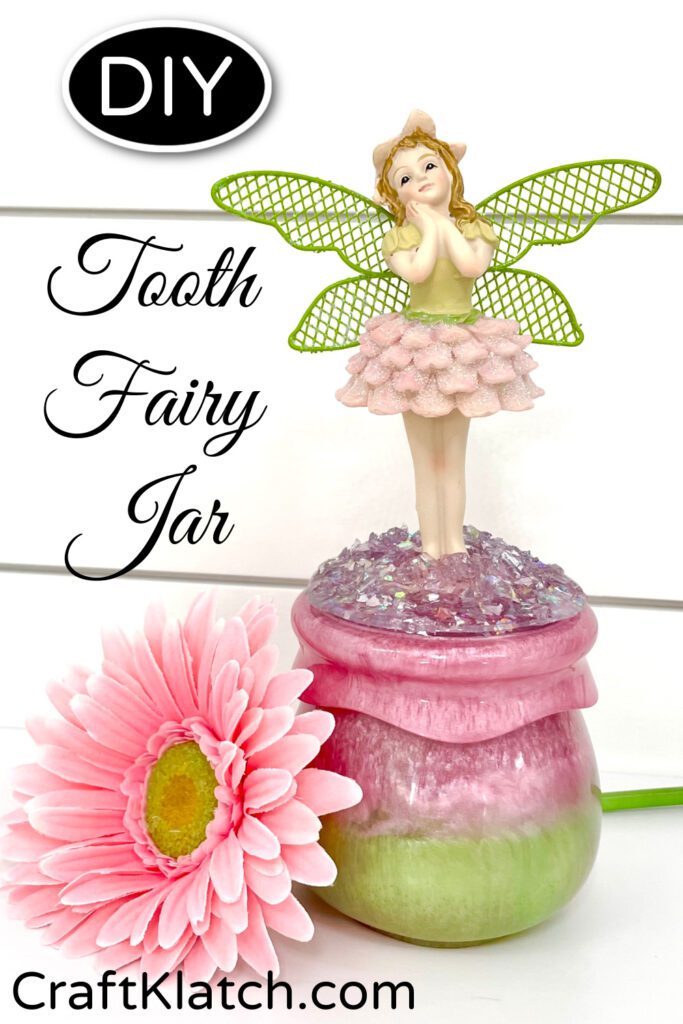
- Fairy statue I found her at Hobby Lobby but check out these sweet fairies!
- I love this Boy Fairy – I’d remove the fish and add a tooth!
- Iridescent confetti
- Broken glass
- Plastic cups
- Stir sticks
Check out the Let’s Resin Amazon Shop!
Tooth Fairy Jar Directions
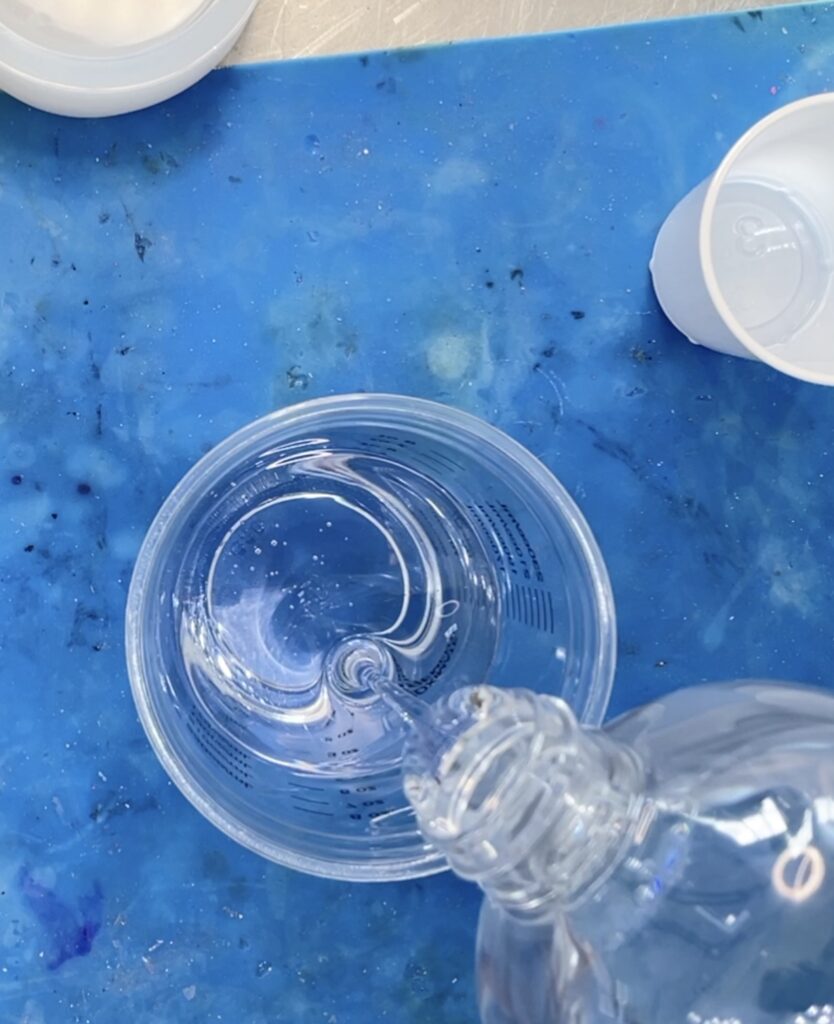
Step 1
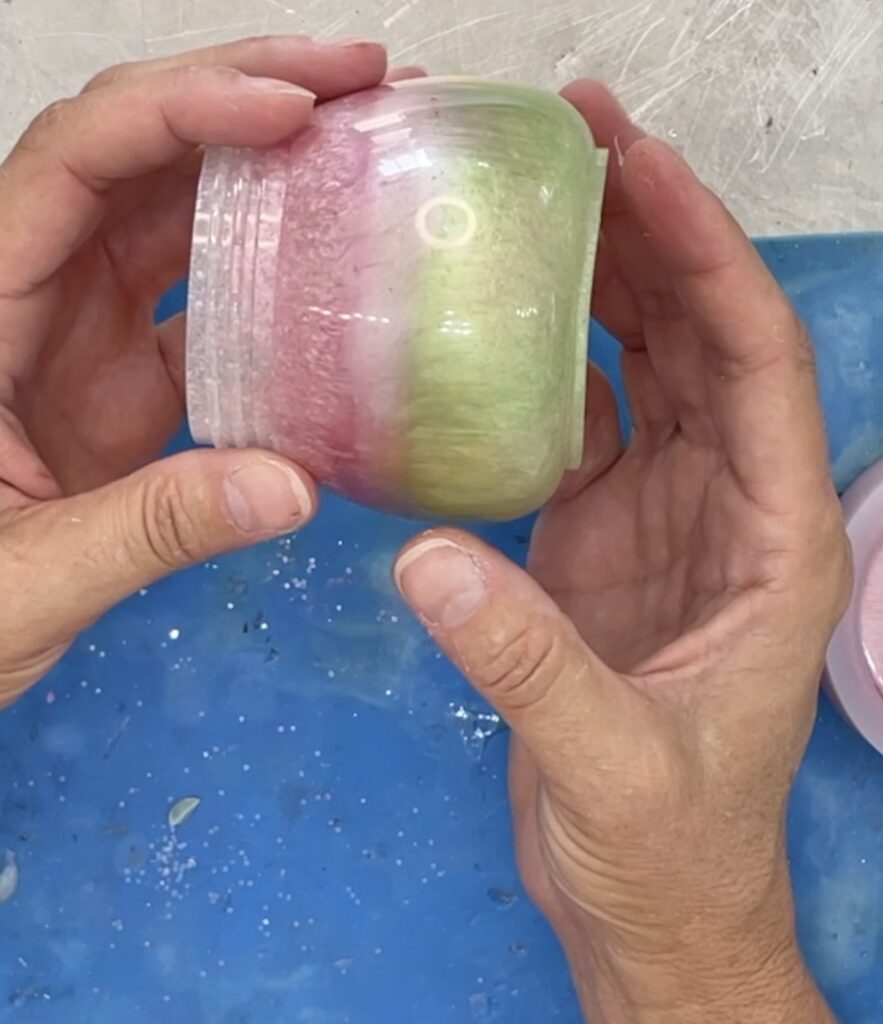
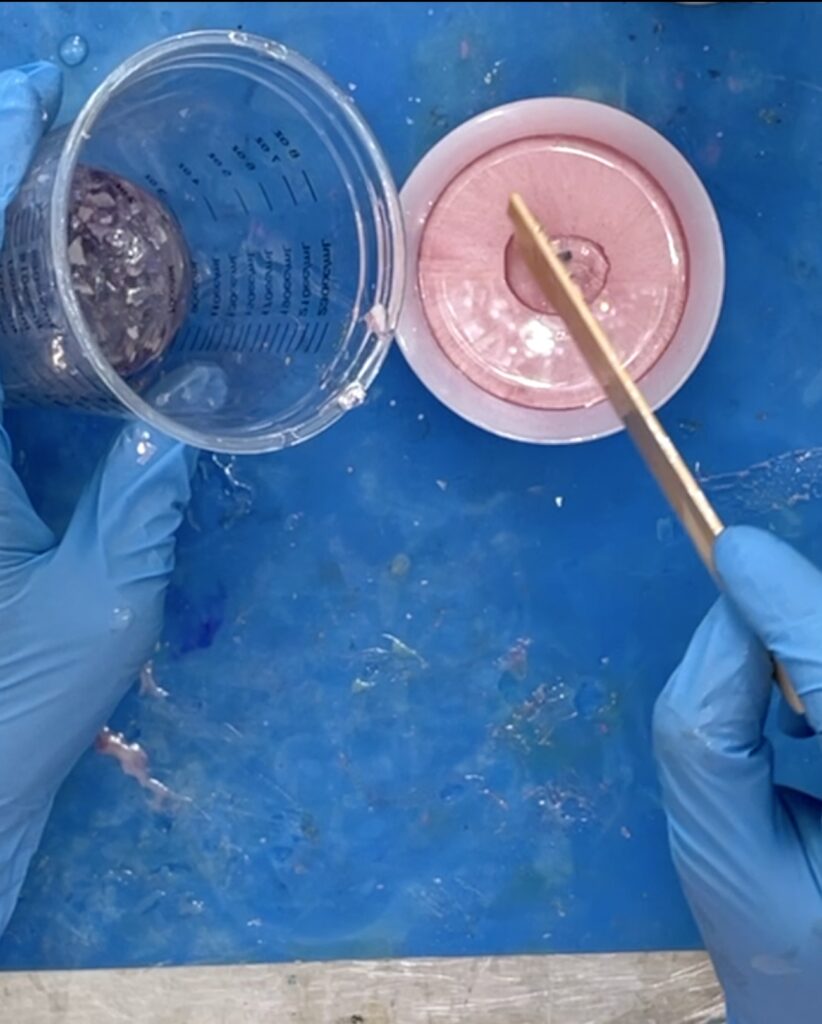
I mixed six ounces of resin and divided it into three cups.
Step 2
I added pink, pigment powder to one, green to the second, and white chunky glitter to the third.
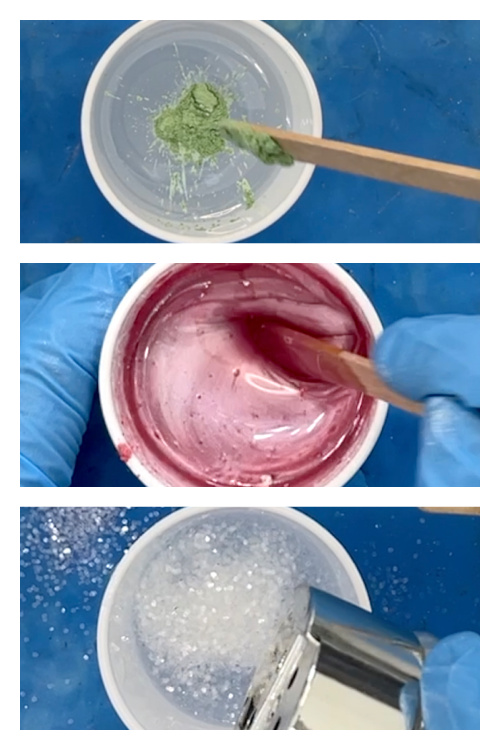
Step 3
I poured the resins into the base of the jar mold. Beginning with the pink, I then followed with the green, and then the white glitter.
I reserved some pink for the lid.
*Remember: When you are pouring the base, the first color your pour will actually be the top of the jar.
Step 4
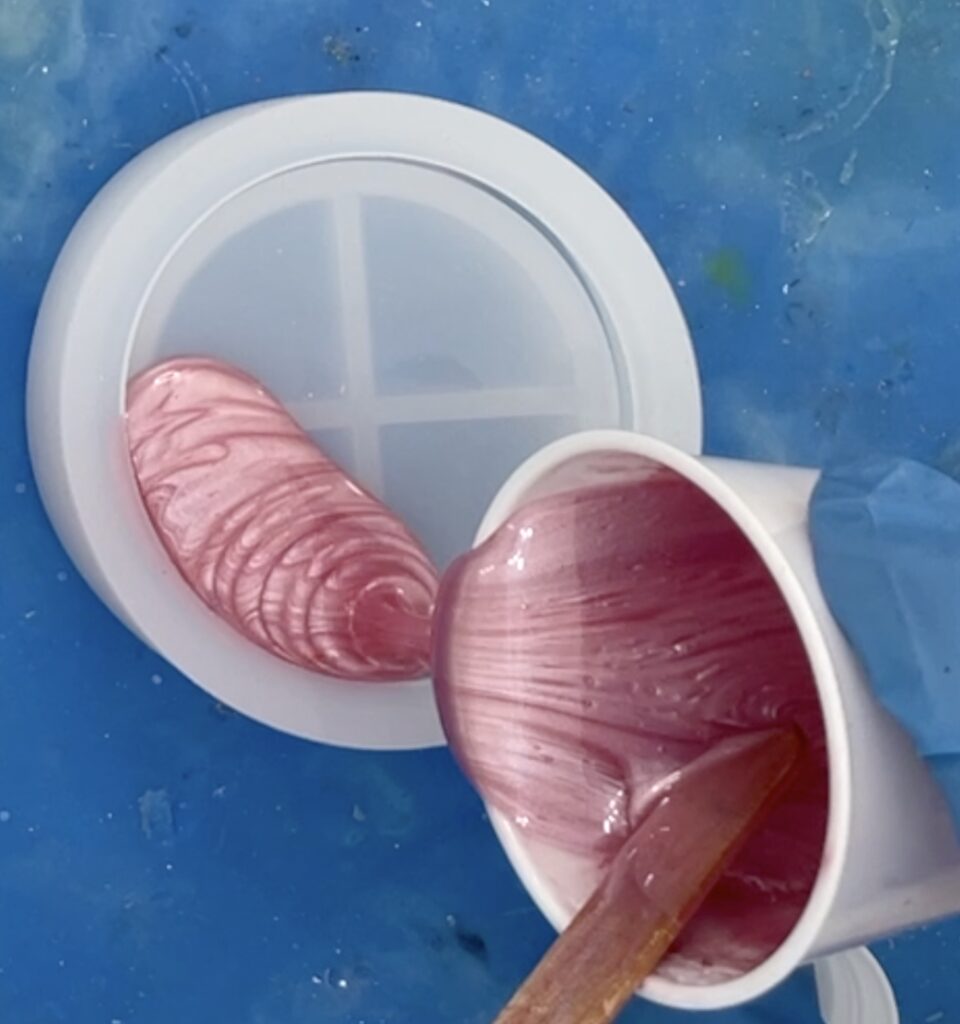
I poured the remaining pink resin into the lid mold.
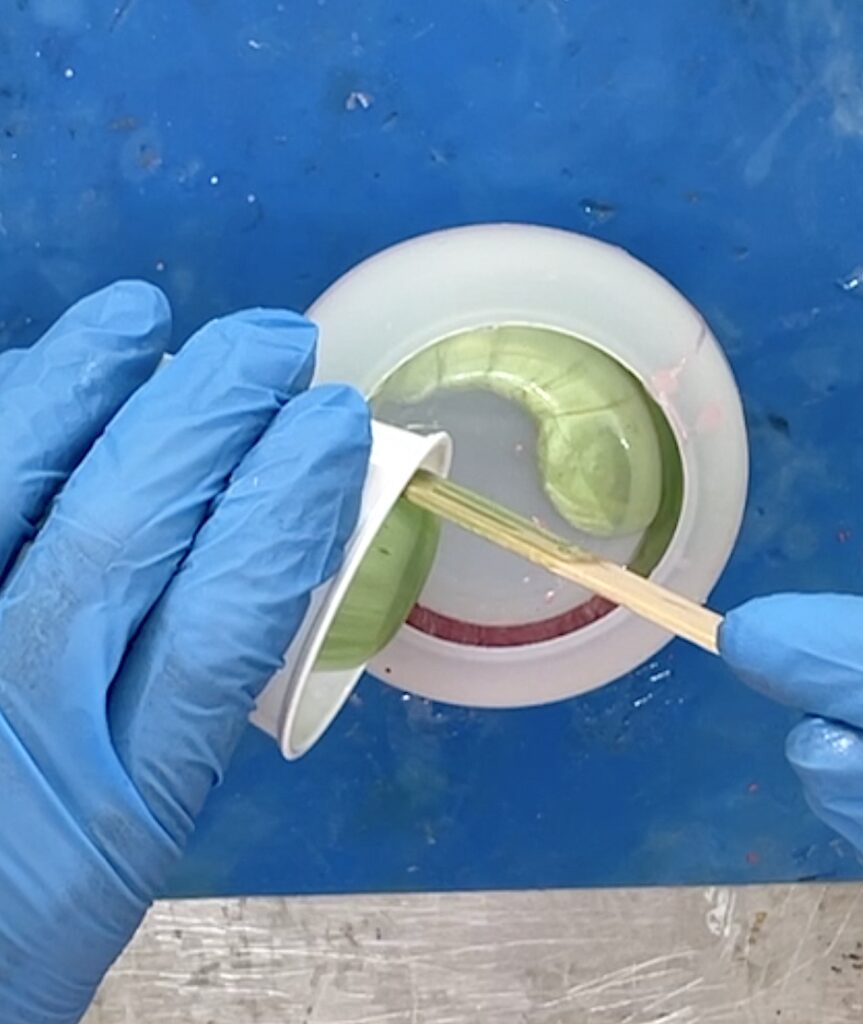
Step 5
Once it had cured, I removed the base from the mold!
WOWZA!
I love it already!
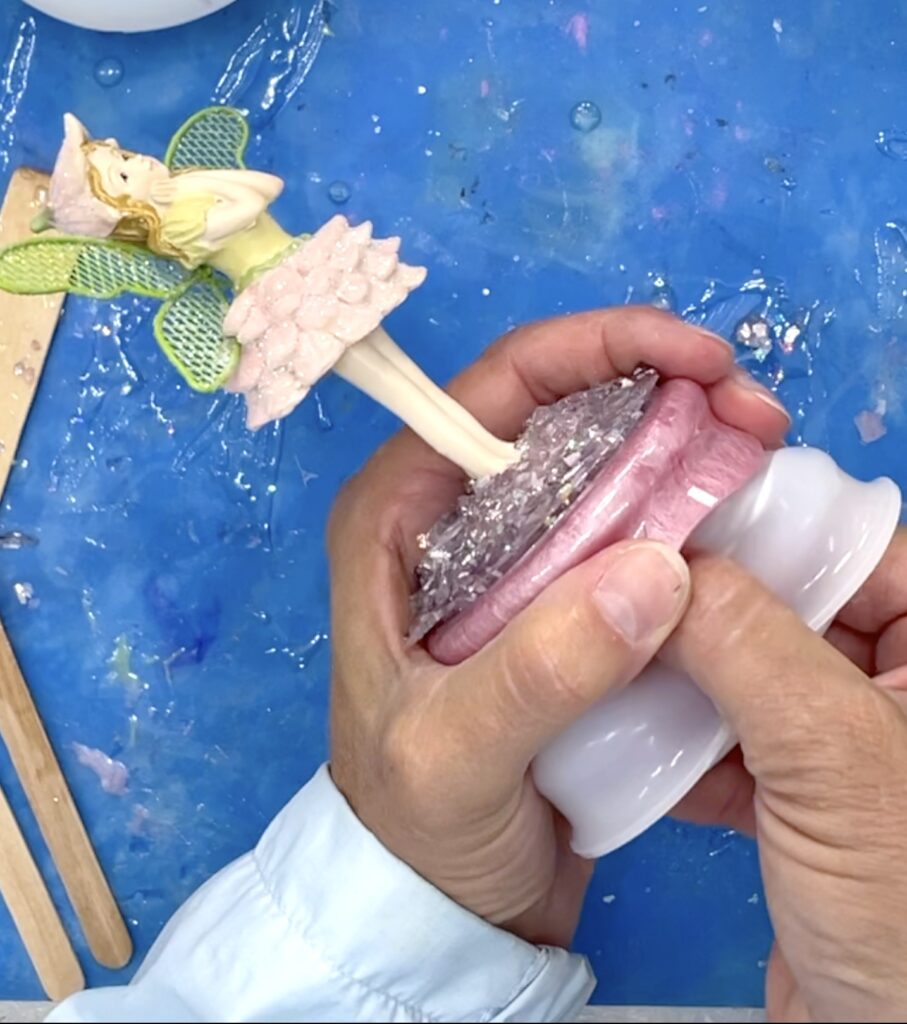
Step 6
I left the lid in the mold for this next step, thinking I would get a cleaner lid by doing so.
I mixed one ounce of resin and put a little bit onto the jar lid.
Then, I put the base of the tooth fairy into that resin. This will help keep her securely on the lid.
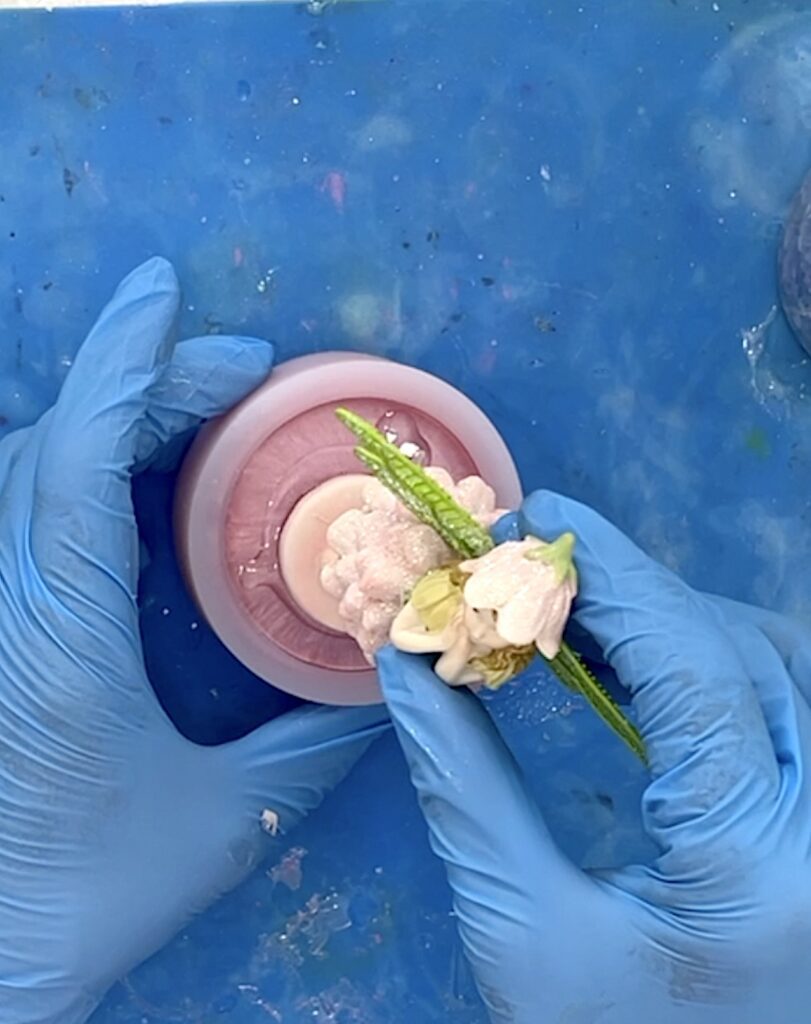
Step 7
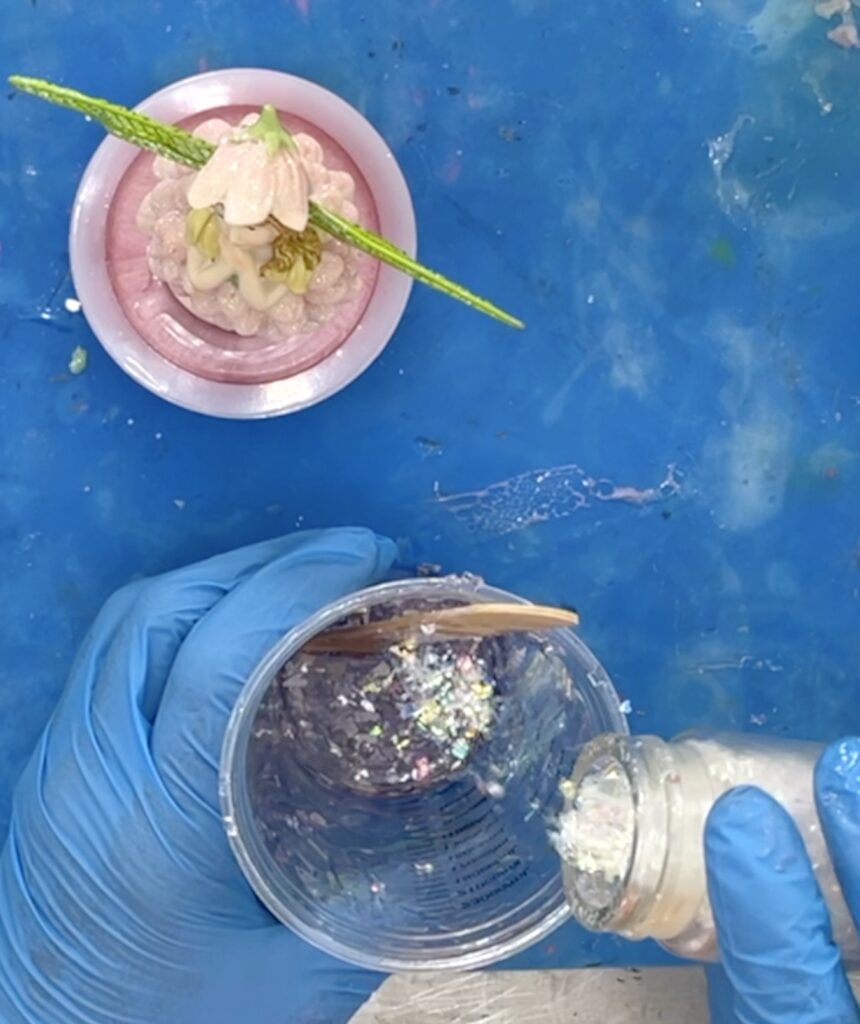
I mixed broken glass shards (they looked like little broken mirrors) and iridescent confetti into the remaining resin.
I wanted them covered so the glass edges would not be sharp.
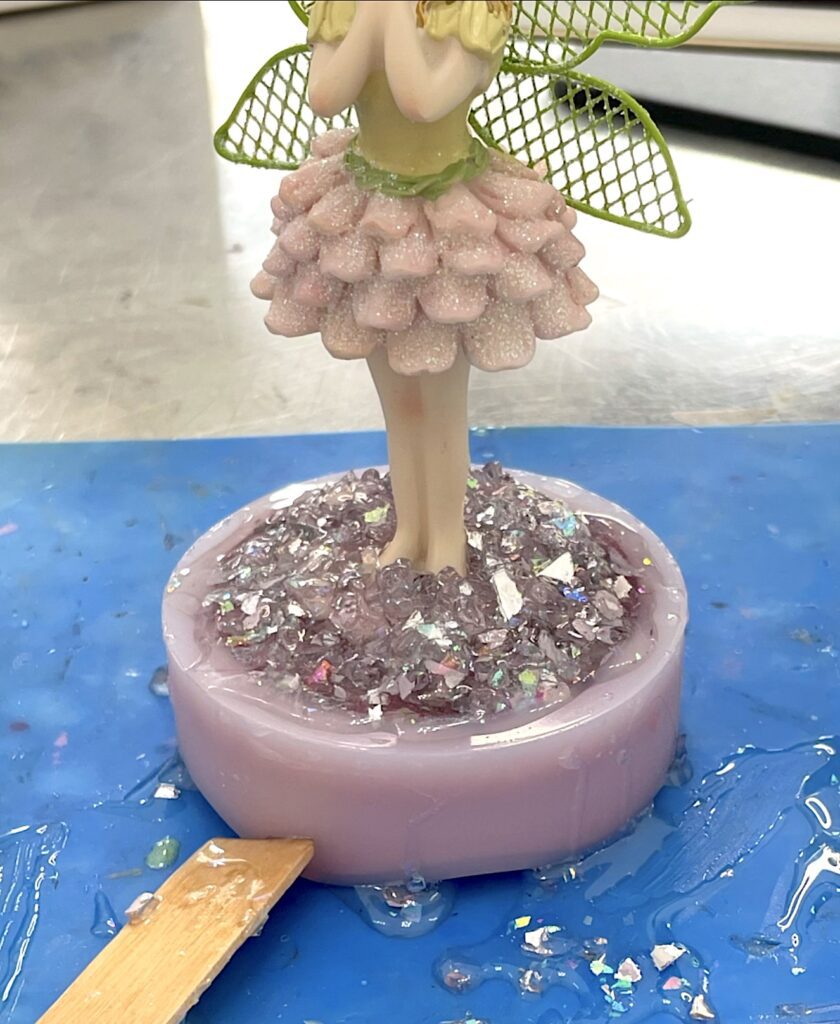
Step 8
I covered the lid and the feet of the tooth fairy with the glass and confetti mixture.

This is why I wanted to leave the lid in the mold. It prevents any excess resin from dripping down the sides of the lid.
I did use my stir stick to scrape any of the resin that ended up over the mold and then let it cure for about 8 hours.
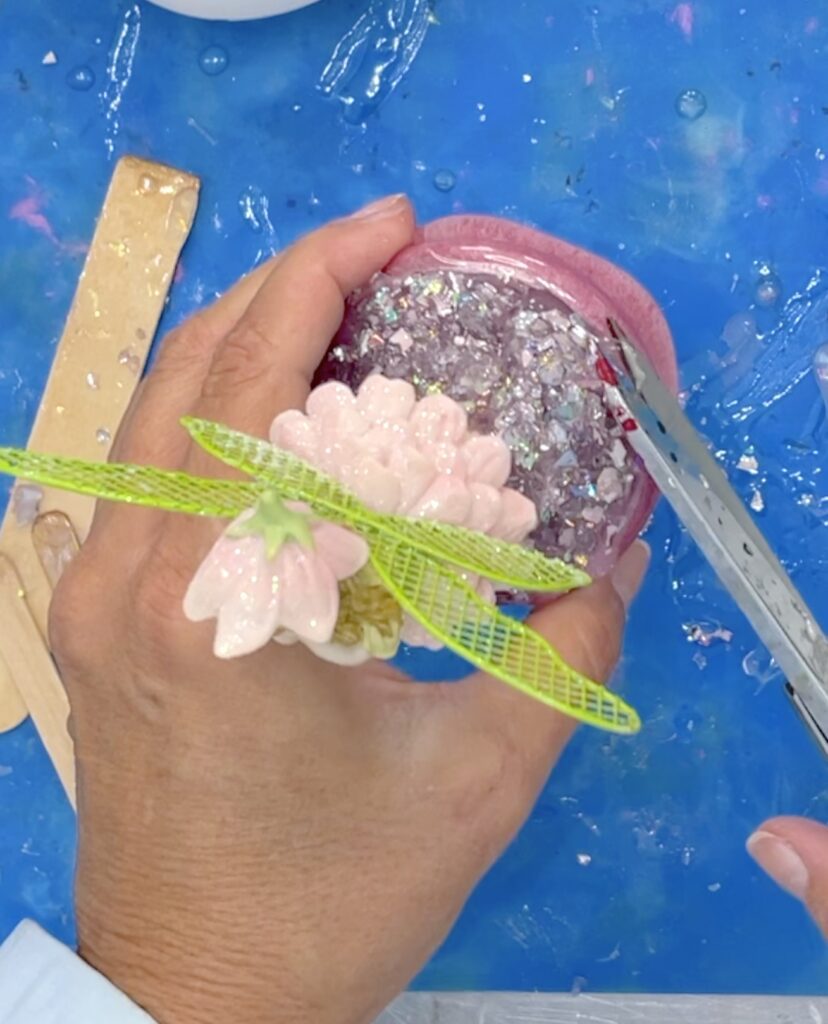
Step 9
I removed it from the mold!
Step 10
The reason I removed it from the mold at around 8 hours is the resin has set but is still pliable enough to manipulate and to trim with scissors.
That’s it!
BUT…if you want to add a little personal touch, you can add a note or a poem.
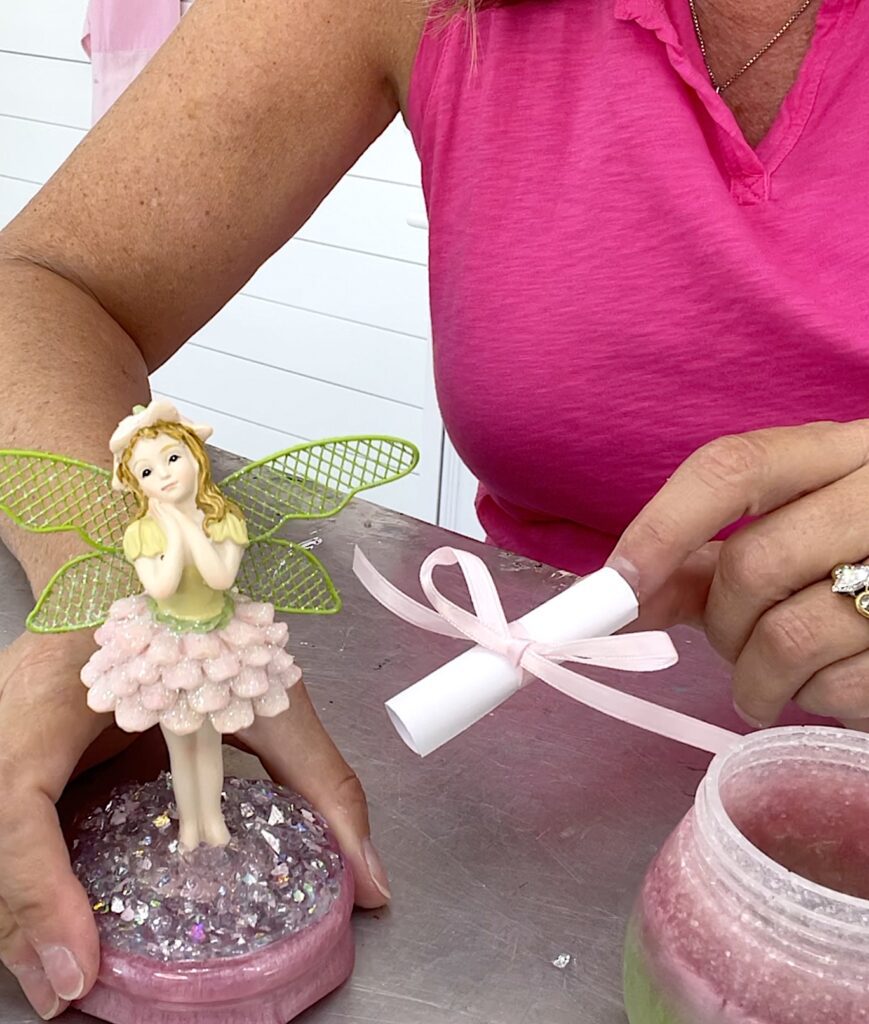
I just LOVE this so much!
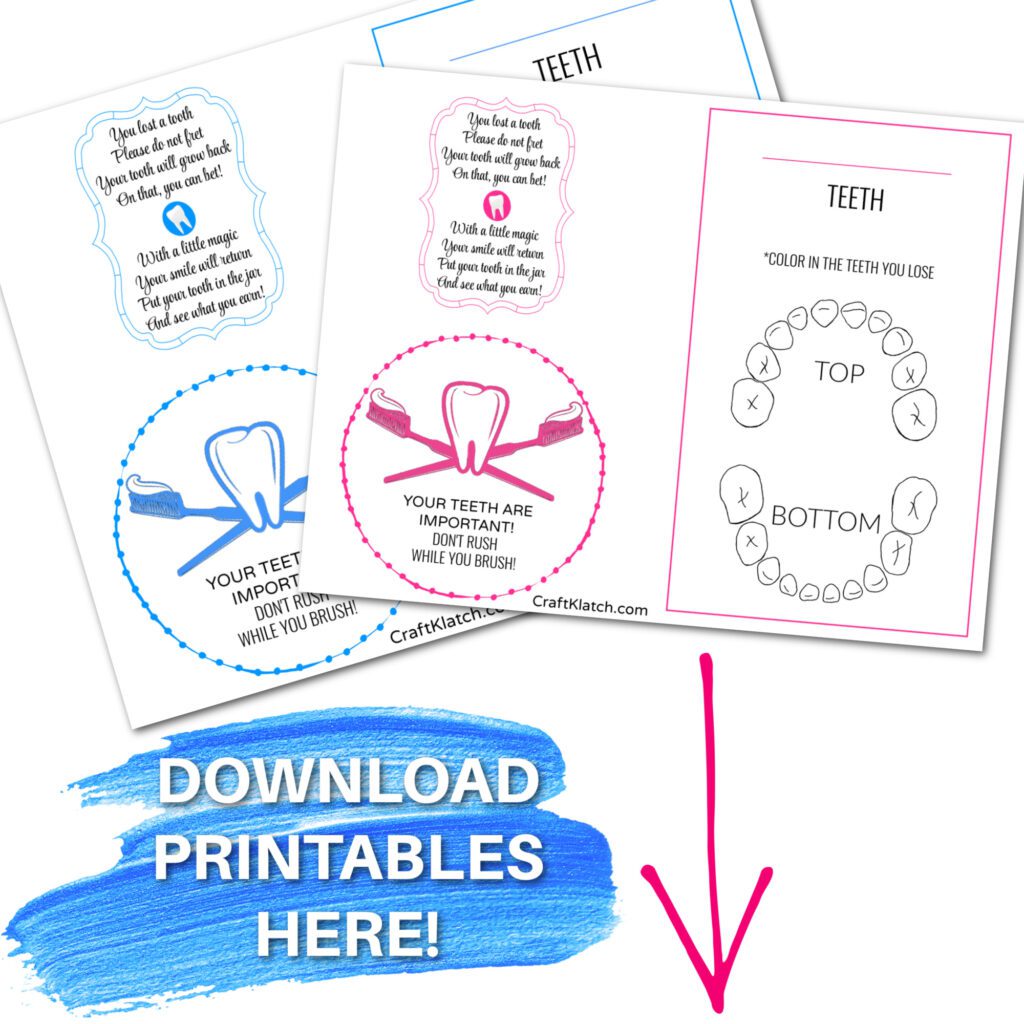
Free Tooth Fairy Printables!
I love this project so much that I made two FREE printables! There is a pink version and a blue version. You get both!
Each printable includes:
- Poem to add to the jar
- Tooth chart – each tooth can be colored in when lost
- A badge that can be hung up on the mirror with a reminder: Don’t rush while you brush!
WAIT!!! More Tooth Fairies?

Yes, I did it! According to Reagan, everyone has their own tooth fairy. So, instead of trying to recreate the same one, I made each grandchild a different tooth fairy jar.
Jake’s is a little smaller, but that is the one he selected. I added a fake tooth to his fishing pole.
Other Resin Projects You Will Love!
If you enjoy working with resin, be sure to check out these projects:
Thanks for stopping by! Remember: Life’s too short not to shimmer, so grab your glue gun and your glitter!™ Stay safe!
Mona
Be sure to PIN IT for later!
Hi Mona, I think that is soooo beautiful!!!! I just LOVE it!! You are so good at everything you do!!! I think I might try those products!! I’m really impressed!!!
Hi Sylvia!
You are much too kind! I have to say that the resin was really easy to use. It calls for being mixed for three minutes and it does not require a second cup. I was not sure it was going to cure properly but it cured BEAUTIFULLY!
This is more of a question than comment. #1 thanks for the info on the new product! #2 with the other product that you used to use for example halloween/christmas/beach house using the ginerbread mold – that product said to use up the entire box within 6 months. I know for you that’s no problem for you because you ARE the resin queen:) but my question is on this Lets Resin product does it have to be used up AFTER you open the bottle within a certain period of time? I went to their website and saw no info on the product in regards to that question. Thanks again for your info/help. I always enjoy seeing what new ideas up come up with!
Hi Kathy- Questions are always good!
I just ran out to the craft shed to look it up. I suspect all resins have a similar shelf life. This is what it said:
1 year in unopened box. Best if stored in a dry place in the container and out of direct sunlight. The ideal storage temperature is 70°F.
I hope that helps!
You can reach out to them and see if they have more information.
Mona
Hi Mona,
I was reviewing the Let’s Resin brand from your video. I reviewed the product on Amazon and there were some really discouraging reviews (double checked unique users on reviewmeta). There was complaint about mixing pigment and how this changed the epoxy to hardener ratio. You used quite a bit of pigment, glass, and glitter. Did you the project had to cure longer or adjust your ratio?
I would be interested in seeing another resin project before I buy. Can you let me know any other experiences you had with let’s resin?
Best,
Angela
Hi Angela-
This is the first time I have used Let’s Resin. When I read the directions for the resin, it said it only needed to be mixed for three minutes and it did not call for being transferred to a second cup. That’s the first time I have come across a resin with a short mix time and not having to use a second cup or container, so I was skeptical. I was worried about soft spots that would not cure properly. I have to say, it mixed easily and it was quick. I did NOT use the second cup. The pigment powder and the glitter mixed beautifully and it did not impact the cure time at all. The jar lid does not stick to the bottom and everything is solid – no soft or sticky spots. I would have no problem recommending Let’s Resin epoxy. Remember, humidity and temperature come into play for curing too. I have my craft shed set to 80 degrees and it keeps the humidity at bay. I hope that helps!
Thank you so much, Mona. I was a little hesitant based upon Amazon reviews. Have a great day.
I get it! I always read reviews too! I was very pleasantly surprised!I hope you are too!