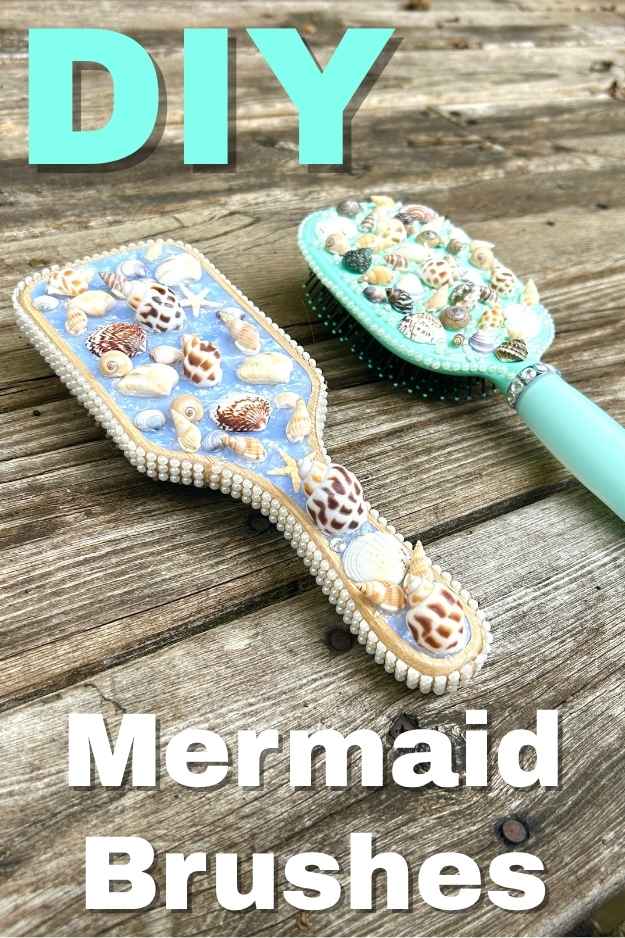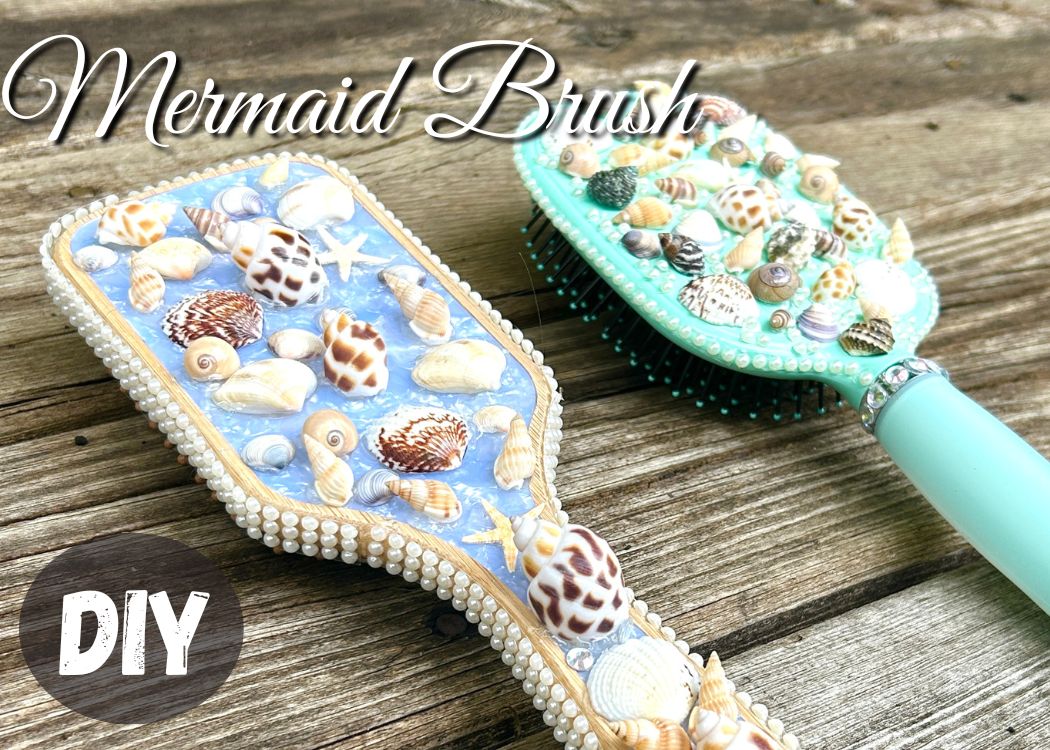
Create a DIY mermaid brush with shells, pearls, and sparkle! A fun and easy craft to make magical memories with kids or grandkids.
When my granddaughter, Reagan, said she wanted to make a mermaid brush, and her mom asked if I wanted to do it with her…
…Well, silly question…
I thought I was just going to hang out and watch her make one, while I cheered her on. That alone would have made me happy. But then I found out they actually brought supplies for me to make one too!
I was completely over the moon!
I turned out to be such a fun and creative project to do together, as it’s one I’ll treasure forever.
What Is a Mermaid Brush?
That’s a great question, because I had no idea when I was asked about it.
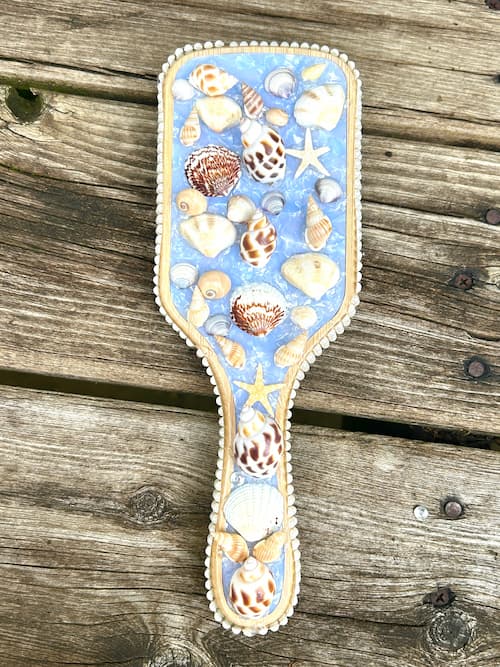
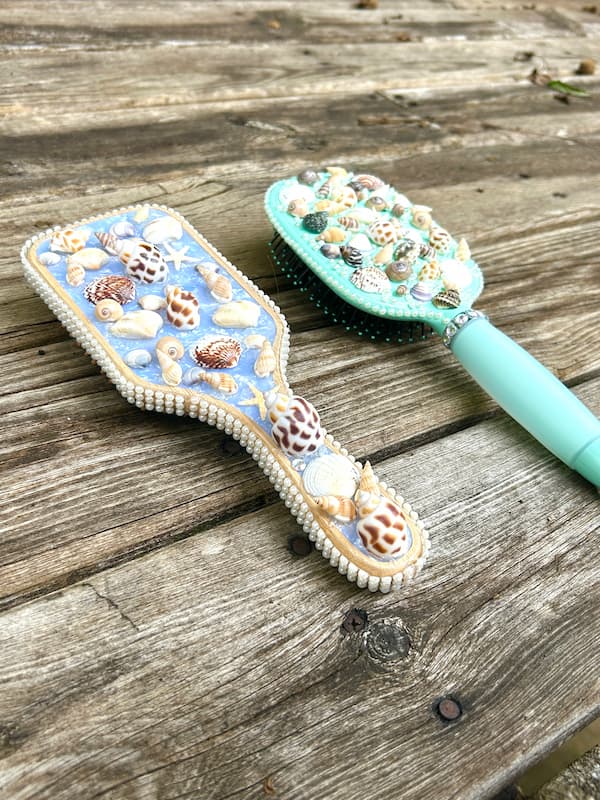
Turns out, a mermaid brush is a fun, decorated hair brush inspired by ocean themes. Think shells, pearls, sparkly gems, and magical mermaid vibes. It’s the perfect craft for kids (and adults!) who love crafting and love beachy designs.
You can use it as a regular brush, or display it as a decorative piece on a vanity.
Mermaid Brush Craft Supplies
*Disclosure: This blog uses affiliate links from Amazon and other retailers. I earn a small amount from qualifying purchases at no additional cost to you.
You don’t need much to make your own mermaid brush. Here’s what we used:
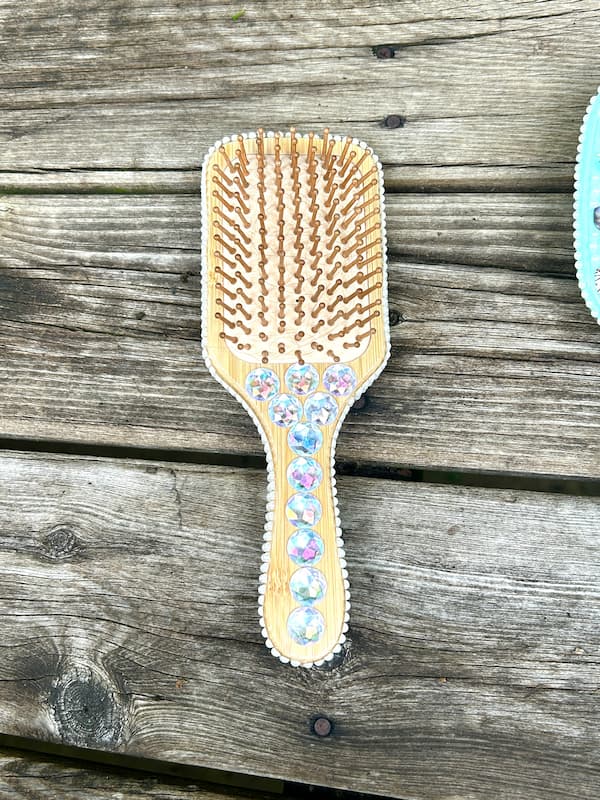
- Hair brushes with a flat back (wood or plastic)
- Shells
- Half pearls
- Self adhesive gem strips or loose rhinestones
- Strong glue
- Sticky-backed pearl/gem strips (for easier borders)
How to Make a Mermaid Brush
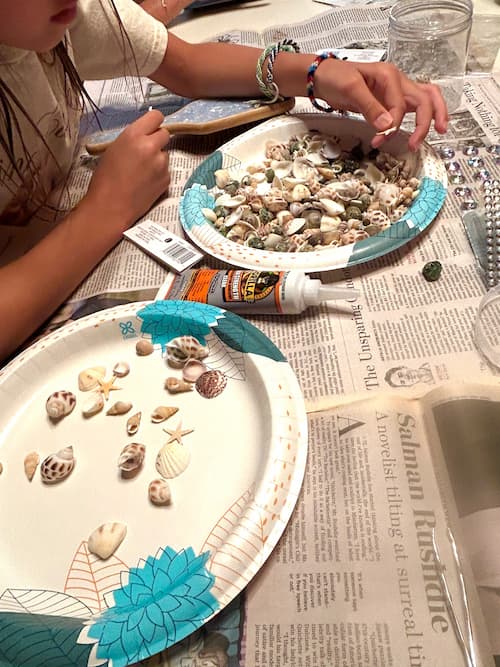
Step 1: Prep and Plan
If the brush needs cleaning, give it a quick wipe down to remove any dust or residue. Rubbing alcohol will do the trick.
Also, cover your work surface with newspaper or foil.
Then, start laying out your design. You don’t need to be exact, but having a rough layout will help you visualize your final creation.
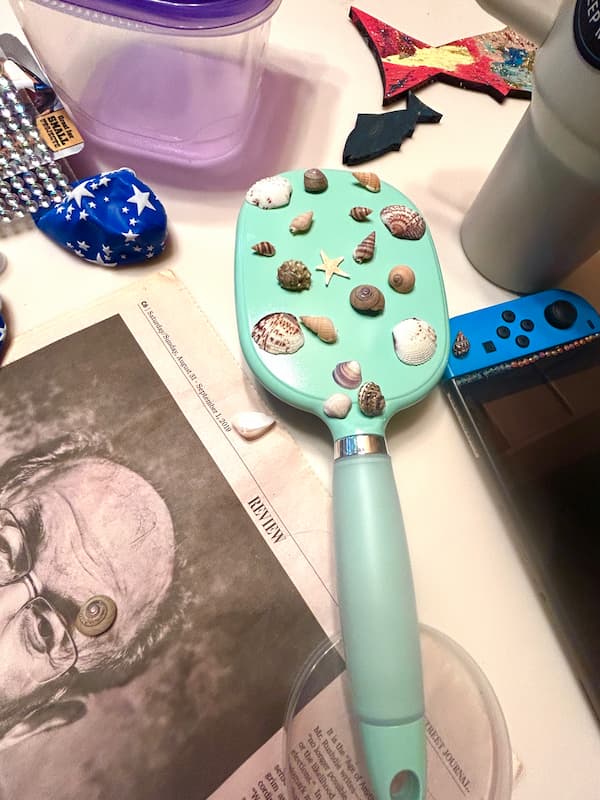
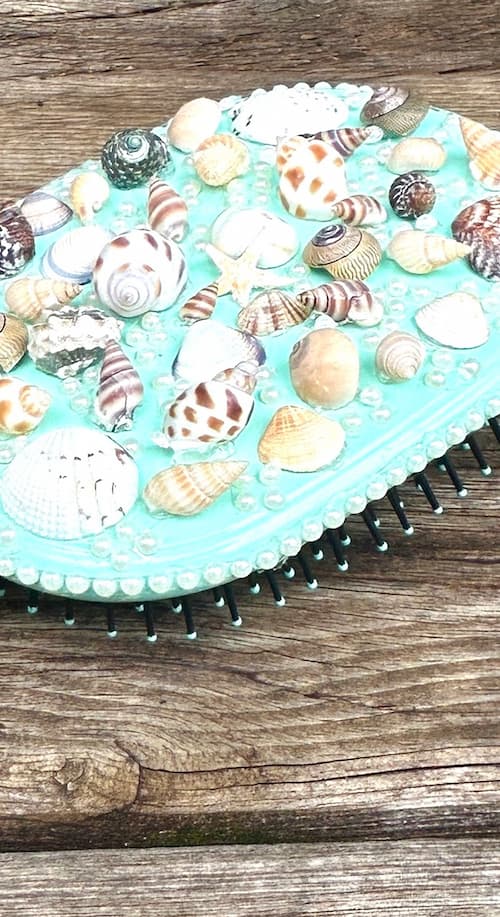
Step 2: Glue on the Shells
Start with the larger elements first. We began by gluing the shell directly onto the back of the brush. Use a strong glue that works on the material your brush is made of, whether plastic, wood, or another material.
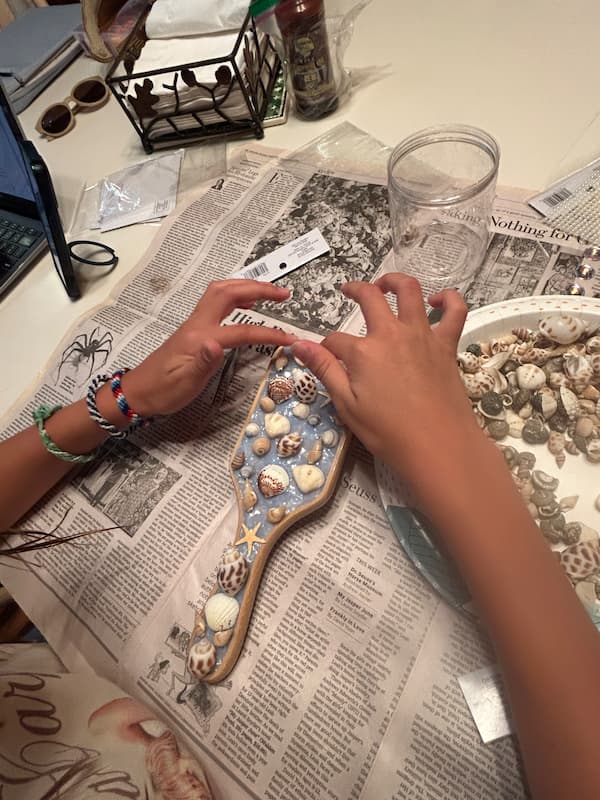
Work slowly so the pieces stay in place.
Step 3: Add Pearls and Gems
Once your shells are secure, it’s time to bling it up! We used half pears and small gems to add that magical sparkle. Using them in small groups is a nice filler without having to fill up ever bit of your brush.
We both created a border around our brushes using stick-backed pearl strips – super easy and very pretty! Way easier than trying to create a border with individual tiny pearls.
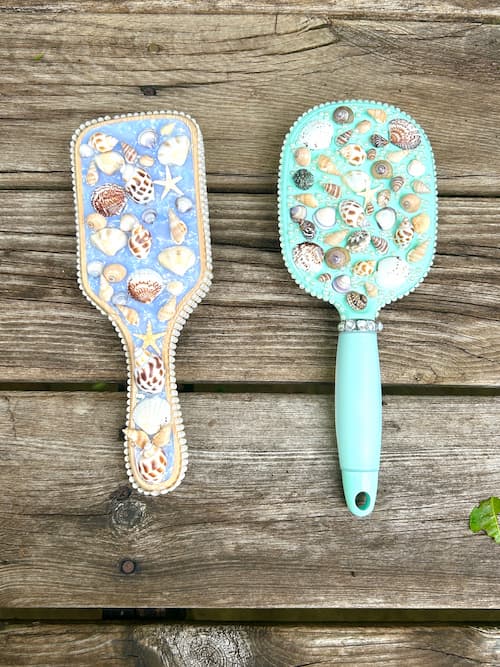
Our Mermaid Brush Designs
Reagan and I both put our own unique spin on our brushes. The background on her brush was really pretty and just added to the overall design.
We had a blast creating these together!
A Magical Memory
Crafting a mermaid brush with Reagan was more than just a fun afternoon – it was a chance to connect, laugh, and create together.
She was proud of hers, and I was pretty proud of mine too!
Projects like these are reminders that crafts aren’t just about the finished product. They’re about the time spent together and the memories made along the way.
Reagan took hers home, but I have mine hanging from a ribbon on the bathroom wall. Now it’s easy to grab when I need to brush my hair, and it is also great beachy decor!
Here are Some Other Fun Crafts to Do Together
- Our Fun Family Tradition: The Fish Sticks DIY
- Kids Artwork Come to Life
- Rainbow Kids Snack Placemat DIY
- Seashell Jewelry Holder DIY
- Alcohol Ink Pendants
Remember: Life’s too short not to shimmer, so grab your glue gun and your glitter!™
Mona
Be sure to save it for later by pinning it now!
While you are there, be sure to follow me on Pinterest!