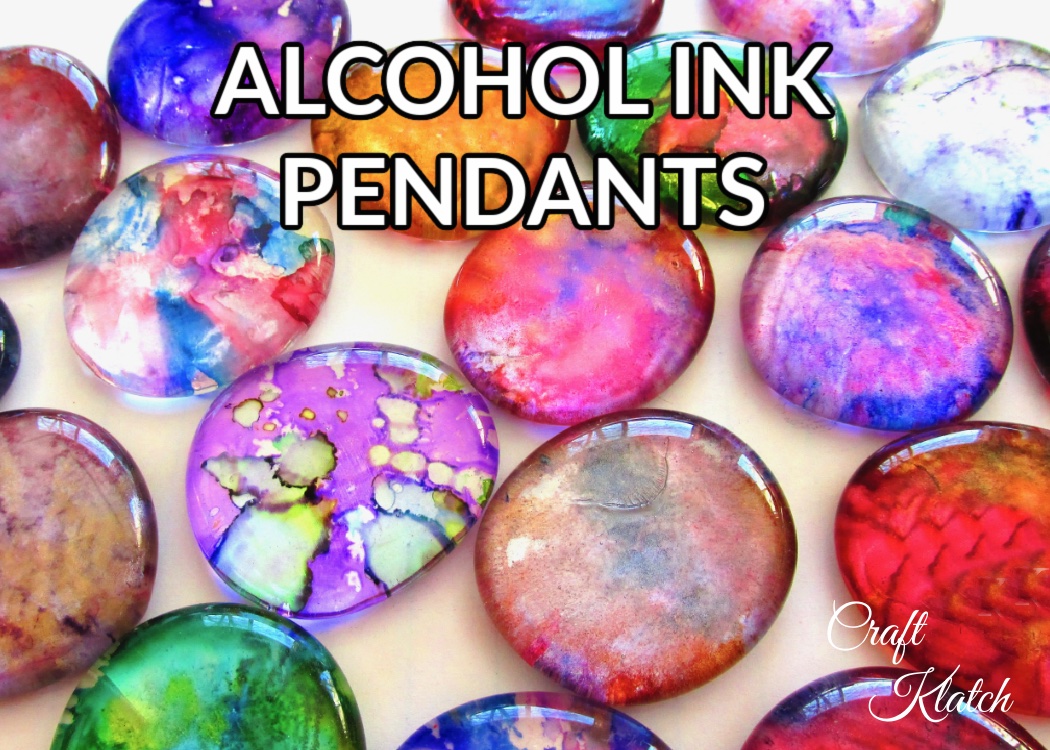
Alcohol ink pendants are an easy jewelry craft for kids, teens, and adults! It’s an inexpensive craft project and you will want to keep making more!
Let me tell you…I am excited! I mean…I’m really excited! If you like to make jewelry pendants and enjoy trying different mediums, alcohol ink on glass is the bomb! You can make alcohol ink jewelry and strut around like you are wearing the crown jewels!
Oh, the compliments you will get!
It is an easy craft and inexpensive! Oh! Did I mention, beautiful? In this case, I am making alcohol ink pendants, but you can turn them into rings, bracelets, magnets, or a gosh darn tiara!
Let’s start with the essentials!
Glass Gems
*This blog uses affiliate links. As an Amazon Associate I earn from qualifying purchases, at no additional cost to you.
The first time I used these glass gems, I made Nail Polish Jewelry.
Talk about an addictive craft!!!
I loved it so much, I came up with a few different versions! Oh my gosh! With so many nail polish colors, where do you stop?
It’s one of my favorite crafts that spans the generations. Great for kids, teens, and adults.
I’ve since made around 17+ projects using the glass gems and I suspect there will be many more in the future!!
The glass gems come in all shapes, sizes, and colors and can be used for WAY more than just jewelry, or as the vase filler, it was originally intended to be!
For example, I made Mosaic Gem Drink Coasters and I also put them in concrete for a Mother’s Day Stepping Stone!
That barely scratches the surface of glass gem crafts!
Alcohol Ink
Like the glass gems, I have used alcohol ink on a number of projects from coasters to jewelry to artwork. I love how vibrant the colors are and I love that they can be used on a number of different materials and they even work on hard, slick surfaces, where a lot of mediums do not!
It actually sticks to the glass!
Different surfaces will give you different effects and results, which makes it even more exciting!
The most common brand of alcohol inks you will find is Tim Holtz alcohol ink, which is an amazing product, but you can find some others too.
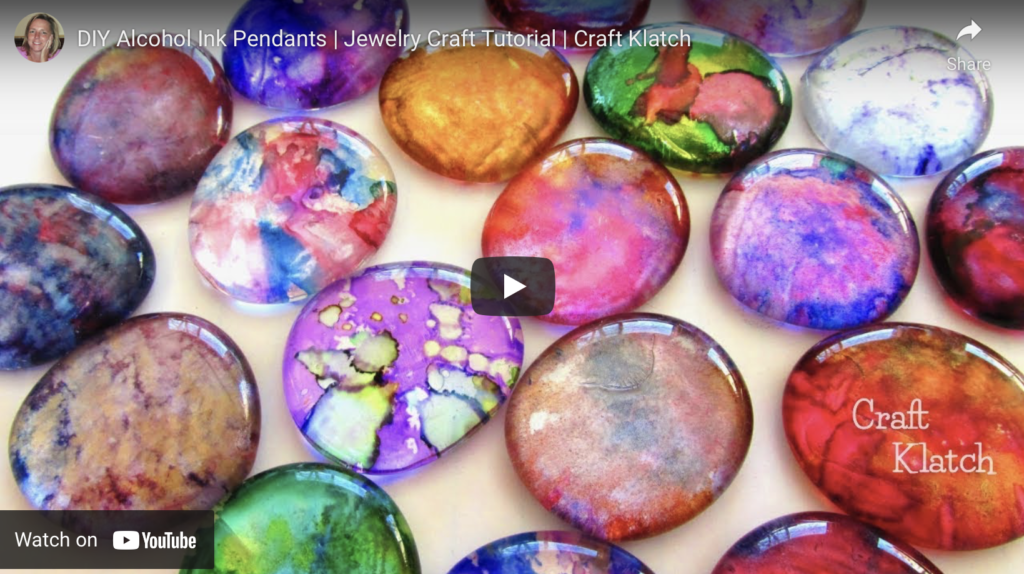
Here is a quick video alcohol ink video tutorial to see how I made them:
Materials You Will Need
From the glass gems to the alcohol inks, to the glue on jewelry bails, you can find the items I used to make this project here:
- Gems: https://amzn.to/2CbvET6
- Jewelry bails: https://amzn.to/2mbigb0
- Alcohol Ink: https://amzn.to/3ni15SY
- Felt or other scrap fabric
- Popsicle stick: https://amzn.to/2qdKDKM
- Glue: https://amzn.to/38Dj7Lc
- Sealer: https://amzn.to/3nbA2sc
Directions:
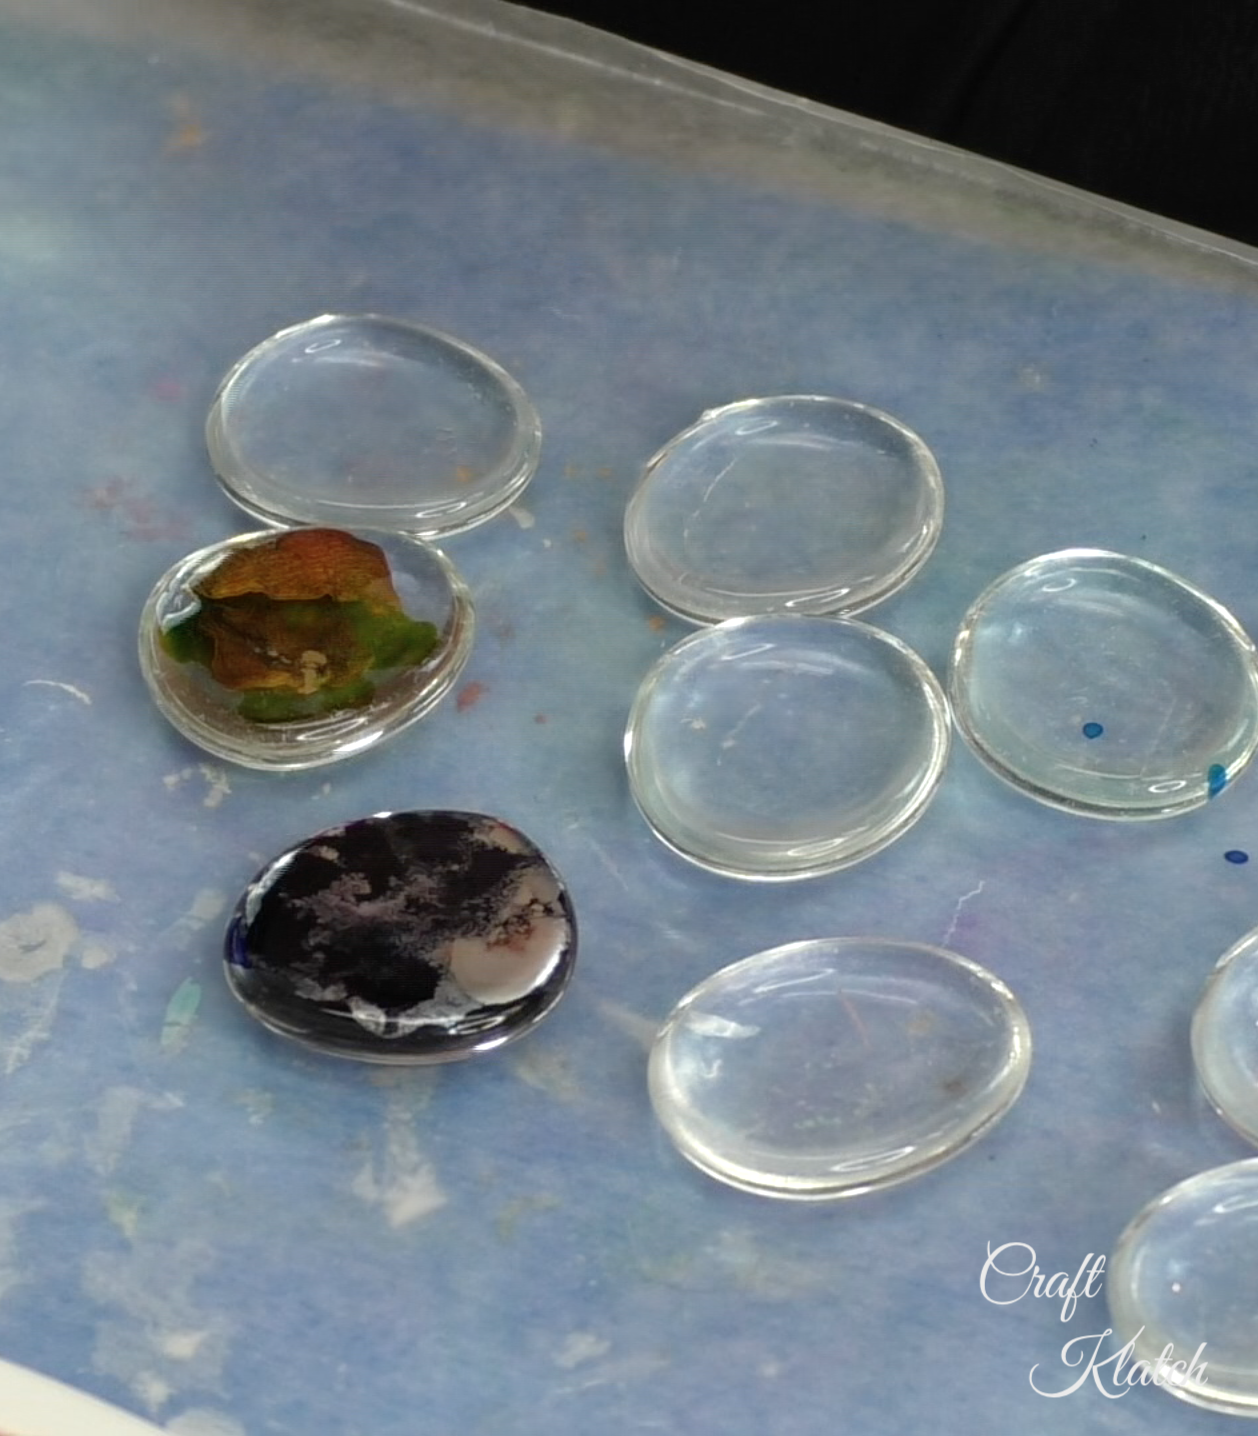
Step 1: Get Out Those Gems!
I started with the round, clear glass gems. If the gem is lumpy or imperfect, don’t worry, it won’t matter. Also, if they are not perfectly round, don’t worry, it just makes them more interesting!
I used the larger gems for the alcohol ink pendants, but you can use smaller sizes for this as well. The smaller ones might make a fun ring, on a bracelet, or…ahem... a piece for your tiara!

Step 2: A Little Cleaning Goes A Long Way!
I took a little rubbing alcohol and cleaned them off. I like to clean them off because I don’t want there to be any grease, oils, or dirt that might get in the way of the alcohol ink properly sticking and/or spreading.
The cleaner the surface, the better.
The rubbing alcohol dries very quickly, so this step won’t even slow you down!

Step 3: I Made My Own Tool!
Let’s not get too excited, I didn’t invent the wheel or fire. I created a dauber. It’s not pretty, but it was free and does the trick!
It consists of a strip of felt glued around a popsicle stick. That’s all it is.
Why do I need it? It allows me to move the alcohol ink around.

You could use a cotton swab instead. If you do use a cotton swab, make sure you don’t get any little lint pieces stuck in your project.
A makeup sponge would be another alternative. You could rip or cut the sponge for interesting effects too!
Step 4: Bust Out The Alcohol Ink And Let’s Make Some Jewelry!
I started adding the alcohol ink. You want to work on the flat side of the gems. Simply drip the colors on the flat side of the gem and let them spread around.
By working on the flat side of the gem, when you flip it over, the effect on the other side is more beautiful, magnified, and shiny.

Step 5: Blending
The colors will blend! Wherever the colors run together, they blend and create new colors!
You can let them run together on their own by dripping the inks close to one another. You can also pick up the glass gem and tilt it, so the colors find each other and start blending.

The alcohol ink pendants don’t look like much…yet…but wait until you see the fronts!

Step 6: Out Comes the Dauber!
On some, I used my dauber, which gave me more muted colors and additional blending. You get different effects depending on how you approach it and what look you are going for.

Step 7: And Then There Were 16!
I let them dry and kept making more!!! Once you get started, you won’t want to stop! No two gems will be alike!
I LOVE IT!!!


Step 8: Jewelry Bails
Time for the jewelry bails, which are sometimes called pendant bails.
There are different kinds of pendant bails. These in particular are glue on bails.
I took jewelry bails and glued them onto the back of the alcohol ink gems.
You can seal them beforehand and I have a sealer listed above. A helpful article for sealing alcohol ink on glass can be found HERE!
Others have also recommended the RustOLeum 2x Clear Gloss Sealer as an option as well.
Any glue that dries clear and will stick to metal and glass should do the job. My go-to glue is generally Ultimate Glue, but any glue that adheres to glass and metal should work.


Look how beautiful they are!
I have these set up as pendants, but you can easily use them as magnets, decorative table scatter, in a mosaic, in a coaster, etc.
Maybe you just enjoy looking at them! I do!
I was able to complete these 16 alcohol ink pendants in no time!

In case you don’t have time to make any, here are some beautiful alternatives you can buy!
They make gorgeous gifts!

Let me answer some FAQs:
Where do you buy alcohol inks?
They are available at craft stores. Michaels has a good variety of inks and a few different brands, including Tim Holtz alcohol ink. They also carry accessories and tools to work with the alcohol ink, including an air blower, applicators, foil sheets, Yupo sheets, etc. It’s a great place to stock up!
Of course, Amazon has EVERYTHING you have ever dreamed of related to alcohol ink, including beautiful books for inspiration! AND get this, they even have alcohol ink gel nail polish…um…WHAT?!?!
That has certainly piqued my interest…not for my nails, but for what else I can possibly use it on!
What is an alcohol ink?
In a nutshell, it’s a high pigment, alcohol-based ink. It works especially well on non-porous surfaces, such as glass, plastic, ceramic tile, etc. They are waterproof, but depending on what you are using them on you may want to seal them.
It will smear if it comes into contact with certain chemicals, including alcohol. Some sealers will also reactivate the alcohol inks and cause them to smear. Read the article I referenced above, where different sealers were used.
Can you make your own alcohol ink?
Yes. There are a bunch of how to make alcohol ink youtube tutorials with rubbing alcohol and Sharpie markers. You have to soak the ink cartridge from inside the marker in rubbing alcohol. The alcohol and the marker ink mix and create an alcohol ink. I’m not sure if it is as vibrant as ready-made alcohol ink, but it is a cheaper way to get a large variety of colors. I have not made any, so I cannot attest to how well they work.
Can you use them to make alcohol ink jewelry? Sure, why not?
What can you use alcohol ink for?
There are so many uses. People have used them to dye fabric, do artwork on canvas and paper. I have seen people do wine glasses and I have used them to make Alcohol Ink Coasters. Yup, resin can work with alcohol inks, like in my Rainbow Resin Coasters.
Can you paint with alcohol ink on canvas?
Yes! A canvas is porous and the ink will soak right into the material. That might be an effect you like. Otherwise, you can prime your canvas with gesso, to keep the inks on the surface and be able to move them around for longer.
I used them on canvas as part of my Resin Fish Painting project.
Can you use alcohol ink on wood?
Yes, but like the canvas, wood is a porous material and it will soak into the wood and create more of a stain effect, which is still beautiful! You will use more alcohol ink on a wood project than you would on a glass, foil, or Yupo paper project, so you might want to keep the size in mind when you are planning a wood alcohol ink project. My wood Shark Coasters incorporated alcohol ink on one of the sharks.
I have two questions for you and I’d love for you to share your thoughts in the comments below:
- Have you worked with the glass gems before? If so, what did you make?
- Have you worked with alcohol inks? If so, what did you make?
I hope this helped inspire you to try something new if you haven’t already!
Thanks so much for stopping by and remember: Life’s too short not to shimmer, so grab your glue gun and your glitter!™ Stay safe!
Mona
Thank you so much for this very informatve and beautiful DIY. These are so vibrant and beautiful and look fairly simple and super fun to make. I can' wait to try it.
I hope you gave it a try! I’m glad you enjoyed the post and are busy making more!
such a fun idea!!! I'm gonna have to try it!!!
I hope you gave it try!
this project looks VERY addicting!
It definitely is!
Do you have to seal them?
I would definitely say yes to that, but not even a mention in the instructions…
I would guess yes, with Mod Podge, as it is mentioned in her list of supporting links.
I have read that several light coats of Lamar Varnish spray by Krylon is a better sealer to use!
I have since revised the post to include a sealer. Thank you for pointing that out!
It is truly fascinating article and I would definitely allude my companions to peruse it. You can likewise get to our site for task help which is
Penelopes Purity rings
Great idea. I have many of these glass "globs", as I call them. Have just waited for someone like you to tell me what to do with them. Thank you.
I hope you ended up trying it and using some of your glass “globs”! 😉
How did you seal the inks?
I have updated the post to include information on a sealer!
I keep buying Designer Diamond Pendants but now I think I should try this DIY style too. Lovely!
I hope you ended up trying it!
what do you use to glue the bails on the gem?
I like Ultimate glue that I have listed. Any glue that will adhere to a metal and glass should work.
Really a great addition. I have read this marvelous post. Thanks for sharing information about it. I really like that. Thanks so lot for your convene. alcohol
Glad you enjoyed it!
I think this is a really good article. You make this information interesting and engaging. You give readers a lot to think about and I appreciate that kind of writing. rockerring.com/
You can also blow air from a straw to get a different flow from the colors.
Yes! You can get great results that way too!
I like this website very much so much fantastic information. niche guest posts
Congratulations for posting such a useful blog. Your blog isn’t only informative but also extremely artistic too. There usually are extremely couple of individuals who can write not so easy articles that creatively. Keep up the good writing !! Masjid Bandaraya
What king of glue do you use?
I like Ultimate glue, but any glue that dries clear and works on metal and glass should work fine.
Great and beautiful project, seems simple enough that I could do…great for older kids. Can a Q-tip instead of dubbers be used? Also could you put a thin piece of felt on the back to make the colors pop even more????
Hi Deb –
Yes! It’s great for older kids. You can use Q-tips, but you just want to make sure you don’t leave any Q-tip fuzz behind. You could absolutely put felt on the back to make the colors pop! After you seal them, you could paint on a color too.
I enjoyed your episode! What glue was used for the backings?
Thanks so much Katt! I have a link to the glue in the post.
Beautiful gems and pendants. Presented sequentially and clearly. Thank you!
on the clearer ones could you not glue a piece of white felt to the back then glue the hanger on? Would they be too heavy for a pin?
Hi Barbara – I think you probably could add the felt and a pin back. It would be a heavier pin, but it would think it would be fine on a sturdier fabric like a jeans jacket.
I love using. The inks.
Made tiles for gifts with small plate stands.
I make jewlery by dipping them in paint that has run of my canvases when I do pour paintings
Lots of cool designs.
I make cards with the inks.
Great backgrounds to add things to.
Time to try inks on jewlery.
Yes, Deb! I love using the inks too! I feel like I don’t use them enough. It sounds like you do some amazing projects!
I just wanted to say that I did this exact craft last year with my second grade class, (15 kids,). We made necklaces for mother’s day, and they all came out great! The only difference was that I glued a piece of white cardstock to the back to make the colors pop. So if I can do this with a bunch of elementary kids, anyone can, (and should) do it!
Thanks, Tiffany! Yes, if you want the colors to pop more, a piece of white cardstock is a great solution! I’m so glad you did this with a bunch of kids! I bet they loved it and I agree, anyone CAN and SHOULD do it at any age!