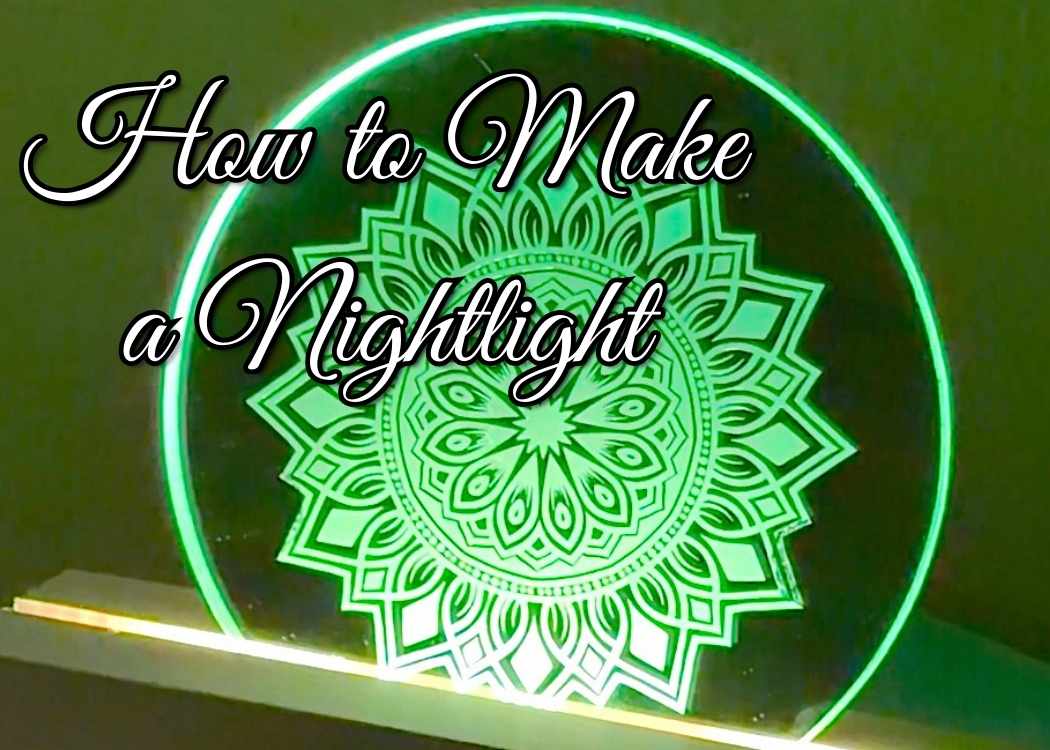
Learn how to make a nightlight from a Dollar Tree mirror using laser engraving and an LED base. Easy DIY that creates stunning ambient light!
Have you ever started a project just to see what would happen?
That’s exactly how this one began.
I picked up a small round mirror at Dollar Tree on a whim. No big plan. No detailed sketch. I just wanted to experiment and see if I could laser engrave it.
Sometimes thos “let’s just try it” moments turn into the most fun project…
…and this one definitely did!
If you’ve ever wondered how to make a nightlight that is unique and high end but costs next to nothing, you are going to love this one.
*Important to note: I am calling it a night light but it can be accent lighting or mood lighting instead. It’s all in how you use it.
It’s simple, customizable, and has that magical glow that make you feel like you totally nailed it…because you did!
Let me walk you thought exactly how I made mine.
The “Mirror” I Used (It’s not what you think!)
First, this wasn’t a traditional wall mirror.
It’s actually one of those round mirrors you put under a candle to protect your furniture from wax drips.
You can find them at Dollar Tree (and lots of other places), and they are perfect for this project because they are small, affordable, and flat.
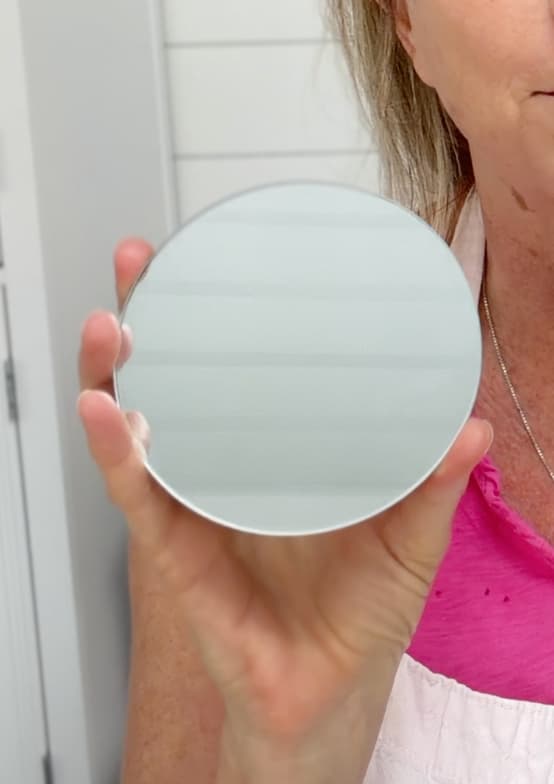
The back had little foam pads attached to prevent scratching furniture. And let me tell you…removing those might have been the hardest part of the whole project. Way harder than I expected.
But since this was just an experiment, I didn’t stress about making it pretty. I scraped off as much of the foam and adhesive as I could and moved on.
This was about testing and idea, not perfection, which is always important when trying out new things.
How to Make a Nightlight Mirror Video Tutorial
Here is a quick video so you can see exactly how I did it!
Find all my videos on YouTube!
Materials You Will Need to Make a DIY Night Light
*Disclosure: This blog uses affiliate links from Amazon and other retailers. I earn a small amount from qualifying purchases at no additional cost to you.
- Candleholder mirror
- LED light base
- Lumos Laser Engraver directly from manufacturer
- Lumos Laser Engraver from Amazon
- A design – You can draw something and do this or find an image!
How to Make a Nightlight Directions
I’m going to walk you through exactly how I made the night light, settings and all.
Step 1: Prep the Mirror
After removing the foam pieces, scrape off as much adhesive residue as possible, but DO NOT scratch the finish on the backing.
Wipe the back clean and make sure the surface is flat before engraving.
It doesn’t have to be flawless, just smooth enough to engrave evenly.
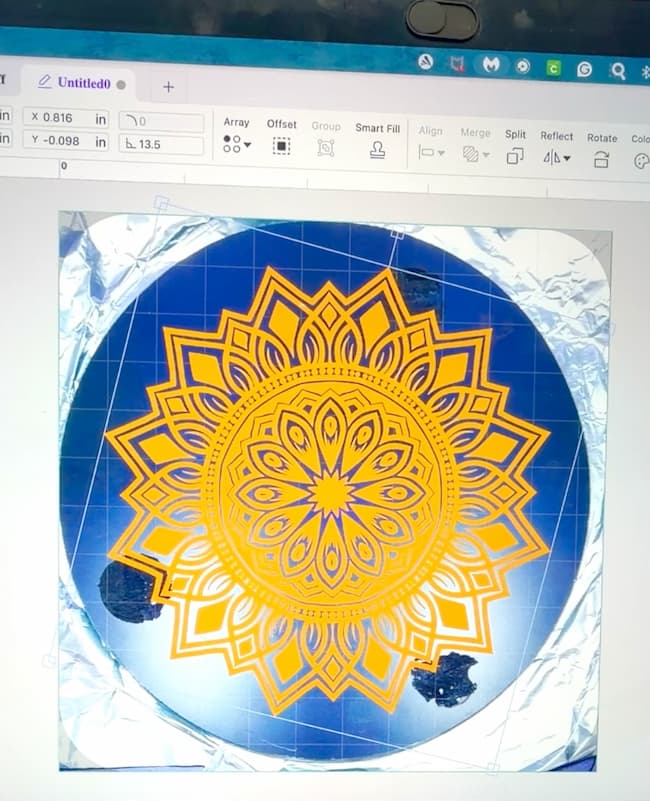
Step 2: Create Your Design
I decided to create a mandala using Canva.
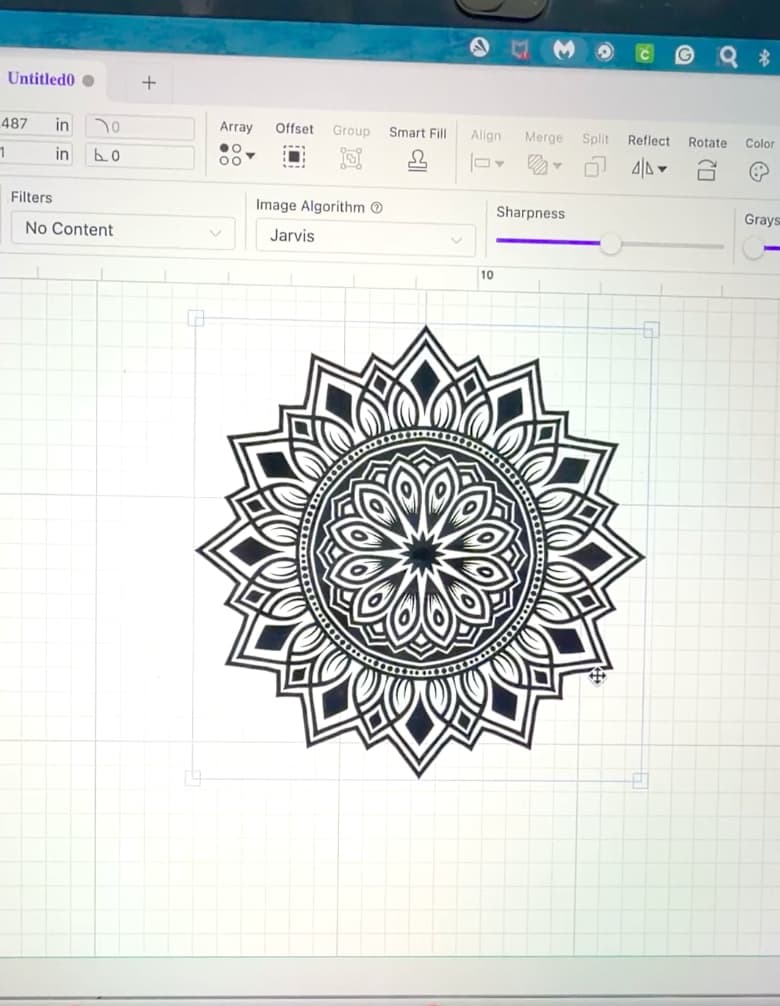
Mandala designs are perfect for this type of project because it feels elegant, it’s stunning and it glows beautifully!
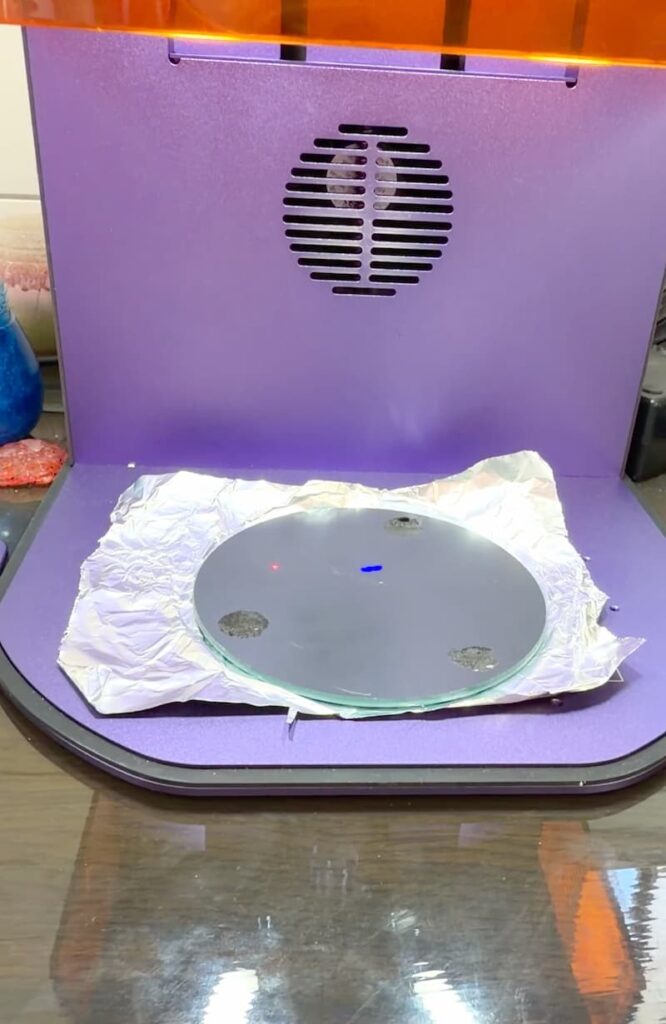
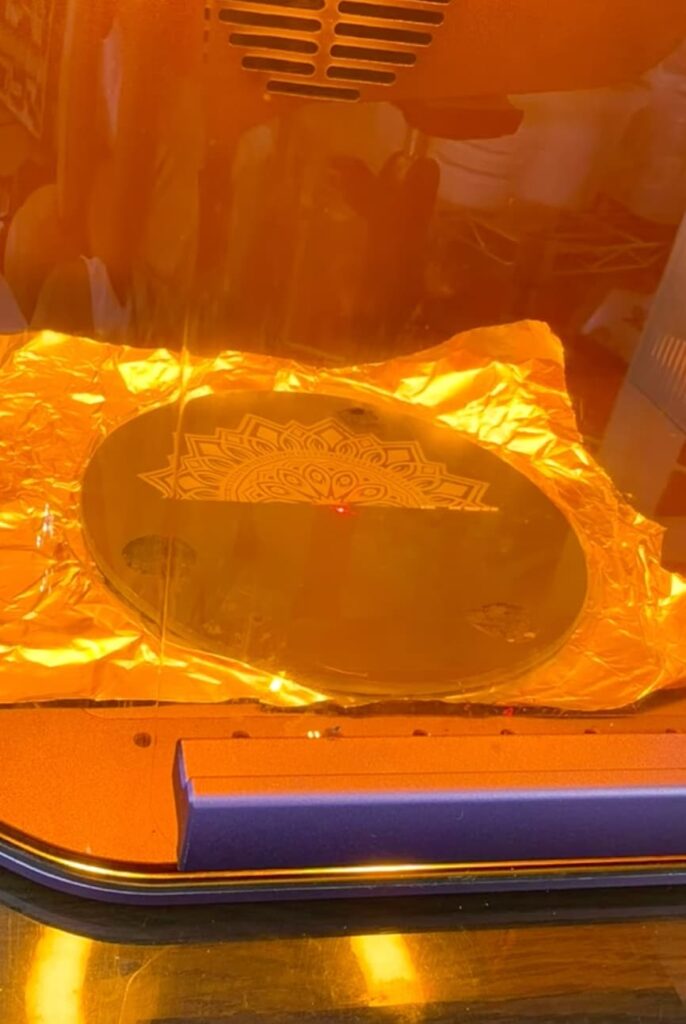
Step 3: Engrave the Back of the Mirror
I placed the mirror backside up in my Lumos engraver because you will be engraving the back of the mirror.
Made sure to center the design on the mirror with the laser’s camera.
Here are the exact settings I used:
- Power: 100%
- Speed: 850
- LPI: 300
Total engraving time: 9 minutes and 29 seconds
And you guys…
It came out PERFECT!
The laser removed the reflecting backing and etching into the mirror exactly where the design was, exposing the clear glass underneath.
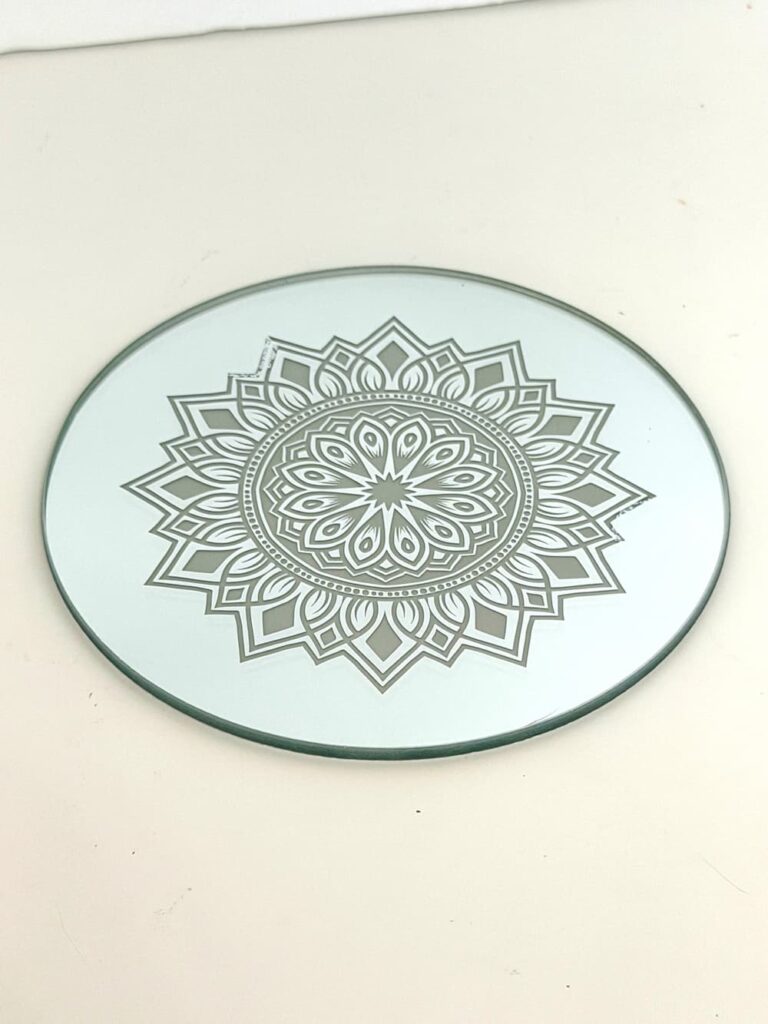
Even before adding light, I could tell this was going to be good.
Truth be told, when I decided to experiment with this project, I hadn’t planned on making a nightlight or anything.
I just wanted to see if I could engrave a mirror.
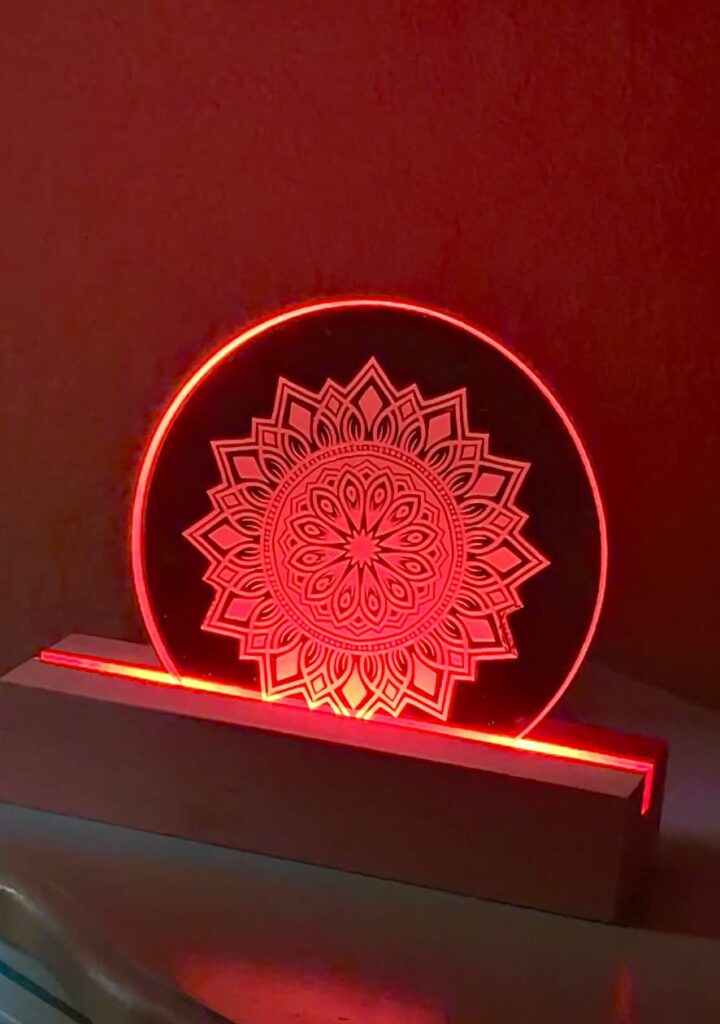
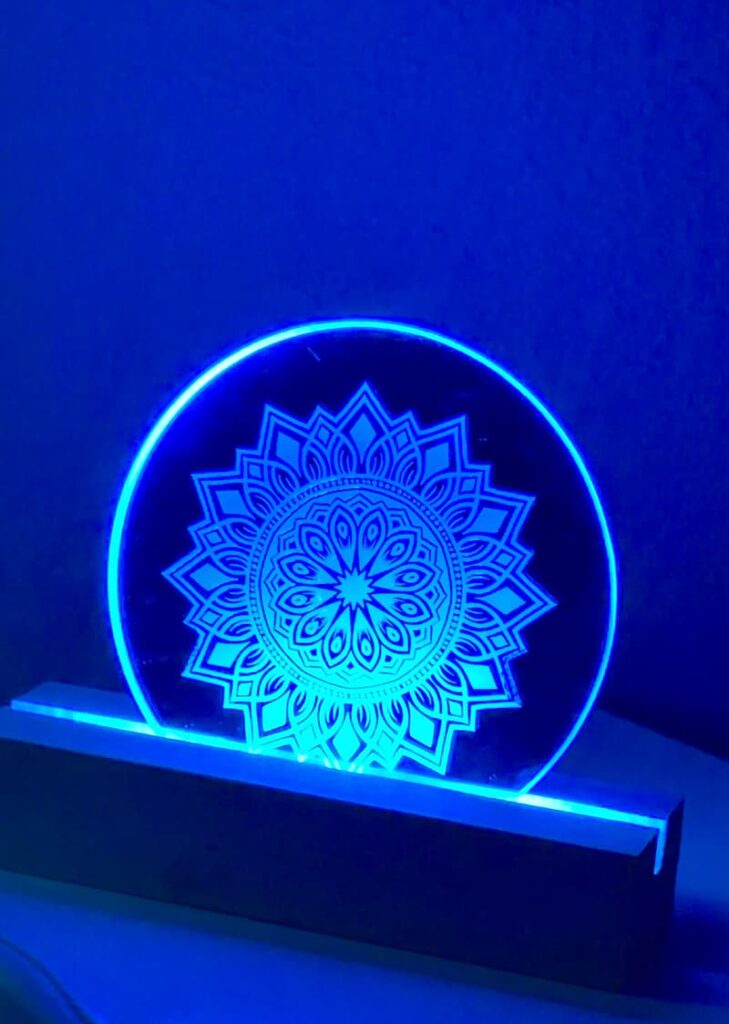
Step 4: Add the LED Light Base
This is where everything changed. I held it up to the light and realized that I just learned how to make a nightlight by engraving a mirror!
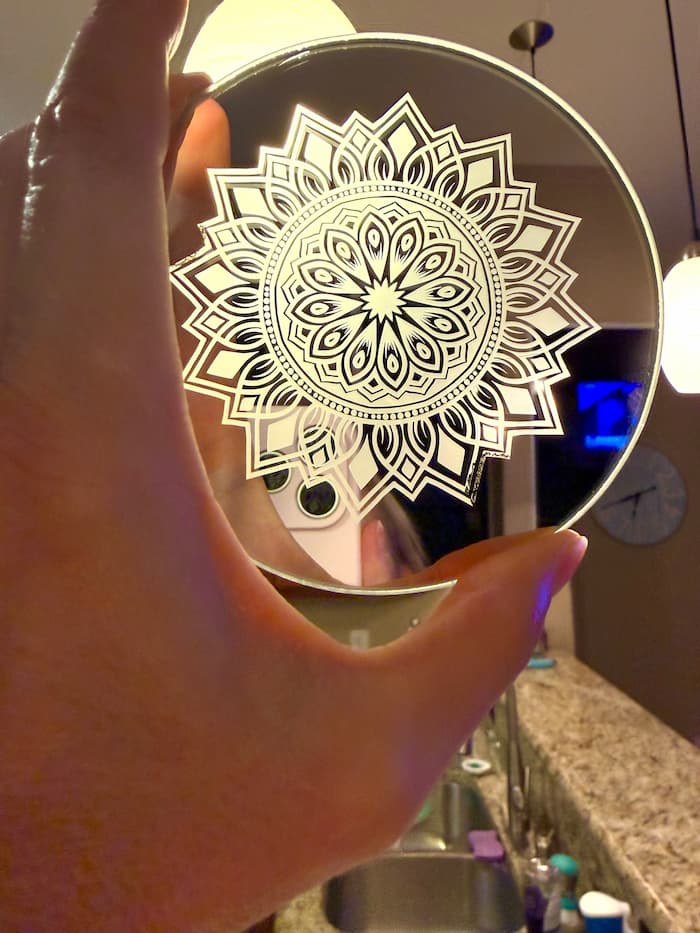
I bought an LED light holder that allows the color the change and when I placed the engraved mirror into it and turned it on…
OMG.
The light comes from below but shines directly through the engraved mandala and creates this glowing, almost magical effect.
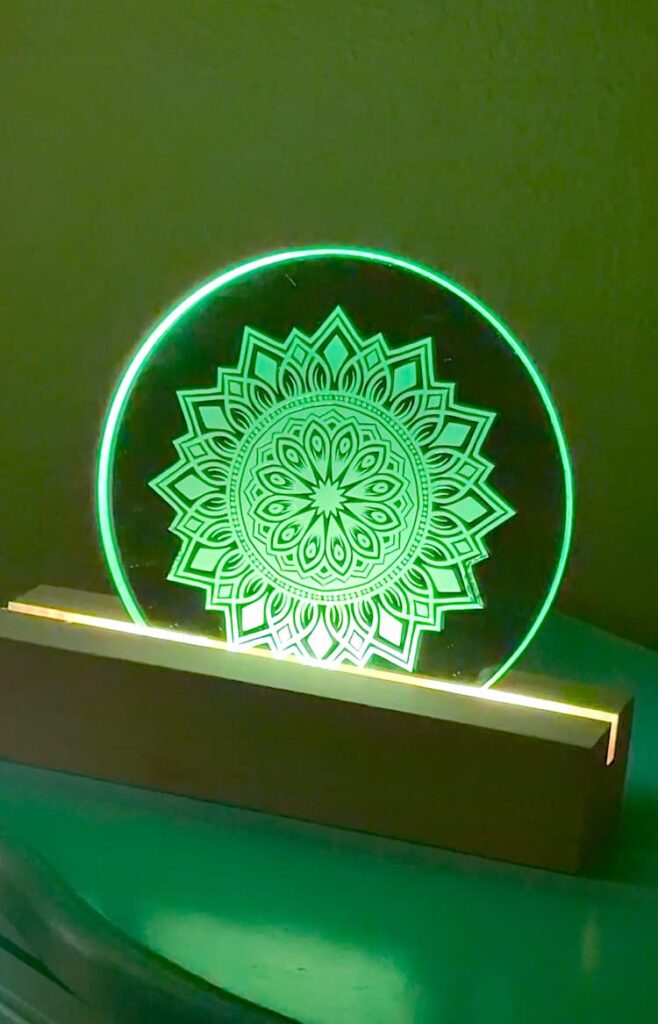
The rest of the mirror remains reflective, which makes the design pop even more.
I didn’t even plan for this to become a nightlight, but once it was lit up, I knew that’s exactly what it needed to be.
Why this Works So Well
When you engrave the back of a mirror, you’re removing the reflective coating. Light can only pass through the engraved areas, which makes your design glow while the rest stays mirrored.
It creates contrast and dimension and makes it look WAY more expensive than it is.
If you’ve been wondering how to make a nightlight that feels custom and artistic, this method is such a fun option.
What Other Designs Could You Do
Now that I’ve seen how amazing this look, I am already thinking of more ideas:
- A personalized name nightlight
- A seasonal holiday design
- A monogram
- A hand drawn picture (think kids and grandkids drawing something special)
The possibilities are endless and since the mirror is inexpensive, you can experiment without fear.
What started out as a simple “let’s see if this works” experiment turned into one of those projects that makes you stand back and say, “Okay,,,that’s REALLY cool.”
I love when crafting surprises me.
Now you know exactly how to make a nightlight from a simple Dollar Tree candle mirror. It’s affordable, customizable, and absolutely stunning once illuminated.
So tell me what you think in the comments!
More Laser Projects
- Metal Engraving a Photo
- Laser and Resin Snowman Decor
- Bamboo Cutting Board Engraving
- Ceiling Fan Laser Makeover
Remember: Life’s too short not to shimmer, so grab your glue gun and your glitter!™
Mona