Remember to stay up on the latest, be sure to SUBSCRIBE to my YouTube Channel!
You can click right HERE!
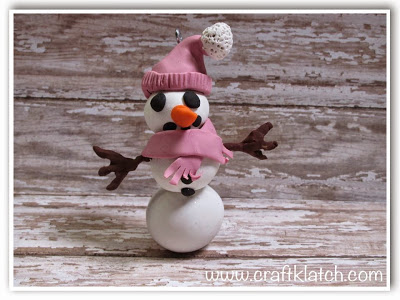
I have one more winter polymer clay project and it’s a snowgirl. It can be an ornament, or just a fun item to have sitting around.

You will need:
– Polymer clay – white, brown, orange, pink and black
– Needle tool
– Blade to cut with
– Wire – I used 20 gauge
– Small eye screw (optional)
Here is the video tutorial:
Here are some items from Amazon, in case you want to give it a try:
Directions:
1. Roll three balls of white clay and stack them.
2. Take wire and bend into arms.
3. Take brown clay and cover the wire arms. It only needs a thin covering and then poke them into the snowman.
4. Create a small cone with the orange clay, for the nose. Attach to face.
5. Take small black pieces for the eyes, buttons and mouth and attach.
6. Roll a piece of pink into a cone and stick to the top of the head.
7. With the pink, create a snake and flatten. With a blade, cut the two long sides straight. Wrap around the base of the hat and cut to size. With your needle tool, add some ribbing to the band of the hat. Also make indents on the carrot nose.
8. Create another snake with pink and flatten. Cut fringes on both ends. Wrap around the neck of the snowman. Arrange the fringes, to create the illusion of movement.
9. Roll a small ball of white and attach to the end of the hat as a pom pom. Use needle tool to poke and create texture.
10. If you want to turn it into an ornament, take your needle tool and poke a hole in the top of the hat.
11. Bake according to the package directions.
12. Once cool, you can screw in the eye screw. Add a ribbon and you have an ornament or winter decor.
Thanks for stopping by and Happy Crafting!
Mona
