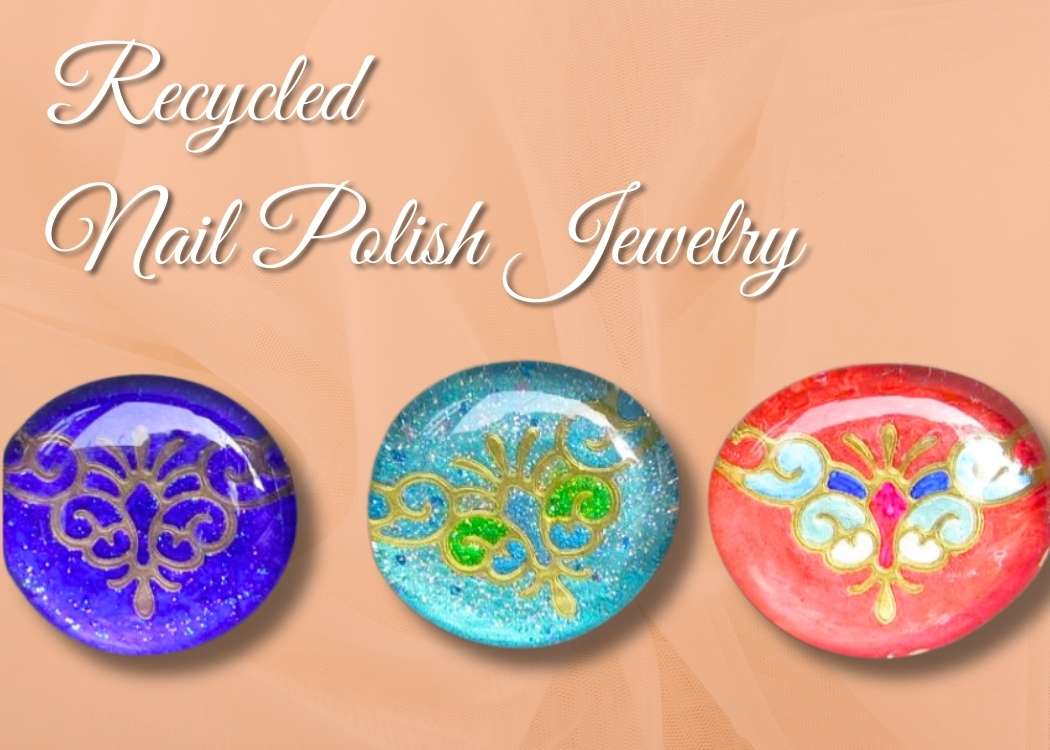
Turn glass gems into jewelry using recycled nail polish and stickers! This easy nail polish set craft makes the perfect DIY gift or accessory!
Got an old nail polish set collecting dust? Random colors or nail polish you don’t use? Or just enough of your favorite color to keep it but not enough to give yourself a manicure?
Well, grab what you got!
It’s time to give it new life! This fun and easy craft transforms glass gems into stunning, one-of-a-kind jewelry using recycled nail polish and outline stickers.
Supplies Needed
*This blog uses affiliate links. As an Amazon Associate I earn from qualifying purchases, at no additional cost to you.
- Nail polish
- Glass gems
- Glitter polish
- Fine glitter
- Stickers (you want outline stickers)
- More stickers
- Clear coat nail polish
- Jewelry bails
- Permanent Markers (optional)
Recycled Nail Polish DIY Video Tutorial
Directions on How to Make Recycled Nail Polish Jewelry
Step 1: Prep the Glass Gems
Clean the flat side of each gem with rubbing alcohol to remove any oils or dirt. The flat side of the gem is the side we will be working on.
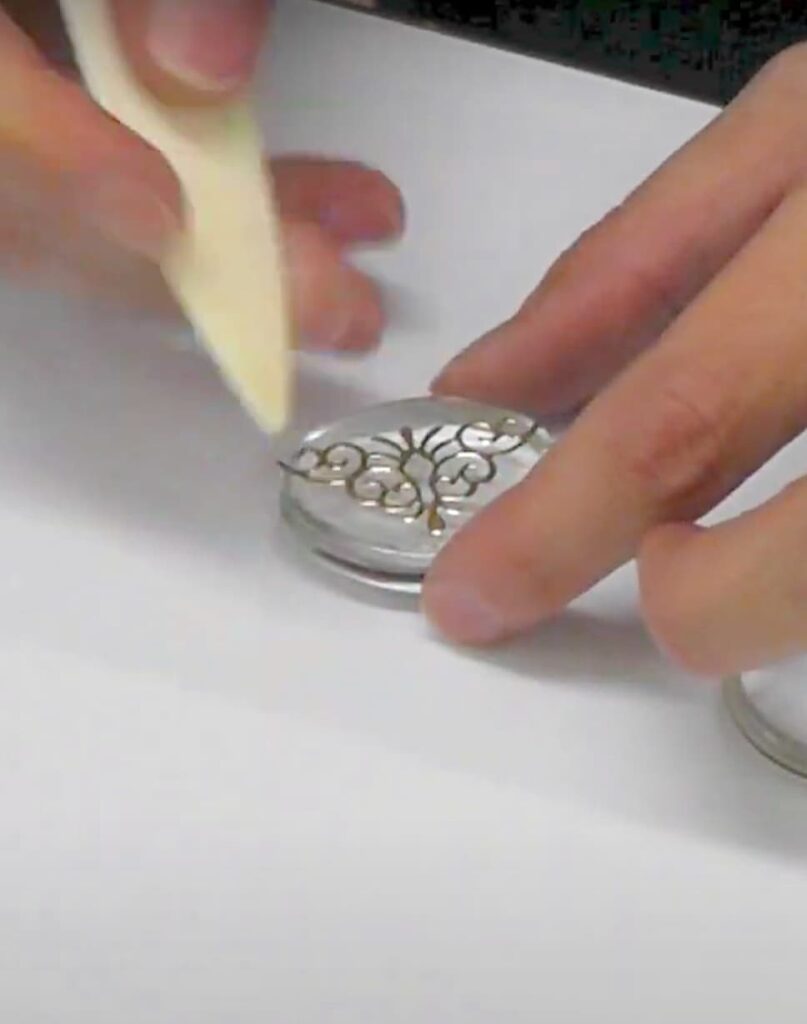
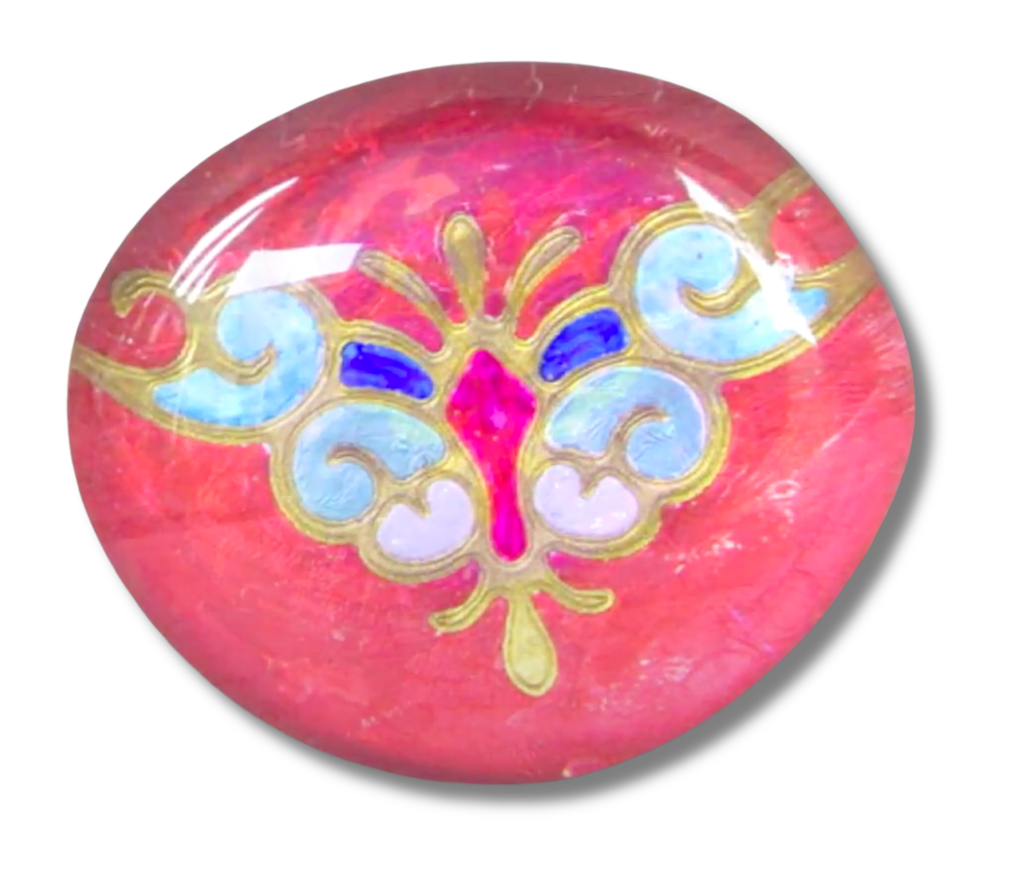
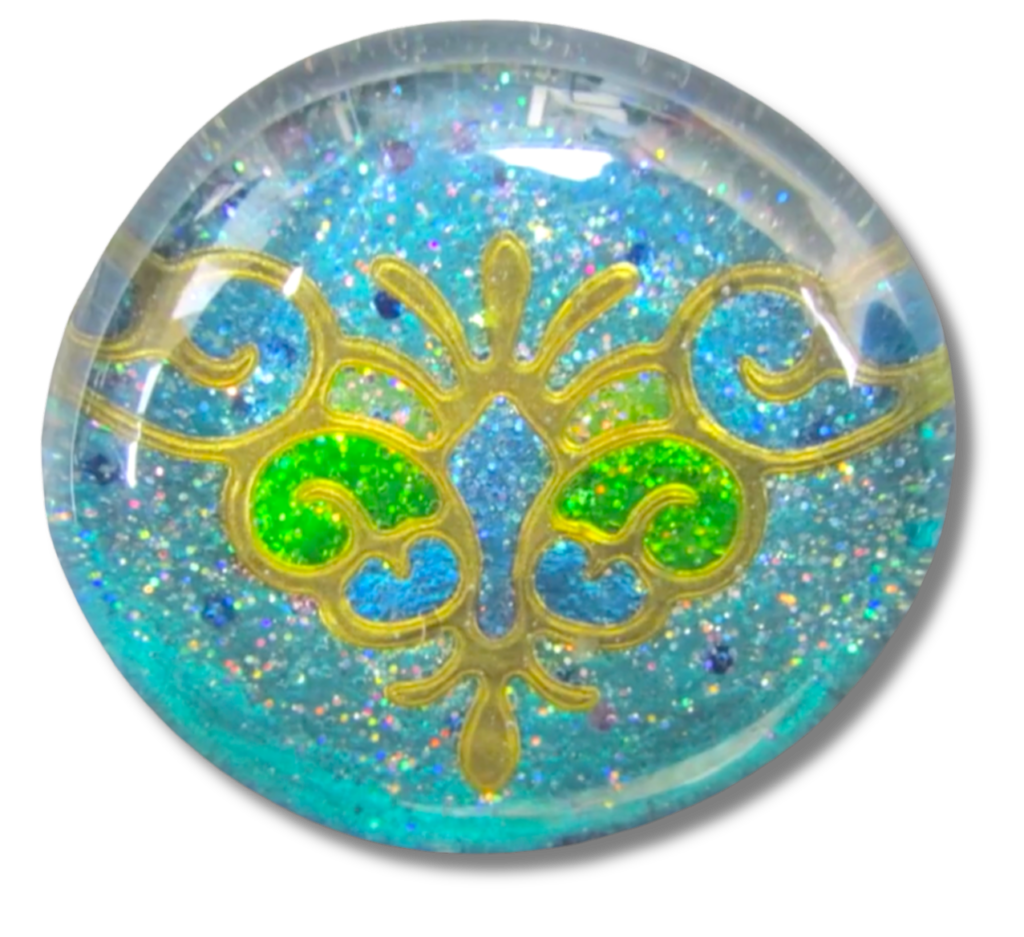
Step 2: Apply Stickers and Base Coat
Stick an outline sticker on the flat side of the gem, pressing firmly with a bone folder or popsicle stick. Cover the back with a thin layer of regular clear or glitter clear nail polish and let it dry.
This is where you can start getting creative!
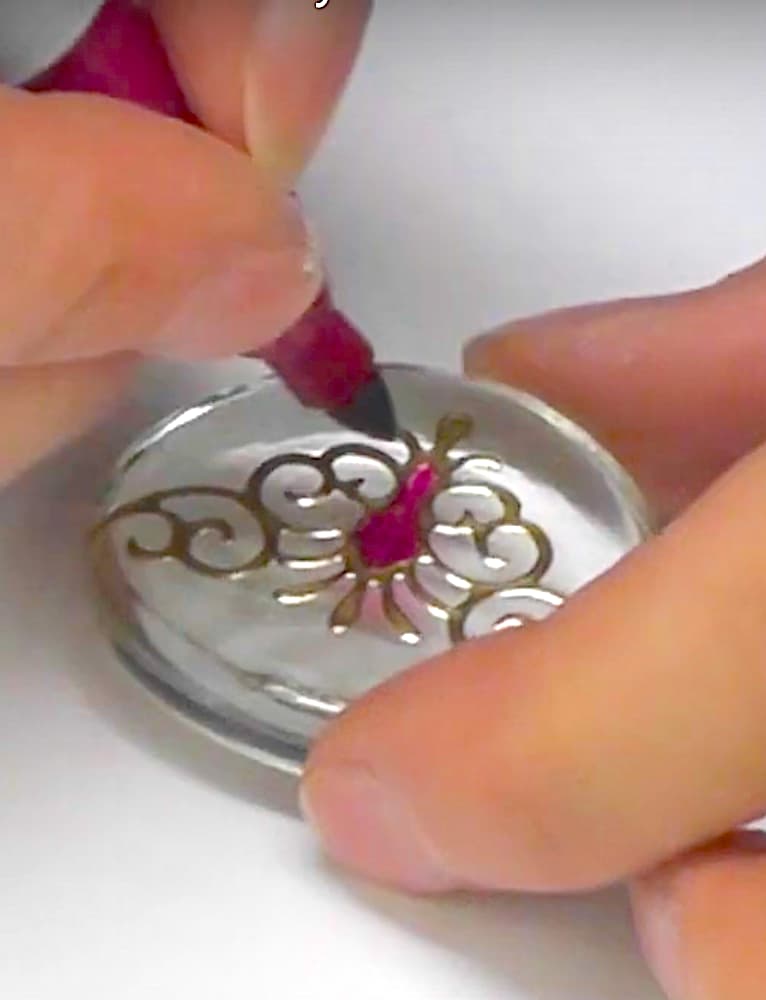
Step 3: Add Color and Design
Use permanent markers to fill in sections of the design. Or you can use the recycled nail polish at this instead.
Step 4: Seal
Then, layer on different nail polish designs or types of polish, including glitter, solid, metallic colors, etc., allowing each layer to dry before adding the next.
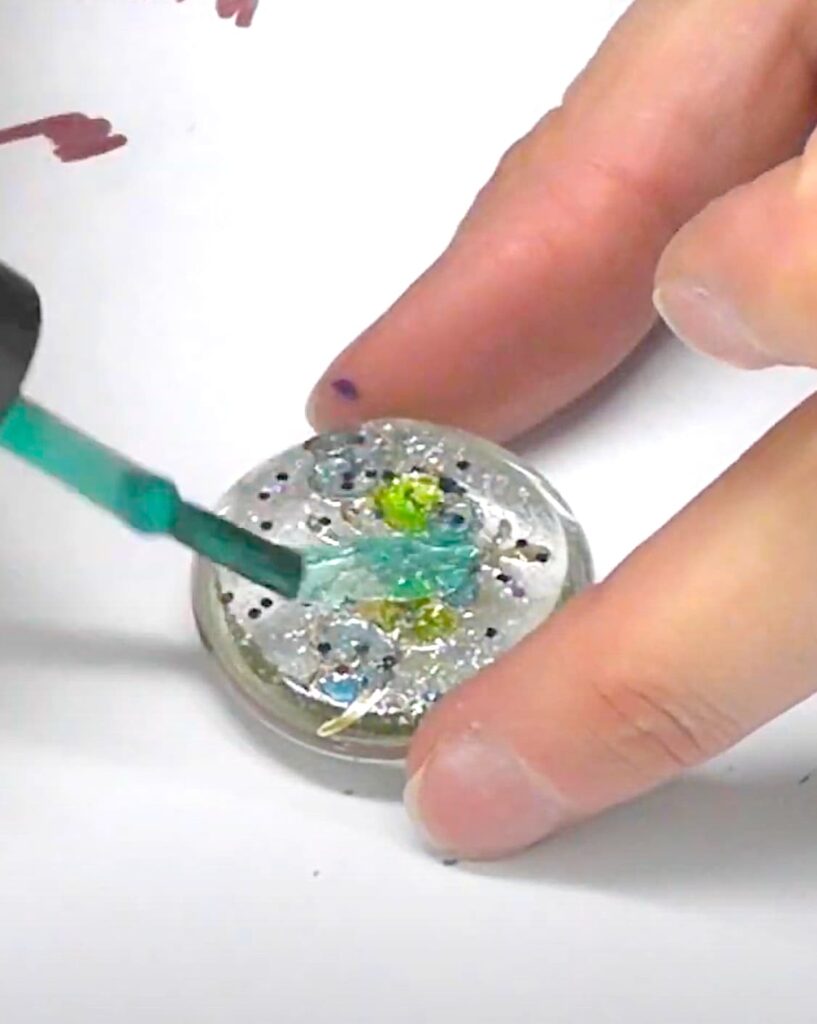
Once the layers are dry, apply a clear top coat polish to seal the design.
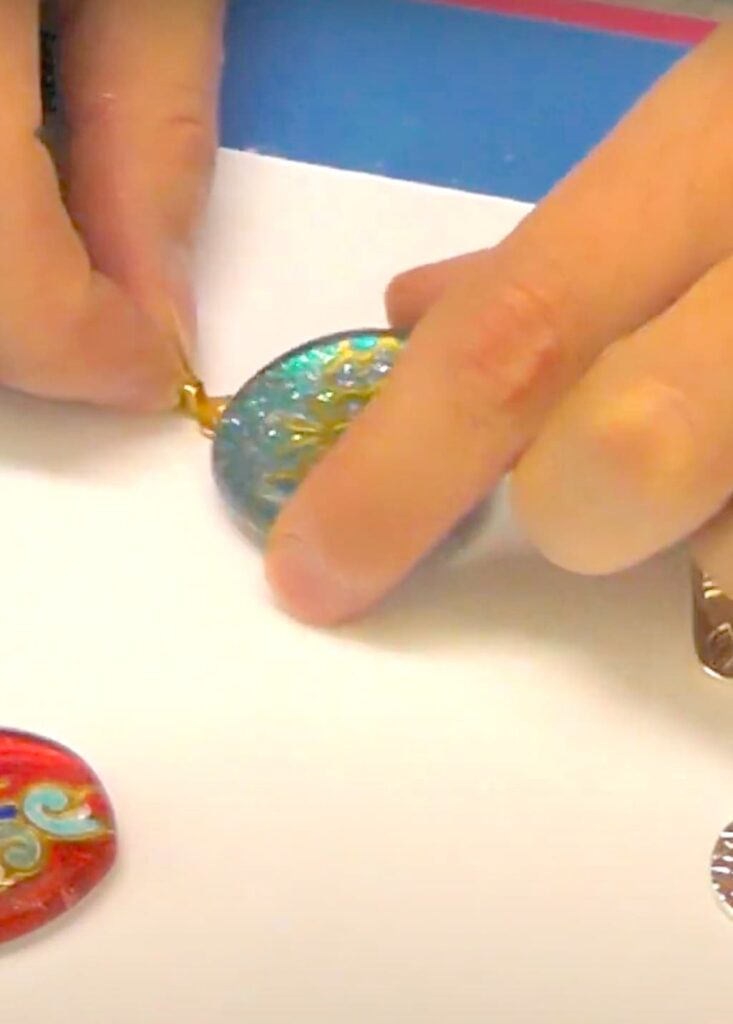
Step 5: Attach Bail to Recycled Nail Polish Jewelry
Once dry, use a toothpick to apply a strong glue to a jewelry bail or a ring blank and attach it to the back of the gem.
Now you are ready to wear or gift your unique creations!
Get ready for the OOOHS and AAAHS!
These unique pieces make great gifts, sleepover crafts, or even Christmas ornaments!

This simple craft is a fun way to create dazzling accessories using recycled nail polish and a little creativity.
I’d love to know what you think!
Be sure to follow me on Instagram!
More Glass Gem Crafts
If you enjoyed this project, you are going to love these!
Remember: Life’s too short not to shimmer, so grab your glue gun and your glitter!™
Mona
Hi Mona, love this project! Love ya' Patricia B
Thanks for sharing this interesting video!!!
Thank you!