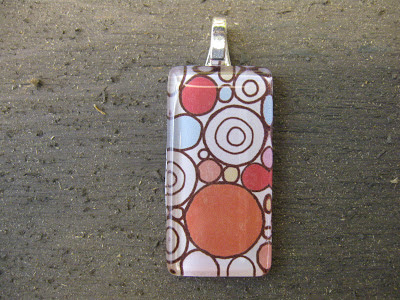
Here is a fun and easy pendant. All you have to know how to do is glue!
You will need:
– A piece of glass with smooth edges. I bought mine a few years ago at Etsy, but you should be able to find something very similar at the craft store, or certainly on Amazon. They have nice acrylic pieces too, if you can’t find glass.
– Mod Podge
– Jewelry bail
– Scrapbooking paper
– Glue – I used Weldbond
Directions:
1. Find a cute piece of scrapbook paper and take your glass piece and put it over different parts of the page, until you find a section you like. Trace around your glass piece and cut out. Put the glass piece on your cut out paper and double check the size. It is likely you will need to do a little minor trimming.
2. Clean your glass and only touch the edges. You don’t want to have fingerprints as part of your final project. Take your Mod Podge and put it on the flat part of the glass. Press the glass down on the paper. Really push on it to make sure it is well adhered. It will look cloudy, but the Mod Podge will dry clear. Put a coat on the back of the paper.
3. Allow to dry and add a few more coats on the back to make sure it is well sealed.
4. Glue bail on the back of the pendant. Allow to dry.
That’s it! Thanks for stopping by and Happy Crafting!
Mona
So pretty!