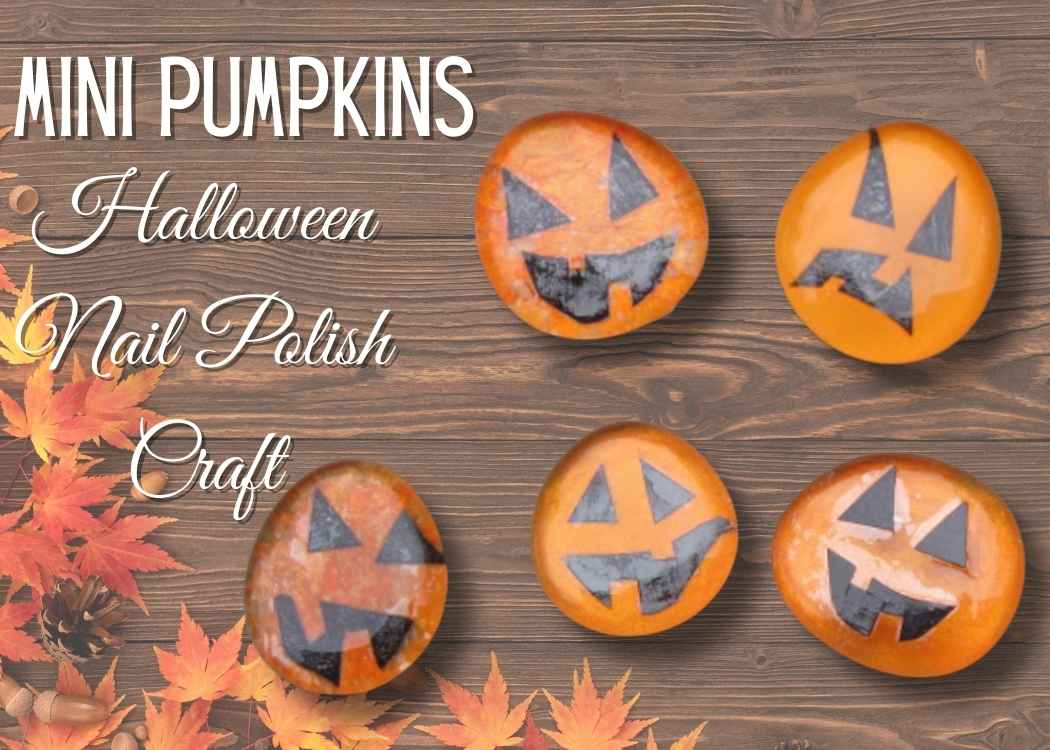
Turn Dollar Tree glass stones into mini pumpkins with this Halloween nail polish craft! Try 5 easy techniques for festive DIY décor.
Halloween crafting doesn’t have to be expensive to be festive! This Halloween nail polish craft takes simple Dollar Tree glass stones and turns them into mini pumpkins you can use for decorating, gifting, or even party favors.
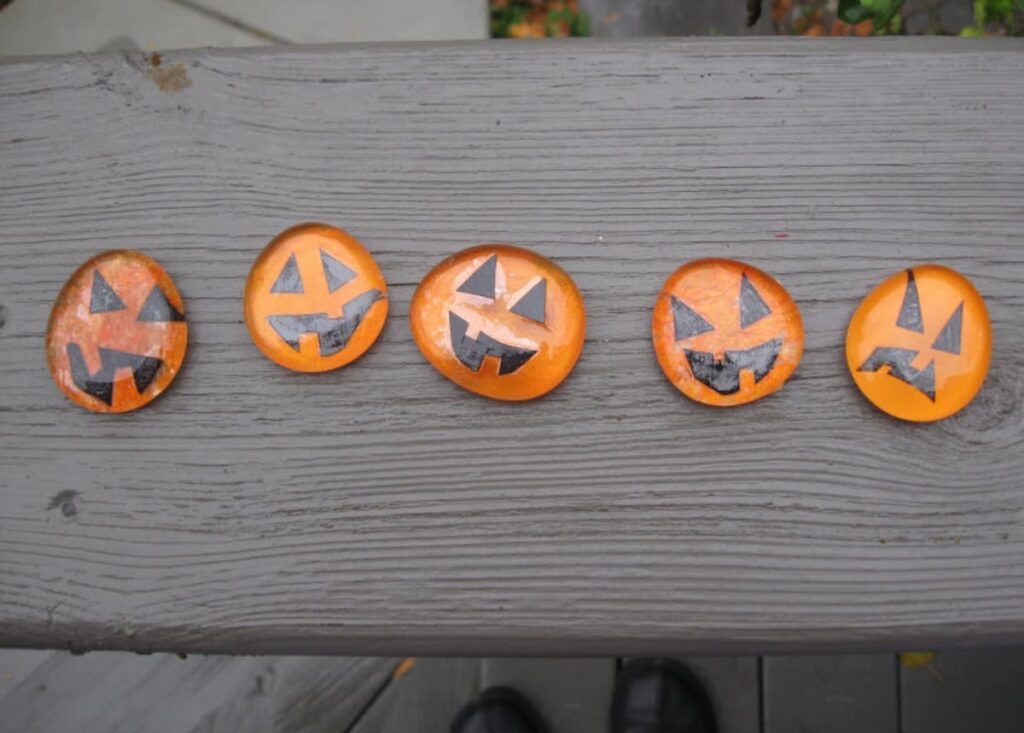
I experimented with five different techniques using nail polish, acrylic paint, Mod Podge, and tissue paper to get unique pumpkin effects. Each one has its own charm, so you can mix and match for a whole pumpkin patch of spooky fun!
Halloween Nail Polish Craft Video Tutorial
Supplies You Will Need
*Disclosure: This blog uses affiliate links from Amazon and other retailers. I earn a small amount from qualifying purchases at no additional cost to you.
- Clear glass stones (Dollar Tree is perfect for these)
- Black scrapbooking paper (or construction paper)
- Orange nail polish
- Orange acrylic paint
- Orange tissue paper
- Mod Podge (or any decoupage medium)
- Paintbrush
- Scissors
- Cup of water (for soaking paper)
Prepping the Pumpkin Stones & Cutting the Faces
Before creating the pumpkins, I prepped each glass stone the same way.
I cleaned them with rubbing alcohol, so all oils were removed.
I cut the black scrapbook paper into triangles for the eyes and crooked grins for the mouth.
Since I couldn’t find construction paper, I used black scrapbooking paper. It was a bit thicker, so I soaked each piece in water for about 30 seconds before attaching it to the back of the stones with Mod Podge.
5 Pumpkin Techniques
Here are the five different methods I used to turn the glass stones into pumpkins:
1. Mod Podge + Tissue Paper Pumpkin
I brushed Mod Podge on the back of the stone and pressed small pieces of orange tissue paper onto it. The layered tissue creates a glowing, almost lantern-like pumpkin effect.
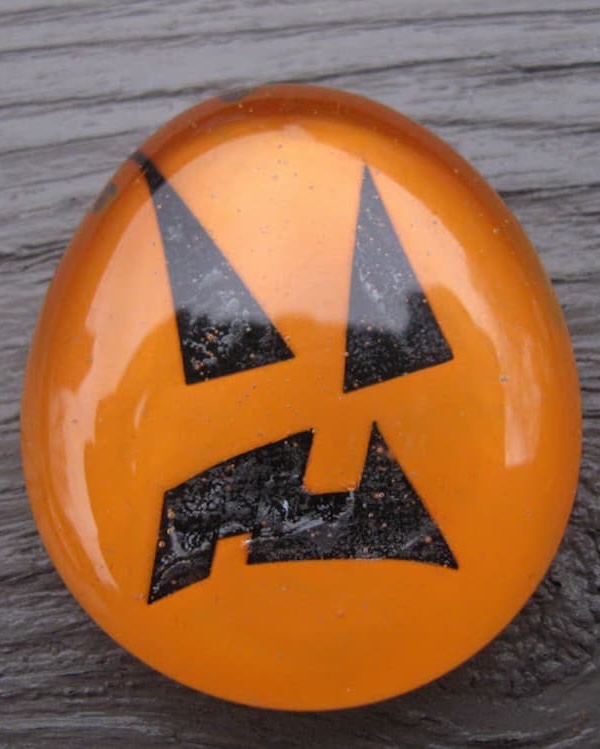
2. Orange Nail Polish Pumpkin
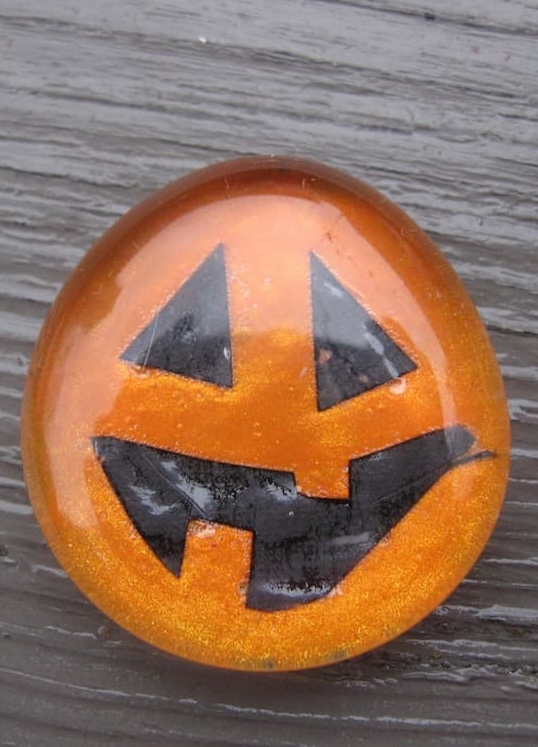
This is the simplest method! Just paint the back of the stone with orange nail polish. The glossy finish makes the stone look like a polished pumpkin. This one is quick, easy, and perfect for beginners trying this Halloween nail polish craft.
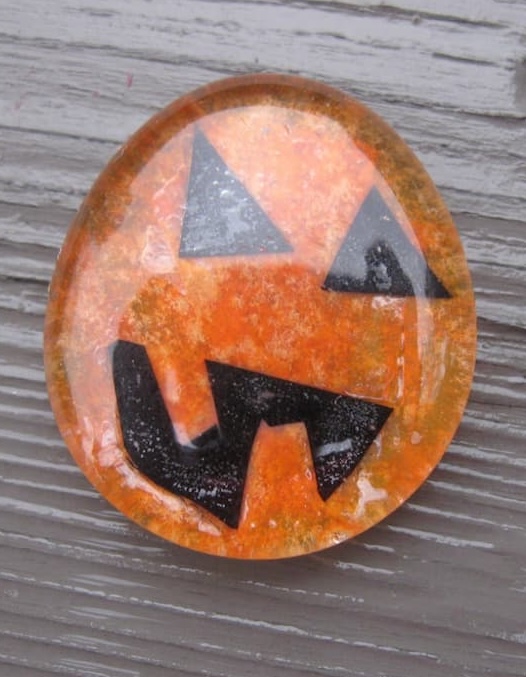
3. Paper on Top + Clear Polish
For this version, I placed the paper on top of the stone and sealed it with clear nail polish. This one gave me a rougher, textured look — more like a rustic pumpkin. It wasn’t as smooth as the other techniques, but added variety to the mix.
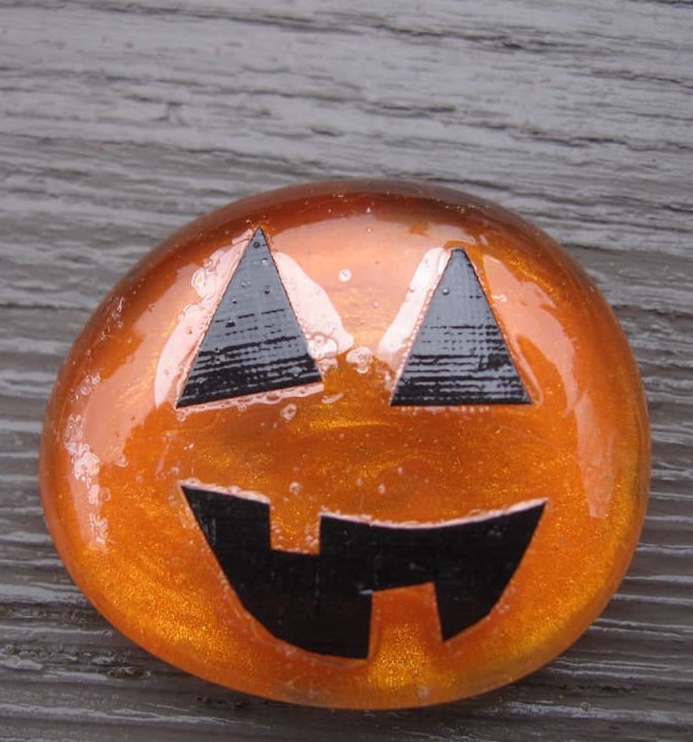
4. Nail Polish + Tissue Paper Texture Pumpkin
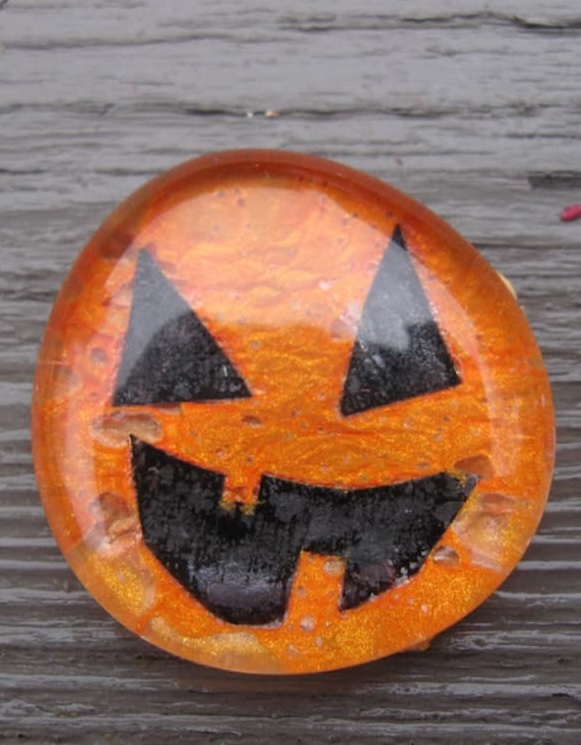
To create a textured pumpkin, I painted the back of the stone with orange nail polish, then pressed in bits of orange tissue paper while it was still wet. This gave the pumpkin a fun, bumpy look — almost like a harvest pumpkin fresh from the patch.
5. Orange Acrylic Paint Pumpkins
Finally, I used orange acrylic paint. It dries matte compared to nail polish, giving the pumpkin a more natural look. For extra shine, you can always seal it with Mod Podge or a coat of clear polish.
Fun Ways to Use Your Pumpkin Stones
Once your pumpkins are finished, you can display them in so many creative ways:
- Scatter them across your Halloween party table as festive accents.
- Place them in a bowl or jar to create a mini pumpkin patch centerpiece.
- Glue magnets on the back and use them on your fridge for Halloween décor.
- Use them as game pieces in a fall or Halloween-themed board game.
- Give them away as party favors or small seasonal gifts.
This Halloween nail polish craft is an easy and affordable way to make festive pumpkin décor with just a few supplies. Each technique gives the pumpkins a different look, so no two are exactly the same. Whether you make a handful or a whole pumpkin patch, these glass stones will bring handmade charm to your Halloween celebrations!
Other Fun Pumpkin Crafts
- Make a Pumpkin Charm in 5 Easy Steps
- DIY Nail Sticker Pumpkin Earrings
- Resin Pumpkin Patch Coaster DIY
- Paint and Glitter Pumpkin Ornaments
Thanks for stopping by! Remember: Life’s too short not to shimmer, so grab your glue gun and your glitter!™
Mona
FUN!
Thank you, Lori! ❤️