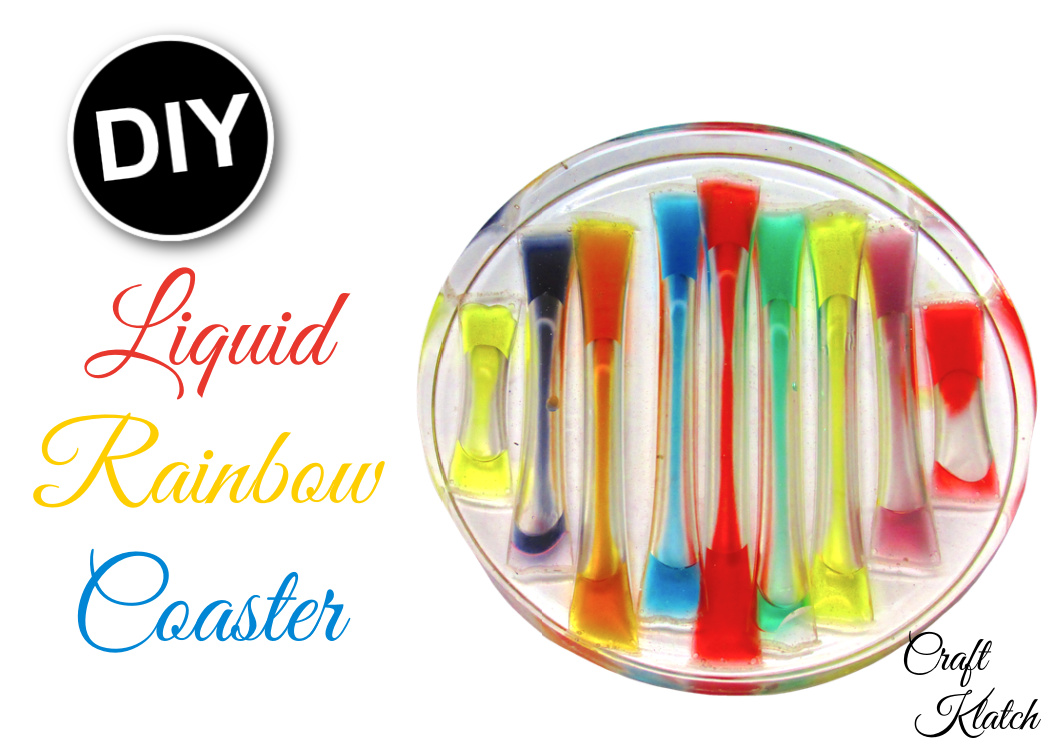
I have always wanted to try to keep liquid flowing in resin. A resin coaster is THE perfect project for to try it! Might I say…it turned out AMAZING!!!
I have made A LOT of resin coasters through the years and this remains one of my all-time favorites!
There is a quick video tutorial at the end of this post, so you can see exactly how I did it!
Supplies You Will Need For The Resin Coaster
*This blog uses affiliate links. As an Amazon Associate I earn from qualifying purchases, at no additional cost to you.
- Coaster mold: https://amzn.to/2zluUd8
- Clear Straws: https://amzn.to/2CdP5us
- Lighter: https://amzn.to/2Cd2sLB
- Pliers: https://amzn.to/2lLUrWG
- Food coloring: https://amzn.to/2lGoSxE
- Resin
- When deciding on which resin to use for your coasters, you need to keep in mind whether you want it just for cold cups or for hot ones as well.
- If only for cold drinks, you can be flexible and use whatever brand you like:
- If you want it to work for both hot and cold drinks, you need to look for a heat-resistant resin, like these:
- Stone Coat (Quick coat)
- Stone Coat (Heat resistant)
- FX Poxy ~ According to the manufacturer, this one is heat resistant to 500° F.
Liquid Rainbow Resin Coaster Directions
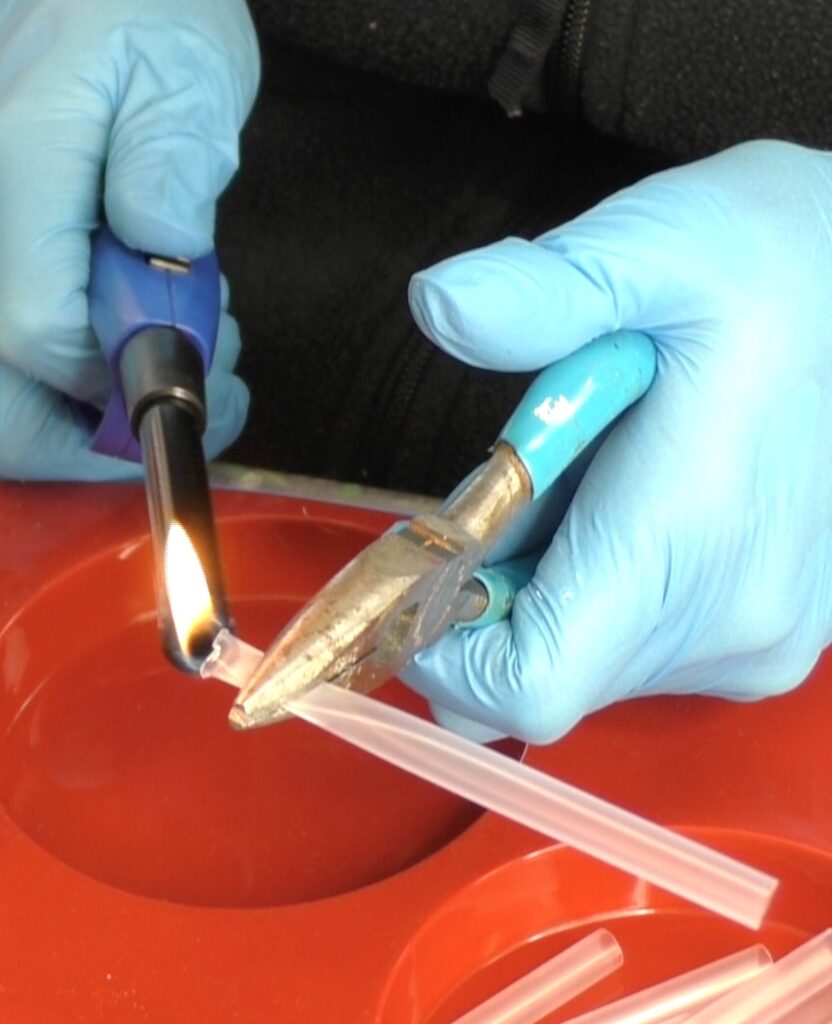
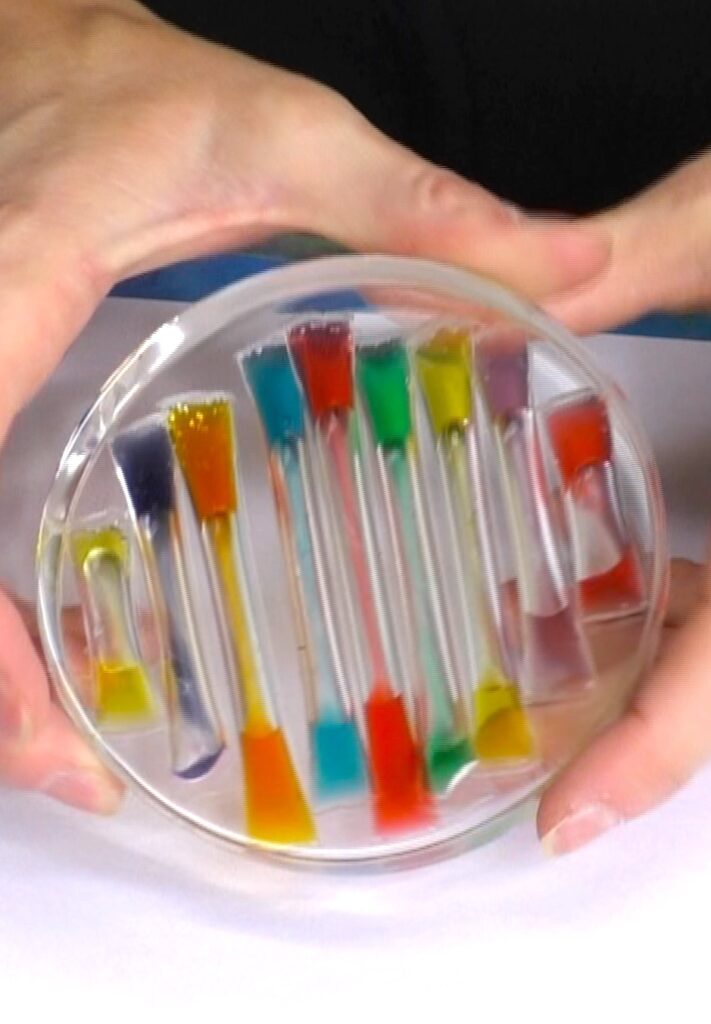
1. Start with your coaster mold and take clear drinking straws and cut them to length. That way, they fit into the mold.

2. Pinch one end of the straw with pliers and take a lighter to melt the end together. Once it has melted, you should have a clean edge.
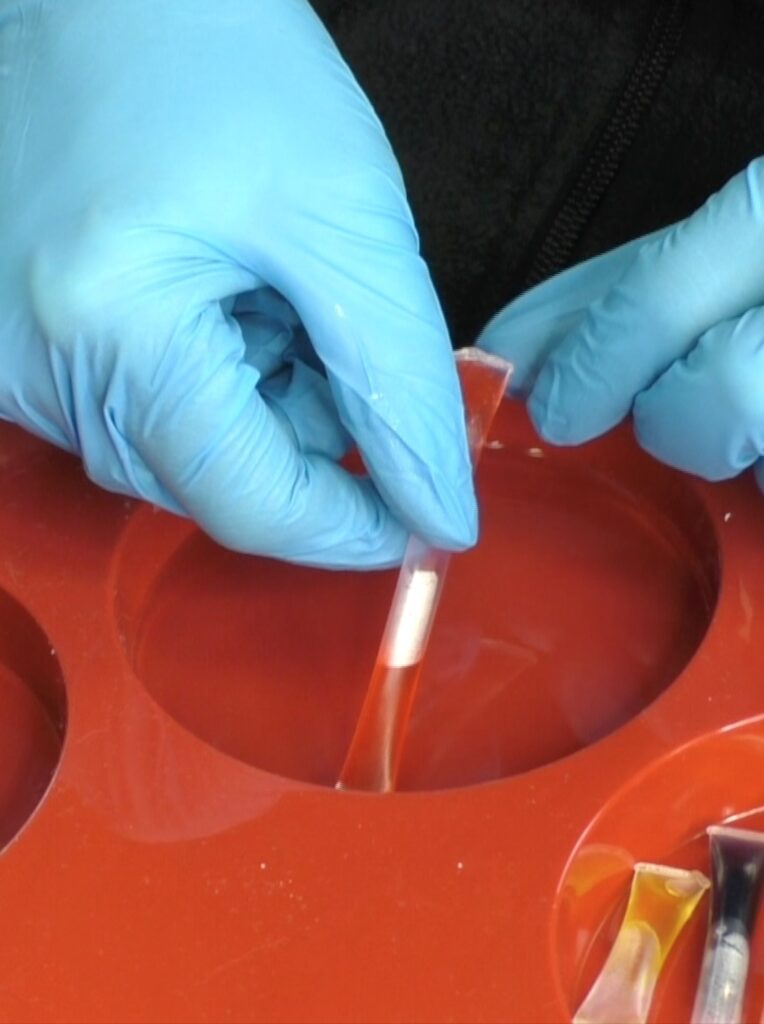
3. Mix water and food color. Then, drip the liquid into the straws. This is what will we will be putting in the resin coaster.
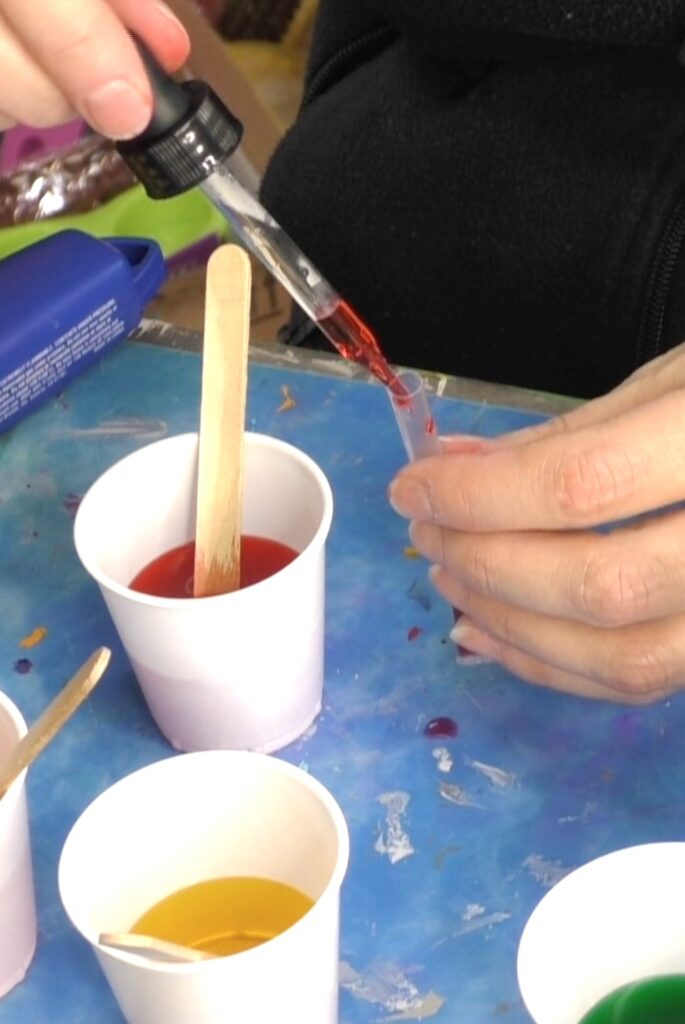
Do not fill them all the way because you want the water to have room to move around.
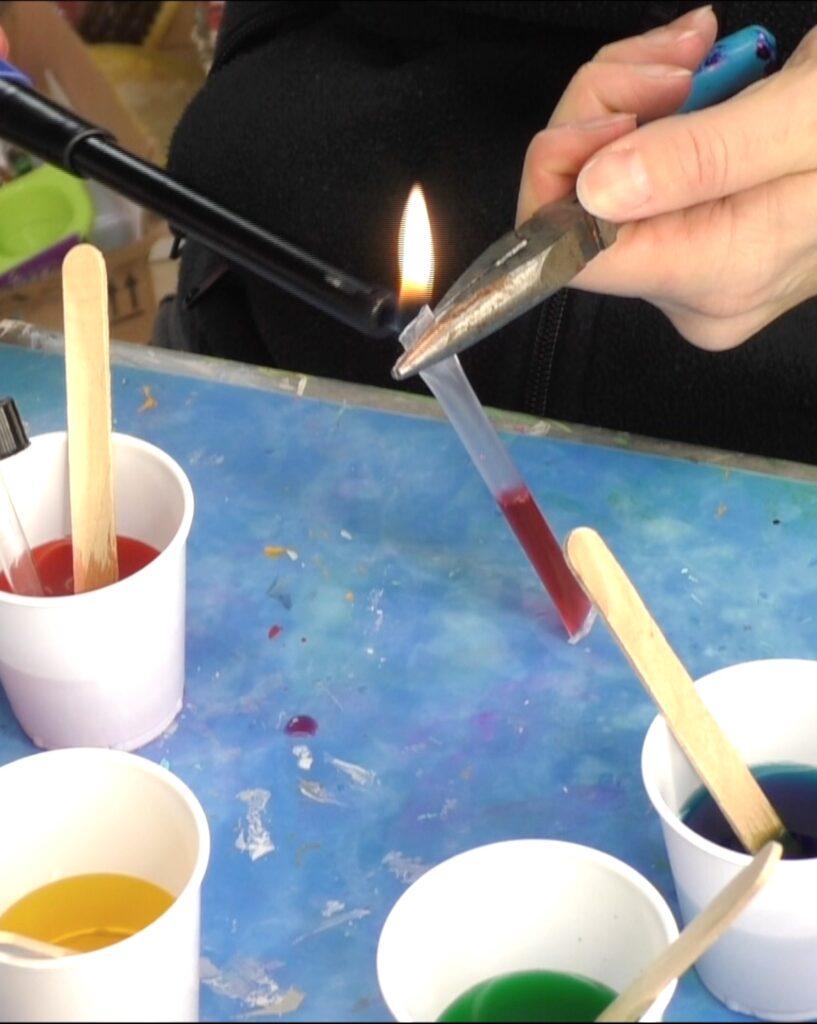
4. Take your lighter and seal the other edge.
5. Mix one ounce of resin and pour it into the silicone coaster mold and pop any bubbles with a lighter.
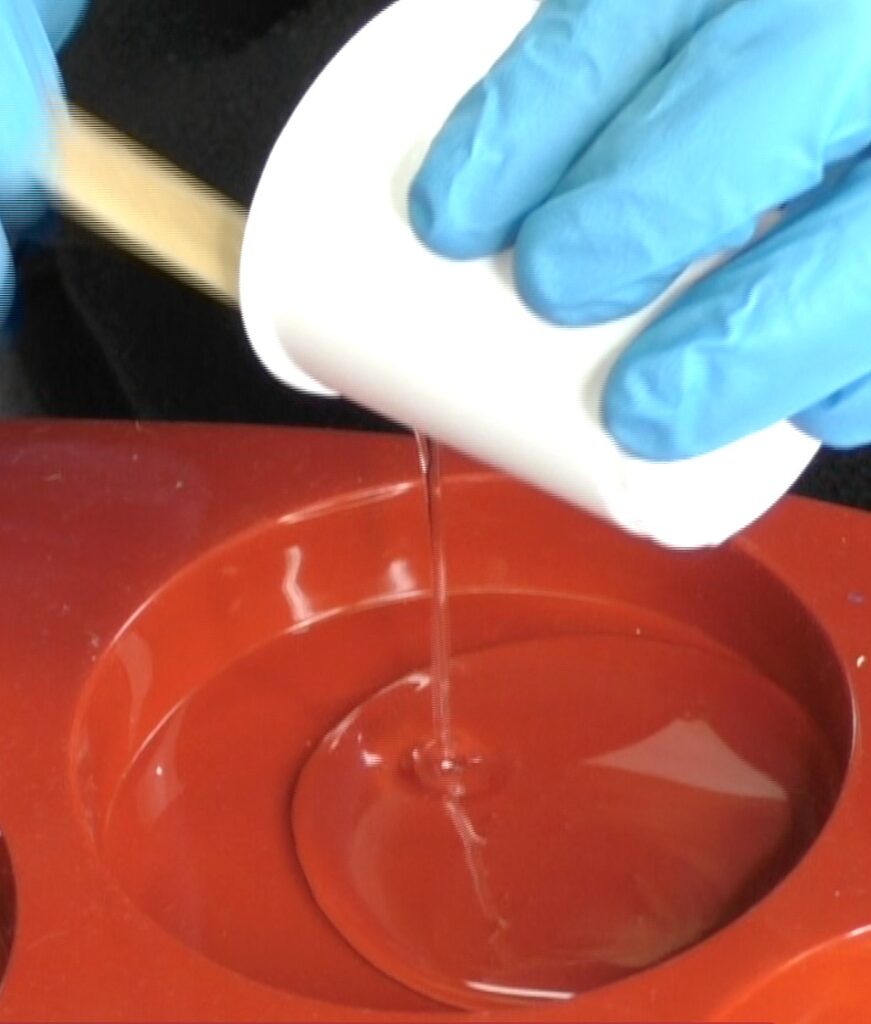
6. Place the filled straws into resin in the mold and let it cure for 12 hours.
*The reason you need to let the resin cure is if you were to add more resin before the first coat cured, the straws would likely float.
7. Mix more resin (1.5 – 2 ounces should do it) and pour it over the straws.
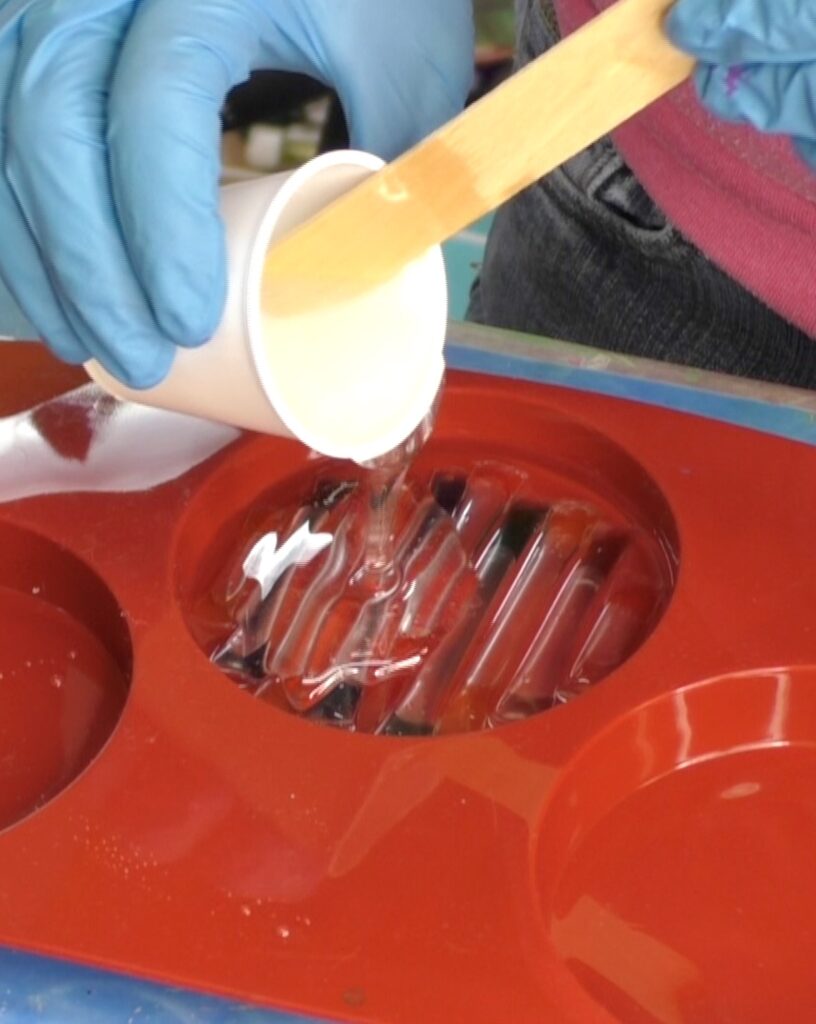
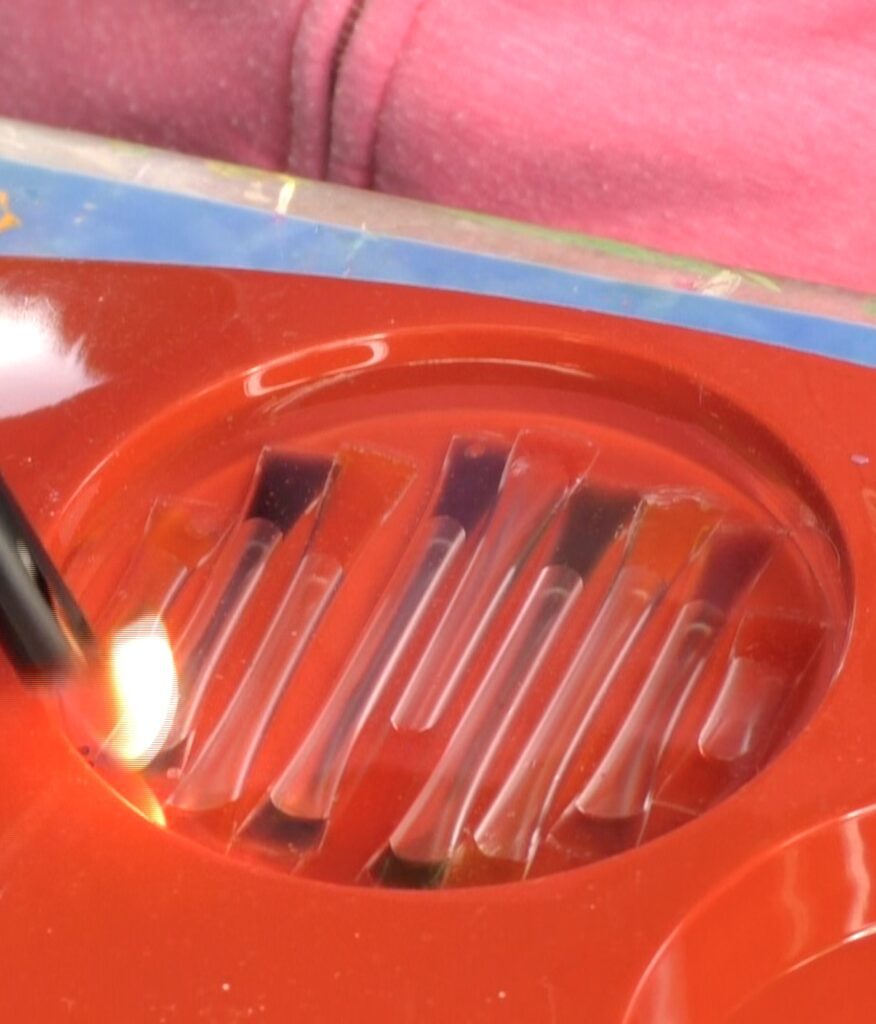
8. The straws should now be encapsulated in the resin. Use a lighter to pop the bubbles and then let it cure a minimum of 12 hours.
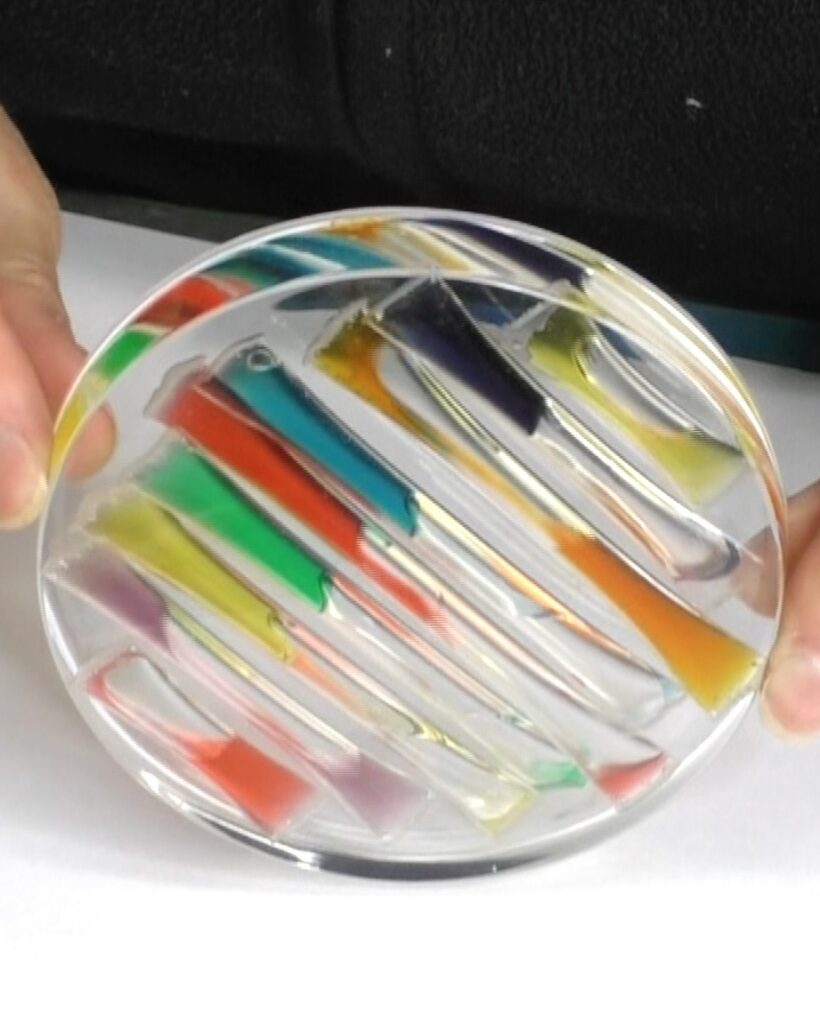
9. Once cured, pull it out of the mold!
HOW COOL IS THAT?!?!?!
Now, you have a resin coaster that has liquid flowing! You barely see the straws because they kind of blend in with the resin!
Finally, I want to make sure I give credit where credit is due! This video, by HelloMaphie, inspired this fun coaster!
Other Fun Rainbow Coasters I Have Made
As I mentioned earlier, I have made A LOT coasters and some of those are rainbow themed! Check them out!
- Swirly Rainbow Resin Coaster
- Rainbow Glitter Coaster
- More Rainbow Glitter Coasters
- Rainbow Bead Coaster
- Rainbow Glitter Charm
Video Tutorial
Be sure to click on the video tutorial, so you can see exactly how I made it!
Amazing Rainbow Coasters You Can Buy!
If you want to add cool rainbow coasters to your home decor, these are pretty cool!

Thanks for stopping by!
Remember: Life’s too short not to shimmer, so grab your glue gun and your glitter!™ Stay safe!
Mona
Can truly relate and retain this outstanding post. Very well written. replica watches india
All of your posts are well written. Thank you. post free ads
Very creative!
Very creative! Better make them quick before all the plastic straws are "banned" LOL!
did you really use water and food color, i ordered the straws you had a link to, the colored water barely moves, and the straw is a bit less than half way. condensation inside the straws makes for unsightly bubbles…so, ive tried 6 times, with no success….what am i missing and please only craft klatch answer
I’m in the same boat as hmurray. My liquid does not move.
Does anyone know what I’m doing wrong?
Thank you GD