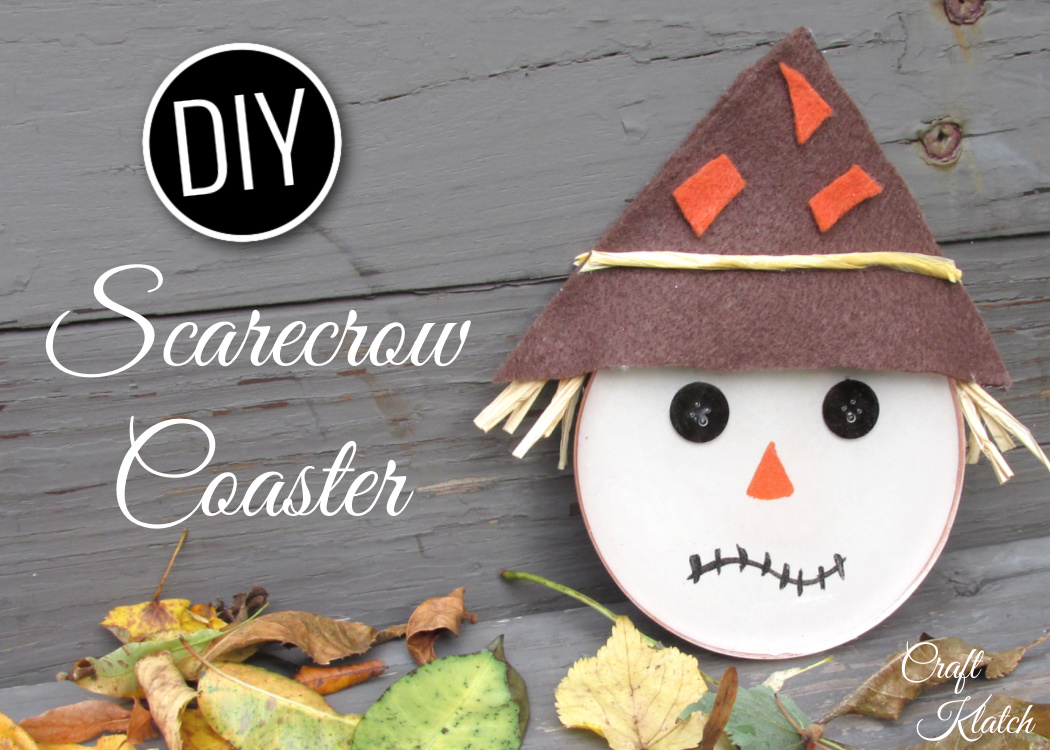
Learn how to make a scarecrow coaster using resin and felt. If you are looking for fall decor ideas or crafts, add this to your list!
But don’t think coasters are the only scarecrows I have made! I’ve come up with a few scarecrow ideas over the years!
Different Scarecrow Ideas
I went with a total recycling project when I made a Scarecrow Centerpiece! We are talking newspapers and paper bags! I think you will be impressed!
I also made a super cute Scarecrow Ornament that you would be proud to have on display!
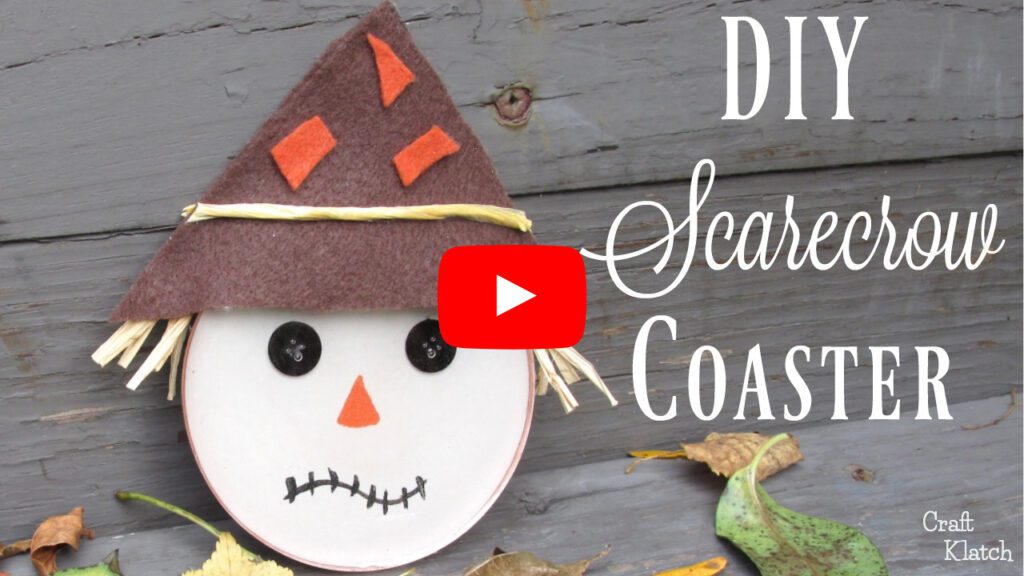
How To Make a Scarecrow Coaster Video Tutorial
Here is a quick video tutorial, so you can see exactly how I made it:
*This blog uses affiliate links. As an Amazon Associate I earn from qualifying purchases, at no additional cost to you.
Supplies You Will Need To Make a Scarecrow Coaster
- Mold: https://amzn.to/2FcRd7J
- Pigment powders: https://amzn.to/2RL523A
- Felt: https://amzn.to/2IS2oF2
- Hot glue: https://amzn.to/2A7fITf
- Two black buttons: https://amzn.to/2EhwROk
- Twine: https://amzn.to/2RKVWDR
- Black acrylic paint: https://amzn.to/2RJgjkK
- Orange/rust acrylic paint: https://amzn.to/2pQM7HZ
- Liner brush: https://amzn.to/2RKgLiP
- Resin (use whatever resin brand you like):
- Easy Cast: https://amzn.to/2yjYmBC
- Art Resin: https://amzn.to/2yk9X3z
- Clear Cast: https://amzn.to/2z4rxGw
- This is the resin I used for this project:
- ***FX Poxy (clear): https://amzn.to/2AF3Pkk ~ According to the manufacturer, this one is heat resistant to 500 degrees F and is UV resistant.
- Fast Cast (optional for white background): https://amzn.to/2wTZ6wc
Directions on How to Make a Scarecrow Coaster:
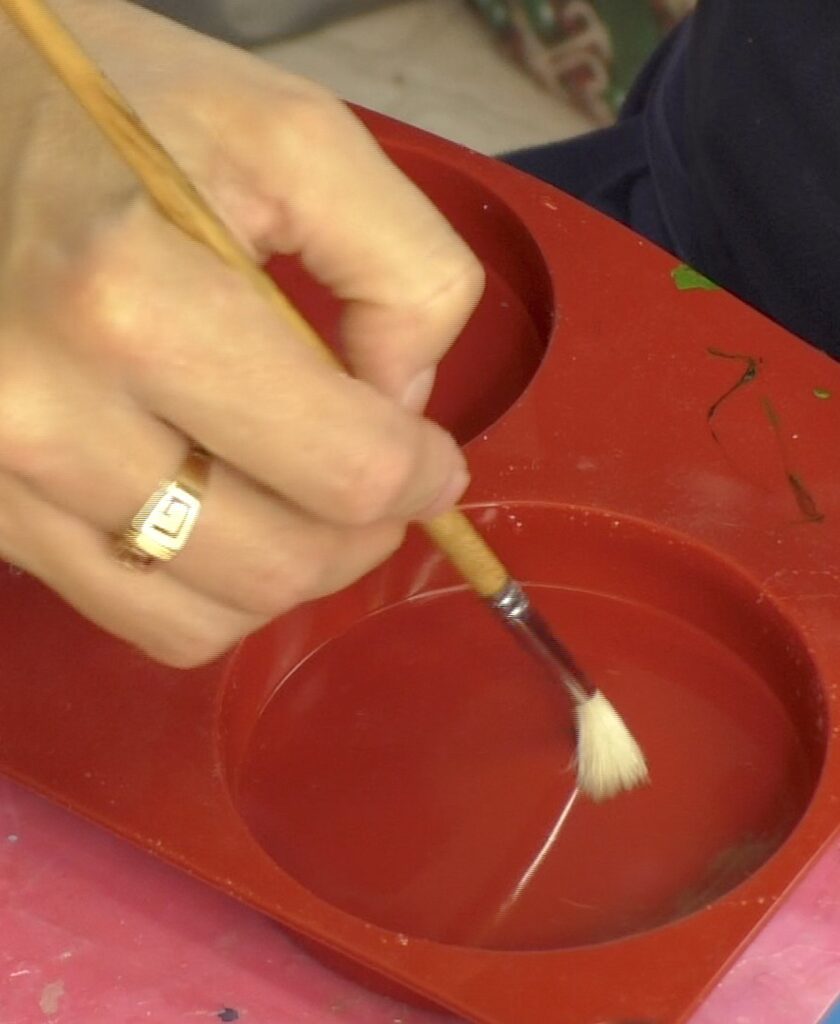
Step 1: A little dusting
I used copper pigment powder and dusted the mold.
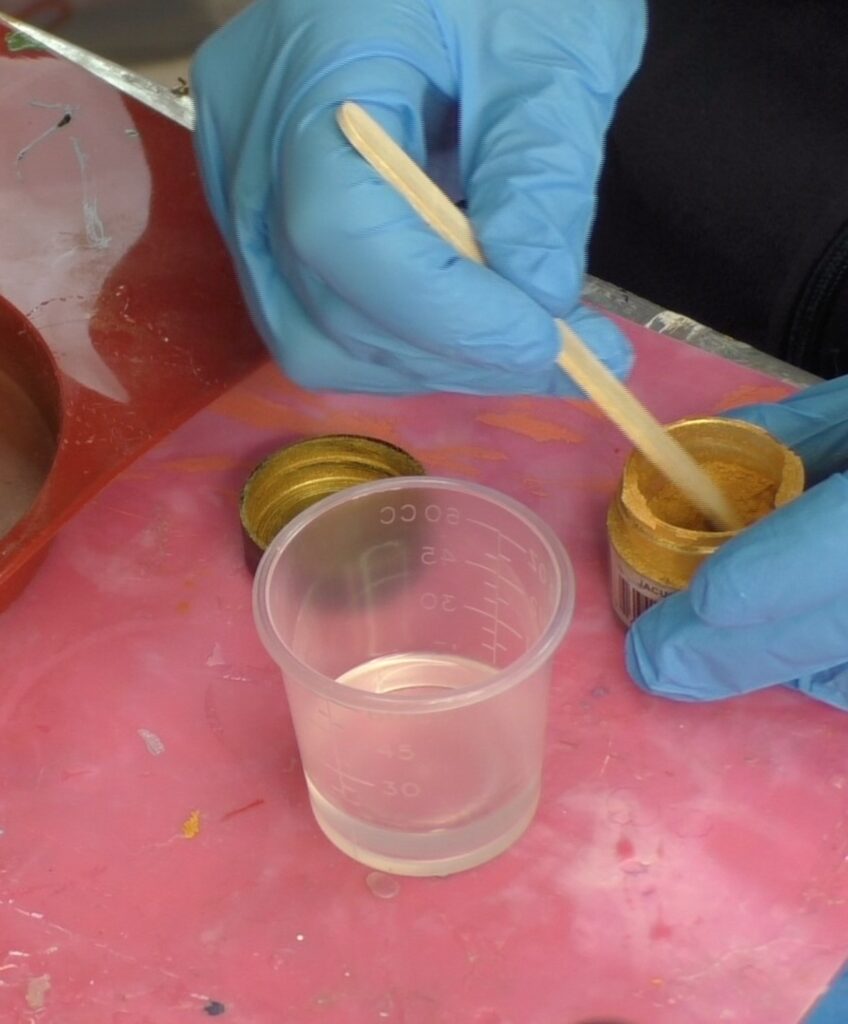
Step 2: A little copper and gold
I mixed one ounce of resin and mixed in copper and gold pigment powder. I am using a fast-curing resin, that cures white. You can use a clear drying resin and add pigments as well, but you need to adjust the color, to your liking.
Step 3: Pour that resiny goodness!
I poured it into the mold and let it cure. Because I used a resin that cures white, it will become much lighter!

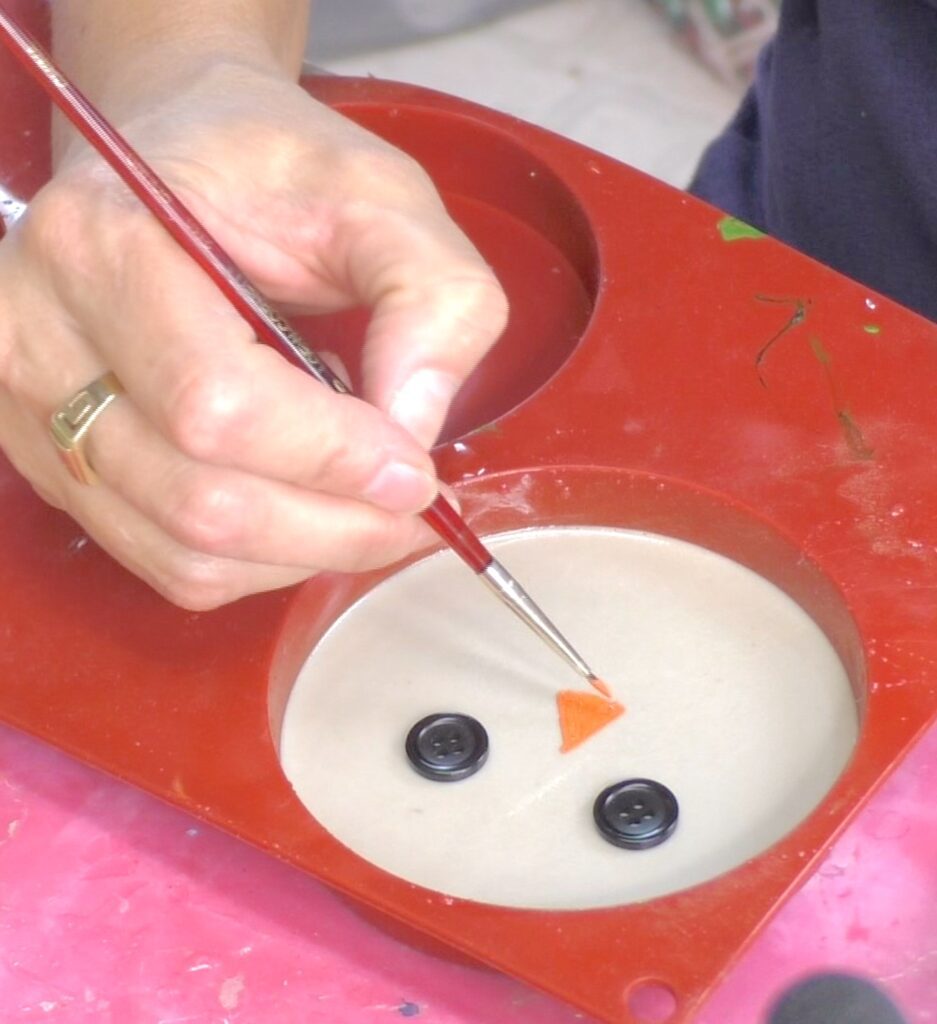
Step 4: Now let’s see how to make a scarecrow face!
Once cured, I laid the button eyes on the coaster, for placement purposes and then painted the nose.
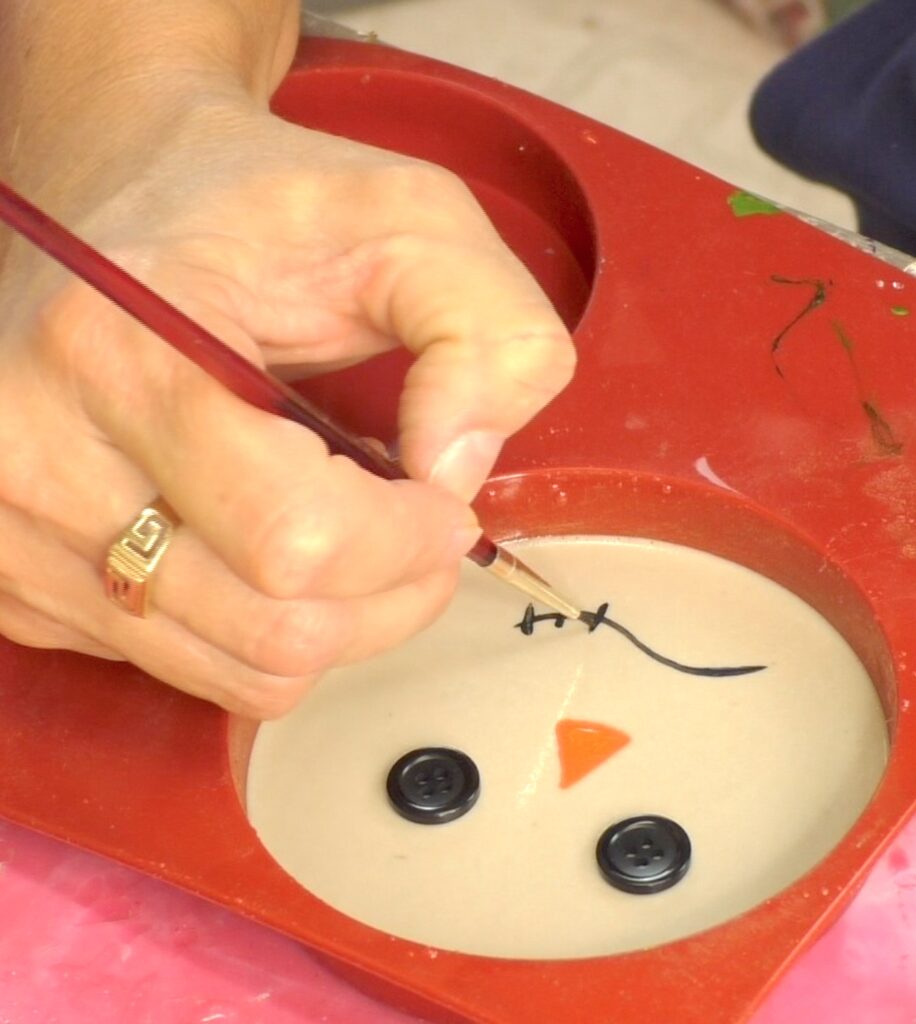
Step 5: A little stitchery
I painted the mouth.
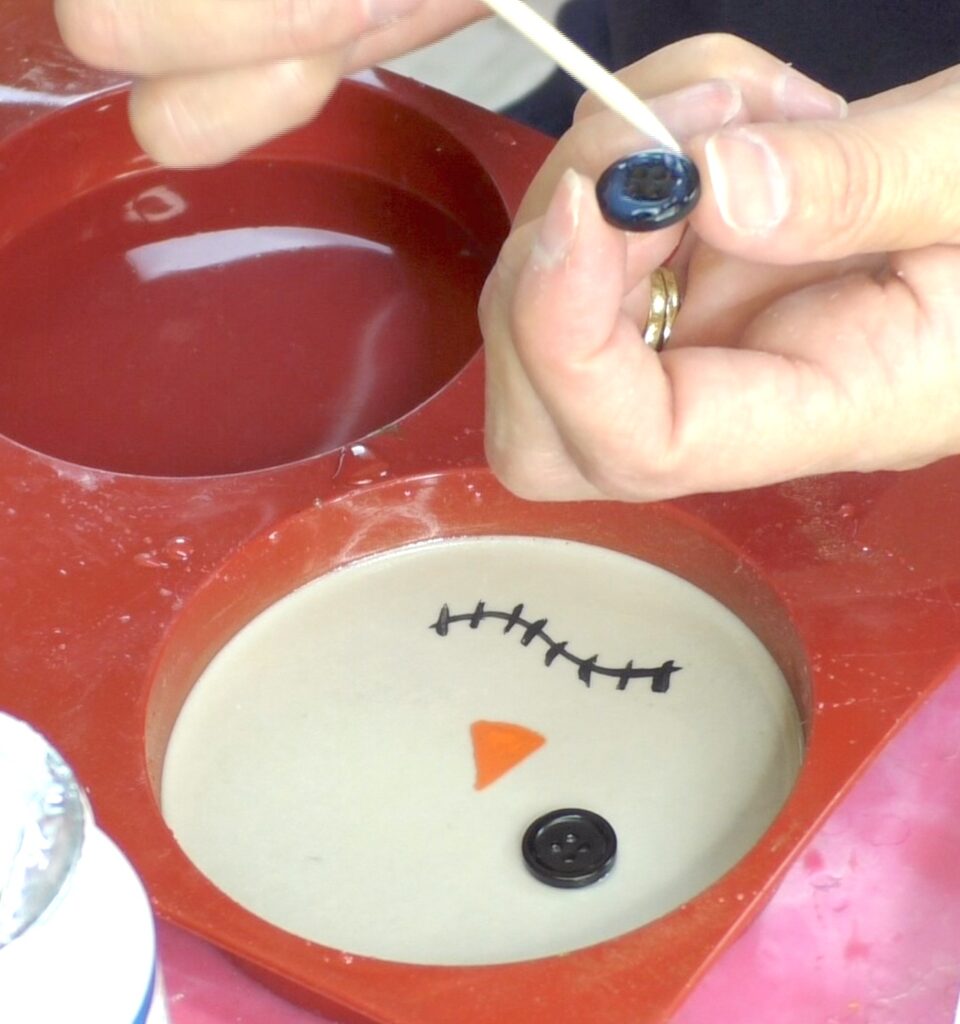
Step 6: Button eyes
I glued on the eyes.
Step 7: The scarecrow coaster is coming together
I mixed one ounce of resin and poured it into the mold, popped the bubbles, and let it cure for a minimum of 12 hours.

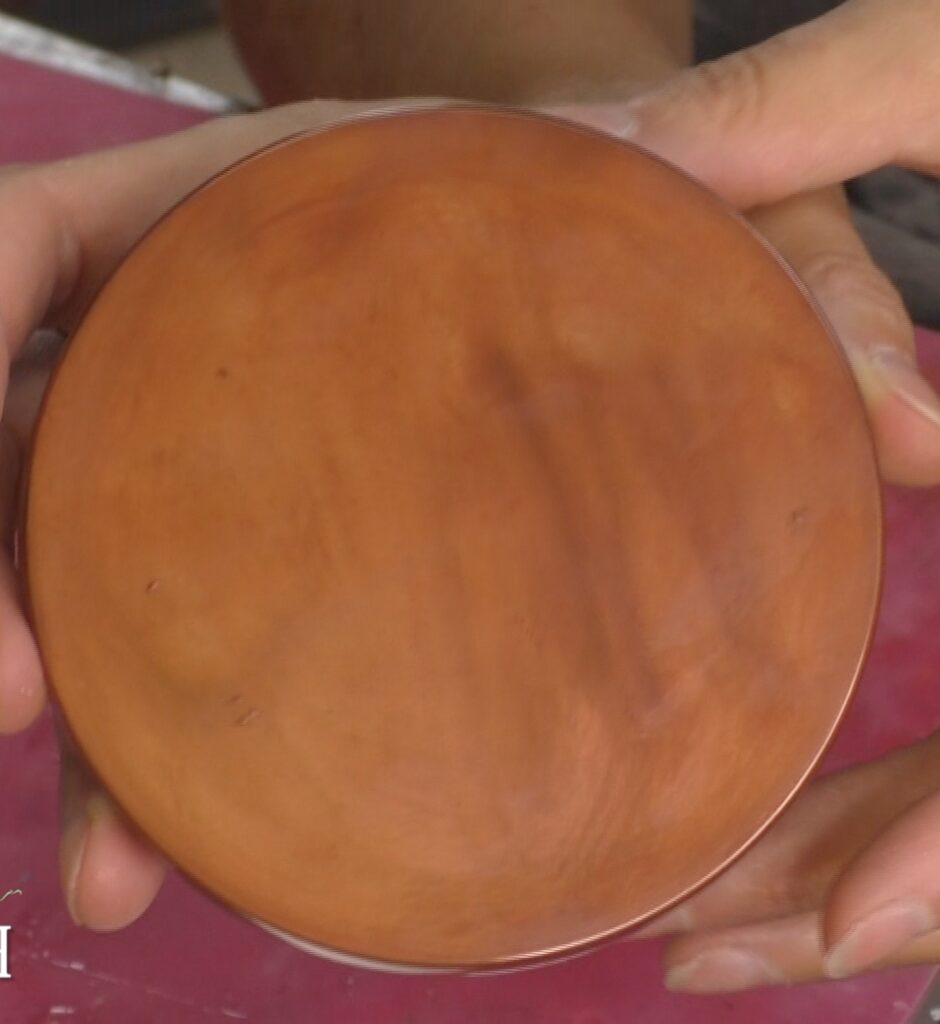
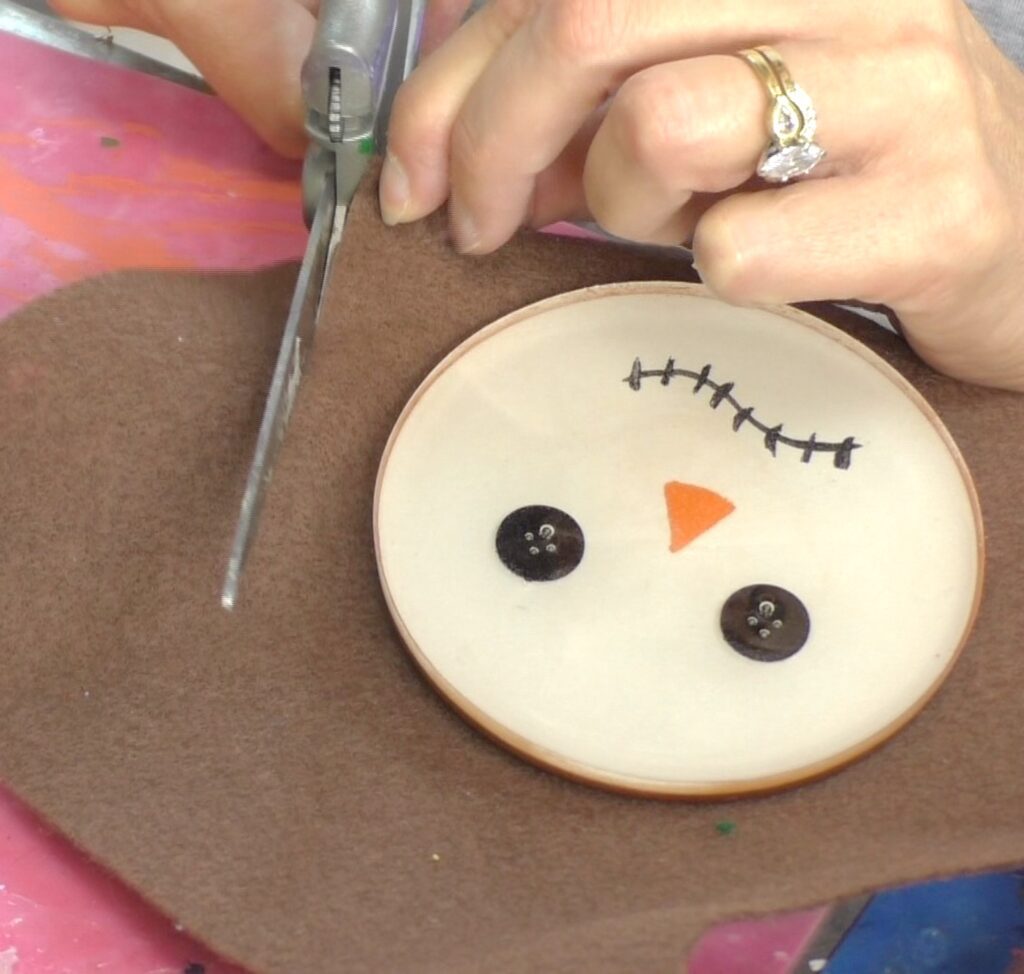
Step 8: Take the scarecrow coaster out of the mold
Once cured, I pulled it out of the mold. This is what the back looked like.
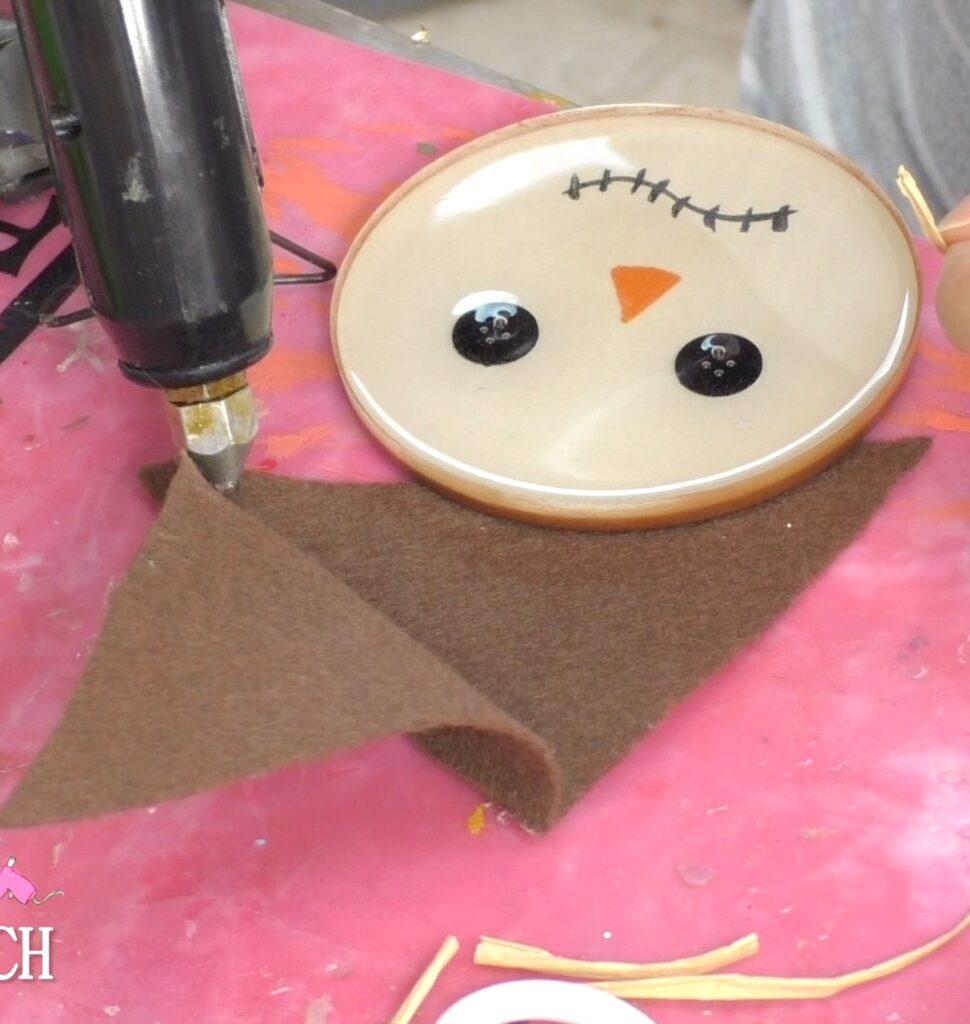
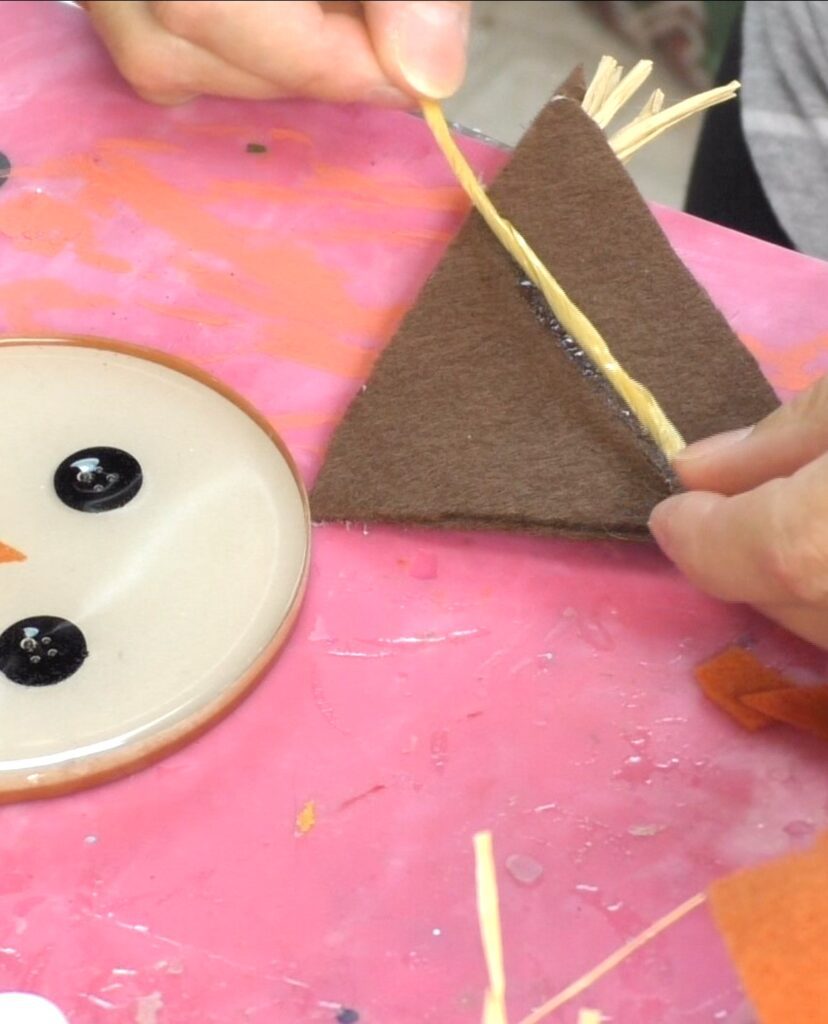
Step 9: A little felt for the scarecrow hat
Cut two identical triangles out of brown felt.
Step 10: A simple triangle
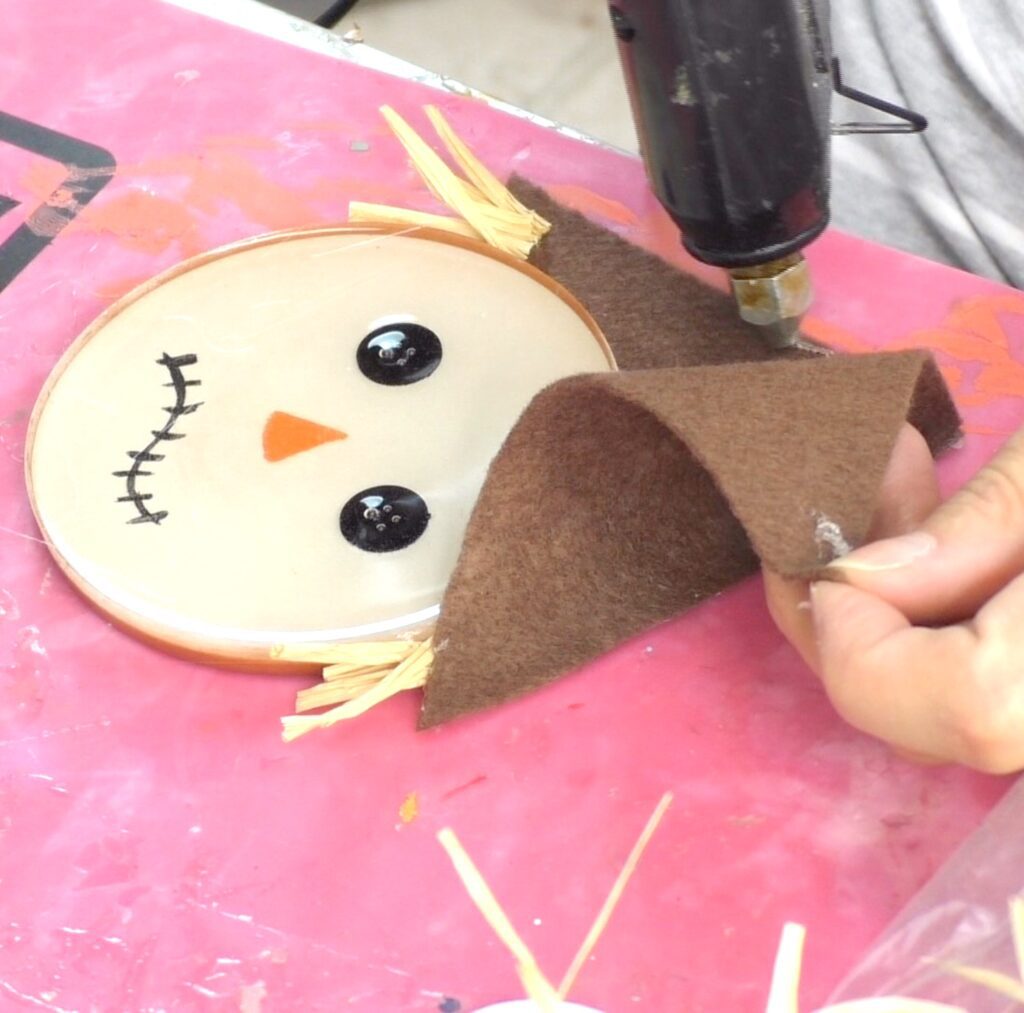
Use a glue gun and put glue on the edge of the triangle and add small pieces of raffia. Glue the pieces to the corners of the hat and glue the open edge together.
Step 11: Little patches
Glue small pieces of orange rectangle felt.
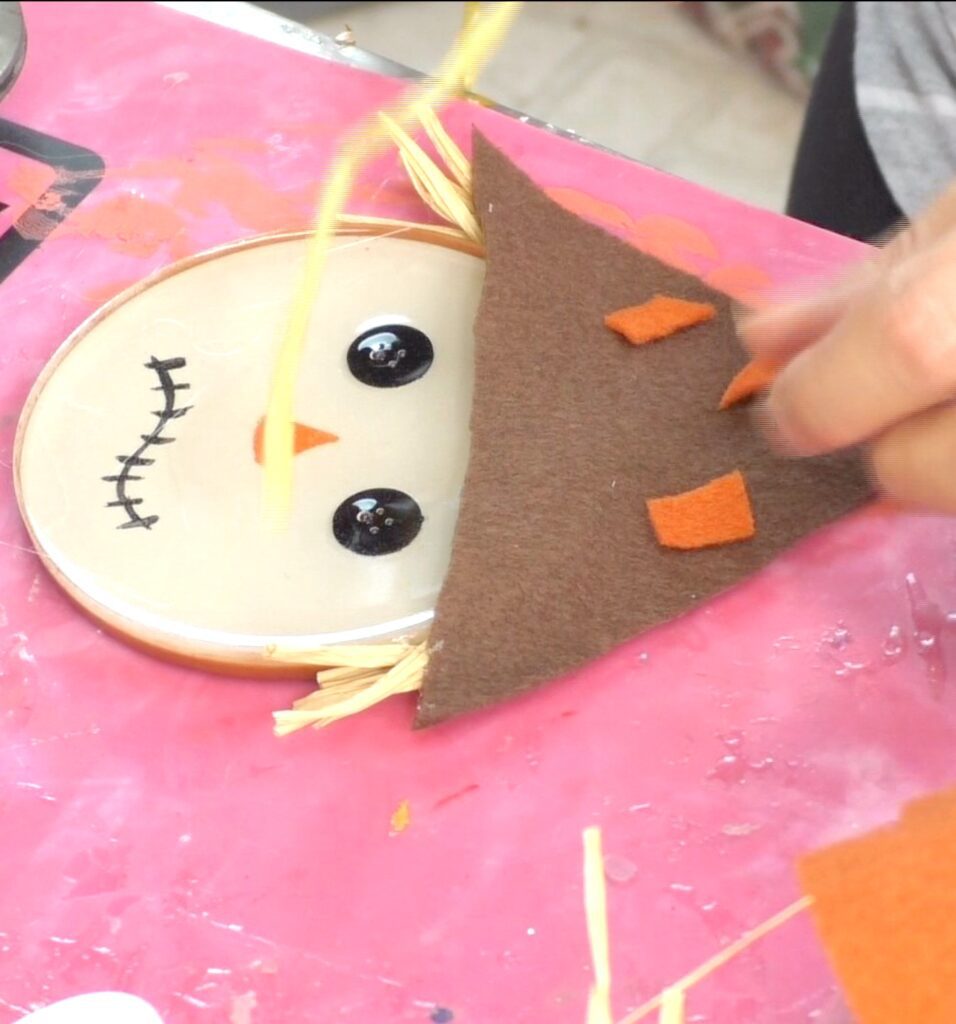
Step 12: Raffia accent
Glue on a piece of raffia.
Step 13: Put the scarecrow hat on
The hat is snug enough, but can still be removed.
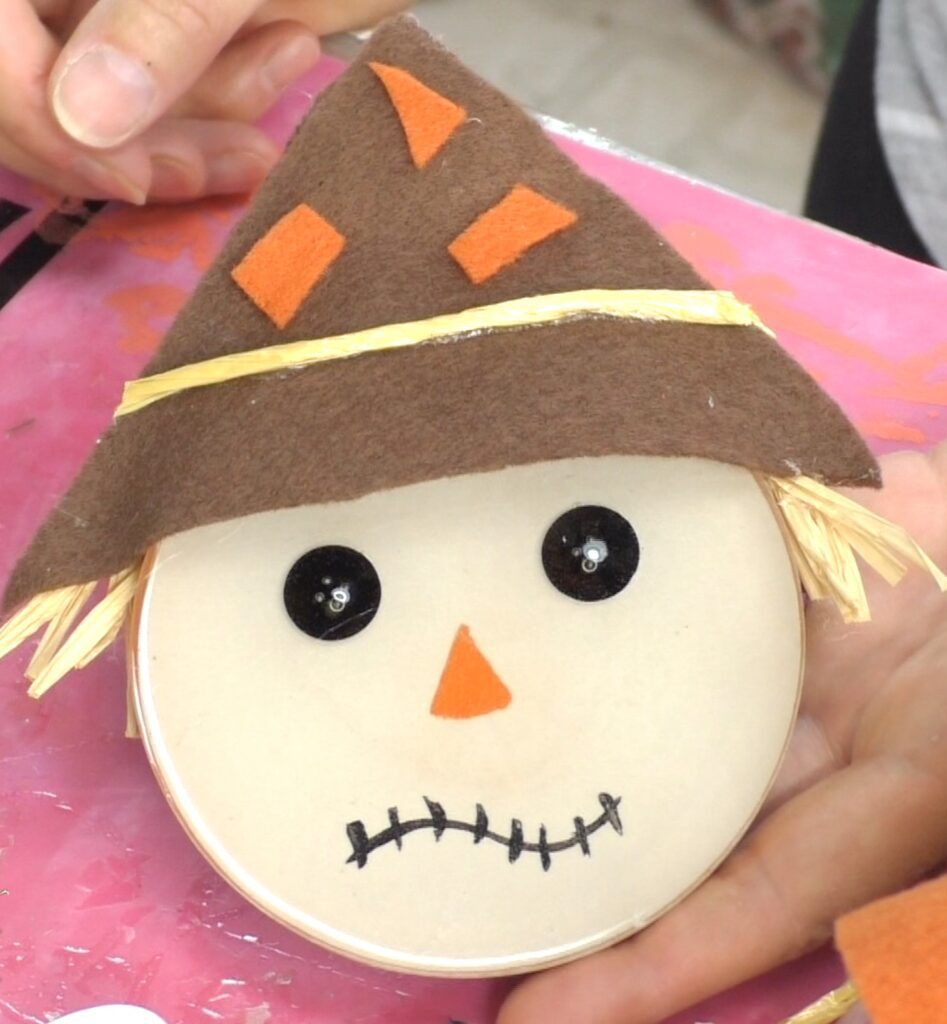
That’s it! Look at that cute scarecrow! Now you know how to make a scarecrow coaster!
Thanks for stopping by! Remember: Life’s too short not to shimmer, so grab your glue gun and your glitter!™ Stay safe!
Mona
Be sure to PIN IT for later!
