It is time for Dollar Tree Ornament Makeover #2! If you liked the Dollar Tree Ornament Makeover #1: Rustic Snowman, put on your seatbelt because this is going in the total opposite direction! This time I added glitz and glam to the Christmas decoration tutorial! Dollar store crafts are great for decorating on a budget! With the addition of resin and glitter, it has turned into holiday art!
Dollar Tree Ornament Makeover Video Tutorial
Materials You Will Need
*This blog uses affiliate links. As an Amazon Associate I earn from qualifying purchases.
- Wood ornament: check local Dollar Tree or Hobby Lobby
- Wood Merry & Bright: check your local Dollar Tree
- Red paint: https://amzn.to/32TRRSc
- Silver paint: https://amzn.to/342eTYC
- Red glitter – chunky: https://amzn.to/2Xo9AjC
- Red glitter – fine: https://amzn.to/341pi6F
- Silver glitter – finer: https://amzn.to/2CRI6cL
- Gold glitter – fine: https://amzn.to/356SlpE
- Silver ribbon: https://amzn.to/35dvBEs
- Resin (use whatever resin brand you like):
- Easy Cast: https://amzn.to/2yjYmBC
- Art Resin: https://amzn.to/2yk9X3z
- Clear Cast: https://amzn.to/2z4rxGw
- This is the resin I used for this project:
- FX Poxy: https://amzn.to/2AF3Pkk ~ According to the manufacturer, this one is heat resistant to 500 degrees F.
- Here is the video tutorial, so you can see exactly how I made it:
Directions On How To Decorate The Merry & Bright Dollar Tree Ornament
It’s time to give this plain Jane a glam and glitzy makeover! I found these ornaments at the dollar store, but if you can’t find them there, check online, craft stores or make one yourself! They are lightweight and fun to finish in different ways. If you find one that isn’t the exact size and shape, you can still use it and turn it into a Christmas ornament decoration to adorn your door or hang in the house to add to the holiday cheer!

To jog your memory, this was the first Dollar Tree ornament makeover: The Rustic Snowman Ornament. To change it up, this one is not going to look anything like the last one!

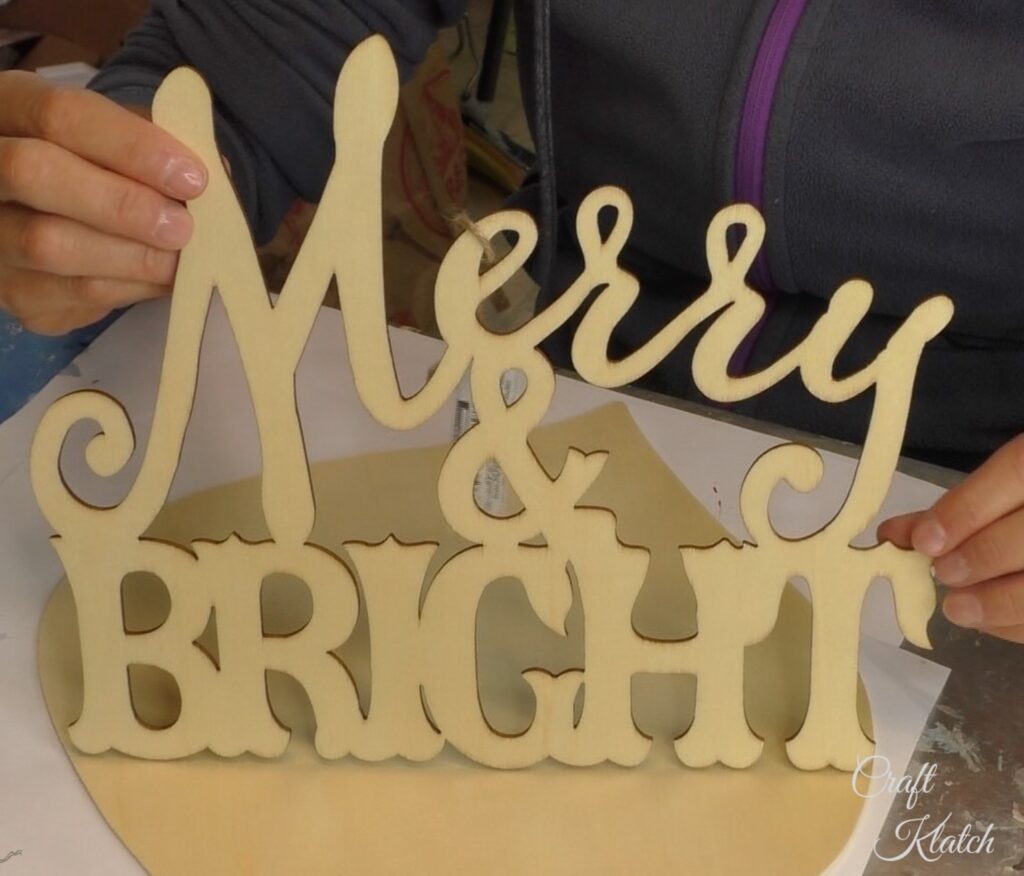
I have a Merry and Bright wood cut out to help decorate this one. It is a little larger than the Dollar Tree ornament, but that will add a little visual drama!
Step 1 ~ Let’s get this Dollar Tree ornament makeover started!
I removed the string and painted it red, on both sides of the ornament with acrylic paint.
Tip: I am going to add this tip again, incase you missed it on the last one. Sometimes when you paint wood on one side, it will bow. This happened to me on this project and many others. Don’t worry, when you paint the other side, it will straighten out again. Therefore, it is important to paint both sides, so don’t cut corners!

Step 2
I painted the Merry and Bright silver. I thought that would be a nice contrast to the red.

Step 3
Once dry, I put painters tape along the back edge and trimmed off the excess with my craft knife. The tape is to catch the drips. A little tip on the drips
Tip: If you put Vaseline on the back of the tape – it just needs to be thin, don’t goop it on – it will allow the resin drips to pop right off of the tape after it has cured.


Step 4
I put foil under my project and raised it up on cups. If resin gets onto the tabletop, it might ruin it. Be sure to take a little time to put foil or something protective on your table first. It will save on clean up and headaches later.

Step 5
I mixed five ounces of resin and then added chunky red glitter, fine red glitter, fine silver glitter, fine gold glitter, and mixed it up really well. I wanted it to be mostly red, but added the silver and gold for a little depth.


Step 6
Once mixed, I poured it onto the ornament. Look at that beautiful resin!

Step 7
While it was nice and fluid, I helped spread it out with my stir stick.

Step 8
I used my torch to pop the bubbles and let it cure for a minimum of 12 hours.

Here it is all cured! Look at that glitter shine! Stay tuned because it’s going to get even better!

Step 9
Before it fully cures hard, I used my craft knife to remove the tape.

Step 10
I put the painter’s tape on the edge again for this next pour. I wanted clean tape because I didn’t want it to build up and be unable to remove it. That is why I removed it after the last pour.

Step 11
I mixed five more ounces of resin. Start pouring that resin!

Step 12
I poured the clear onto the ornament, but not quite all of it. I would say reserve about and ounce or two.

Step 13
I moved it around with my stir stick because I wanted to make sure it was fully covered with resin.

Step 14
Then, I used my torch to pop the bubbles. The Dollar Tree ornament is unrecognizable!

Step 15
Now it’s time to add the Merry and Bright! I laid the Merry and Bright into the resin and made sure to position it. I knew that it was larger than the ornament when I bought it. That was the effect it was going for…bold.

Step 16
Then, I used the leftover resin to go over the Merry and Bright. The resin will work as a glossy finish, but also as a glue. When it has fully cured, it will become one with the ornament below.

Step 17
I used my torch to pop the bubbles and let it cure for a minimum of 12 hours.
Tip: When I do coasters, I like to use a lighter that has a torch flame. But when I do something larger, and resin canvas or something like this, I prefer to use the torch. It can cover more area more quickly and easily. On the other hand, I do not like to use torches on my coaster molds because I believe they heat up the edge too much. Consequently, your coaster may get stuck to the mold.

Step 18
I used my craft knife to remove the tape.


Step 19 ~ Let’s finish up this Dollar Tree ornament makeover!
I drilled the hole back through the resin, so I can add a ribbon. Otherwise the hole is too small.

Step 20
I pulled the silver ribbon through the hole so I can hang it up. I matched the ribbon to the Merry and Bright paint.

Step 21
I tied a knot and trimmed it.

Step 22
I added a bow.

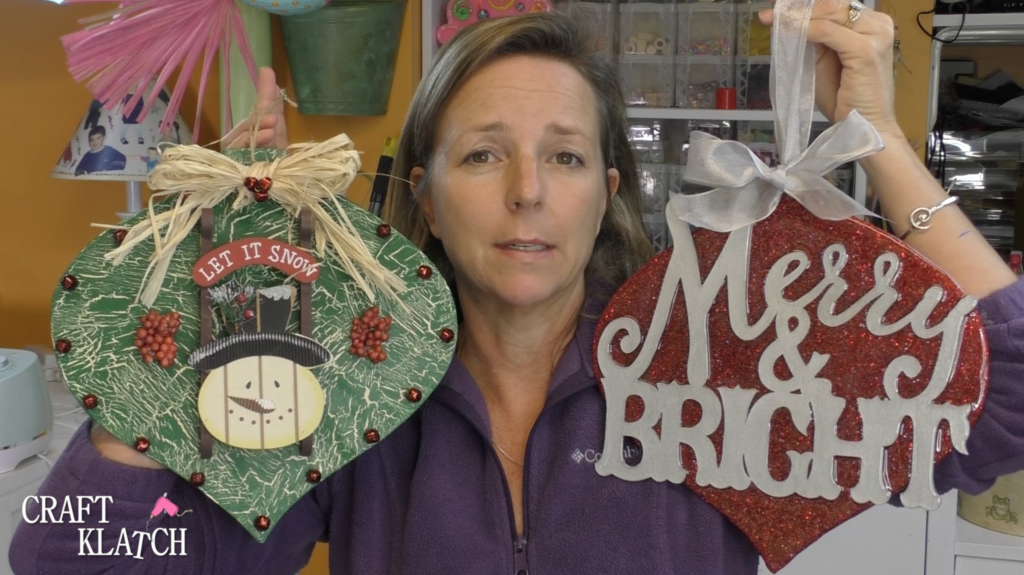
That’s it! It’s ready to hang and decorate your home! Now you have a custom Dollar Tree ornament that looks like something you would buy in a designer shop.


Here is last week’s ornament. Both are very different but equally beautiful!
Be sure to check out the other versions:
The first version went a rustic with crackled paint and a snowman!
Dollar Tree Christmas Ornament Makeover #1: Rustic Snowman
The third version went more contemporary in the blue cool colors and with a snowflake vibe!
Dollar Tree Ornament Makeover #3: Frosty Snowflake
Finally, the fourth version went back to tradition and cute with gingerbread men!
Dollar Tree Ornament Makeover #4: Gingerbread Ornament
If you are looking for other Christmas decoration ideas and holiday inspiration, you can find them HERE!
Here is the full video tutorial!
Thanks for stopping by! Remember: Life’s too short not to shimmer, so grab your glue gun and your glitter!™ Stay safe!
Mona


These are awesome! So creative and festive!
Thank you Kim!