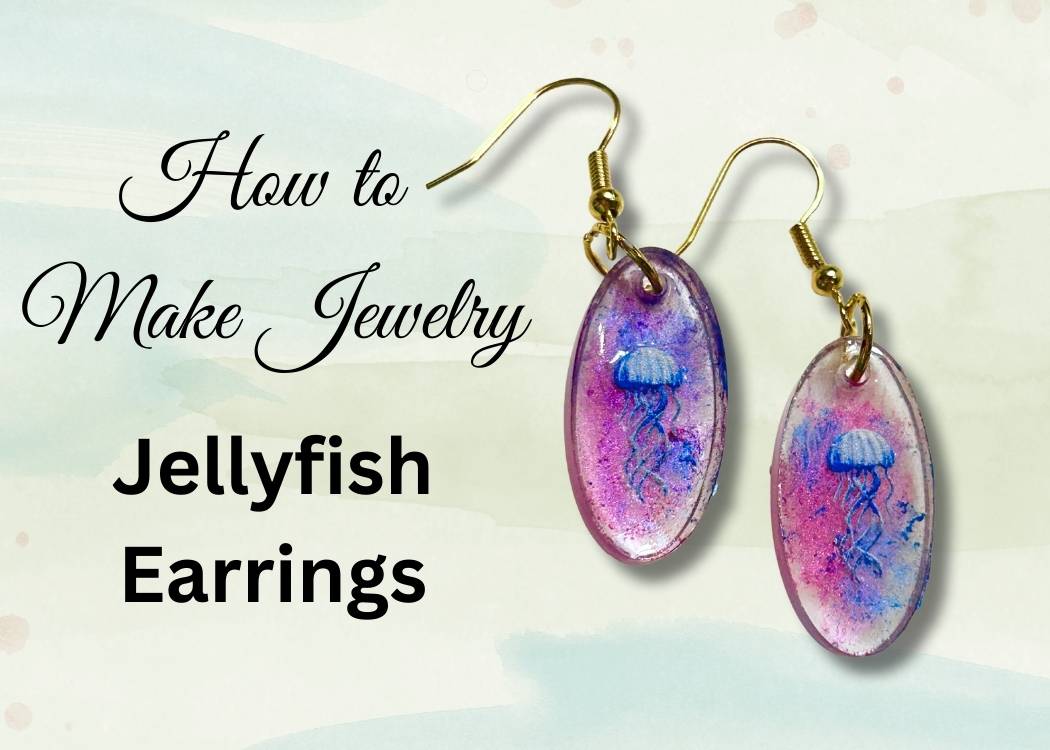
Learn how to make jewelry with resin! These DIY jellyfish earrings are easy, fun, and the perfect gift idea for ocean and beach lovers.
One of the things I love most about crafting is when it sparks joy and creativity in others. Recently, my grandson made a Halloween charm for himself and had so much fun that he wanted to try something new.
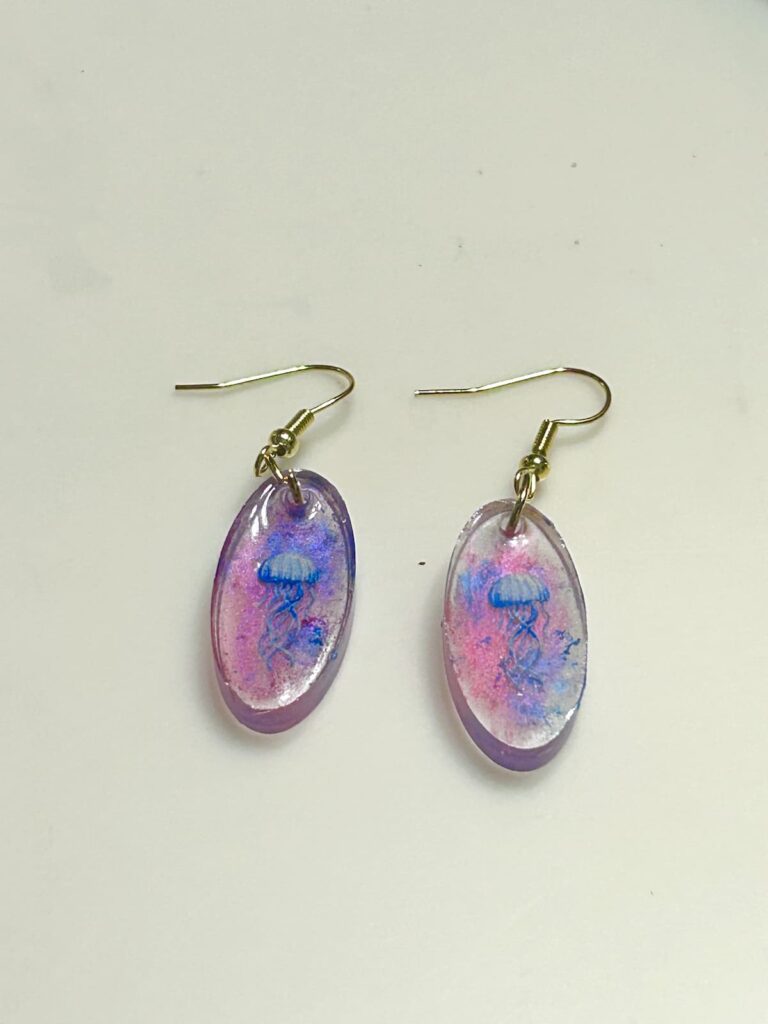
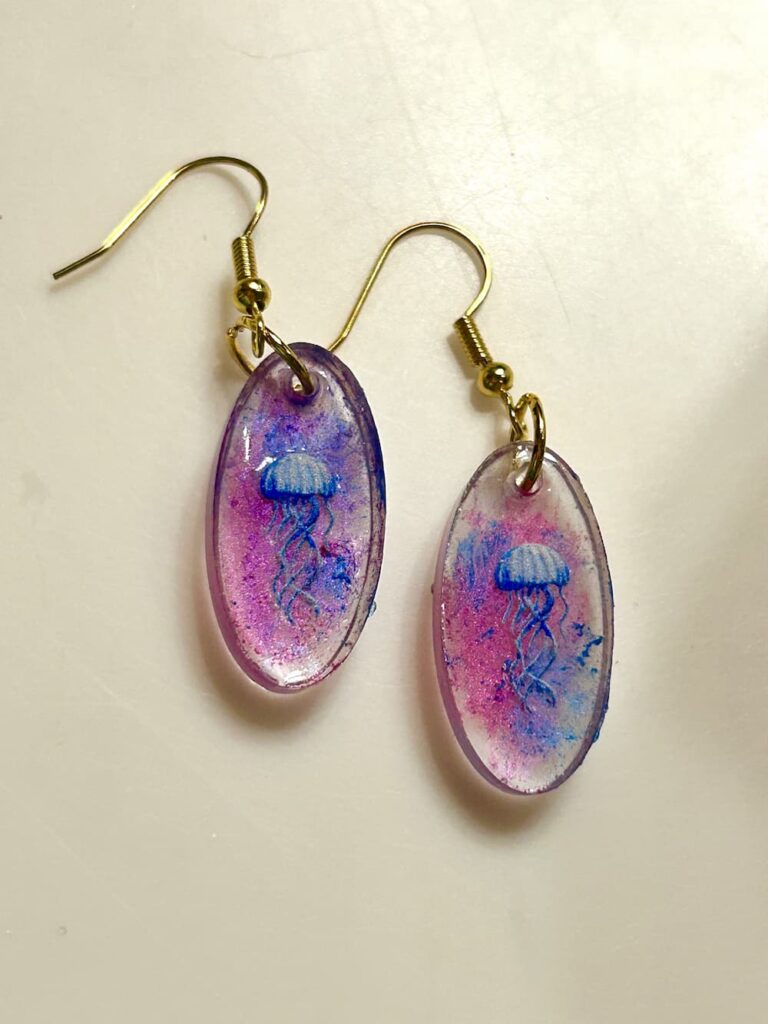
He decided to make his sister a special pair of jellyfish earrings…and they turned out amazing!
If you’re looking for a fun project to try with UV resin, this step-by-step tutorial will show you how to make jewelry that’s personalized, trendy, and perfect for gifting.
Material Needed for the Jellyfish Earrings
*Disclosure: This blog uses affiliate links from Amazon and other retailers. I earn a small amount from qualifying purchases at no additional cost to you.
- Oval earring molds & earring findings (come in this bundle)
- UV Resin Starter Kit (includes UV light)
- Pigment powders (purple, black, and orange)
- Beach nail stickers
- Gloves
Jellyfish Earrings Video Tutorial
Directions on How to Make Jewelry Jellyfish Earrings
Step 1: Create the Base Layer
To start the resin earrings, my grandson poured a thin layer of UV resin into the oval silicone mold.
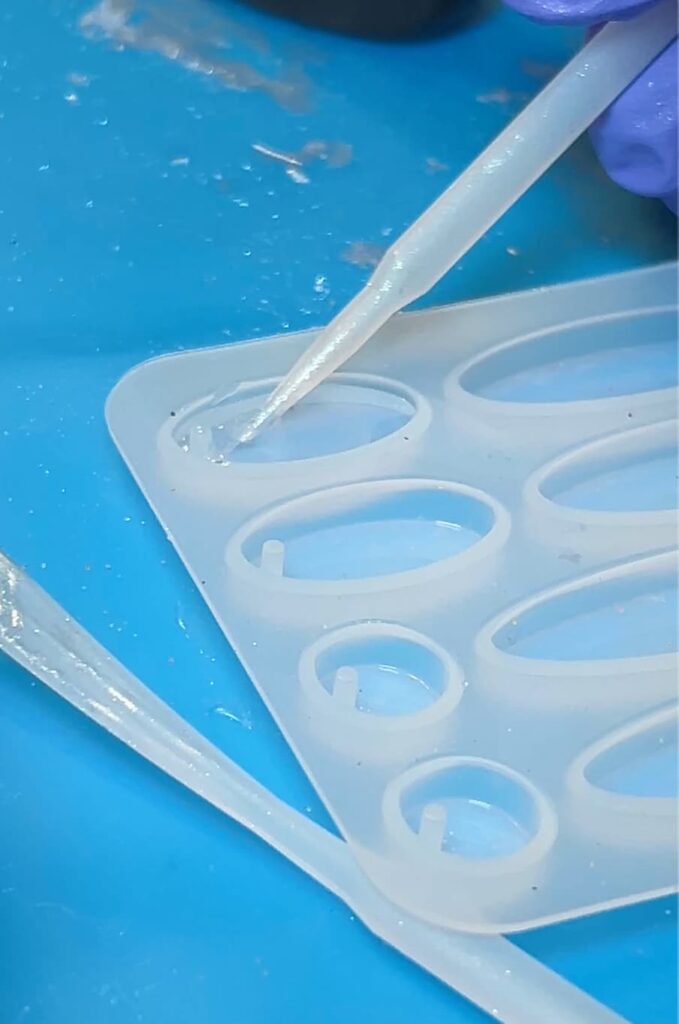
He cured it under the UV light until it hardened.
This created a clear base for the design.
Step 2: Add Color with Pigments
Next, he used a small brush to apply shimmering pigments in shades of blue, purple, and pink to the cured resin.
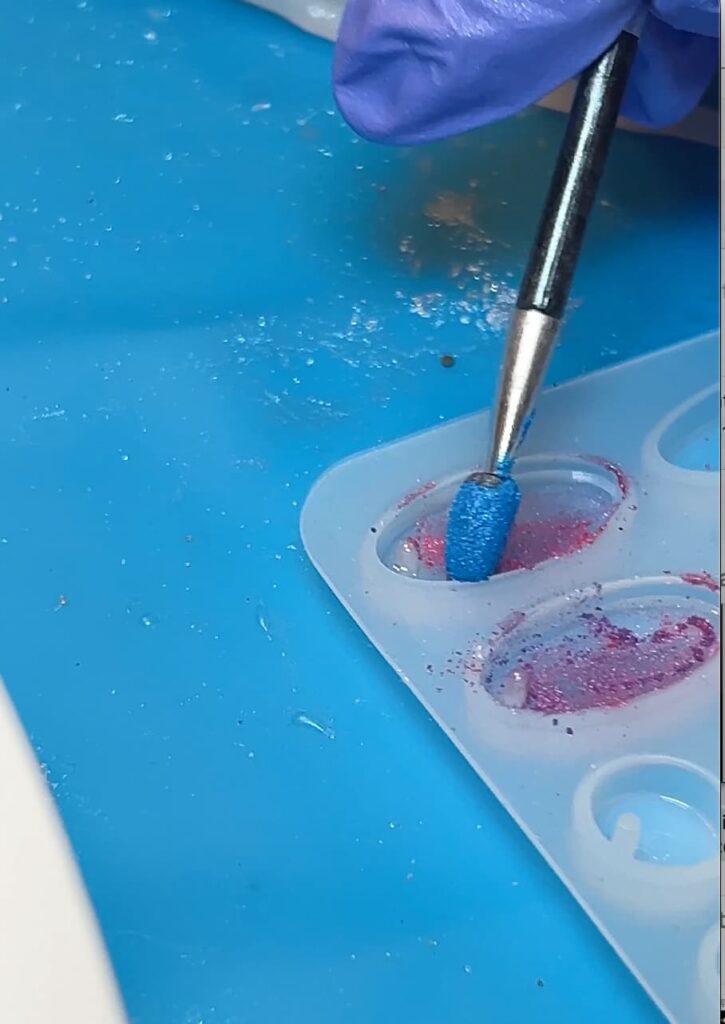
This gave the earring a beachy, ocean-inspired background.
To lock in the colors, he added another thin layer of UV resin over the pigments and cured it again. This step seals everything in and make the colors pop!
Step 3: Add Jellyfish Stickers
The star of the show was the jellyfish jewelry theme. My grandson carefully places small jellyfish nail stickers on top of the cured resin.
These gave the earring their underwater whimsical look.

Once the stickers were in place, he put another layer of UV resin on top of the stickers to seal them in.
After curing under the UV light, the design was completely smooth and ready for finishing.
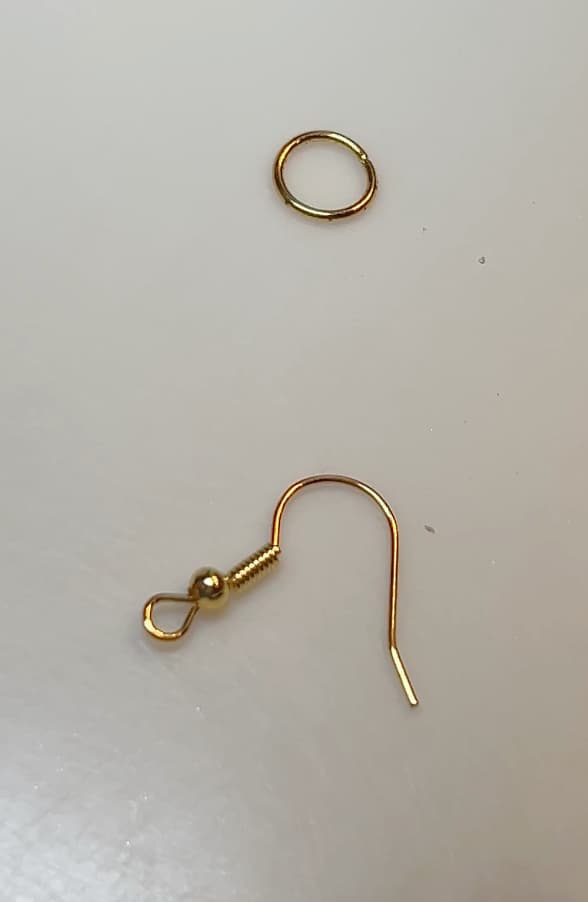
Step 4: Attach the Earring Findings
The final step was transforming the resin pieces into earrings. He added jump rings and earring hooks, using jewelry pliers.
With that, the earrings were complete!
His sister was thrilled with her new jellyfish earrings because they were so beachy, fun, and unique.
It was such a sweet gift, and the perfect example of how easy it can be to learn how to make earrings with resin.
More Resin Jewelry
Making resin jewelry doesn’t have to be complicated. With just a few supplies, you can create something that looks store-bought, but has the love and creativity of a handmade gift.
Here are a few more fun resin jewelry projects:
These jellyfish earrings are proof that anyone – kids and adults alike – can enjoy experimenting with resin and create something special.
Whether you’re making them for yourself or as a gift, this project is a wonderful way to explore how to make jewelry at home.
Don’t forget you can ALWAYS find me on YouTube!
Remember: Life’s too short not to shimmer, so grab your glue gun and your glitter!™
Mona
Well, I’m jealous! How old is your your grandson? Just curious to know due to how old kids can play around with resin. Thanks!
He is seven, almost. I made sure he was all covered up and protected. My eleven year old granddaughter has a mind of her own. I don’t think there is a specific age. I think it depends on when you, they and their parents are comfortable with it.