Remember to stay up on the latest, be sure to SUBSCRIBE to my YouTube Channel!
You can click right HERE!
I’ve been wanting to try this since I created the bowl mold, but never got around to it…UNTIL NOW!

You will need:
– A bowl mold (I have video linked below)
– Resin – I used Easy Cast – for more info go to www.eti-usa.com
– Glitter and iridescent confetti (I bought the confetti and Hobby Lobby)
– Something to finish the bowl – either sandpaper, a file or a rotary tool
This is the product I used to make the bowl mold:
Here is the video tutorial on how to make the bowl mold:
Here is the video tutorial on how to make the glitter bowl:
Directions:
1. Prepare your resin, according to the package directions. Mix glitter and iridescent confetti in whatever amounts you want to use to create the bowl.
2. Pour glitter and resin mixture into the mold.
3. Take inner section of mold and place into the other mold. This will squish the resin up the sides, creating the bowl shape. Tip: I put rice into the inner mold, so it has weight and keeps its shape.
4. Allow to cure for at least 12 hours.
5. This is when I decided I wanted to make the bowl thicker. I removed the inner bowl and I mixed some glitter and confetti together and poured it into the mold. I let it settle in the bottom, figuring when I poured the next layer, it would keep it raised up and allow the bowl to be thicker. Allow to cure for at least 12 hours.
6. Now it’s time for the last layer. I mixed only the iridescent confetti and the resin. I thought this would make the inside of the bowl look a little different than the outside. I placed the inner bowl back in and allowed it to cure for at least 12 hours.
7. I peeled the inner mold off and removed the bowl from the outer mold as well.
8. Depending on your mold, you might need to paint a layer of resin on the inside and outsides of the bowl. Mine had more of a matte finish and I wanted them to be shiny.
9. Using a pop can, I turned the bowl upside down. The pop can allowed the bowl to be raised off of the table. I covered my table with parchment paper, for any drips.
10. I prepared my resin and using a disposable brush, I painted on the resin, on the outer side of the bowl only — allowing any excess to drip off.
11. Allow to dry for at least 12 hours.
12. Now is the time to finish off the edge of the bowl. If your’s doesn’t need it, great! Mine did. You can sand it, or file it down. I decided to use my rotary tool, with the cutting attachment. I braced the tool on the edge of the table (remember to use a mask and safety glasses for the dust) and used it to cut along the top of edge of the bowl. I slowly turned the bowl and kept the rotary tool stationary. As long as you hold it firm, you should get a nice cut. I demonstrated in the video, in case you want to see how I did it.
13. Clean the bowl. I first brushed off the dust. Then I rinsed it with water and dried it completely.
14. Here’s the final coat. I prepared my resin and brushed a thin layer on the inside of the bowl. Let it sit for at least 12 hours and you are done!
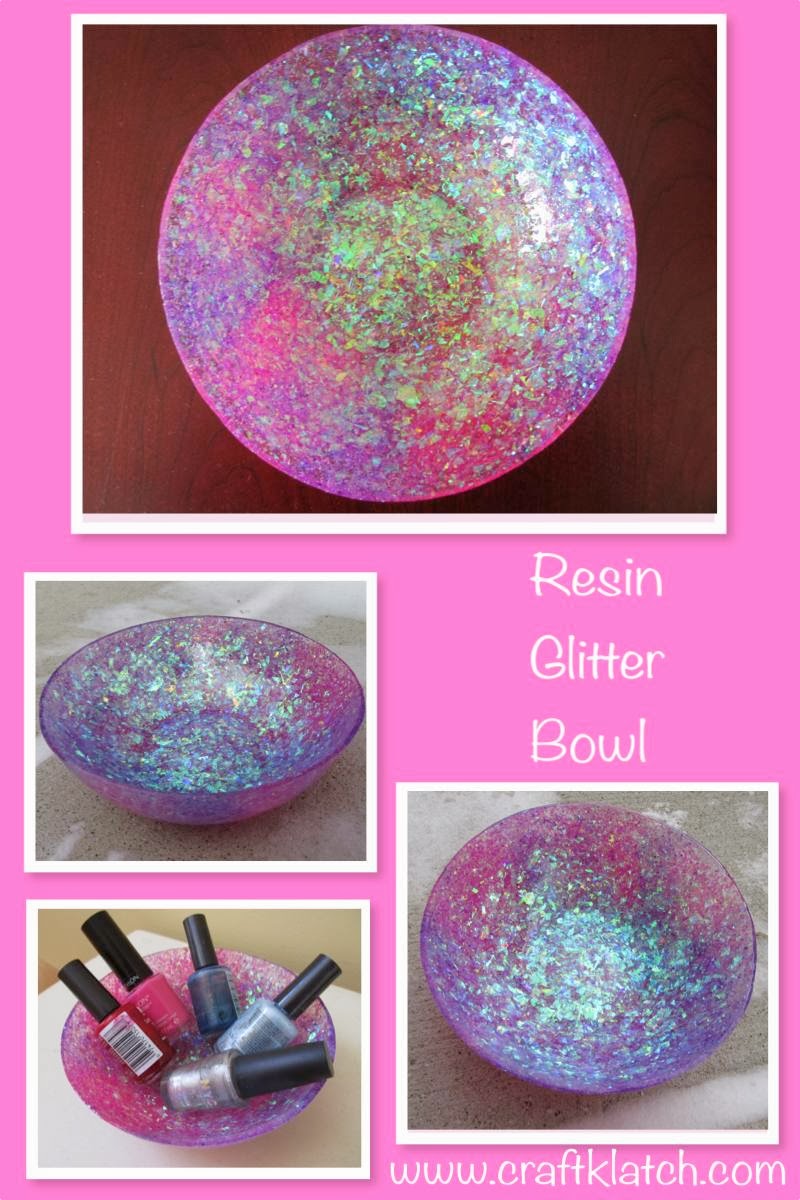
Now you have a beautiful bowl. Use it to store accessories, or change, nail polish, keys whatever!
Thanks for stopping by! Here are tutorials for two other bowls I have made. A Jellybean Bowl and a Pistachio Shell Bowl!
Thanks for stopping by! Happy Crafting!
Mona

This is really nice to read content of this blog. A is very extensive and vast knowledgeable platform has been given by this blog. I really appreciate this blog to has such kind of educational knowledge.
เร ซิ่น