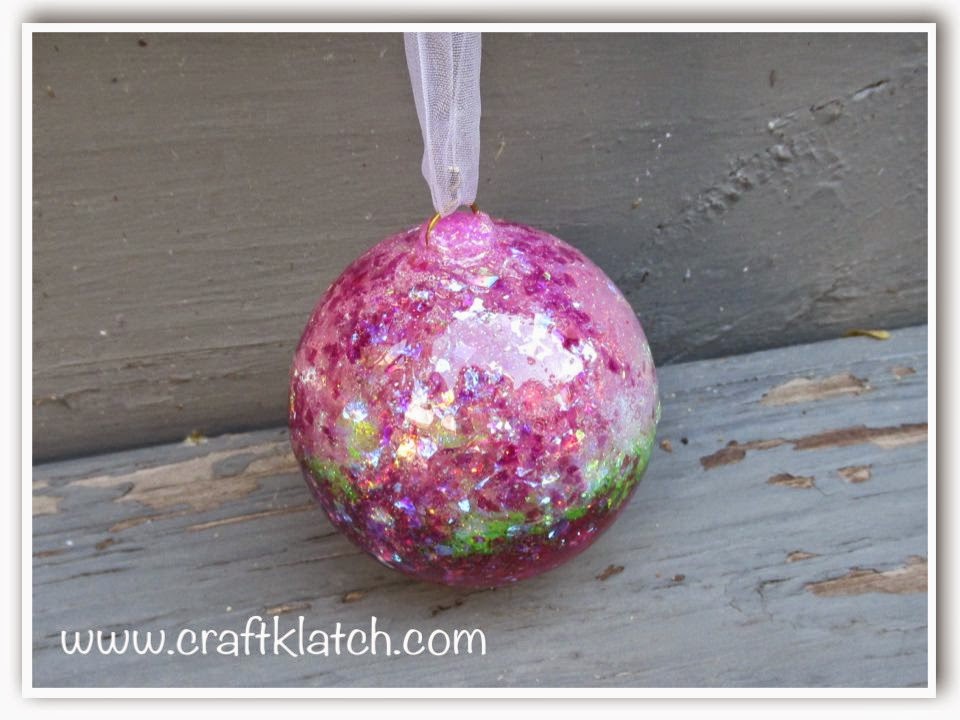
I found this mold, which is actually made for making large ice balls, for whiskey, or whatever you want to use it for. Being silicone, I thought it was perfect for resin. It comes in a set of four, so I will dedicate one (maybe two) to the craft room and use the other two for ice cubes. This is my first attempt at using it with resin:

Supplies You Will Need:
*This blog uses affiliate links. As an Amazon Associate I earn from qualifying purchases, at no additional cost to you.
- Silicone mold: https://amzn.to/24iSaQg (FYI: This is a different mold than I used in the original project. It’s better because it has a shiny surface on the inside).
- Resin: https://amzn.to/1Pk9D9E
- Various glitter and confetti: https://amzn.to/2QefnZZ
- Wire – I used 20 gauge: https://amzn.to/3ocfcuG
- Disposable paintbrush: https://amzn.to/2RQwEIR
Directions:
1. Prepare some resin, according to the package directions, and mix in glitter. This is actually a great leftover resin project. As you have leftovers, you just drop them right into the mold.
2. I tried adding the glittered resin to both sides of the mold, but I think it all ended up at the bottom anyway. TIP: You do want your mixture to be thick. That way, you won’t have much settling and then a clear layer, between the layers.
3. Continue doing that with varying glitters. You can choose to either wait a few hours between the layers, or just put them all in together and leave it to chance. I did both.
4. When you are almost full, take a piece of wire and bend it into a loop and twist the ends together. Insert that into the mold and it will become embedded into the resin.
5. Keep filling until full, if it overflows, that is okay.
6. Once cured – wait a minimum of 12 hours, you can unmold it.
7. I created a stand using two glass bottles, with water in them, a skewer stick, and duct tape. See video for the set up. I hung the ball from the stand.
8. Preparing a small amount of resin (it does not take much), dip the brush into the resin, and brush the entire ball.
9. Remember that the resin will run to the bottom and drip off. Make sure you are working on a safe surface. Also, remember to go back periodically and wipe the bottom of the ball. Otherwise, you will end up with a permanent drip.
10. Allow it to cure for a minimum of 12 hours before handling. Remember it takes a full 72 hours to fully cure.
That’s it! Use is to hang in the garden, as Christmas ornaments, hang in a window or from a light fixture. The possibilities are endless!
Here is the full video tutorial:
Thanks for stopping by! Remember: Life’s too short not to shimmer, so grab your glue gun and your glitter!™ Stay safe!
Mona