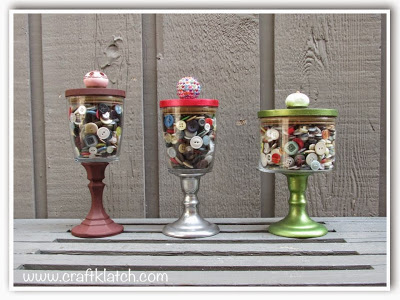
Craft room storage has ALWAYS been an issue for me! I had these used glass candle jars sitting around FOR-EVER! They were too nice to throw away, but I couldn’t think up any ideas to reuse candle jars. I wasn’t planning on making any candles for them, so what to do? After some thought, I figured out how to repurpose the candle jars and make them work for me!
Tip: It was important to use candle jars with lids in order to make them function for the kind of storage I was trying to do, but no lids work too.
My plan was to store all my buttons!
I get asked (A LOT), What’s with all the buttons? I’ll answer that later and we’ll talk about button crafts later too!!
*This blog uses affiliate links. As an Amazon Associate, I earn from qualifying purchases.
A Perfect Pairing!
I’ve had some fun knobs, like dresser knobs, for a while now. I didn’t know what I was going to do with them either.
Lightbulb moment!
Pair the knobs with the empty candle jars! It was time to get them together! Just call me the matchmaker!
Other Ideas to Reuse Candle Jars
My specific purpose was to use them to organize buttons in my craft room. However, once I started thinking about ideas to reuse candle jars, the ideas just kept coming!
Off the top of my head:
- Bathroom storage (Q-tips, cotton balls, etc.)
- Gift jars – decorate add homemade bath salts
- Office desk storage
- with lids – paper clips, rubber bands, etc.
- without lids – pens and pencils
- Grow succulents (if you don’t have a green thumb, they have nice looking fake succulents that you cant put in with coffee beans!)
- Hold fragrant potpourri
- Use as a fresh flower vase
Supplies You Will Need To Repurpose Candle Jars For Stylish Craft Room Storage!
- Empty candle jars with lids: https://amzn.to/2S0884
- Candlesticks: https://amzn.to/2RggJlo
- Acrylic paint: https://amzn.to/2QTyqrm
- Drawer pulls/knobs: https://amzn.to/2LCIQG7
- Glue – anything at adheres to glass (E6000, Super Glue, Glue All, etc.): https://amzn.to/2RleH3mh
- Drill or rotary tool: https://amzn.to/2rVFzIQ
- WD 40 to clean the candle jars, if you haven’t cleaned them already: https://amzn.to/2QSjDgV
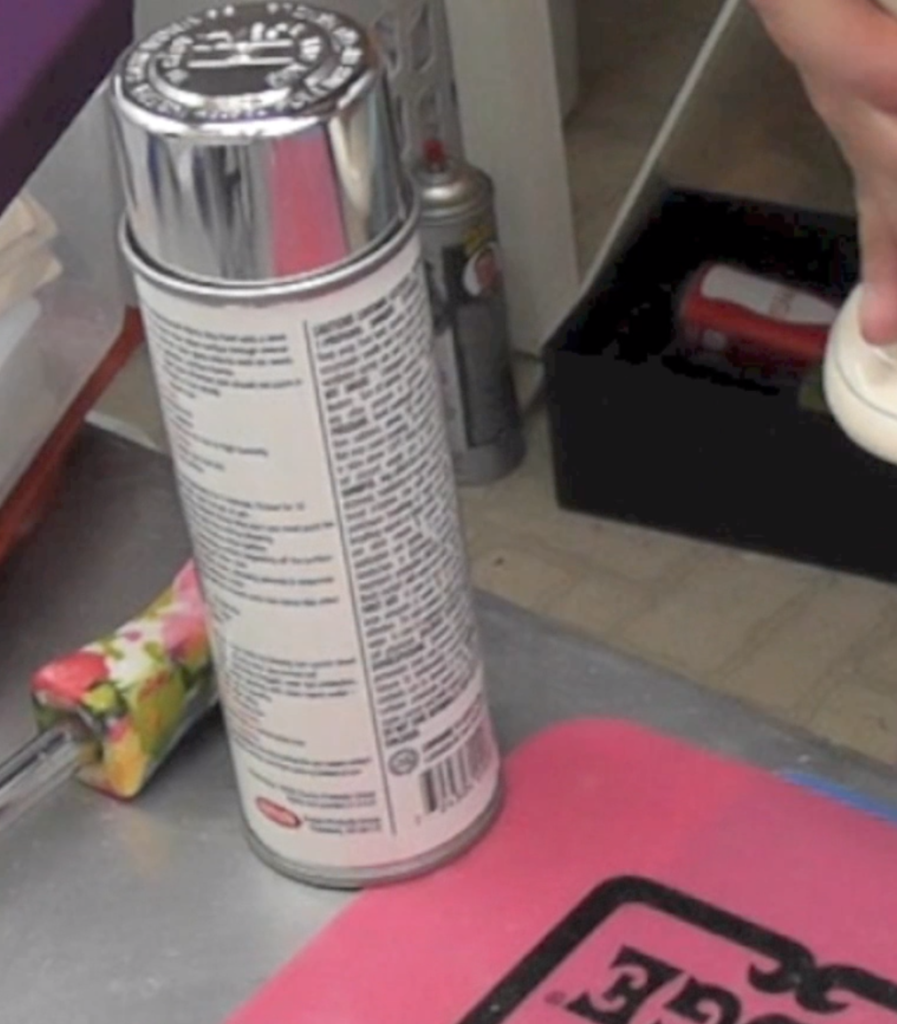
- Spray paint or primer: https://amzn.to/2RlFbBG
- Sandpaper: https://amzn.to/2CzVbYR
Here is the video tutorial:
Directions on How to Repurpose Candle Jars for Craft Room Storage:
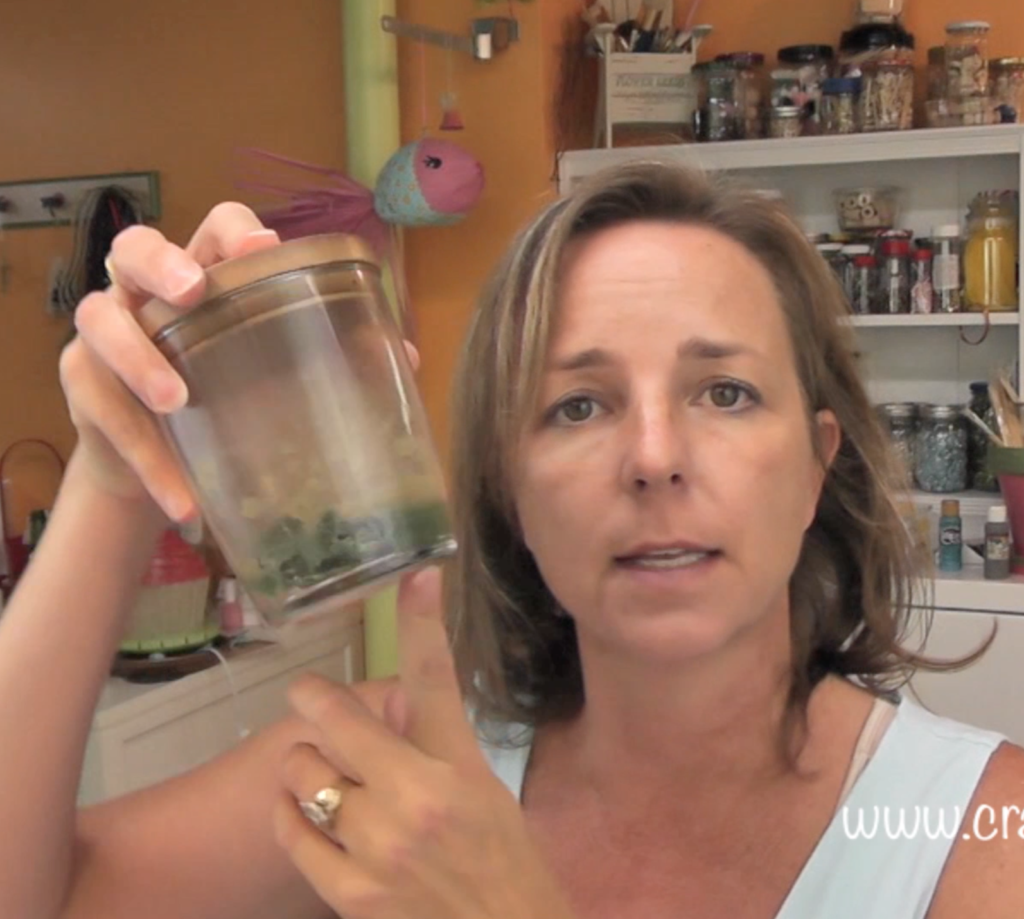
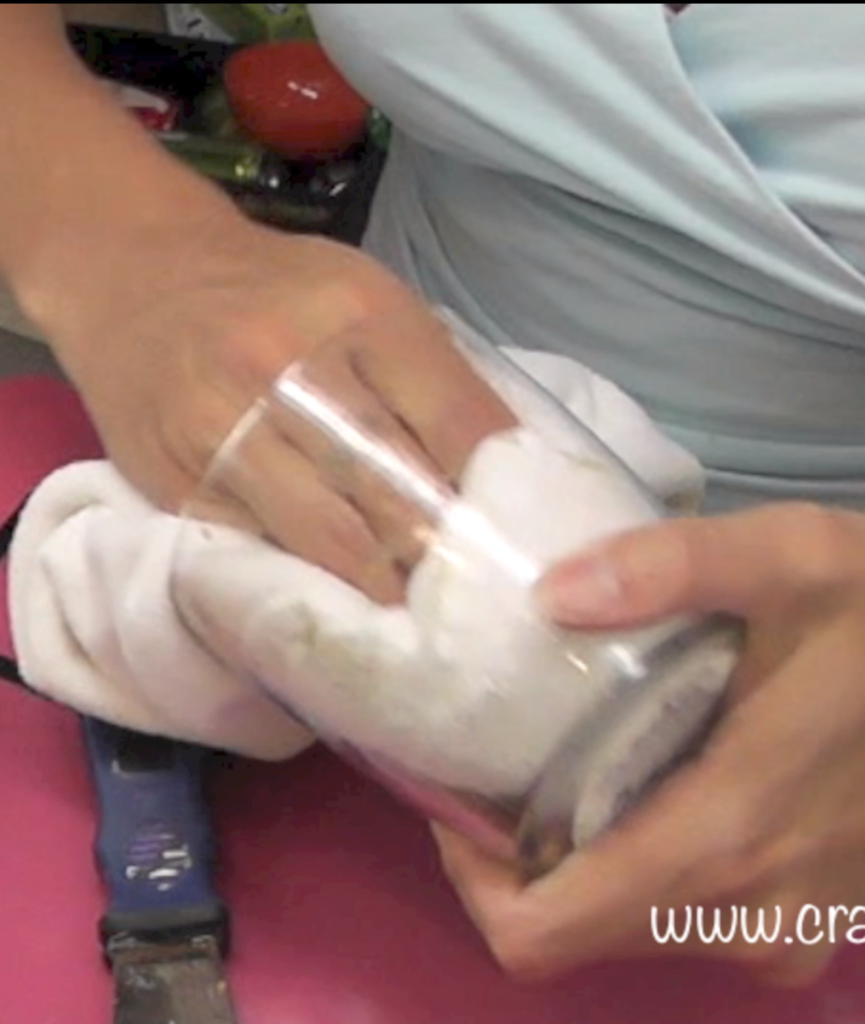
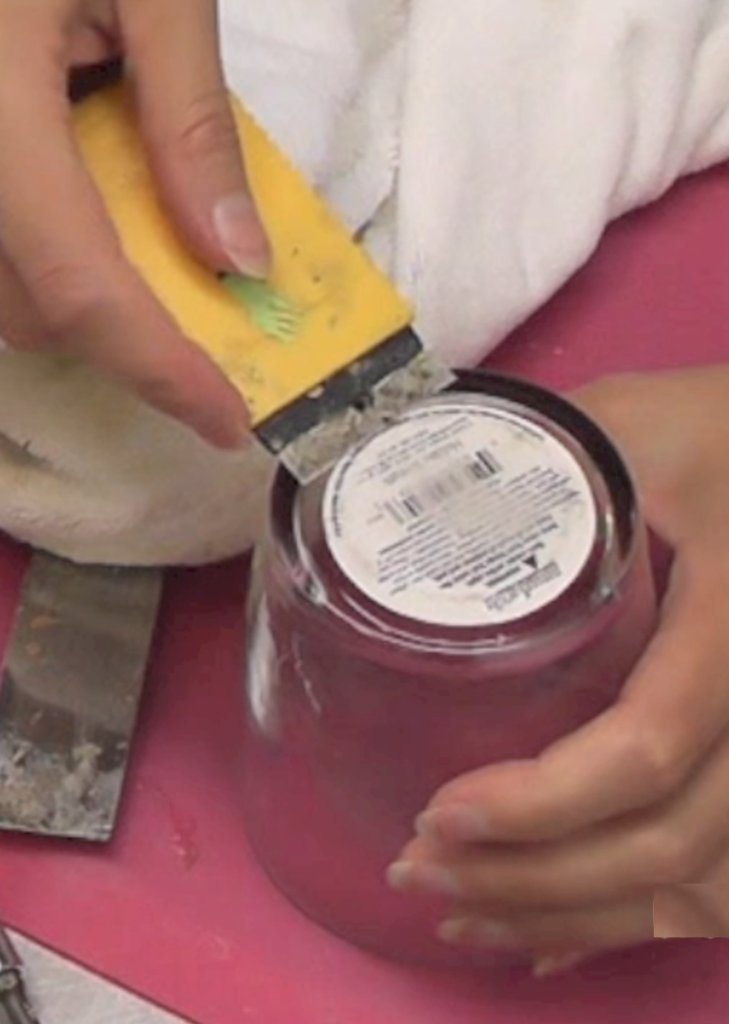
Step 1: Clean!
Clean the candle jar. I started by loosening the leftover wax.
I found WD 40 cleans the wax out and takes off the labels beautifully!
Once everything was removed, I used some glass cleaner for the final clean up.
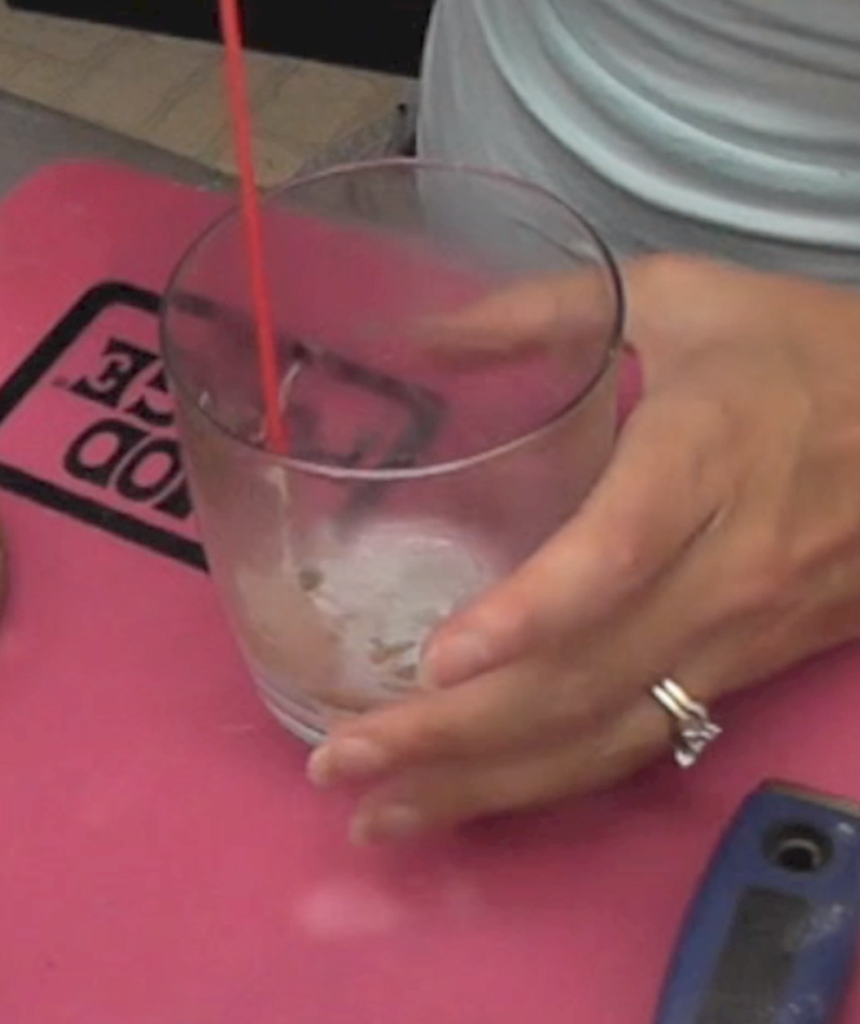
Step 2: Let the drilling begin!
I needed to drill a hole in the middle of the lid. There is a really easy trick to find the center of a circle.
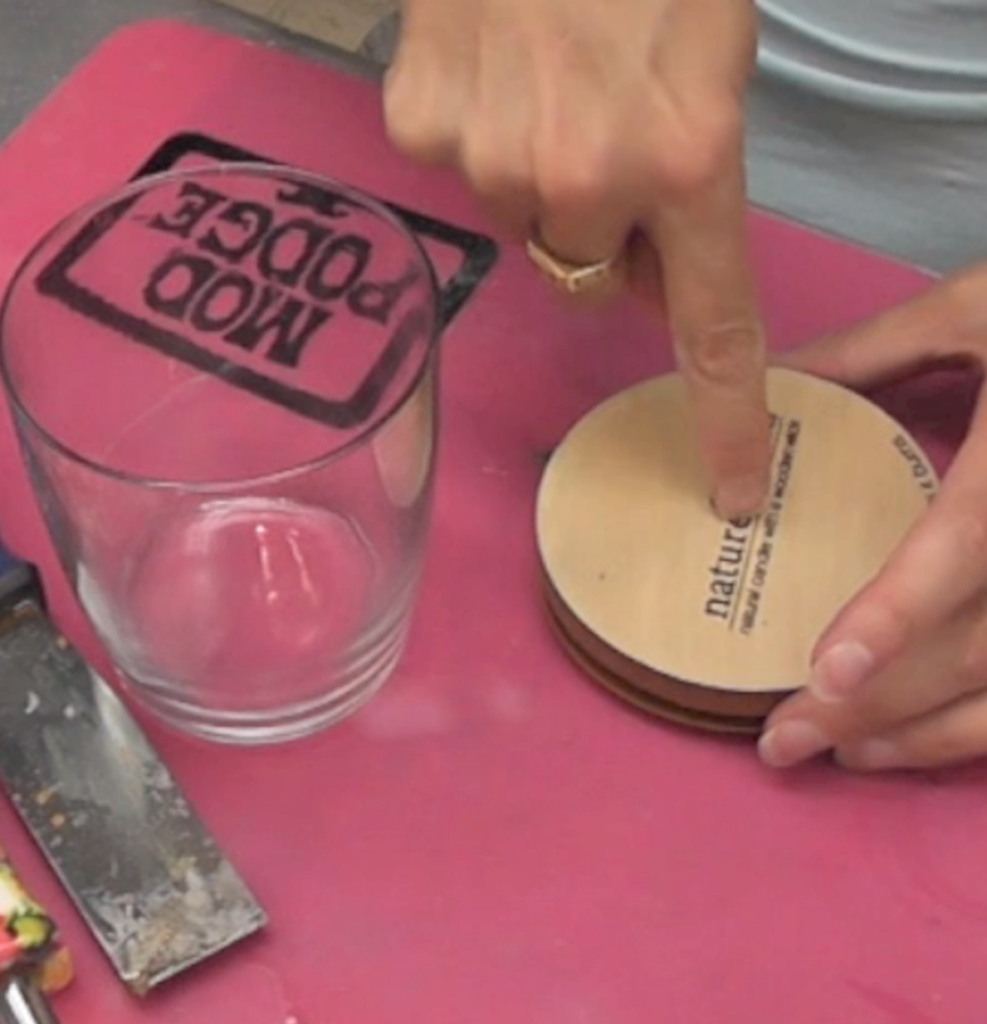
Trace the circle on a piece of paper – in this case, I traced the lid. If you want to find the center, trace the lid on a piece of paper.
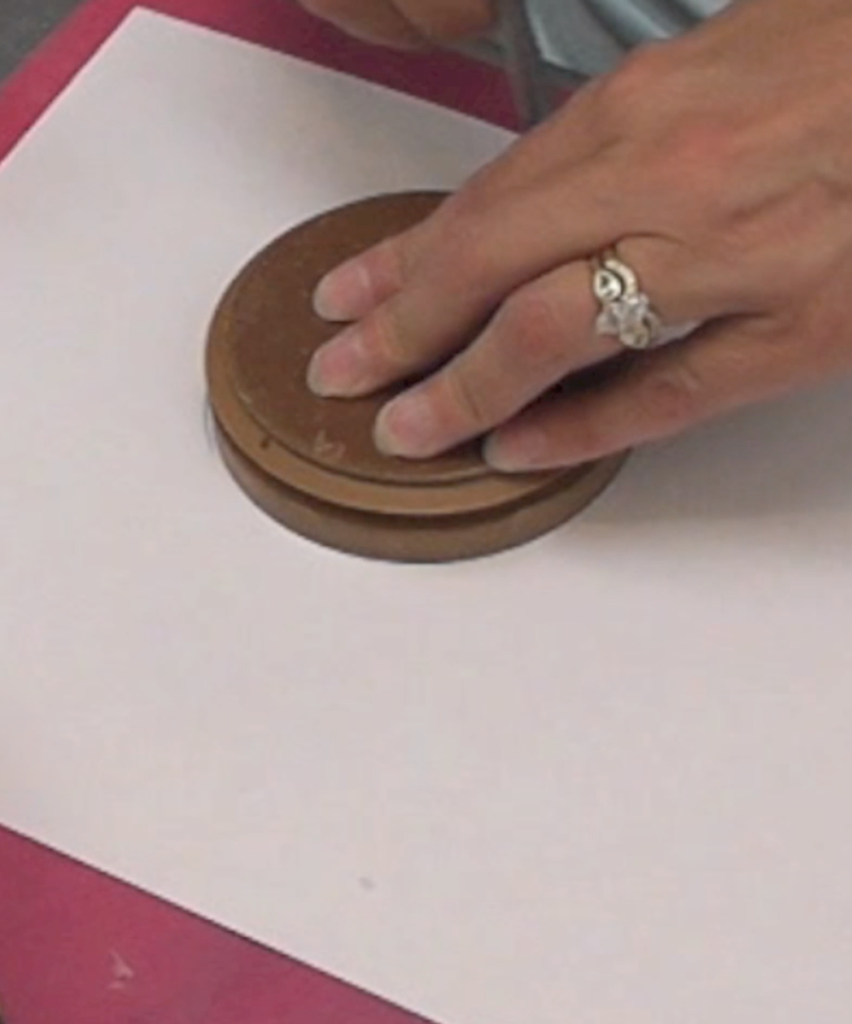
I used scissors to cut the circle out.
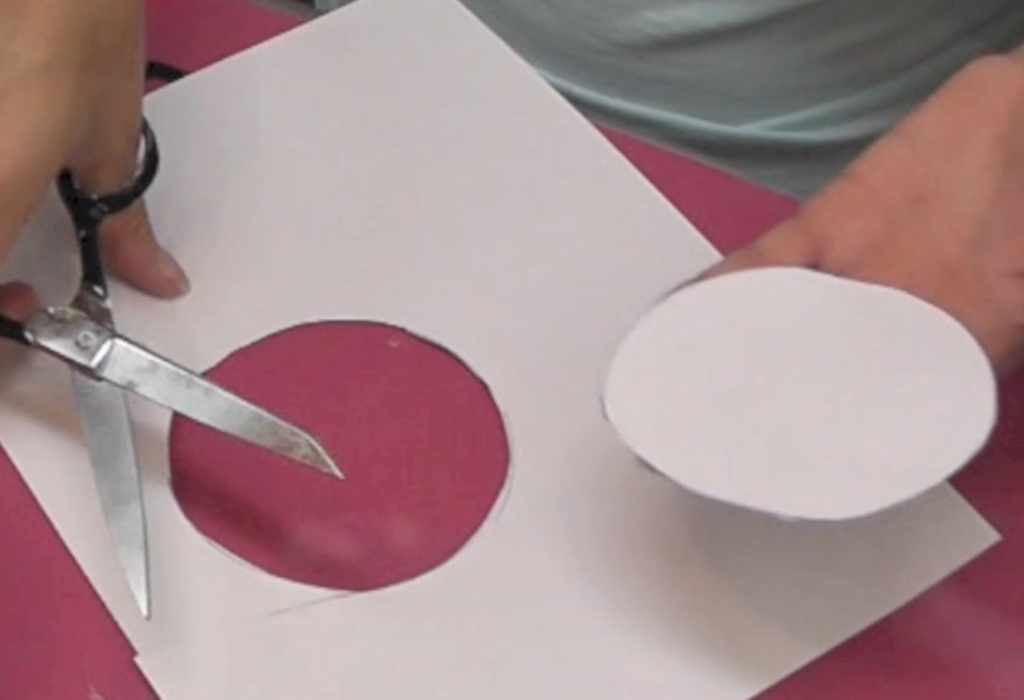
Once cut out, I folded it in half and in half again.
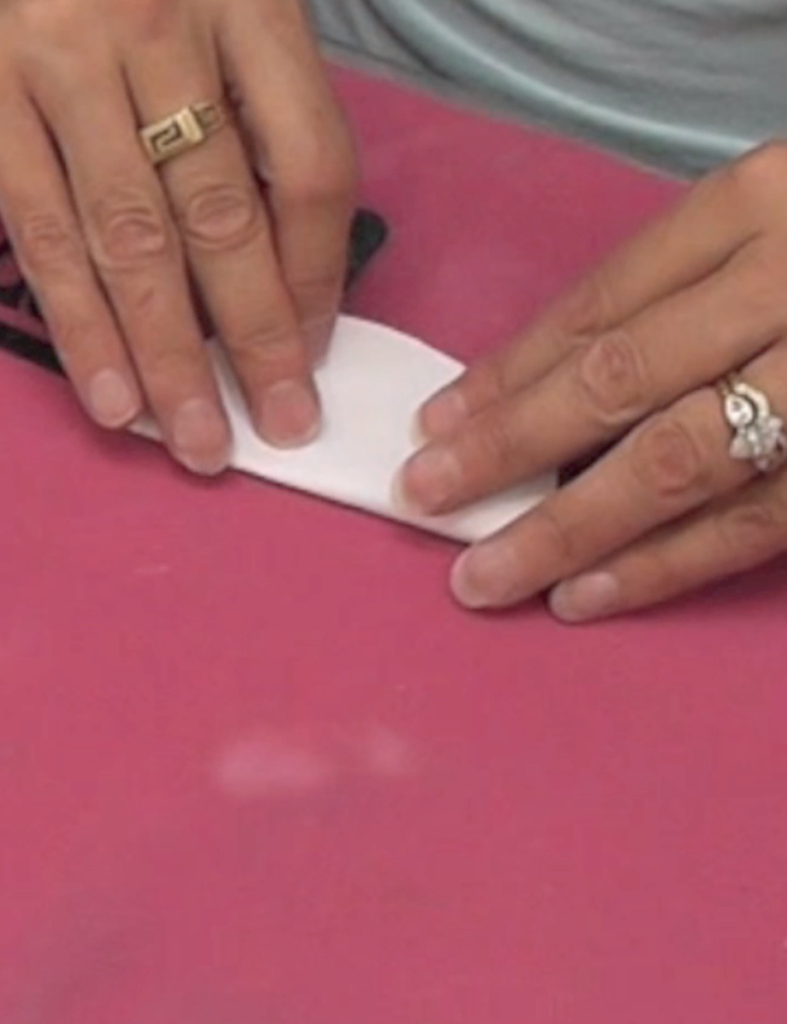
I cut off the tip.
If everything goes as planned, the hole should be right in the center.
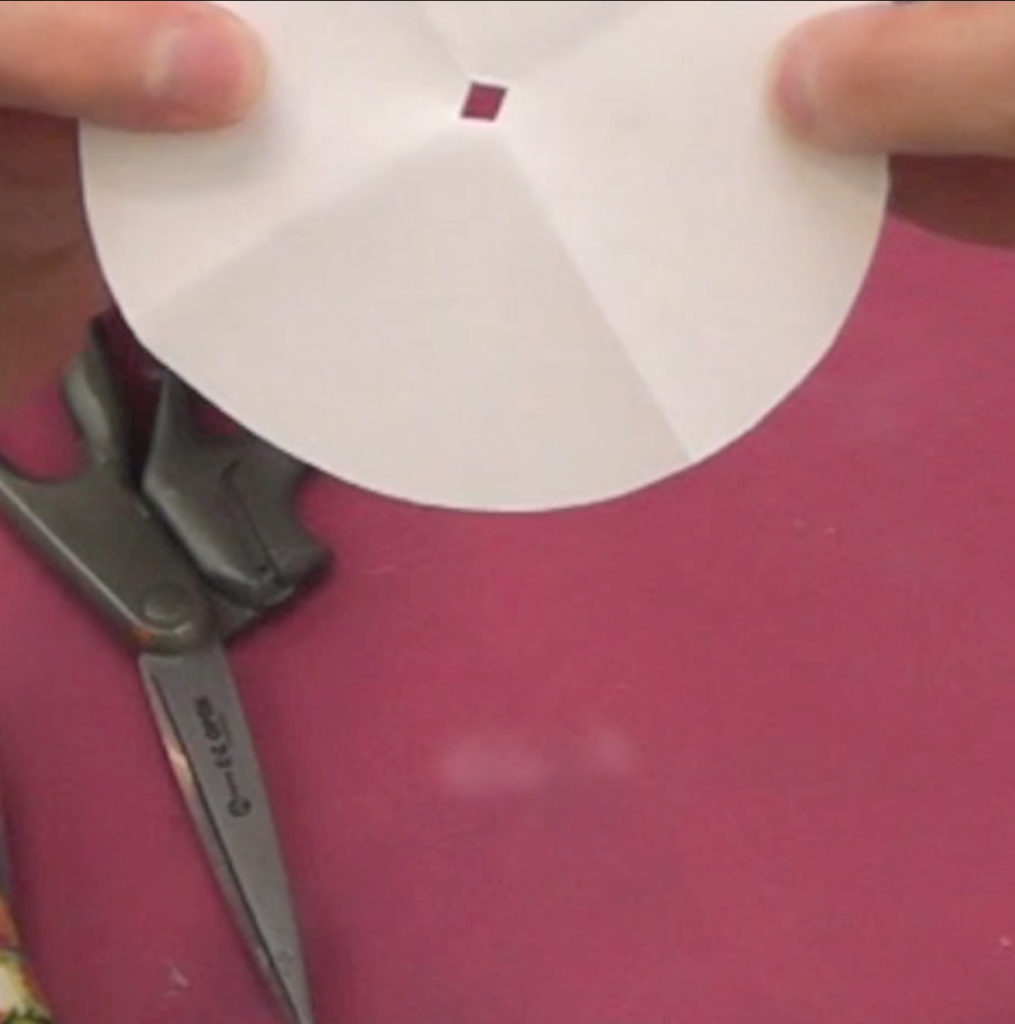
I placed it on the lid and marked the center. So easy!
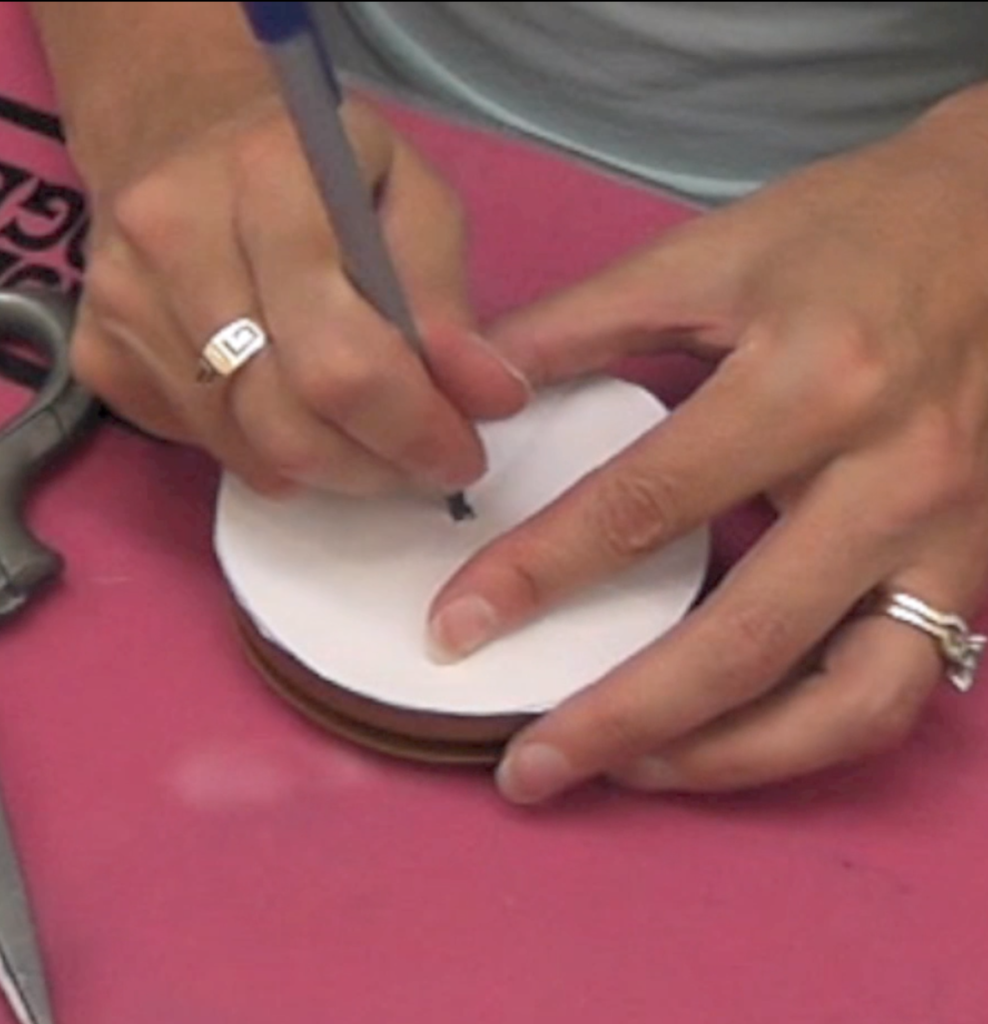
Using my rotary tool, I drilled the hole.
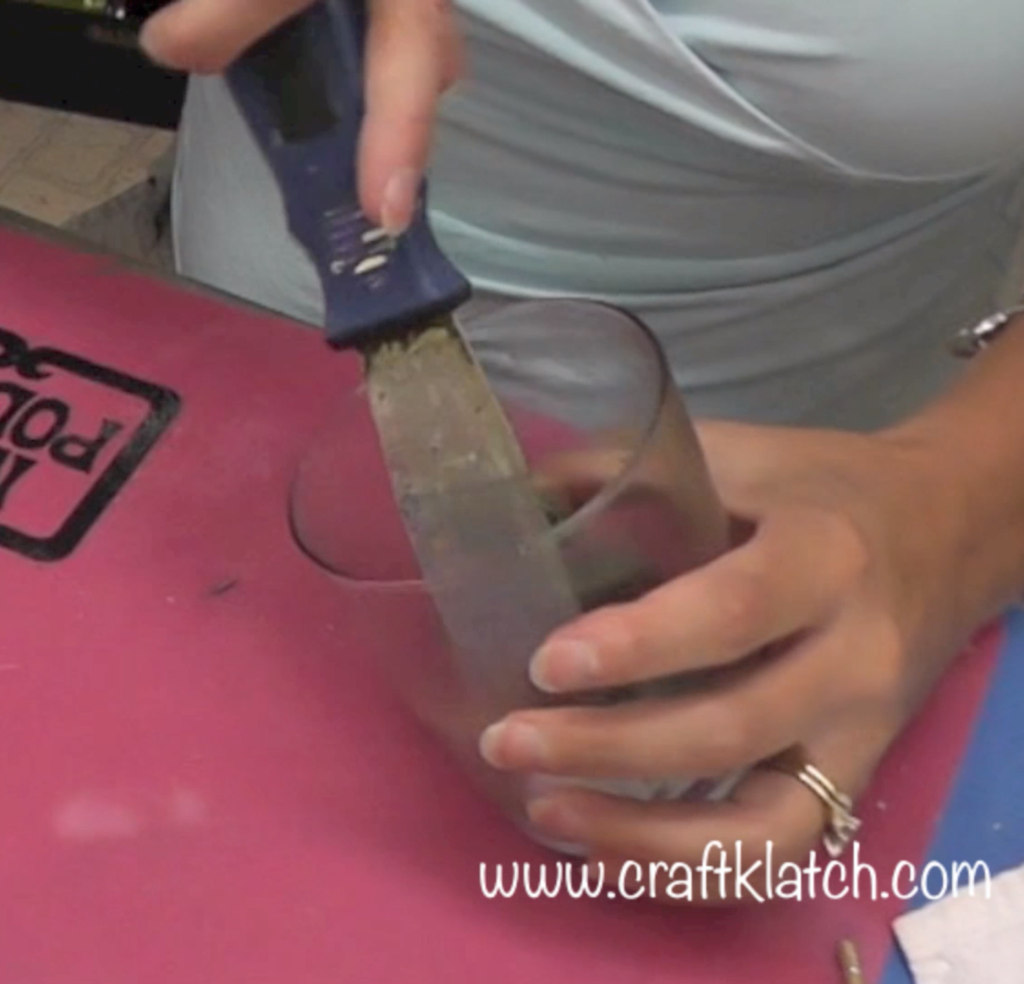
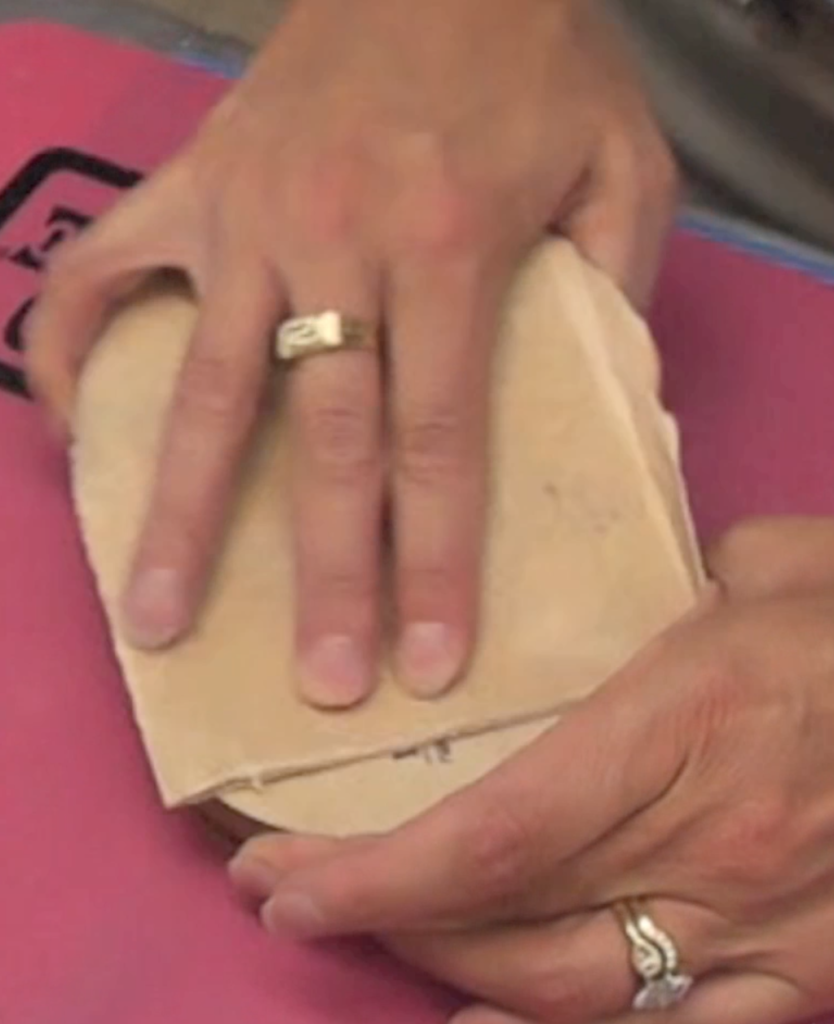
Step 3: Rough it up!
I did a little sanding. I wanted to make sure the surface was able to take the paint. The candle jars with lids often have a finish on the wood, so rough it up!
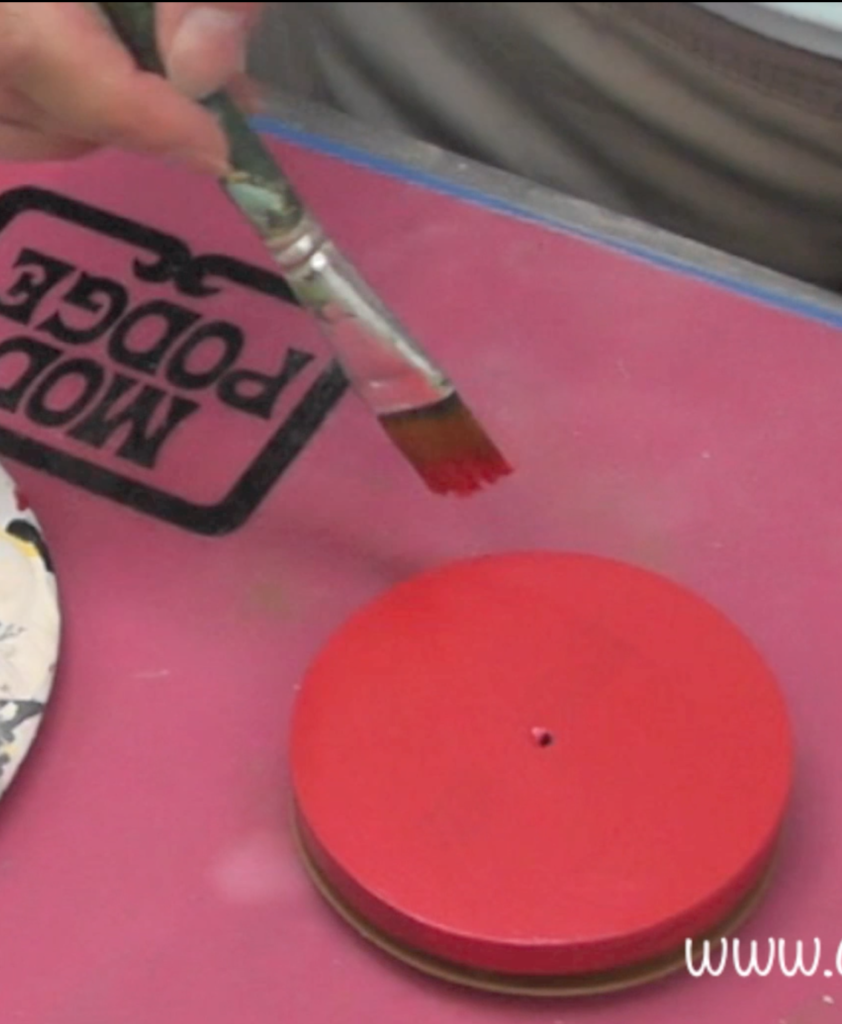
Step 4: Paint!
I mixed it up and painted the lids in different colors. Pick colors that make you happy. They can be bright, pastel, all one color or a variety, whatever you want! Plan on painting at least two coats.
Step 5: Let’s give it a little leg!
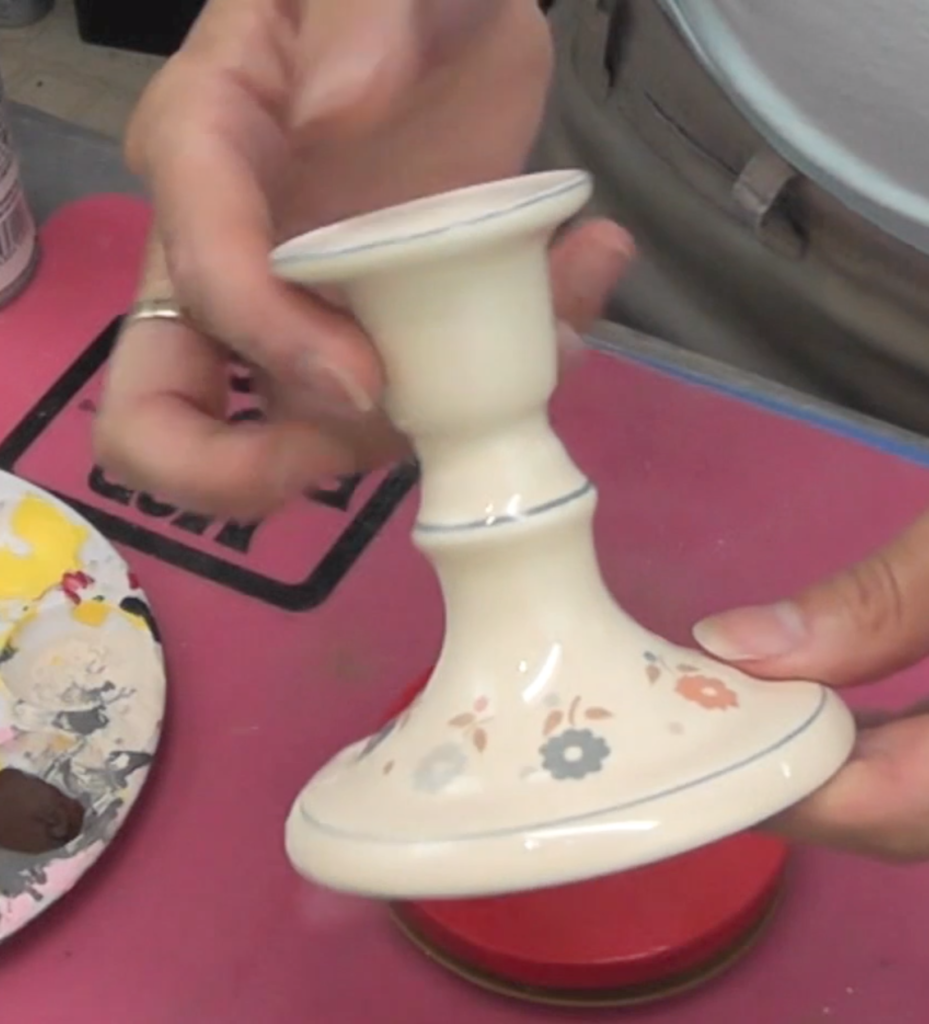
I needed to paint the candlestick! A friend of ours moved and brought over two bags of random odds and ends. This country candlestick happened to be one of the items. It’s definitely outdated, with it’s 80’s kitschy country charm – though the mauve and blue would have gone perfectly with my dorm room color scheme…back in the day! If you are wondering where to get candlesticks, you can go thrifting for candlesticks, or you can usually find some at a dollar store for cheap!
I did like the shape of this particular candlestick and it was sturdy. Really nothing a little paint couldn’t cure! It did take multiple coats. If you use spray paint that adheres to the glass or ceramic, then you don’t need a primer. However, if you are going to use the acrylic paint, then you must first spray on a primer. Otherwise, the paint will scrape right off.
Step 6: It’s a sticky situation!
I added glue and stuck the candle jar to the candlestick. It’s a good idea to read the directions for the glue. Sometimes you have to stick it, remove it, and stick it again for the glue to properly activate. Sometimes, you just stick it, and you are done.
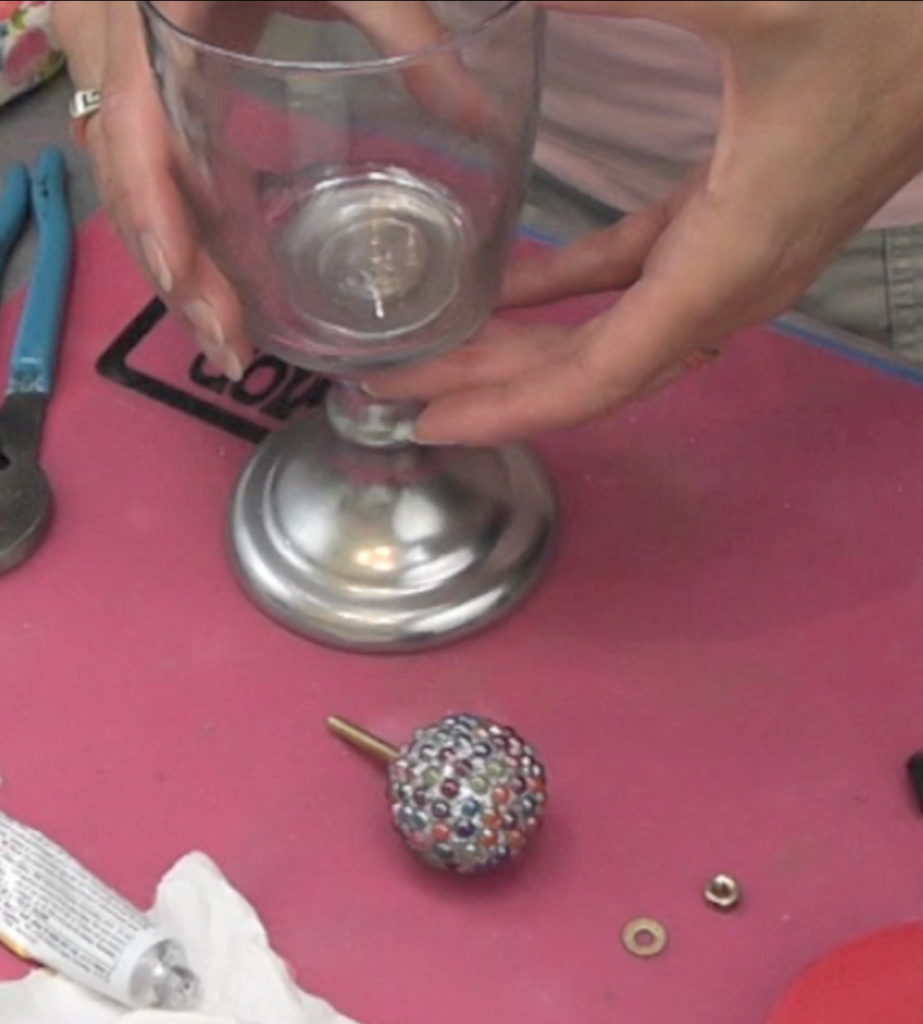
Step 7:
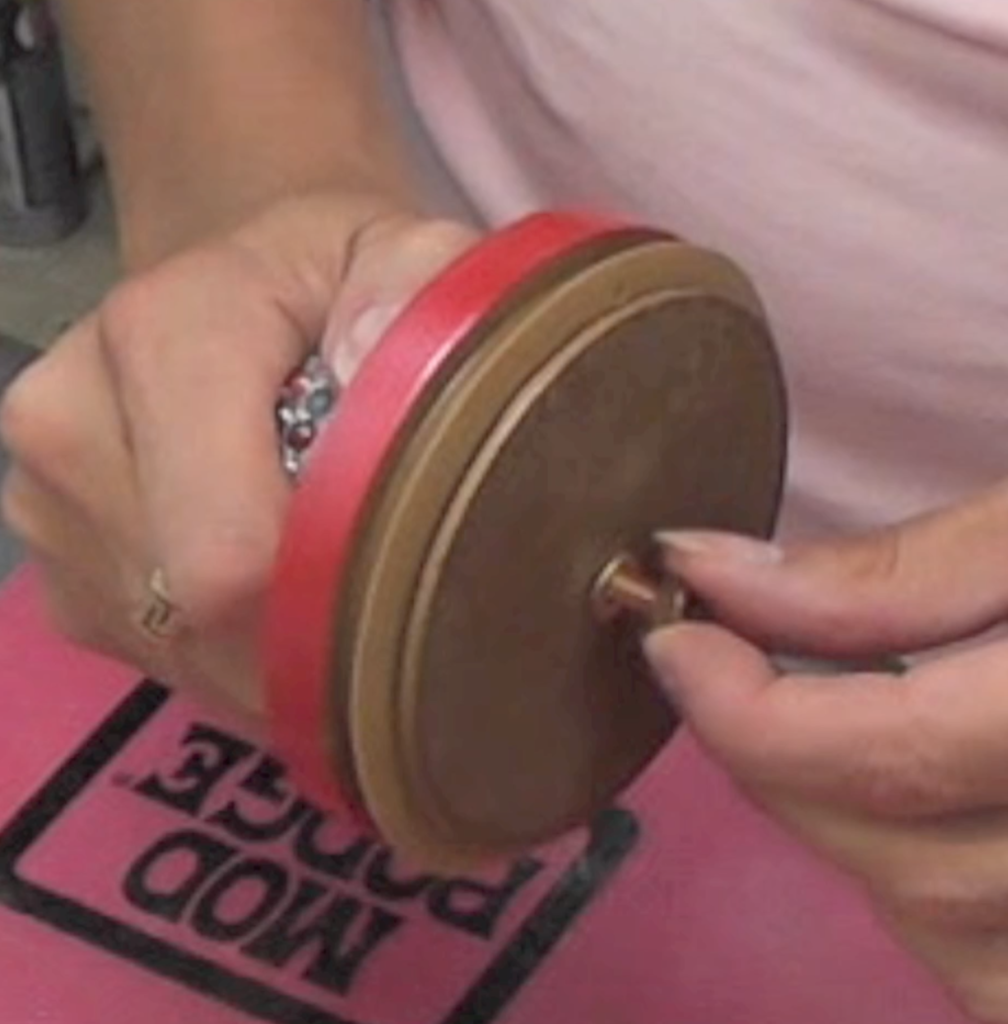
Once the paint dried, I added my knobs.
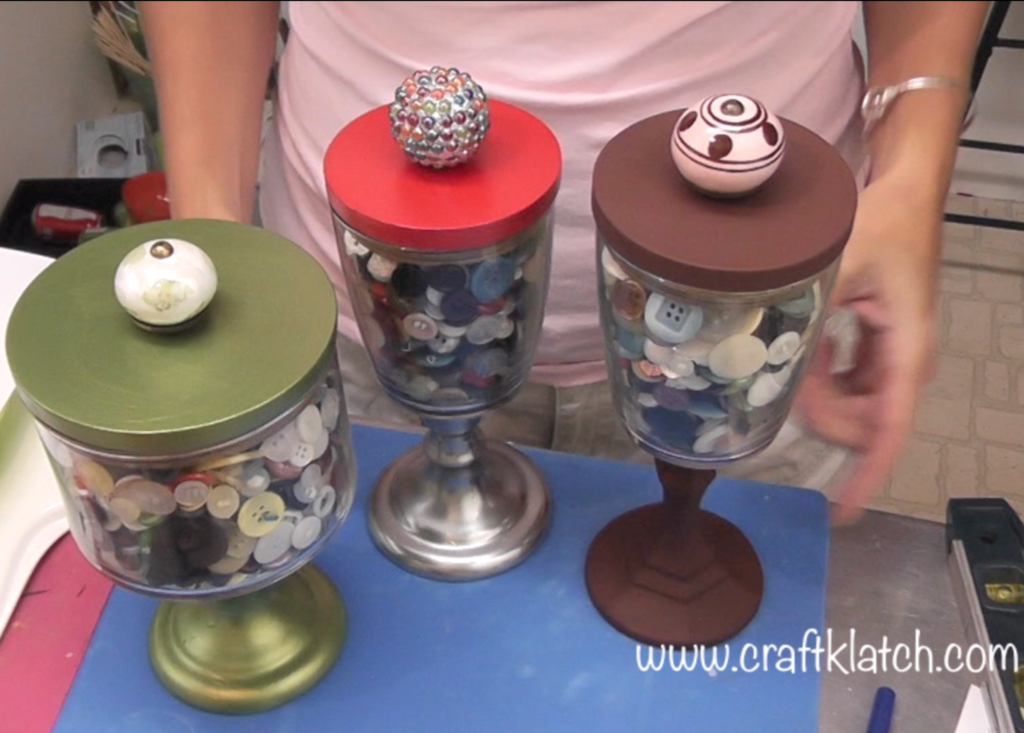
Start storing!
I let everything dry and now have beautiful decorative jars for craft room storage! I’m using them for buttons, but they could also work for beads, glue sticks, small glitter tubes, etc. Tame the mess! Remember if you don’t have candle jars with lids, they still work. Just use them for a different kind of storage!
That is how to repurpose candle jars, but it’s only one way. I’m sure you all have many ideas to reuse candle jars and I would love to hear about them in the comments below!
My favorite thing about this project is that what would have ended up in a landfill found a place in my home! A useful place!
What’s with all the buttons?
Well, I bought them years ago at a garage sale that was actually an estate sale. The lady that passed was a hoarder. She cut buttons off of clothes and left thread and bits of fabric still attached. She had sooo many buttons and sooo much of a whole lot of other things.
I thought it was a steal! I did not buy them all, but I sure did buy A LOT! This is only a portion of what I used to have since I do enjoy crafting with buttons. I took them home, trimmed off thread and fabric, and washed them with soap and water.
What Have I Done?!?!
I’m trying to think of the things I have made with buttons…
I made a Button Snowflake Holiday Decoration, which used up a lot of the white and ivory colored buttons. But such a cool piece for the mantel, bookcase or to hang on the wall.
My Christmas Tree Button Coaster used up a bunch of green buttons, but is a nice spot to rest your egg nog!
For Mother’s Day, I made a DIY Button Frame, which is a great gift for kids to make for moms!
I used a combo of blue and ivory buttons to make the inside of my Frosty Christmas Star Tutorial, which was actually part of a recycling challenge and turned out better than I expected!
I’ve put buttons in resin to Resin Button Pendant because why shouldn’t buttons be jewelry? I just realized I did two resin button pendants and they both look totally different! Button Resin Charms Craft Tutorial.
Speaking of button jewelry, I also did DIY Button Rings, which are super cute and colorful.
One of my favorite coasters is the Button Coaster I did. So colorful!
Alright, that’s probably more button talk than you signed up for…but there are more! We’ll save those for another day!
But what if…?
Let’s say you have come this far and you love the look of a footed jar, but maybe you don’t want to make them.
That’s okay!
There are so many available that would be PERFECT!
Like these:

Or get creative!

Thanks for stopping by!
Remember: Life’s too short not to shimmer, so grab your glue gun and your glitter!™ Stay safe!
Mona