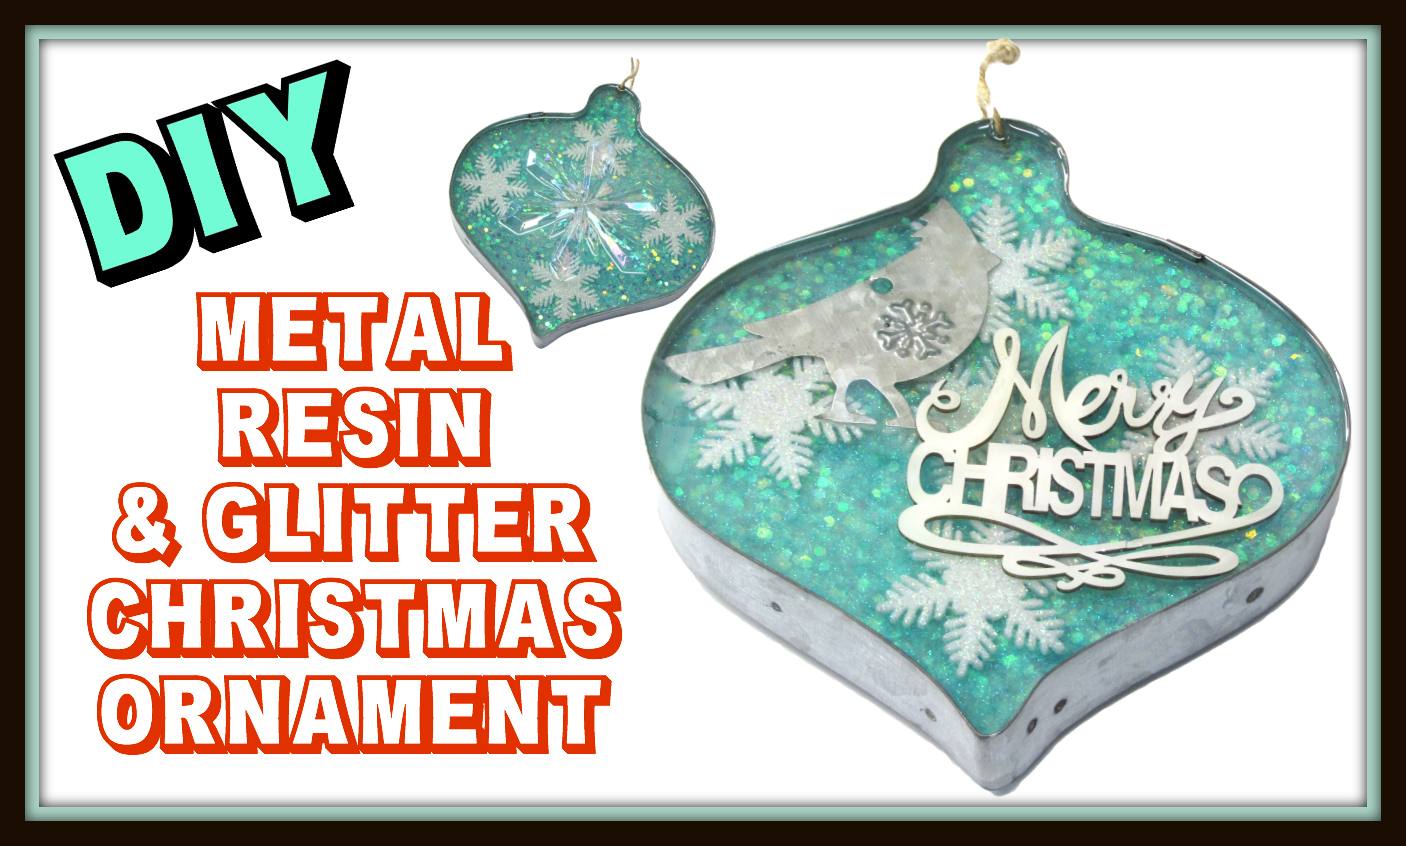
With the exception of Friday’s coaster, this is the last Christmas craft this year. I can’t believe 2015 is almost over. Things keep moving crazy fast! I bought everything for this project at Michaels.
You will need (affiliate links):
– Metal ornament: I had found it at Michaels, but it doesn’t have to be an ornament. You can do a really cool tray and is functional and decorative.
1. The metal forms actually have gaps on the edges. It’s very important to seal the gap, otherwise your resin will leak through. Run glue along the gaps and the hole where string comes through. Do it on both sides to ensure it is all sealed. Allow to dry.
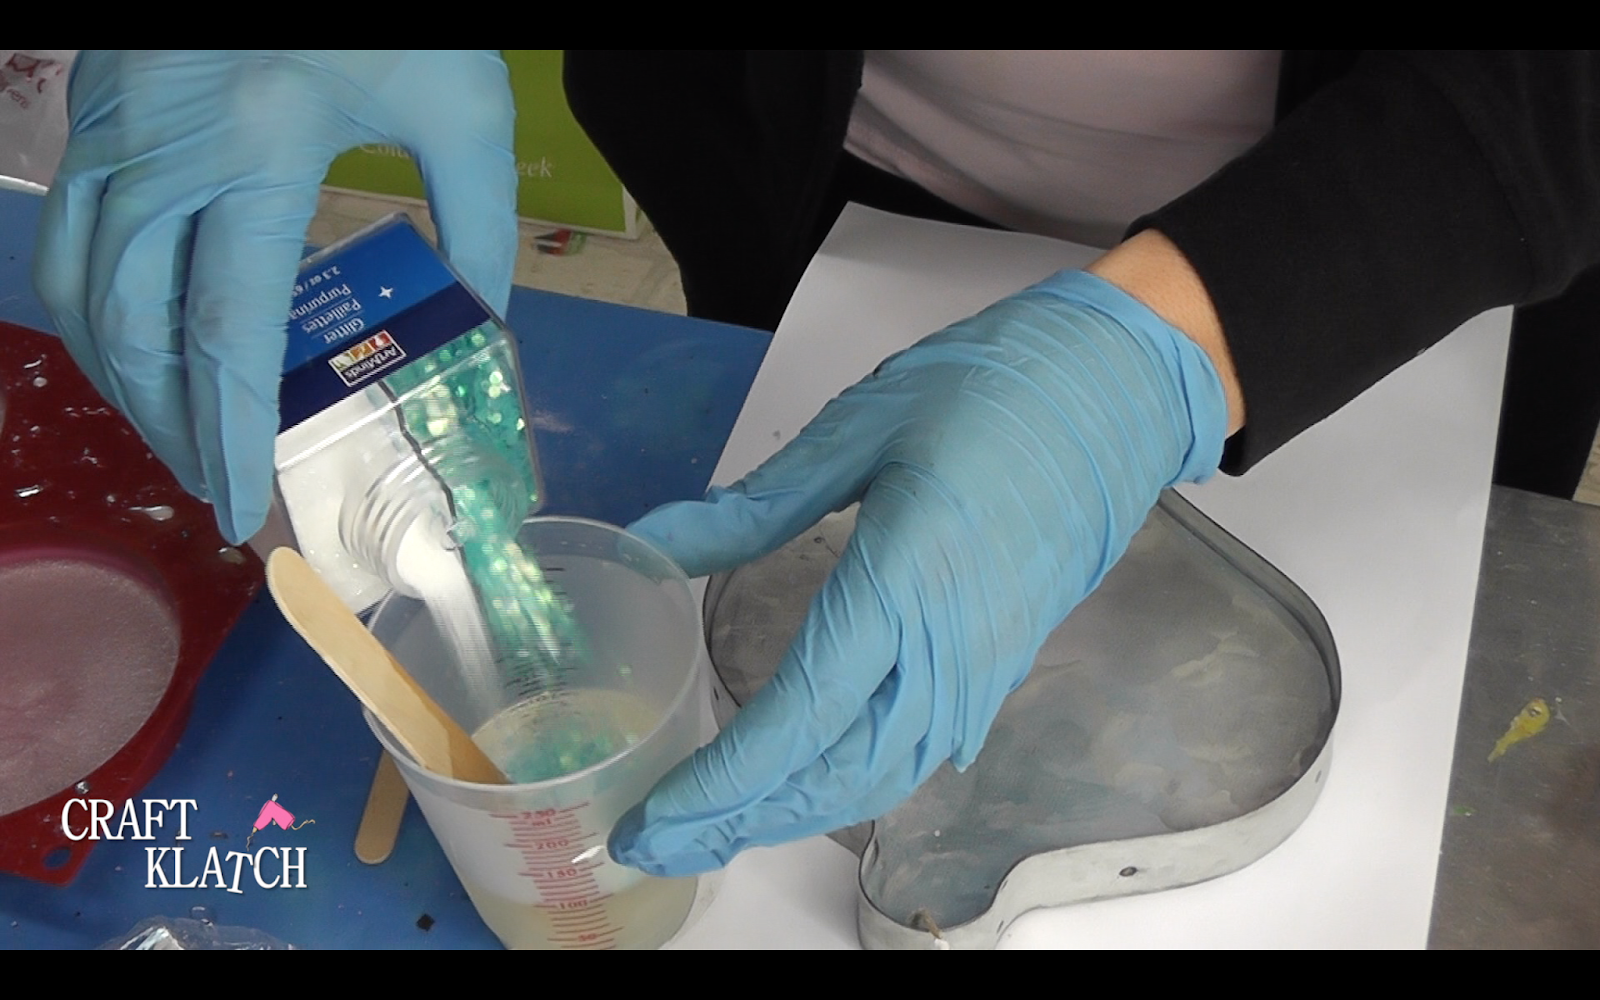
2. Mix three ounces of resin, according to the package directions.
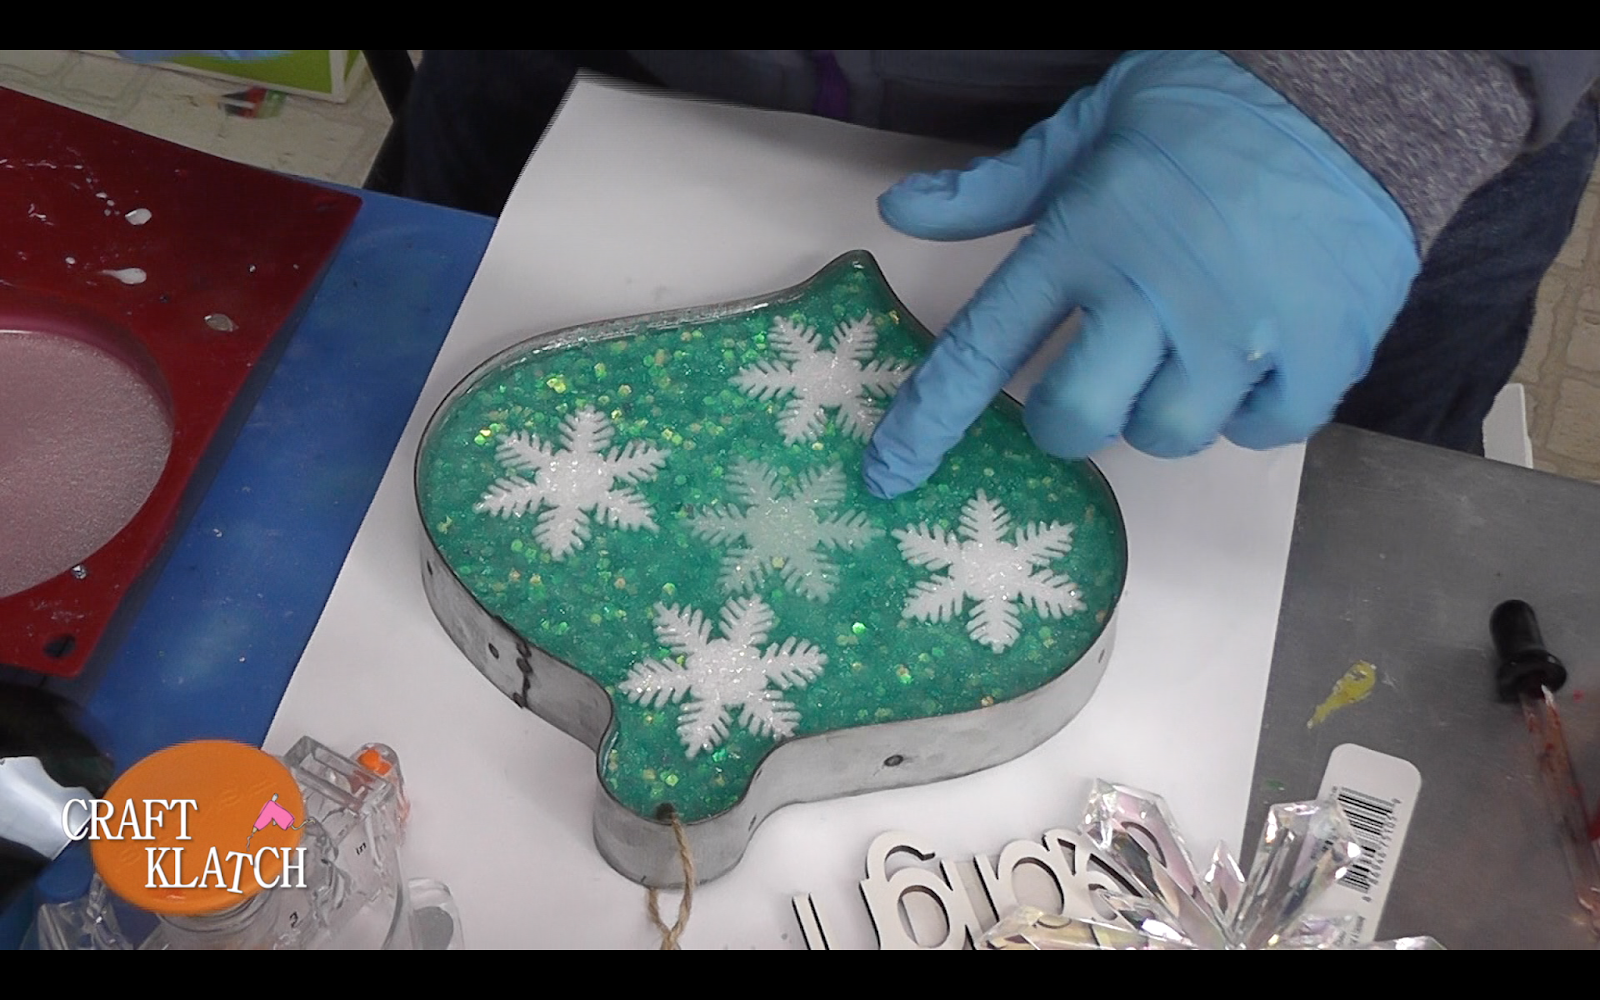
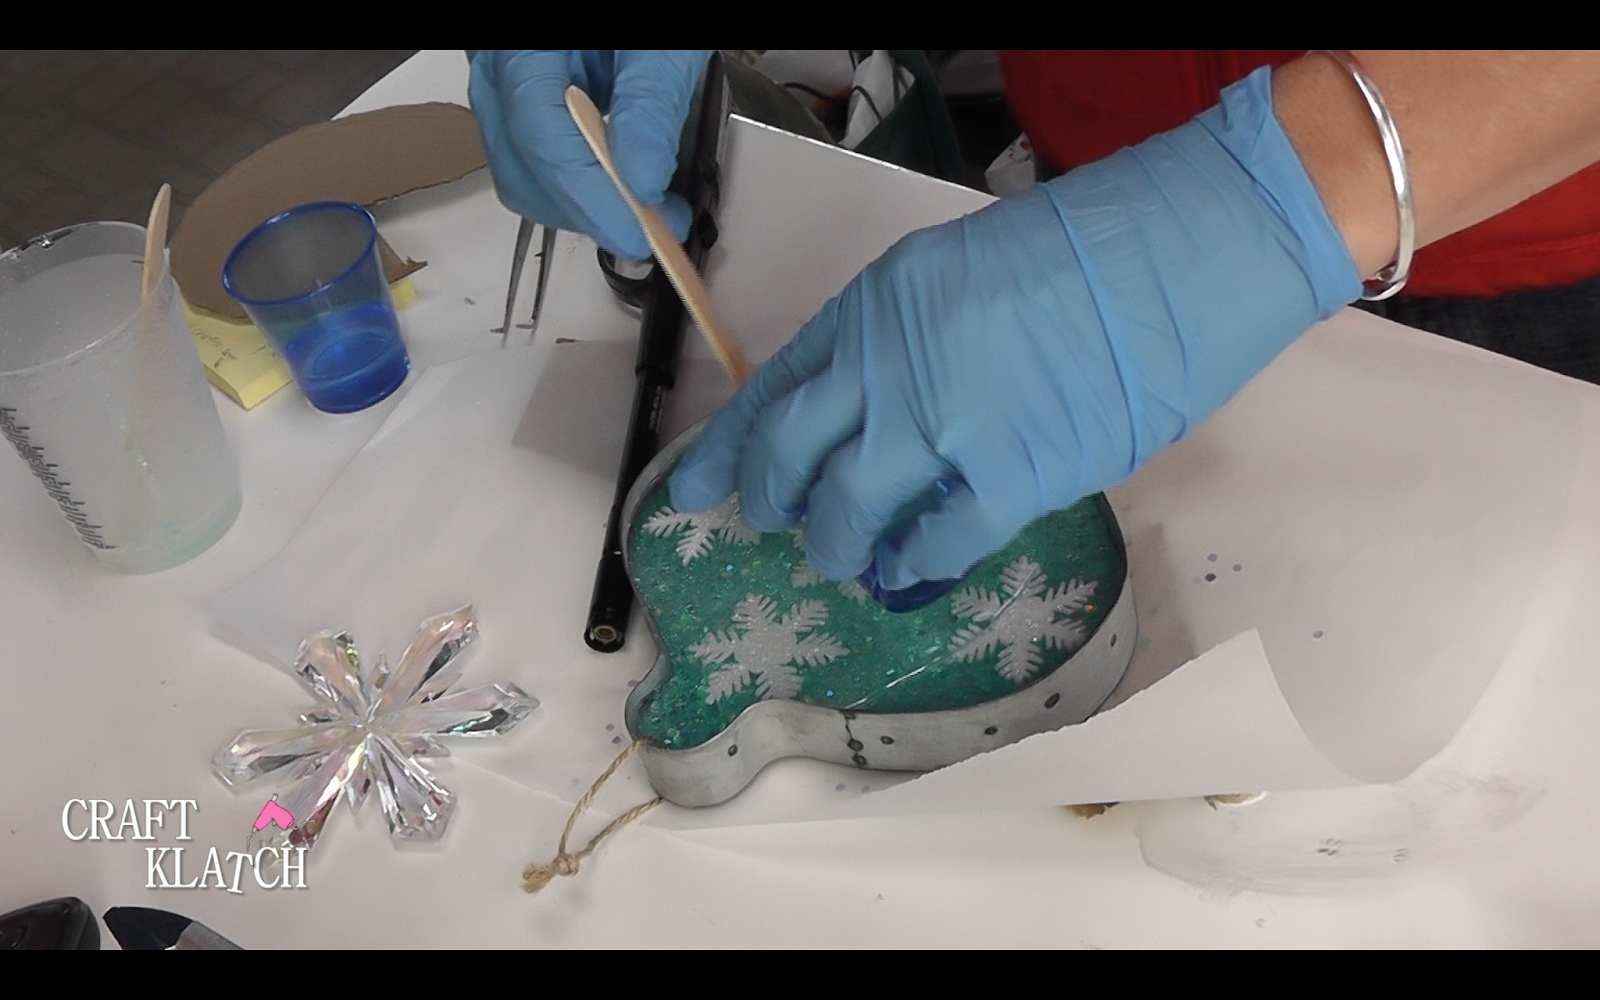
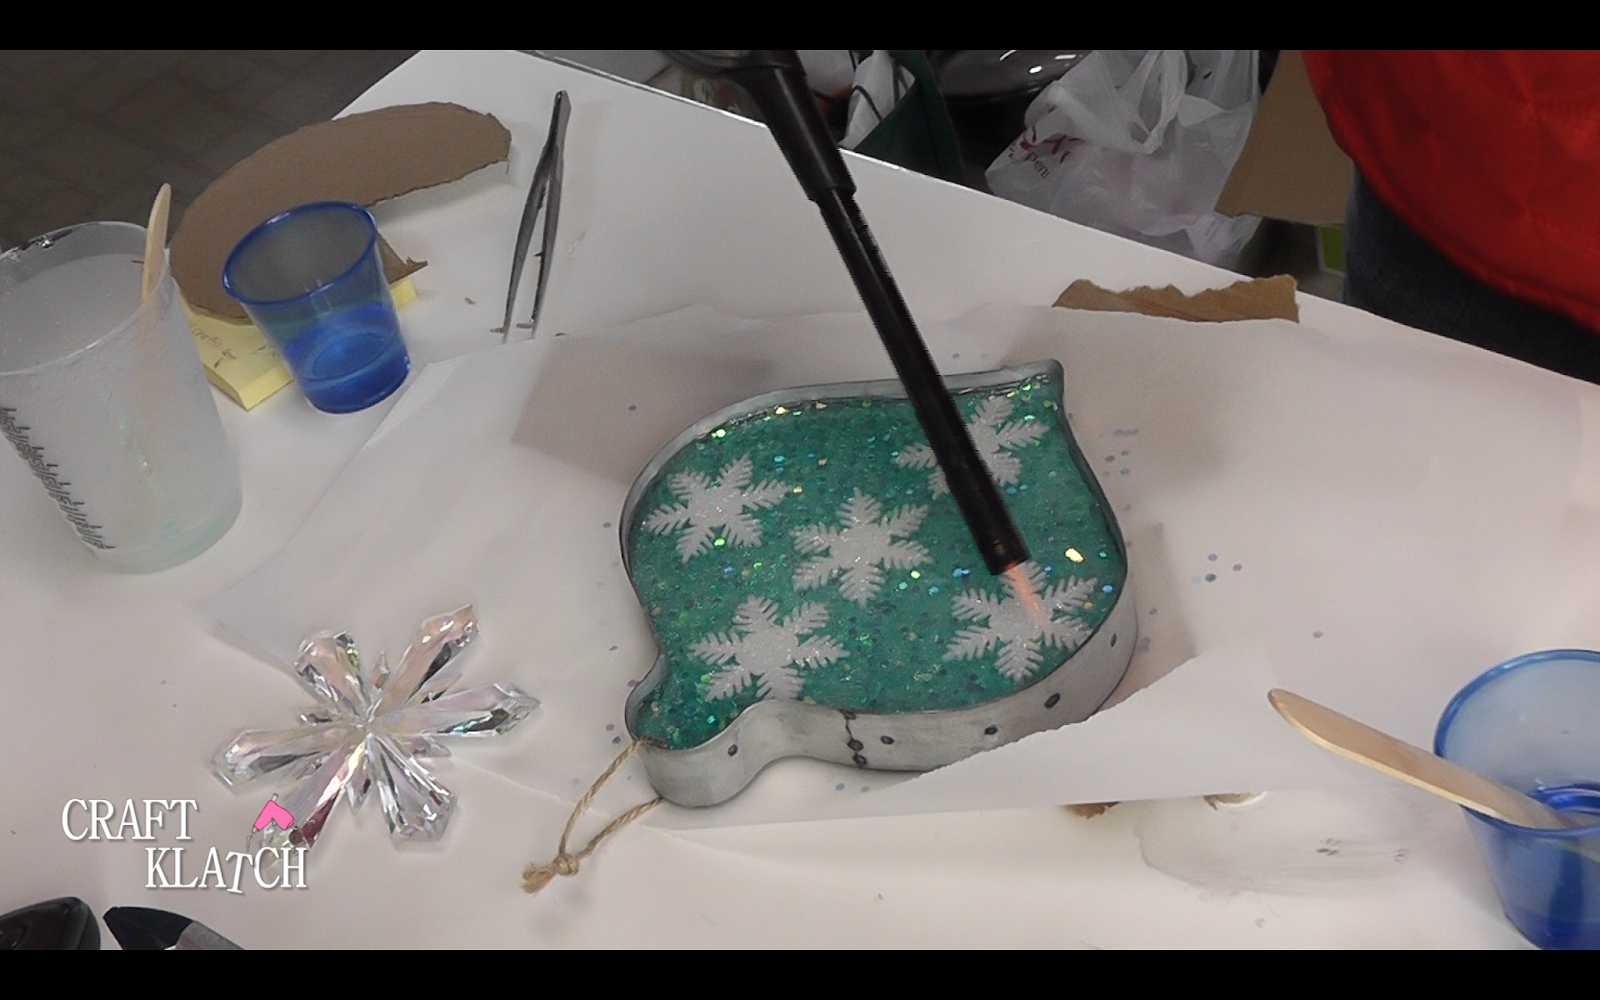
3. Mix in a bunch of glitter and pour into the mold.
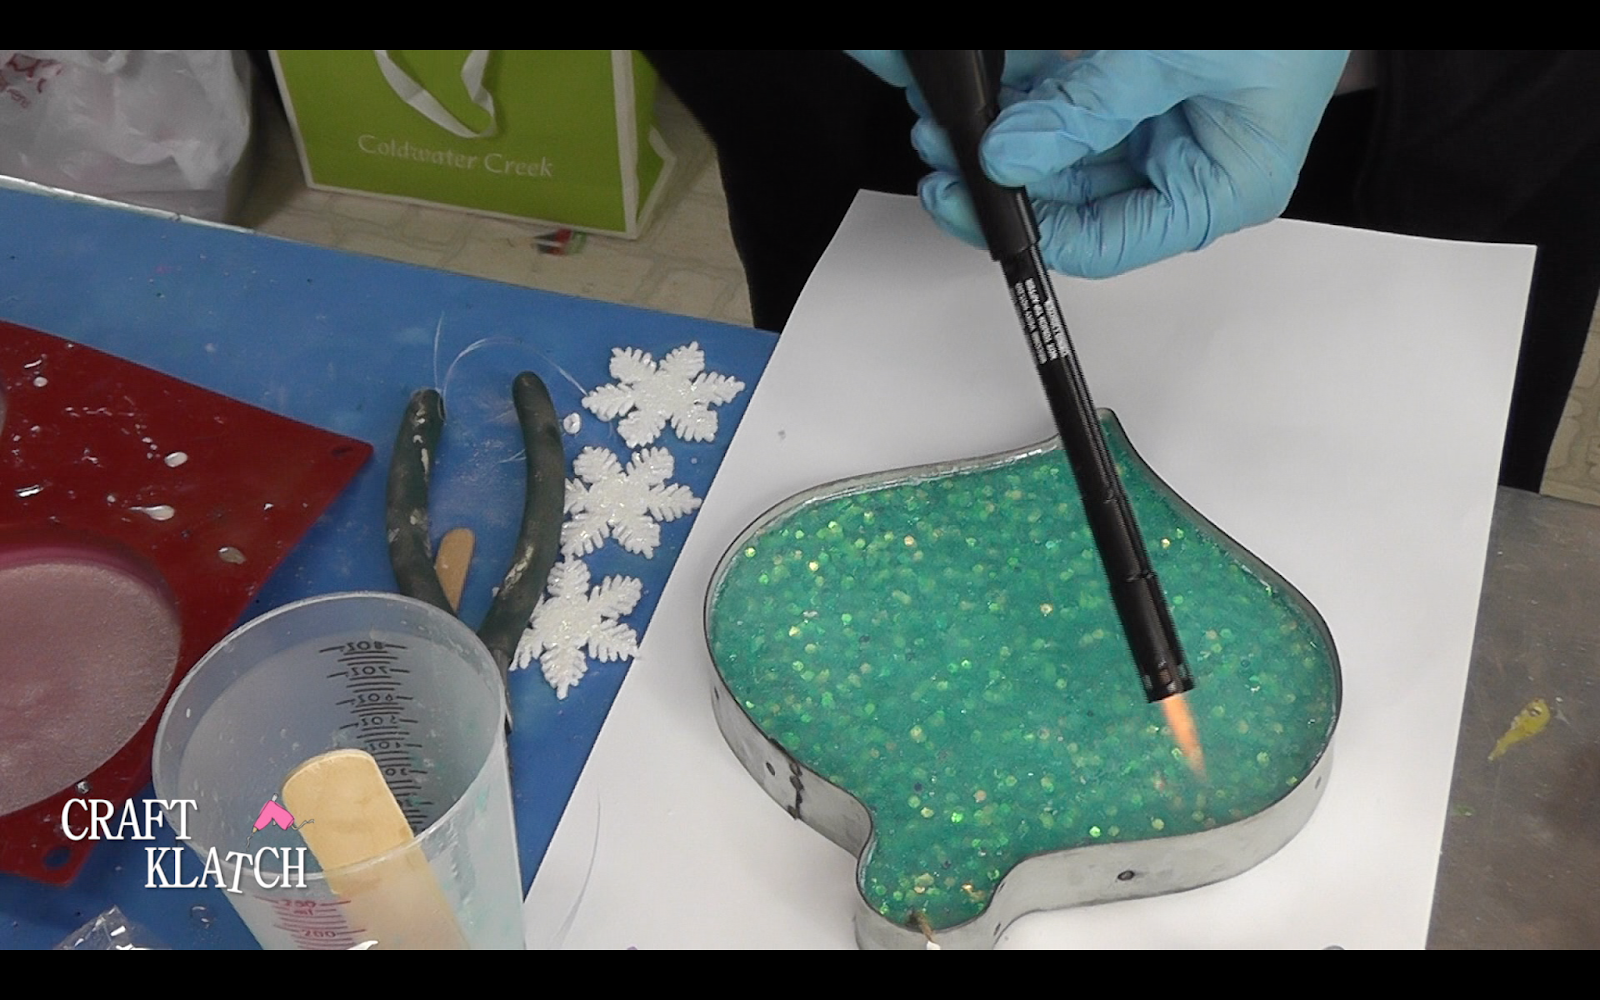
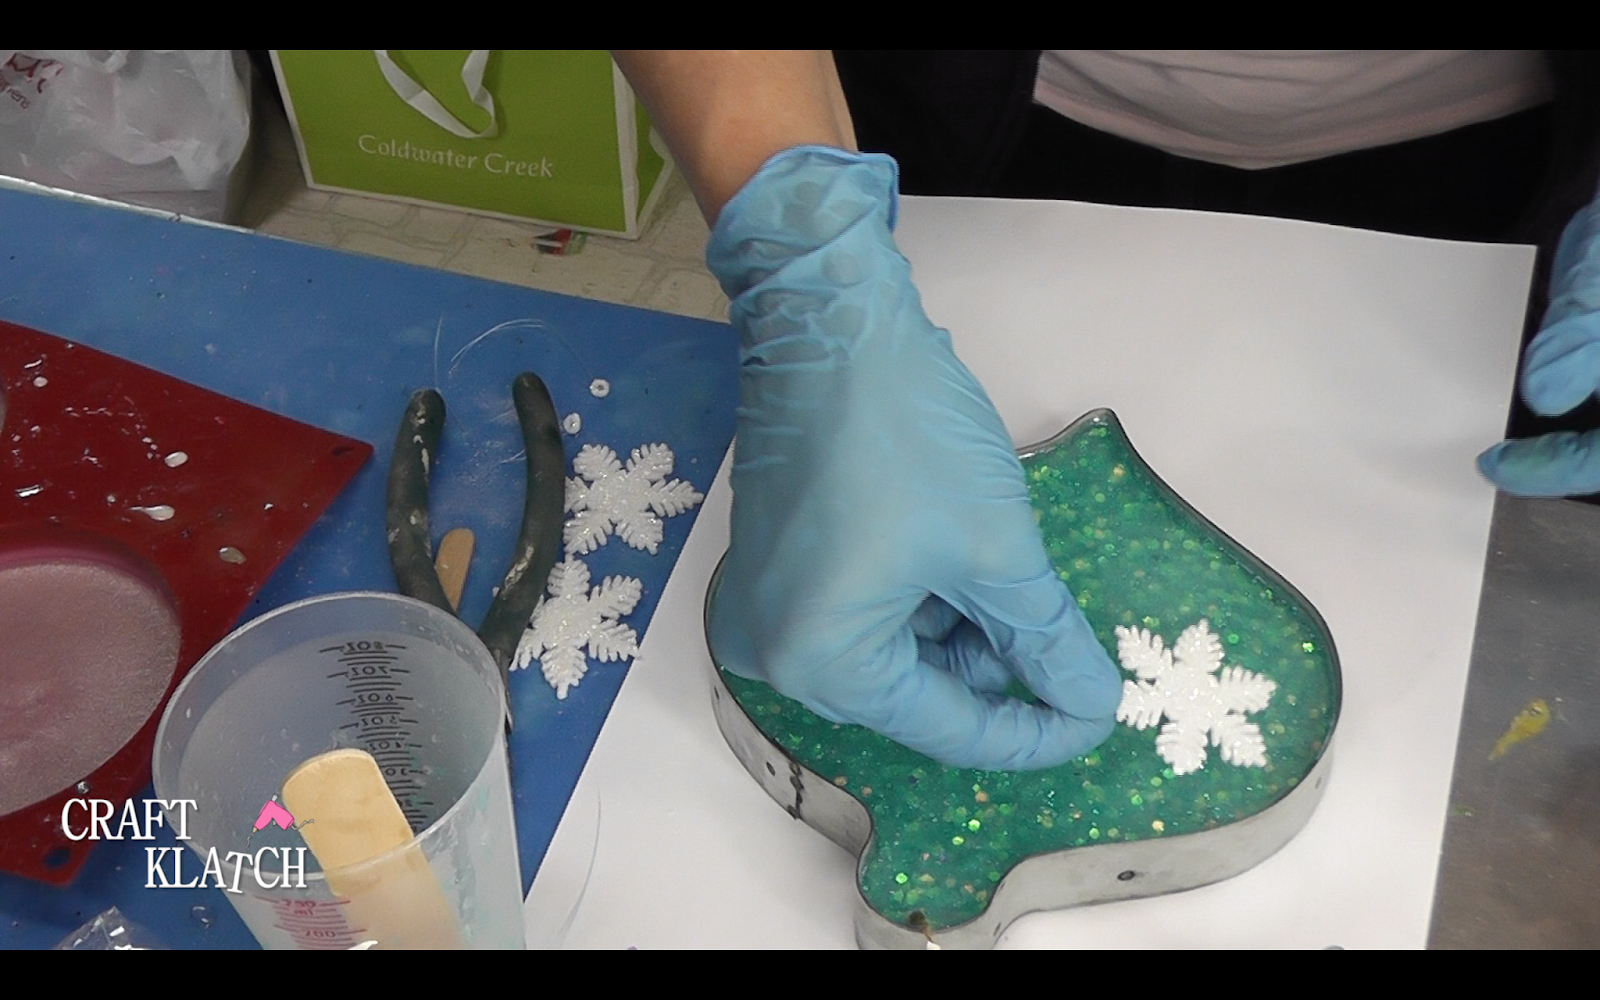
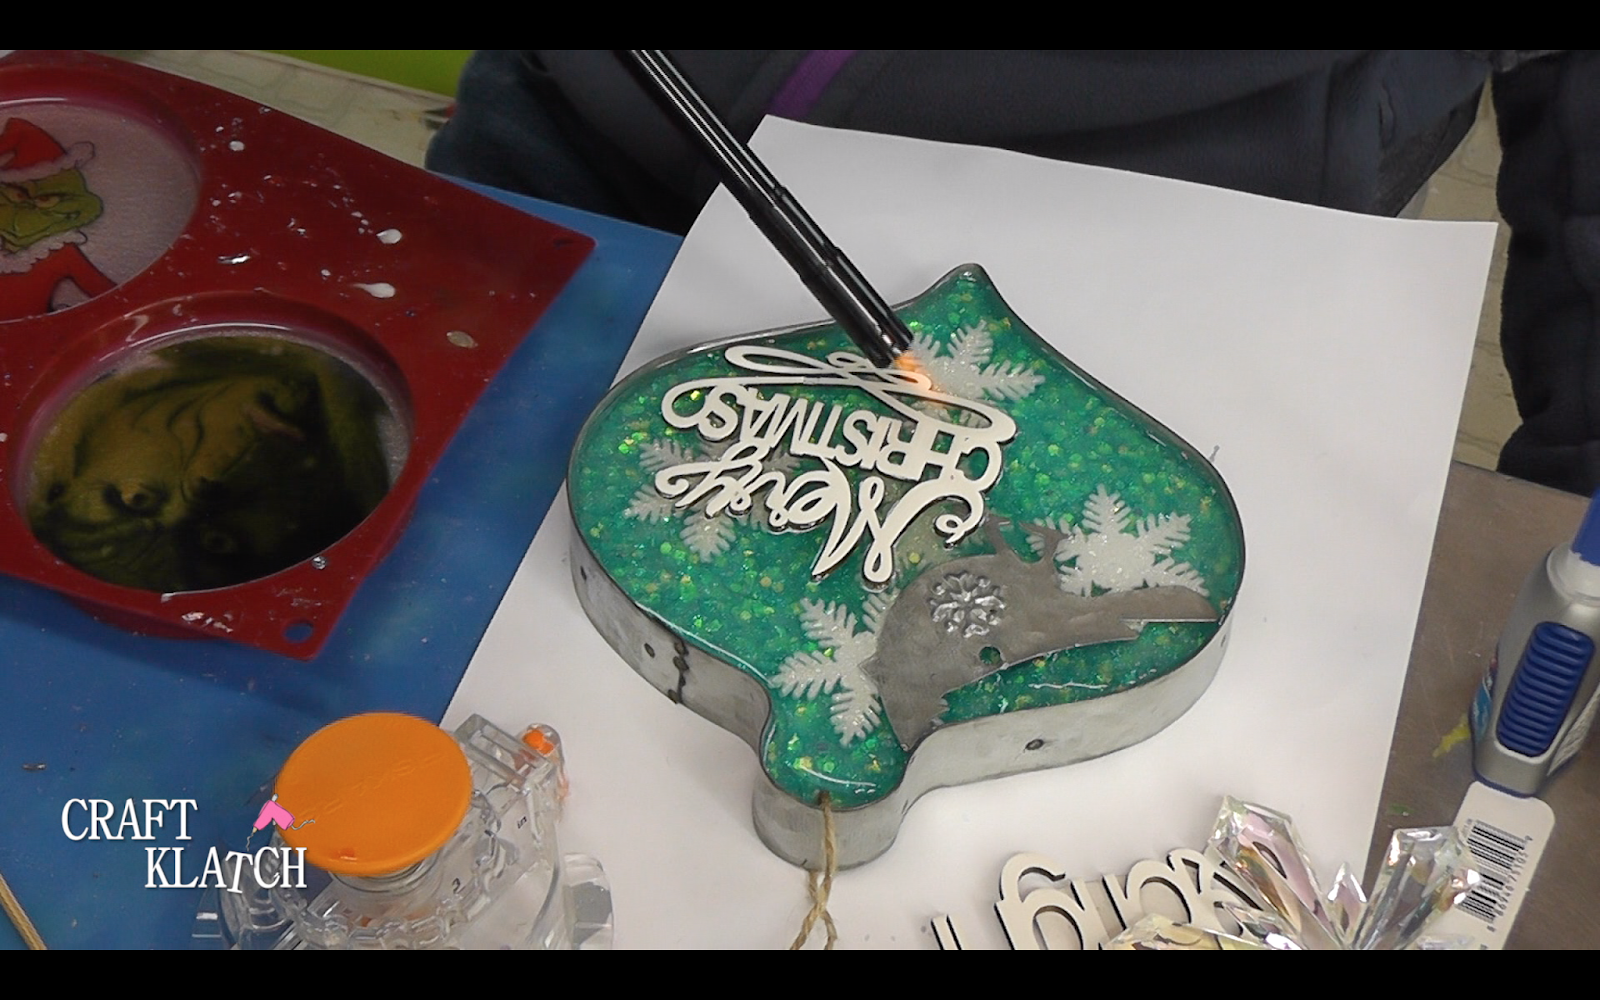
4. Snip the strings off of the little snowflake ornaments and place them into the poured resin. Take a lighter and pop any bubbles. Allow to cure.
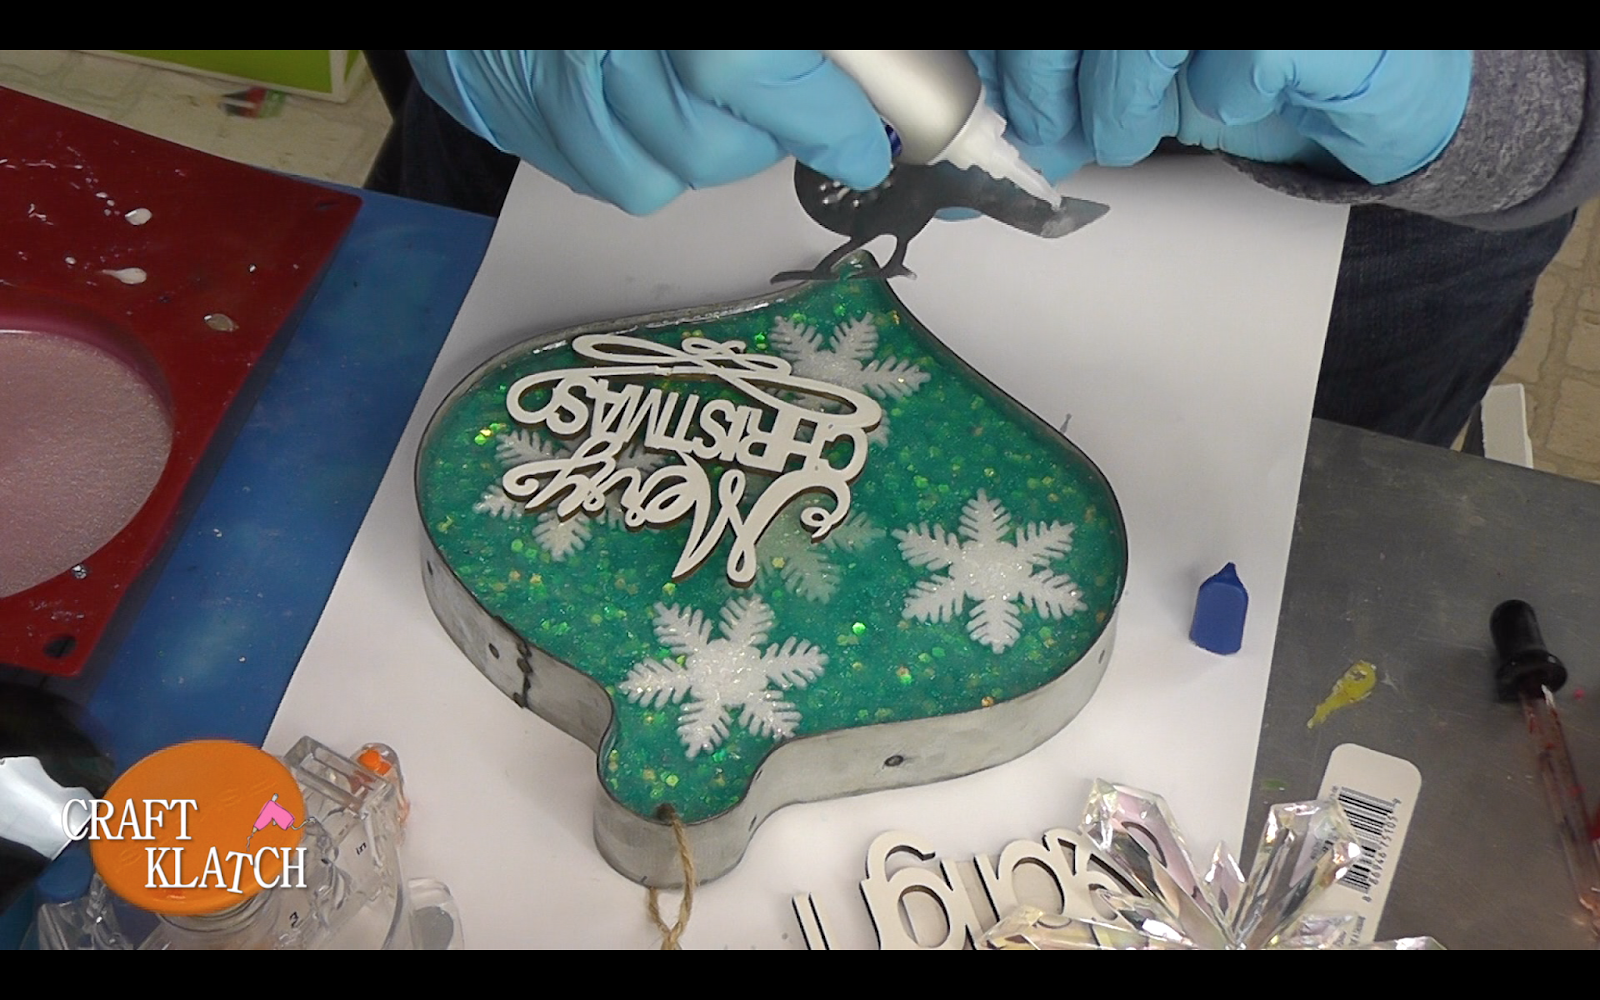
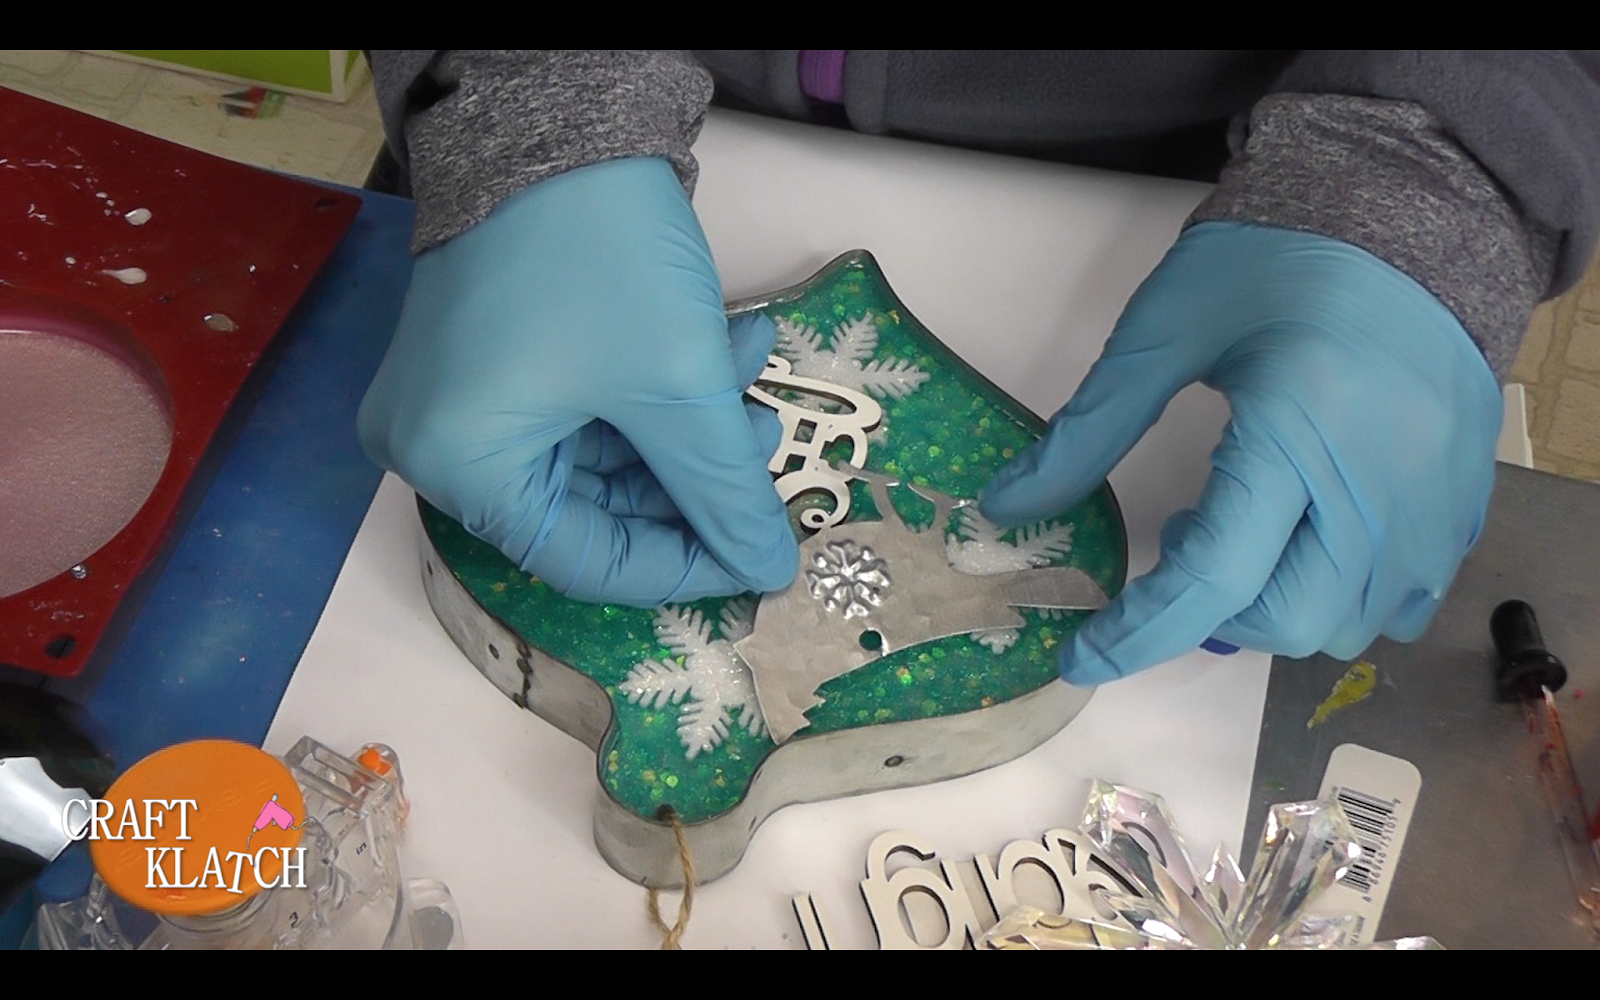
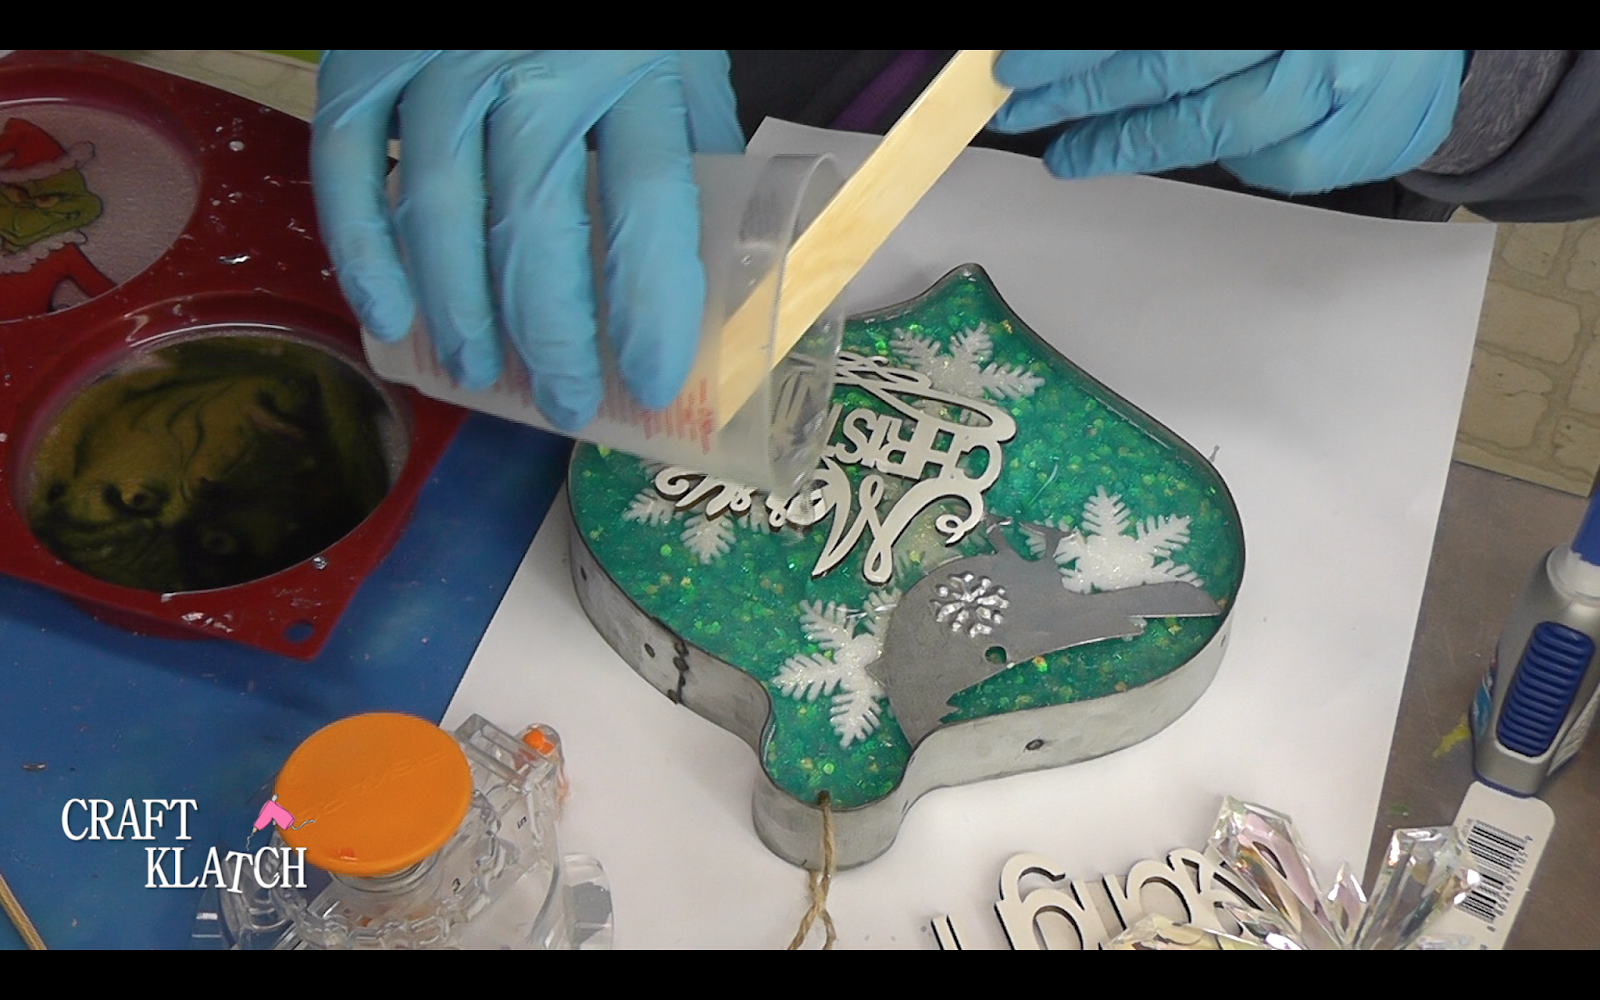
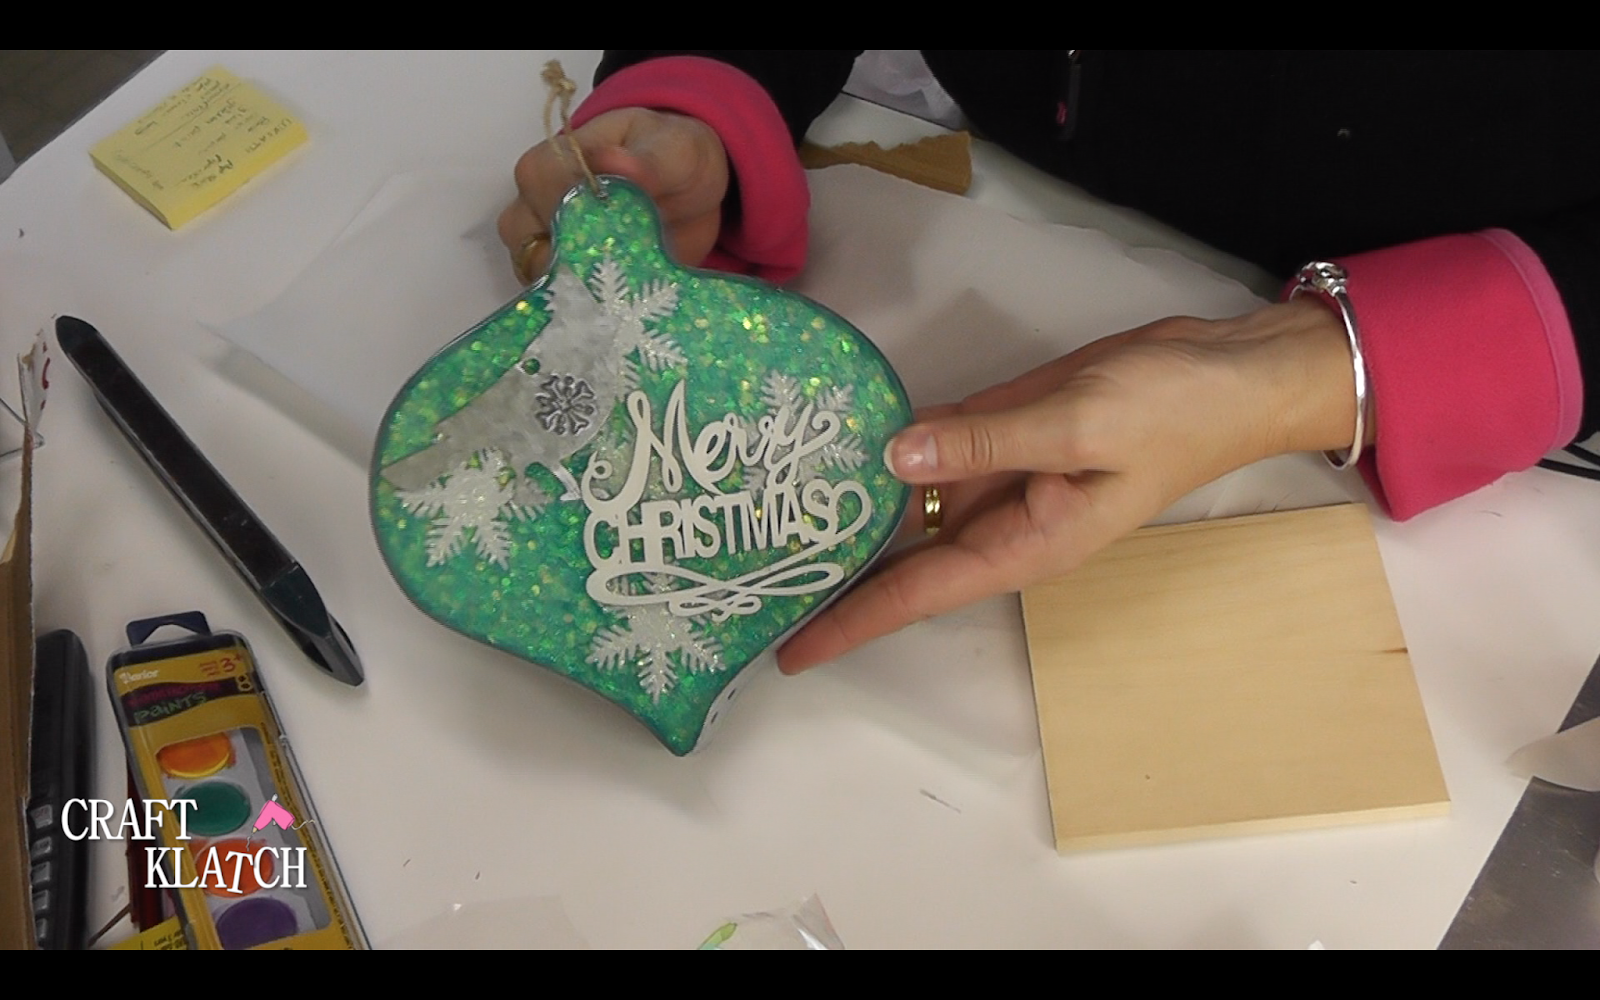
5. Once cured apply the metal bird and the wood Merry Christmas. I applied a little super glue to the back of both before placing them, to ensure they would not move around when I poured the next layer of resin.
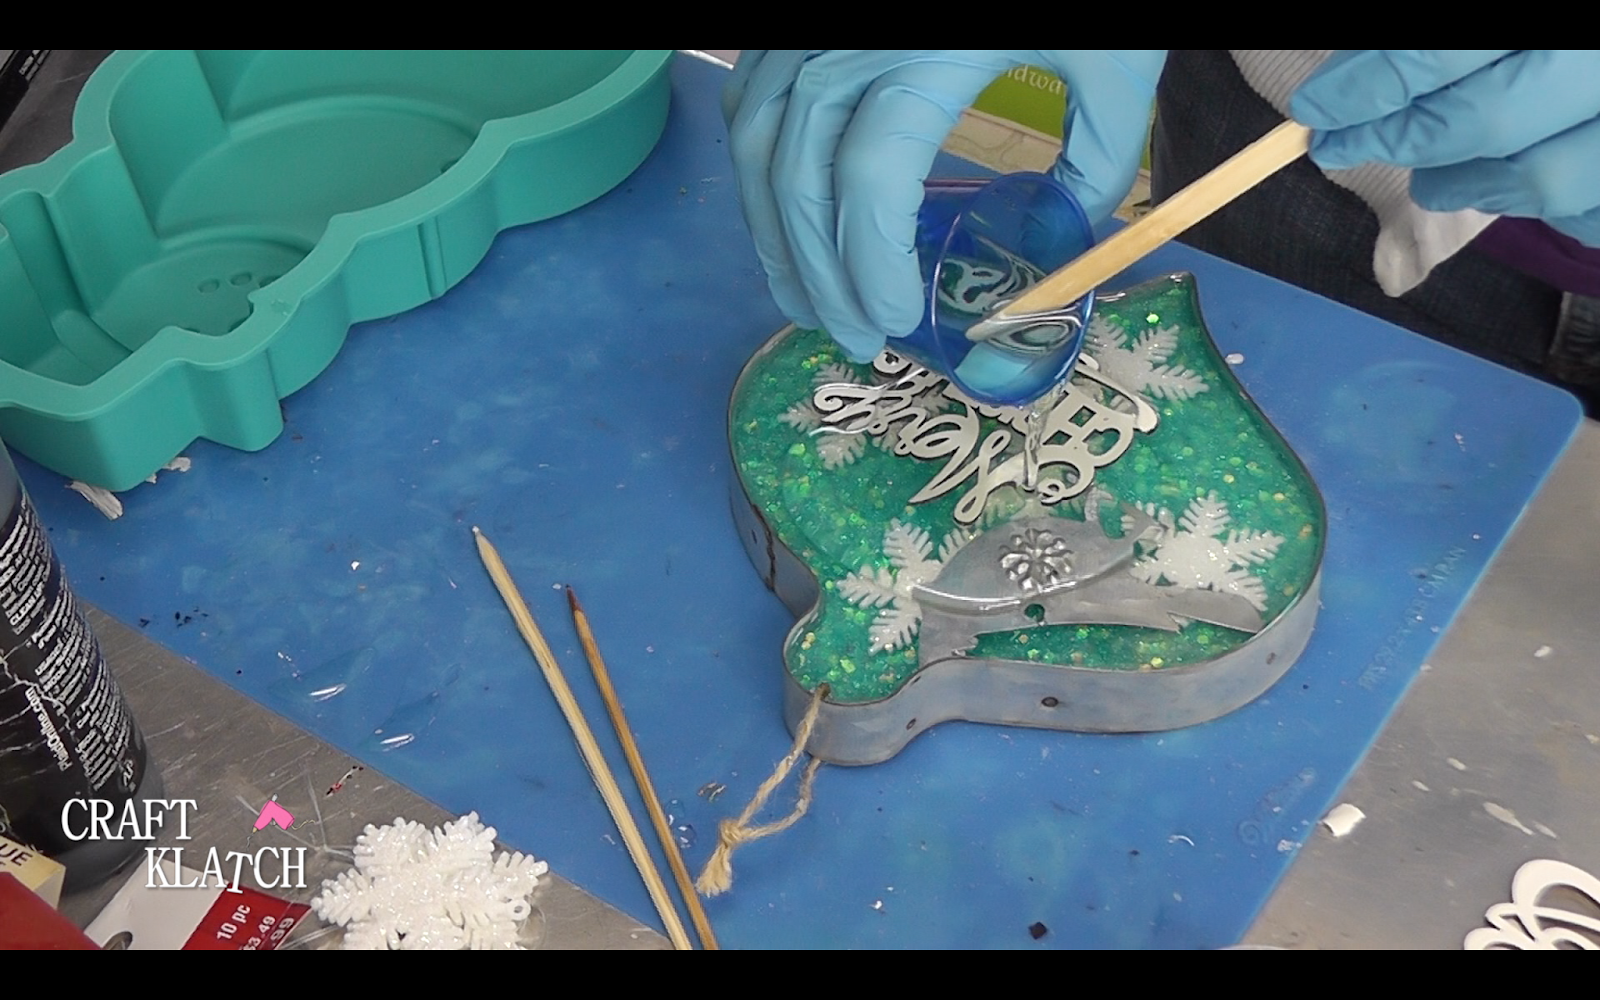
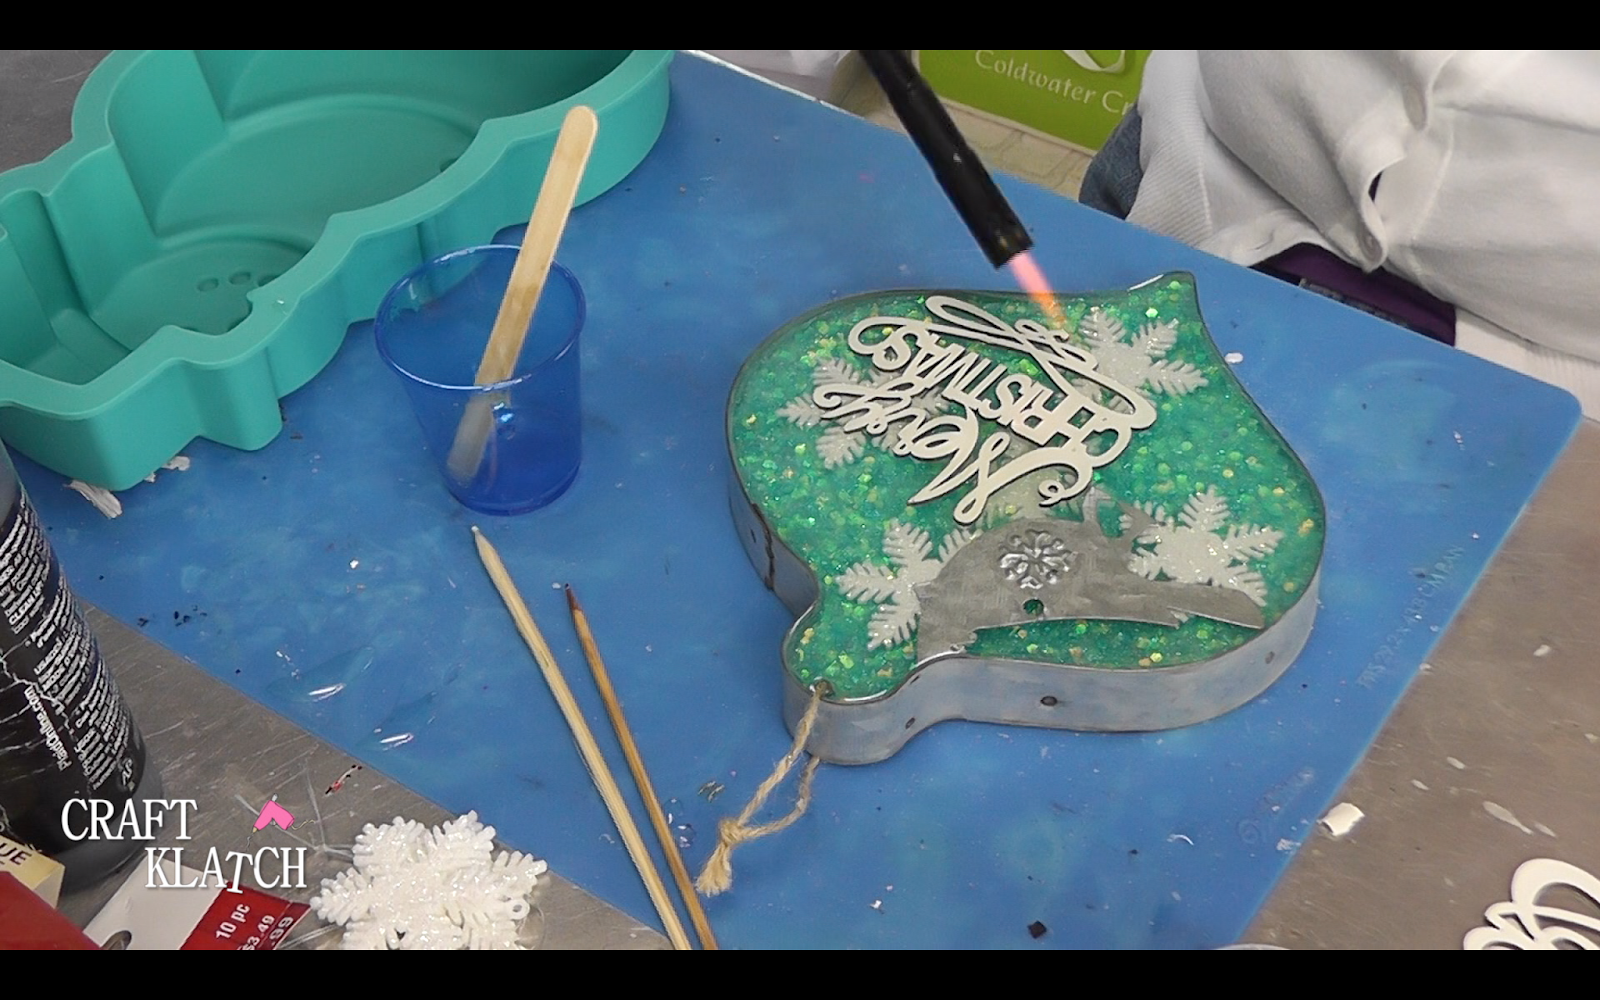
6. Once the glue is dry, mix one ounce of resin. When pouring it in, be sure to pour it over the wood piece because it will help seal the wood and cut down on bubbles. Pop bubbles as needed and allow to cure.
7. Add two more ounces of resin, pop bubbles and allow to cure.
The other side:
Follow directions 1-4 above.
5. Once cured, mix two more ounces of resin and pour into the mold. Pop bubbles as needed.
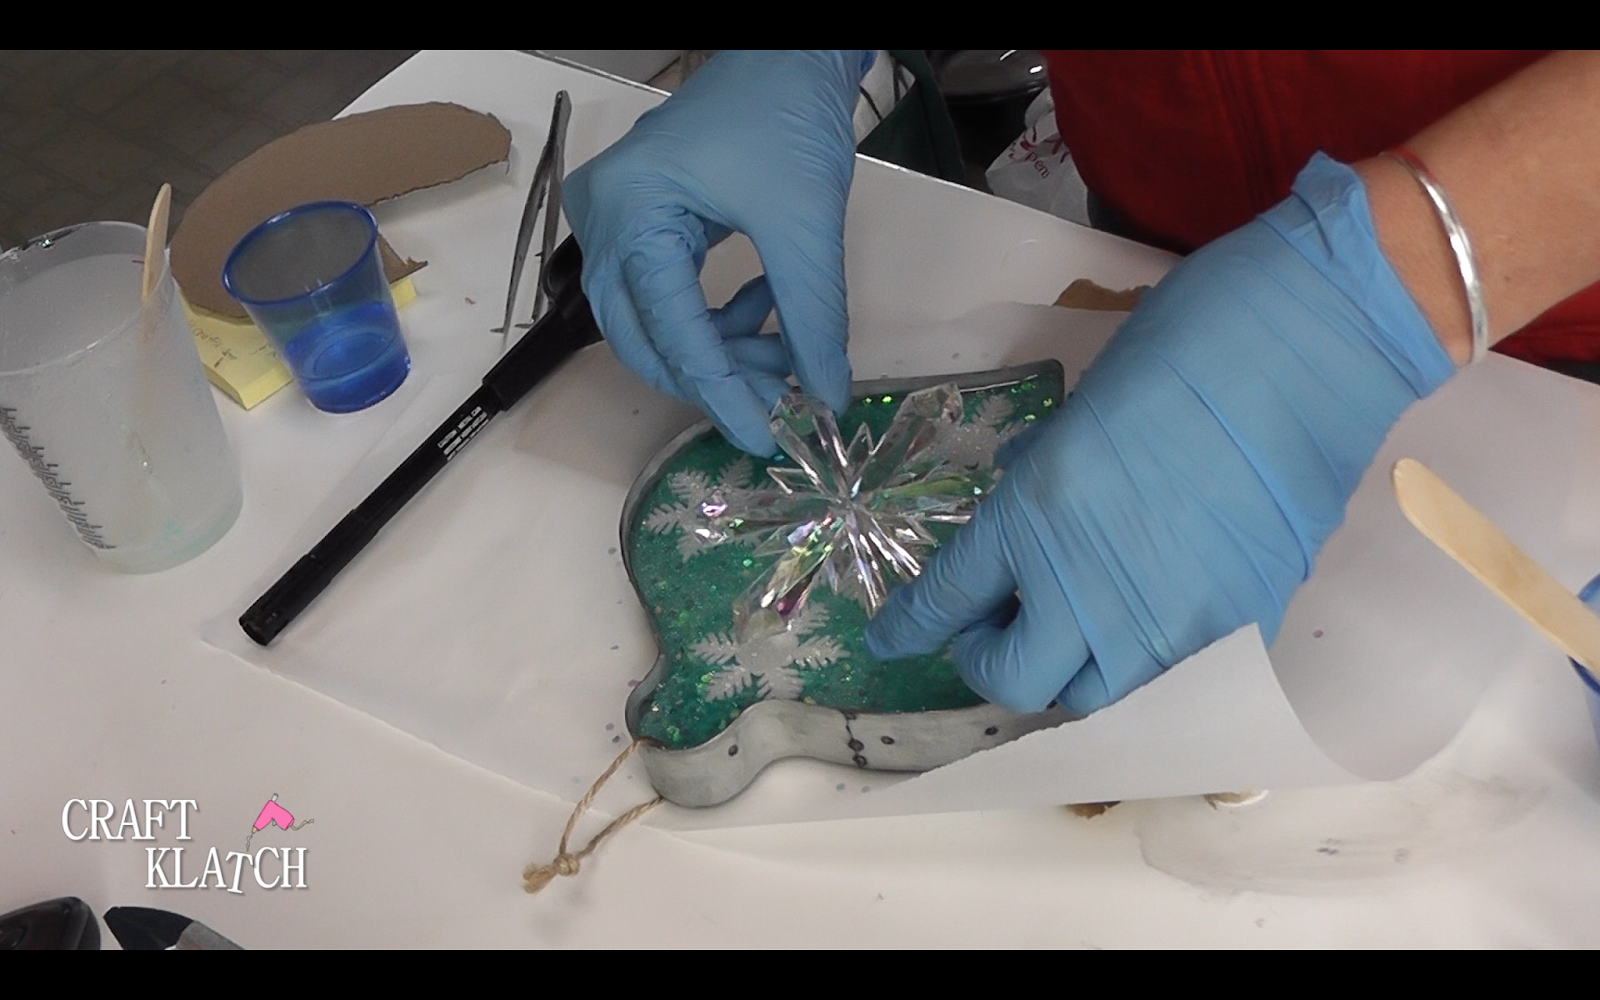
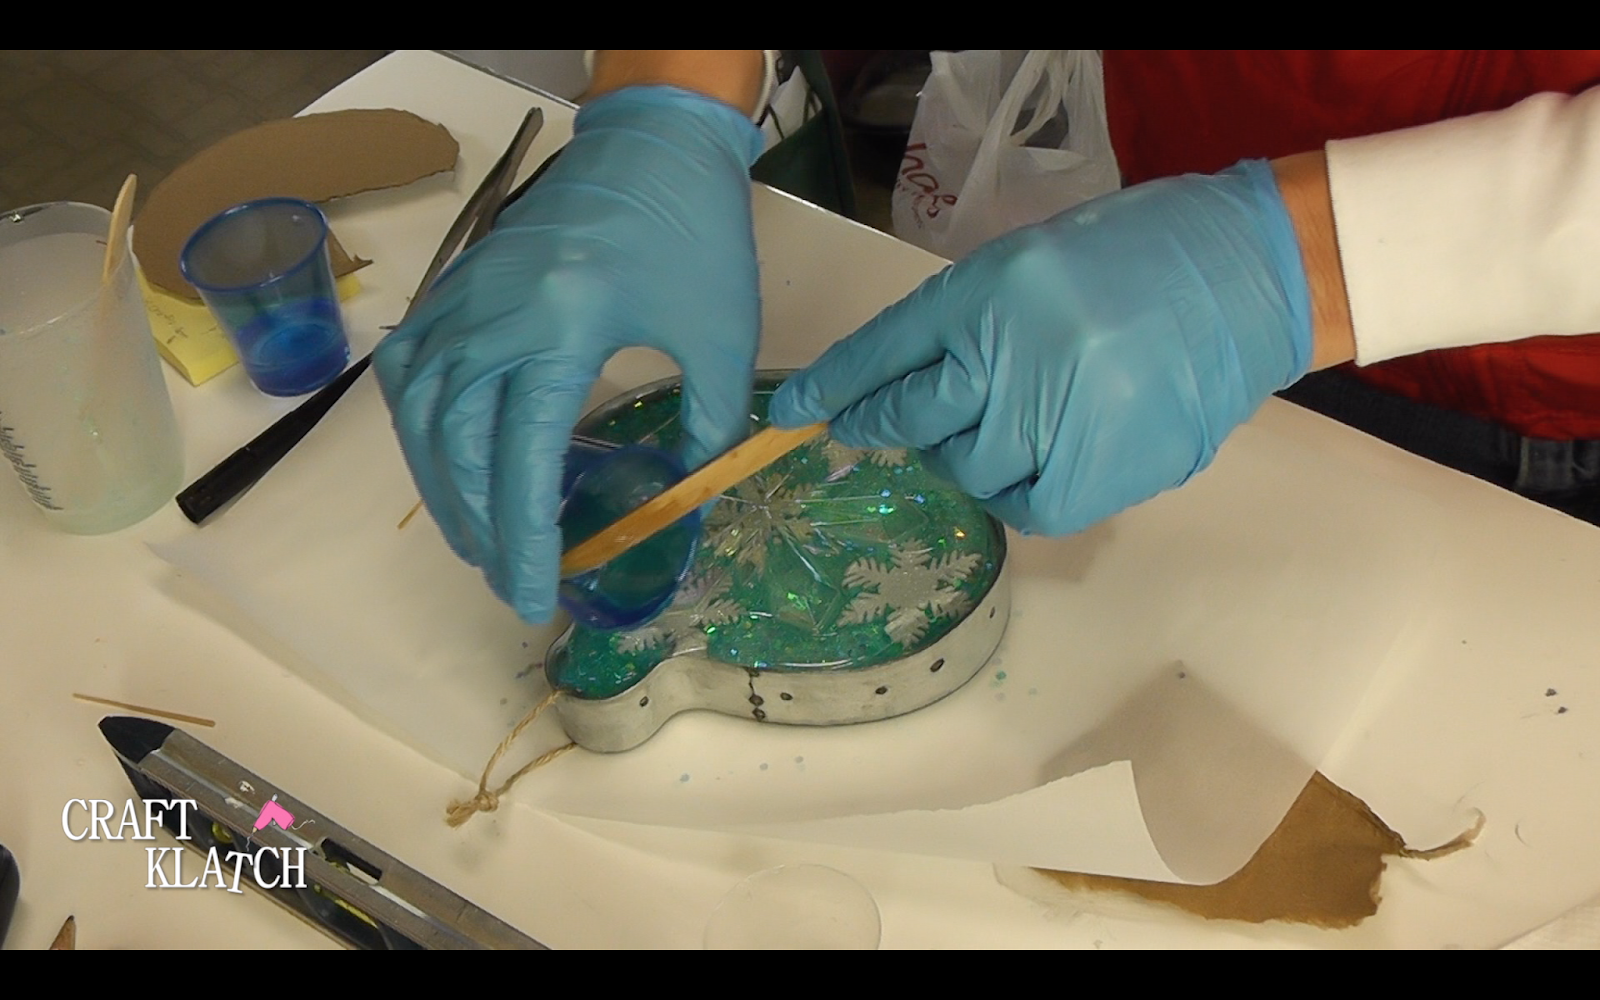
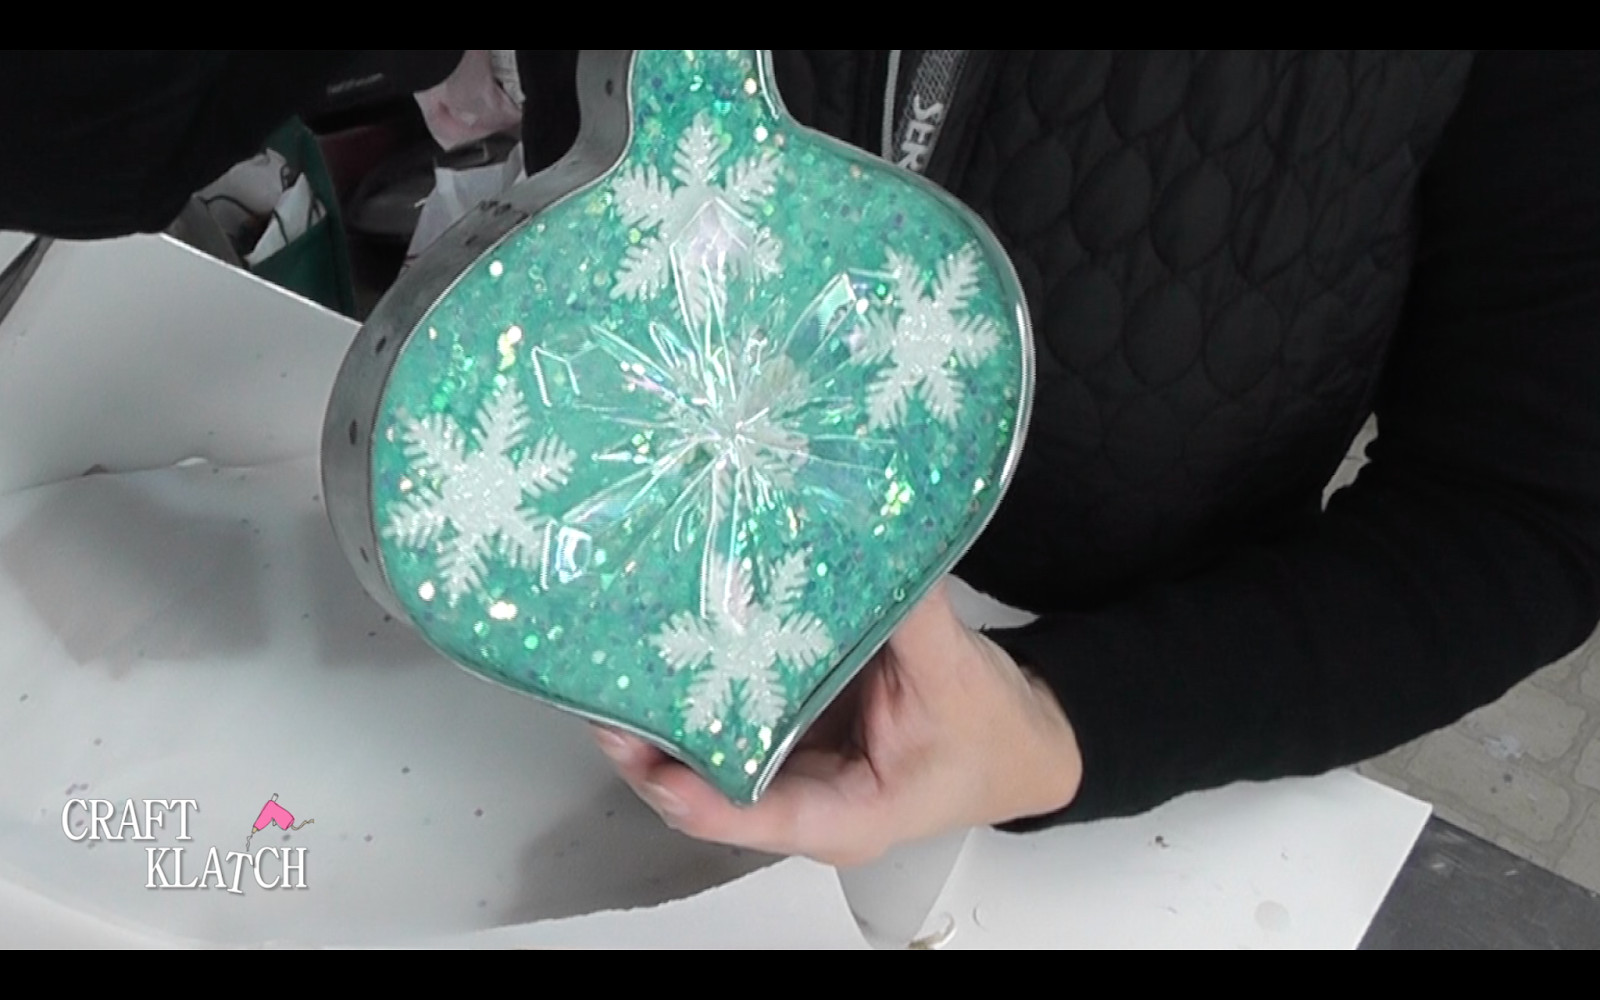
6. Place the clear snowflake ornament into the resin. Allow to cure.
7. Mix two more ounces and add to the ornament. Be careful not to overfill. If you get resin onto the clear ornament, it will lose the definition, so you want to make sure it is raised up.
Allow to cure.
That’s it! Now you have a beautiful, one of a kind ornament! If you cannot find a double sided ornament, you can make a tray that functions as a tray, or you can lean it up on a shelf or the mantel, to be decorative.
Happy Holidays! Thank you for stopping by! Remember: Life’s too short not to shimmer, so grab your glue gun and your glitter!™ Stay safe!
Mona
6 thoughts on “Glitter, Resin and Metal Christmas Ornament DIY ~ Craft Klatch Christmas Series”
I absolutely LOVE it! It is hard to pick a favorite side, but I guess it might have to be with the Bird and Merry Christmas…. even though the back sure is beautiful in its own right. Thanks Mona!!
Mona, what was the glitter that you used? Does the glitter actually color the resin? Which glitter adds the color along with the added bling? I just am not sure what to look for that that will add color, so your help is very much appreciated.


Very beautiful!!
This is probably my favorite craft you have done. Absolutely gorgeous!
This is beautiful! I like the side with the bird. Thanks for sharing.
This comment has been removed by the author.
I absolutely LOVE it! It is hard to pick a favorite side, but I guess it might have to be with the Bird and Merry Christmas…. even though the back sure is beautiful in its own right. Thanks Mona!!
Mona, what was the glitter that you used? Does the glitter actually color the resin? Which glitter adds the color along with the added bling? I just am not sure what to look for that that will add color, so your help is very much appreciated.
Thanks so much for your help!
Vicki