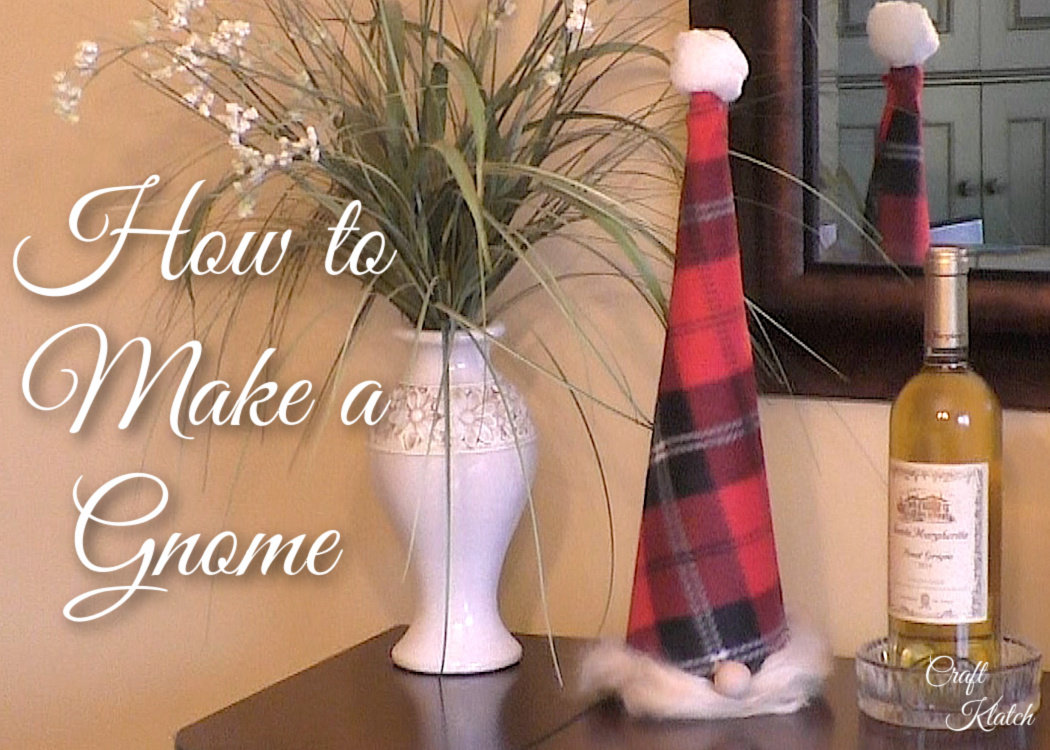
Learn how to make a gnome! They are great for Christmas decorations, but really are fun home decor anytime, with any theme!
How To Make A Gnome Video Tutorial
Here is a quick video tutorial, so you can see exactly how I made it!
Be sure to Follow Me on Instagram!
Supplies You Will Need to Make a Gnome
*This blog uses affiliate links. As an Amazon Associate I earn from qualifying purchases, at no additional cost to you.
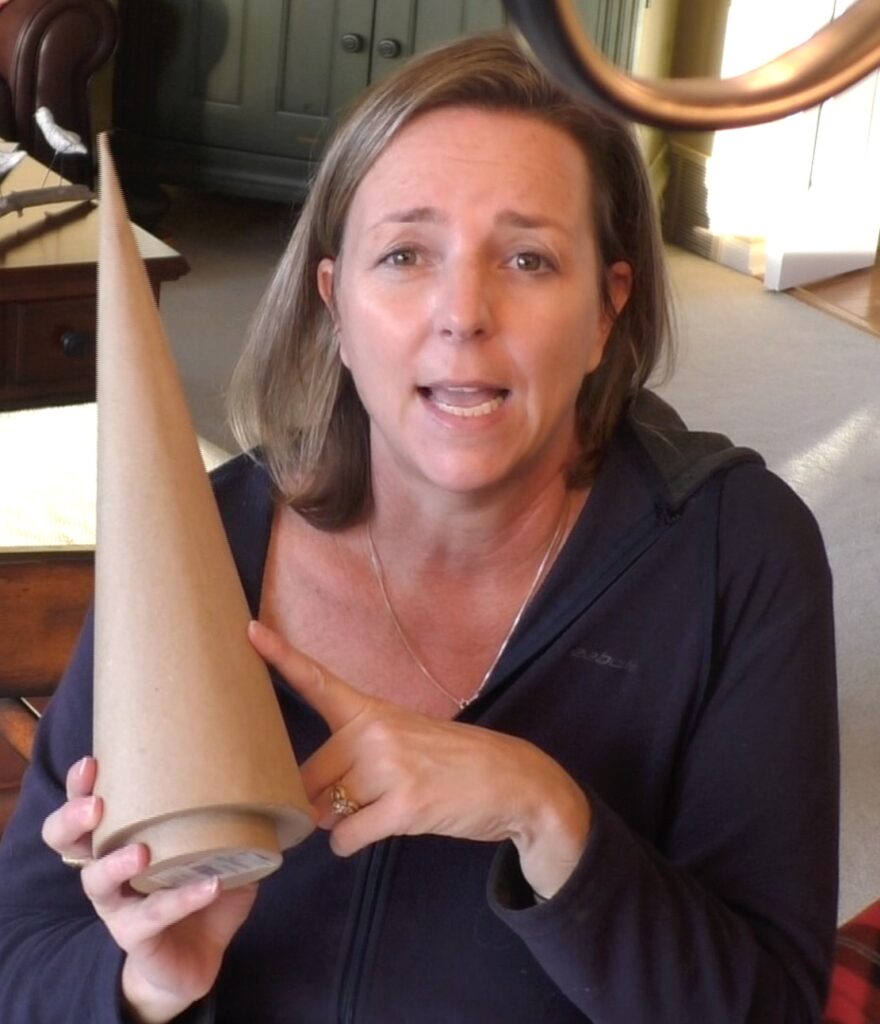
- Cone (see below)
- Fabric
- Hot glue
- Furry trim, yarn or doll hair
- Pom pom
- Wood ball
You can buy a cone, but the easiest and most inexpensive way is to make your own!
Here I show you How to Make a Cone for Less Than $1. I have found cones can be pretty pricey, so I learned how to make a cone and now I can make them in ANY size!
If I hadn’t found this one on sale, I would have made one!
Directions on How To Make a Gnome
Step 1
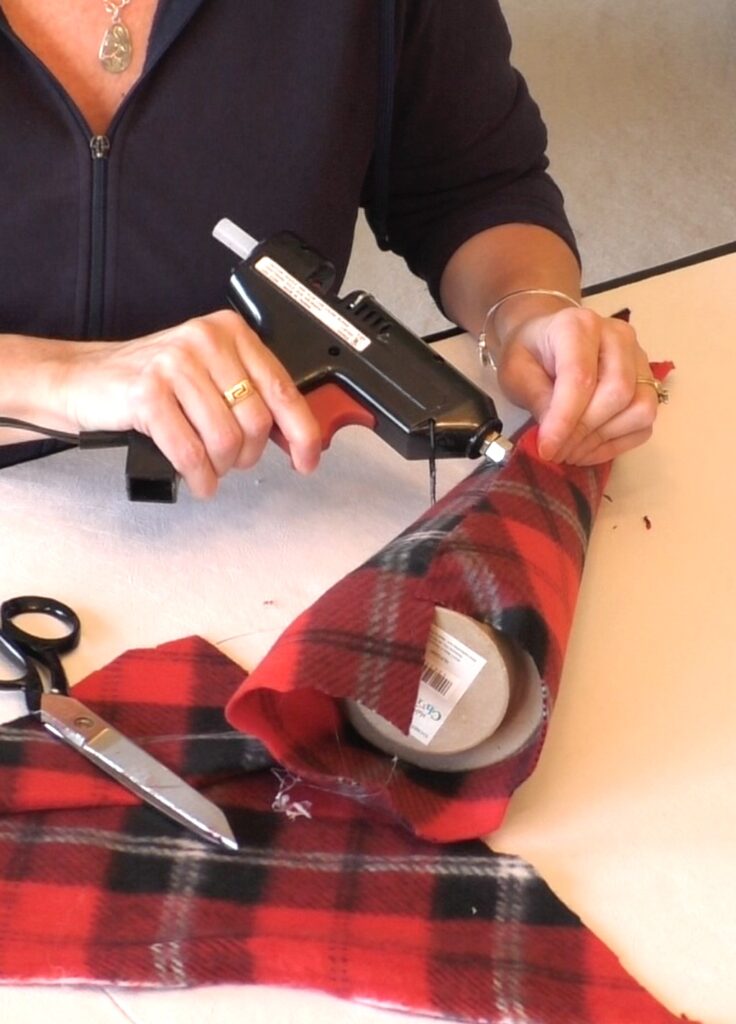
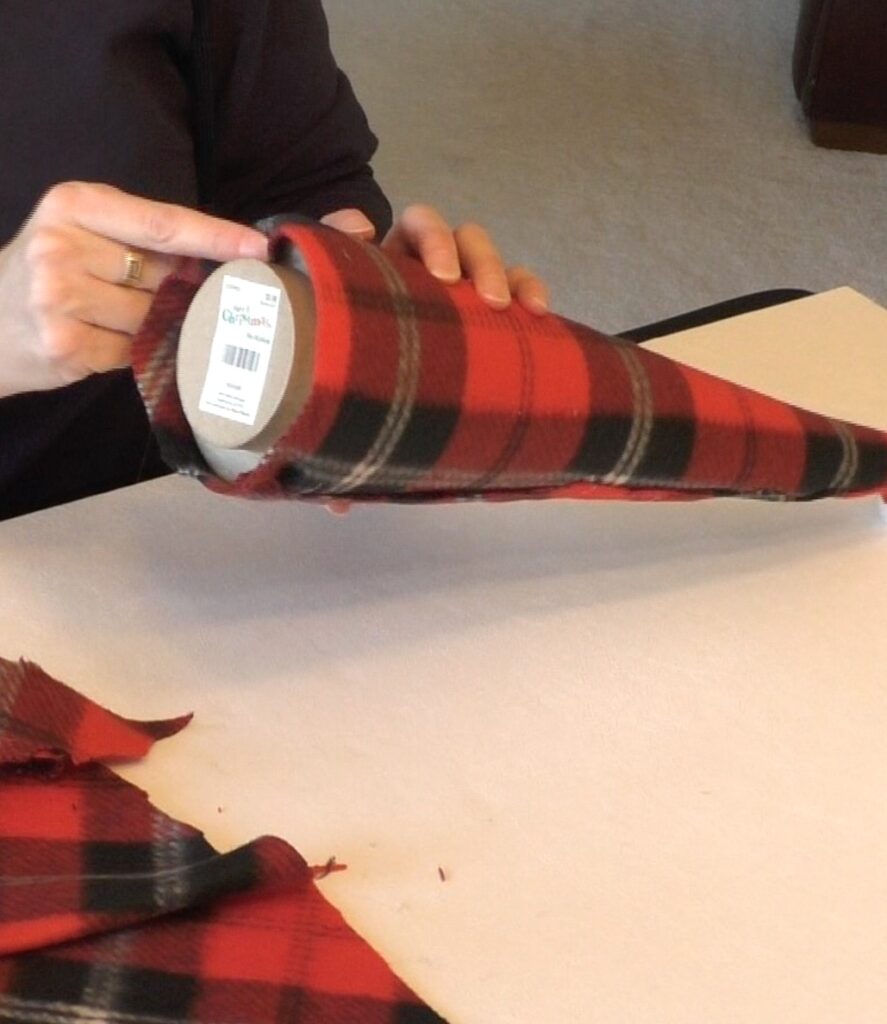
Lay out your fabric and roll your cone into the fabric.
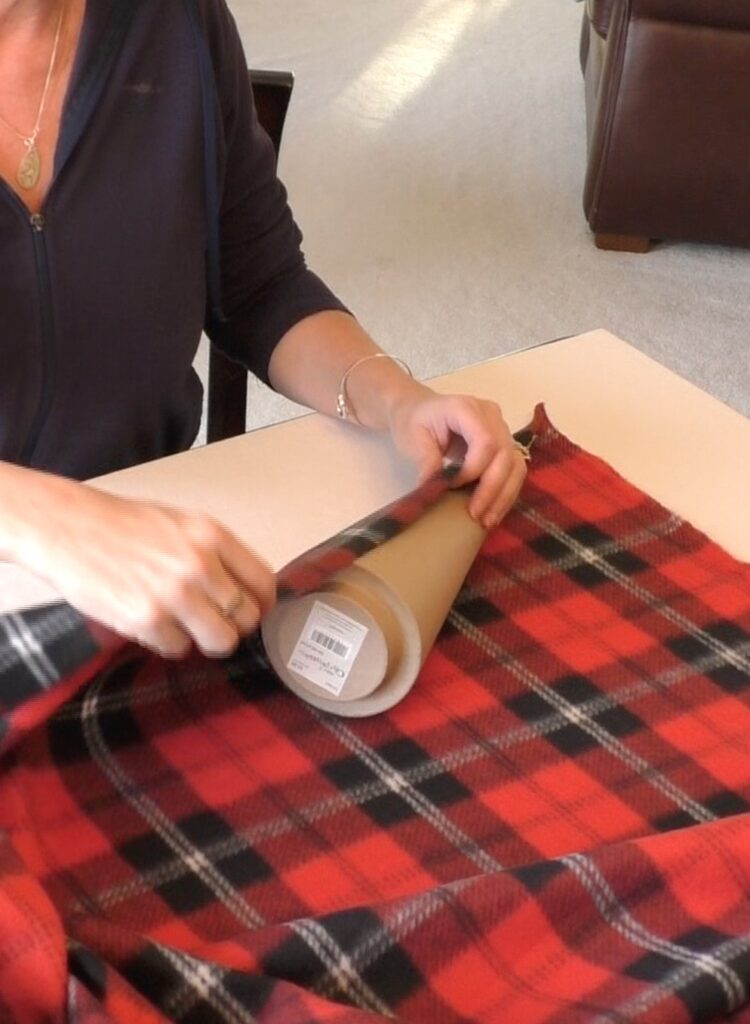
Then, cut it. Give yourself a little extra. We can always trim off the excess.
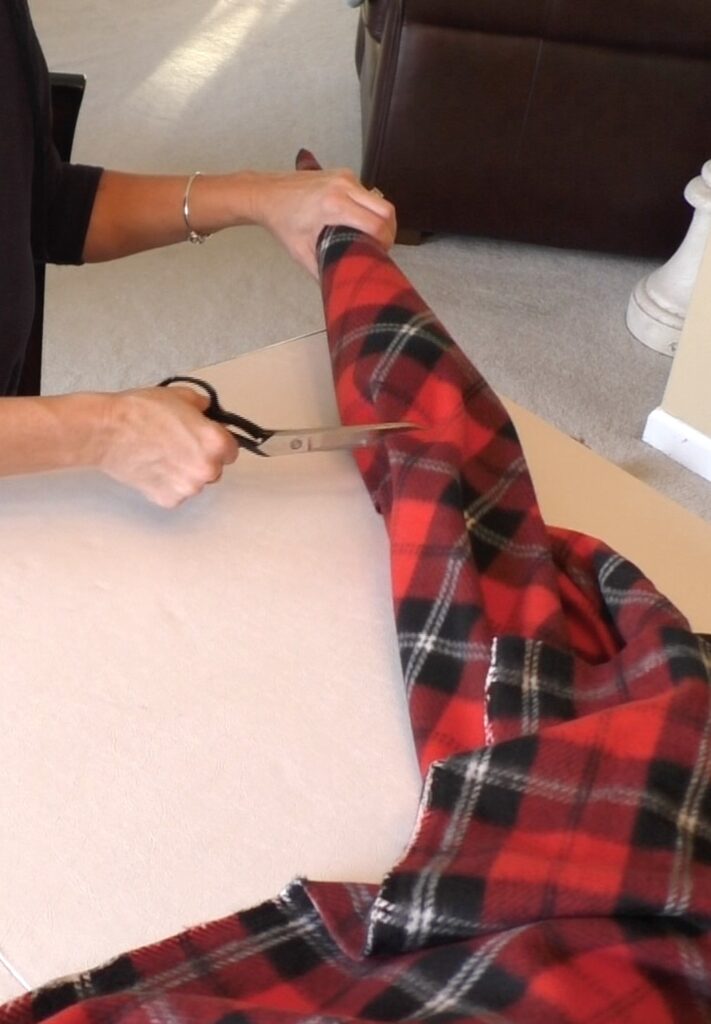
Step 2
Glue the fabric onto the cone with hot glue and cut off any excess. You want to be neat about cutting it off and if your fabric is thin enough, you can fold over the edge.
Step 3
Glue to pom pom to the top of the gnome.
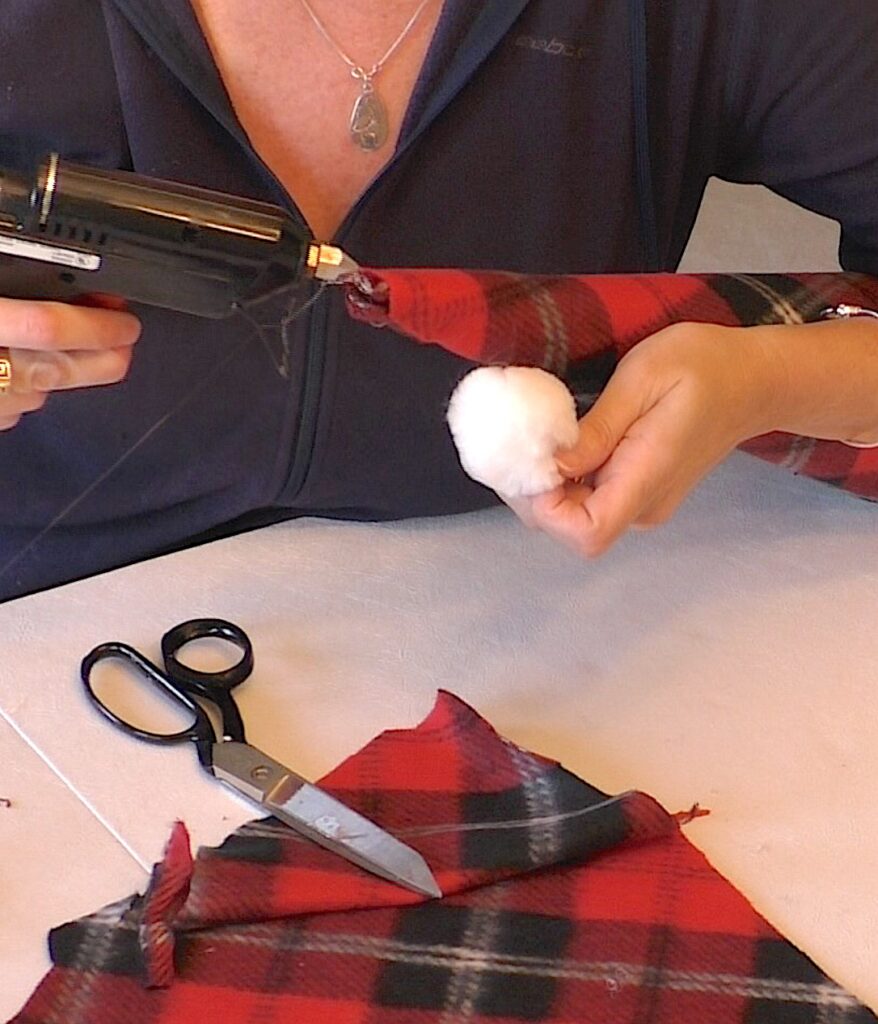
Step 4
Glue to bottom edge of the fabric under the cone. You want to give it a clean look.
Step 5
For the hair, you can use fuzzy trim, combed out yarn, or doll hair. You want to glue that around the base.

Step 6
Glue the wood bead on as a nose.

Now you have a cute gnome! It’s that easy!
Be sure to PIN IT for later!

Other Fun and Easy Gnome & Other DIYs
If you love the gnomes, here are some other projects you can make!
To Feed Your Gnome Addiction!
For those of you with a gnome addiction, I think you might just fall in love with these!

Remember: Life’s too short not to shimmer, so grab your glue gun and your glitter!™ Stay safe!
Mona