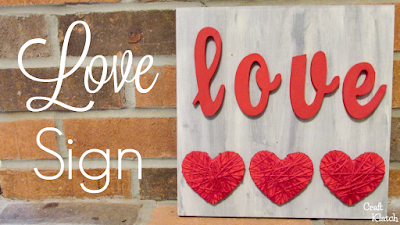
Make a DIY Love Sign for Valentine’s Day!
Be sure to check out some other great Valentine’s Day craft tutorials:
Here is a quick video tutorial, so you can see exactly how I made it:
*This blog uses affiliate links. As an Amazon Associate I earn from qualifying purchases, at no additional cost to you.
Materials List
- Square wood plaque: try craft store or here are some options: https://amzn.to/2FYUICz
- Wood letters: Hobby Lobby or Michaels
- Wood hearts: Hobby Lobby
- Hot glue: https://amzn.to/2SbINqr
- Ultimate glue: https://amzn.to/2SetEVp
- Red embroidery floss: https://amzn.to/2G4983o
- Red paint: https://amzn.to/2DFa8t1
- Black paint: https://amzn.to/2TidYxK
- White paint: https://amzn.to/2FTwhWR
- Gray paint: https://amzn.to/2B5v22Q
Directions:
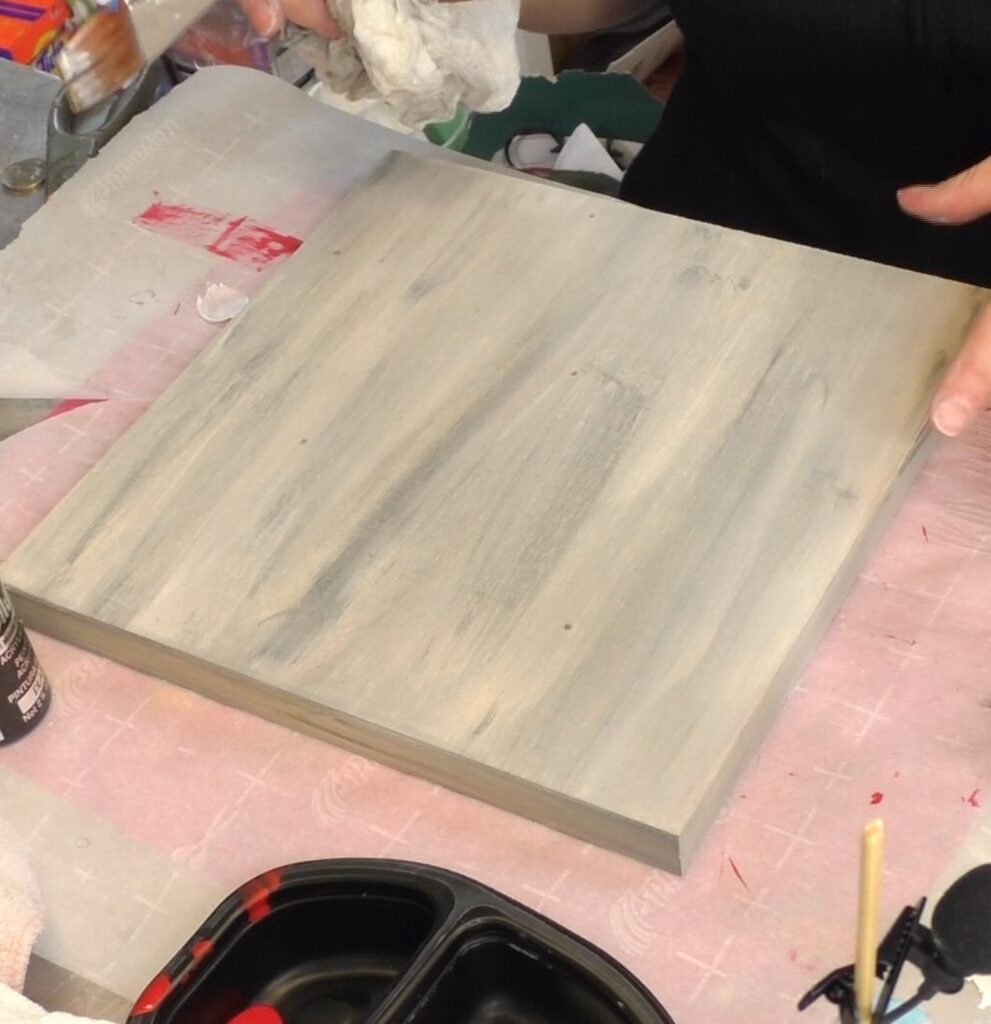
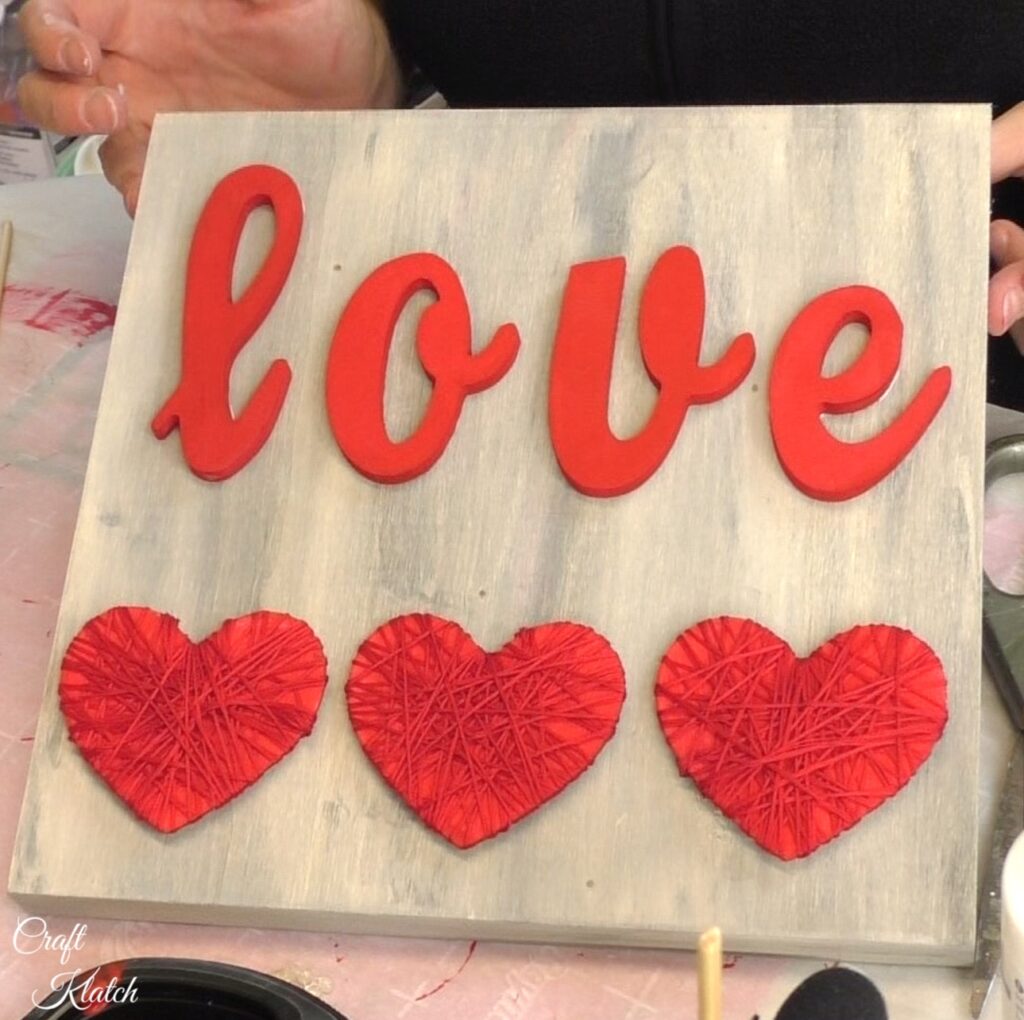
1. Find a plaque for the love sign. I used a square one. They are also called wood canvases.
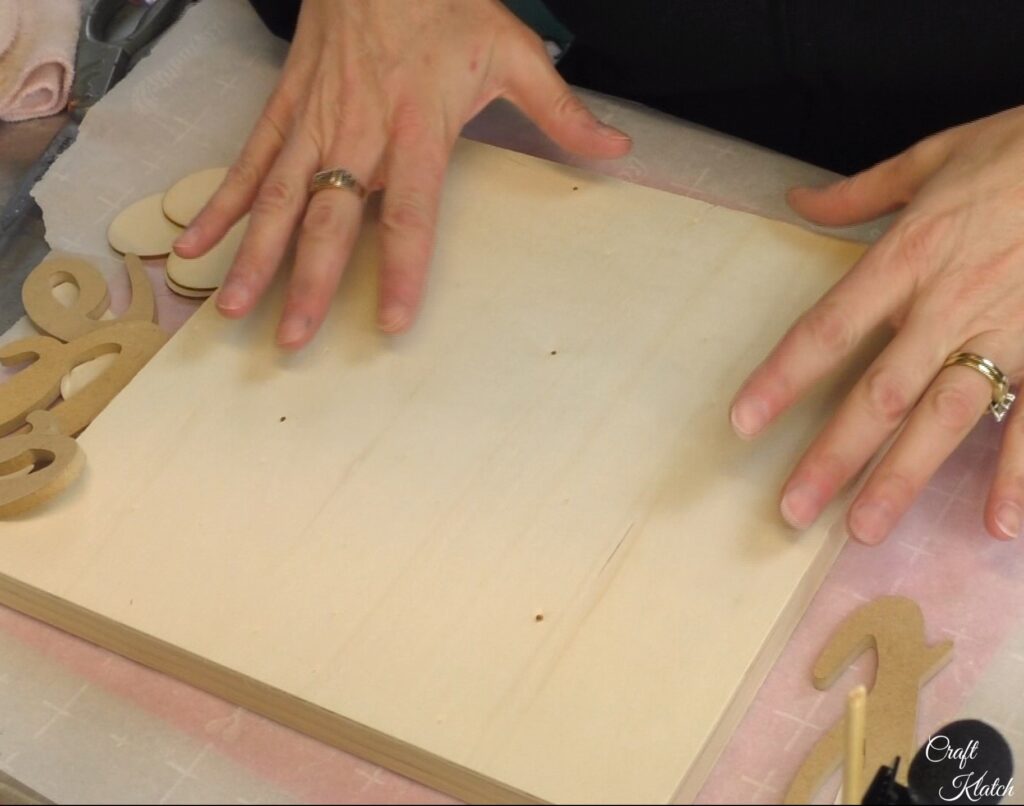
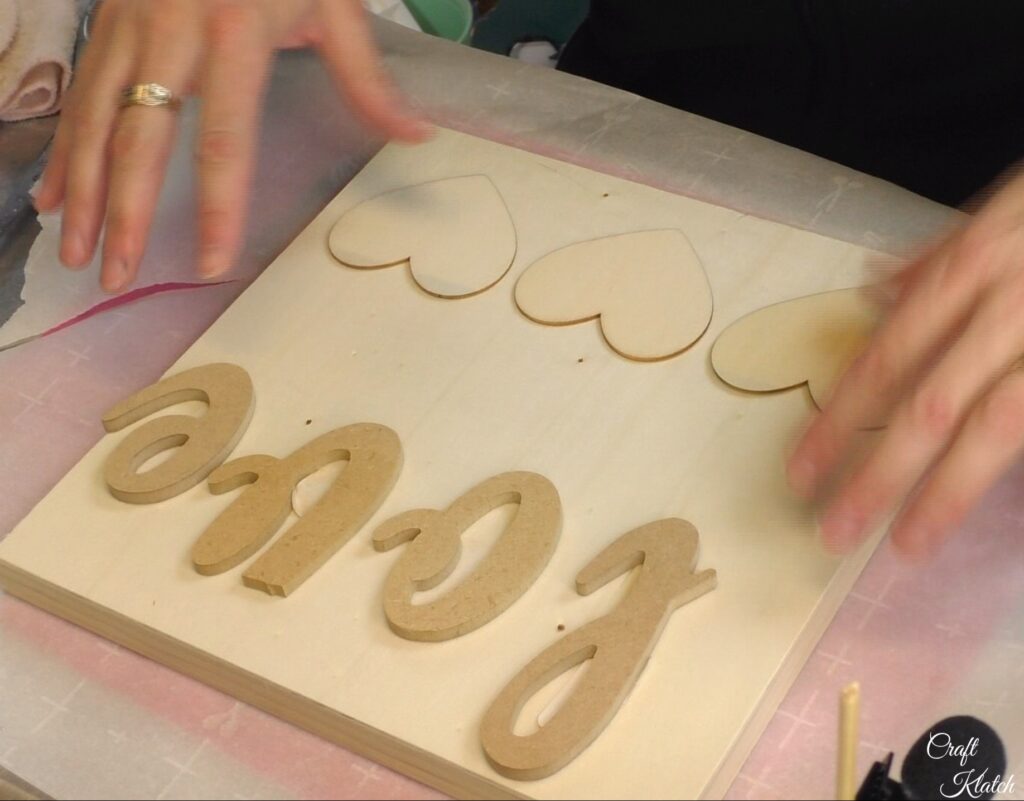
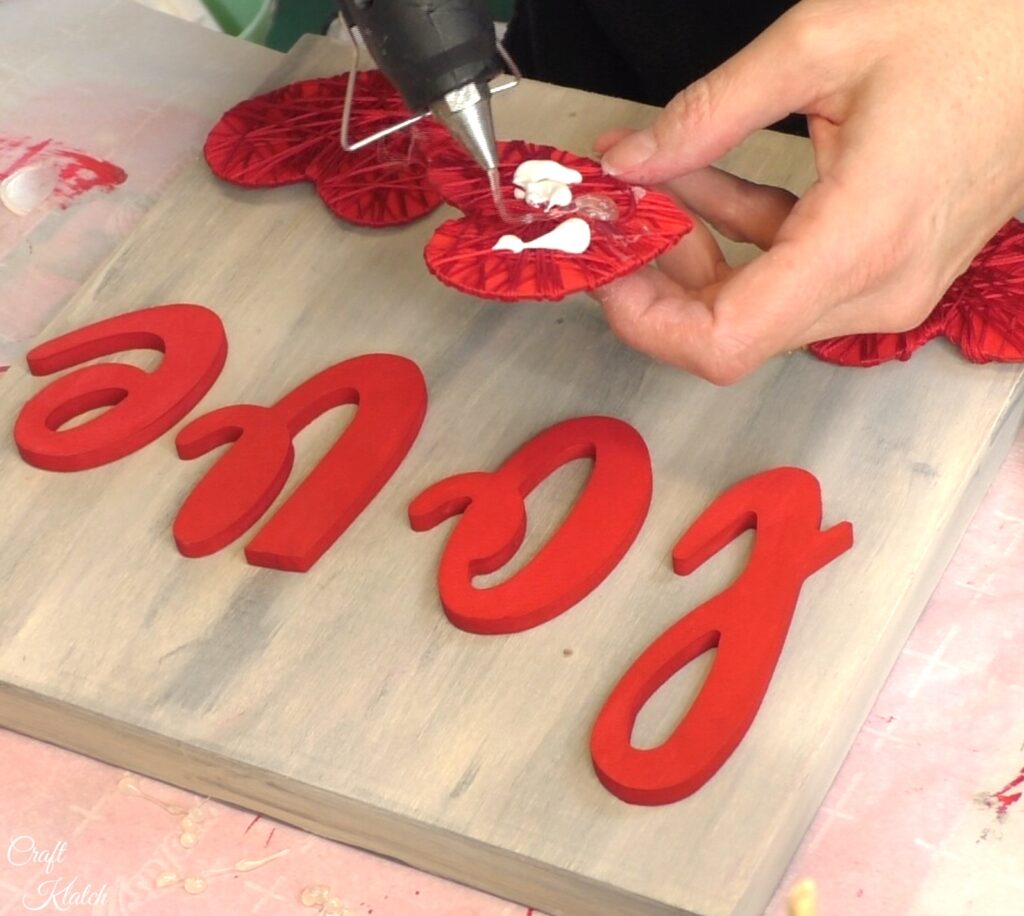
2. Plan the layout of the hearts and the love on the plaque.
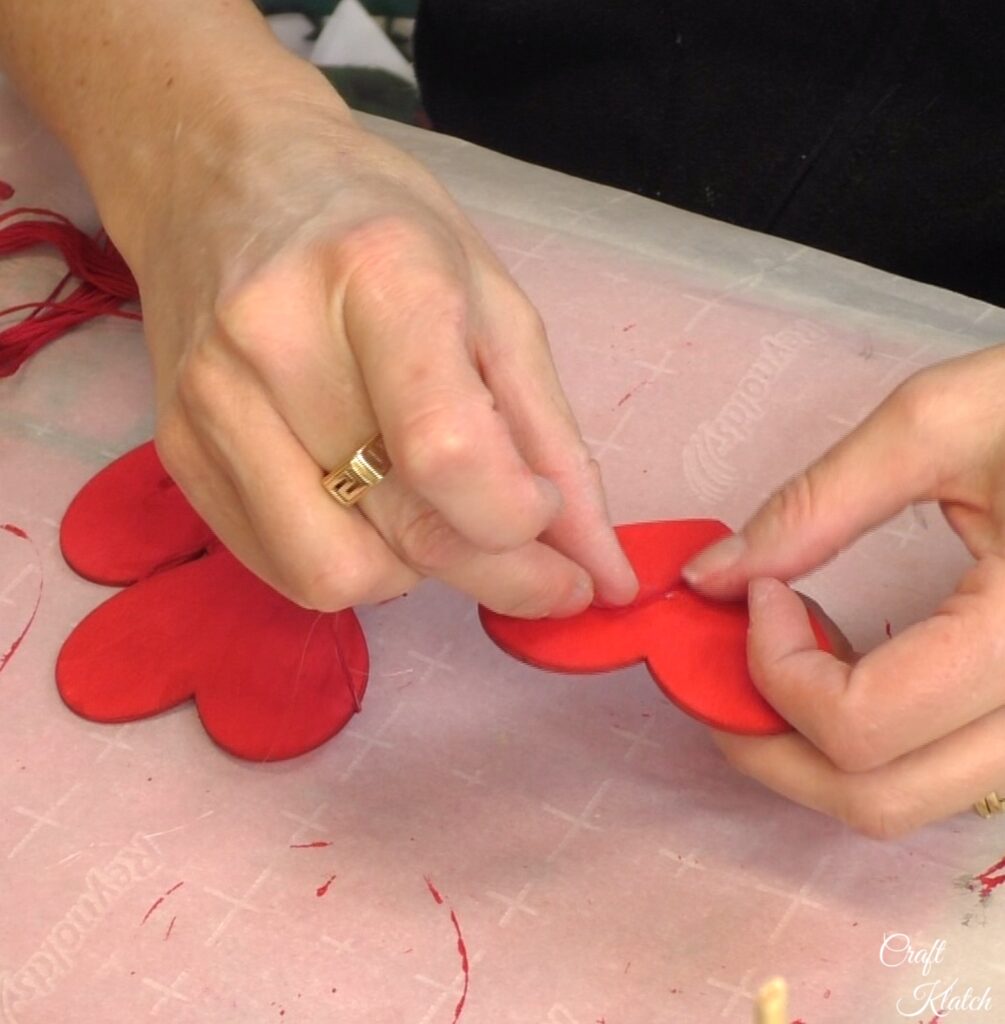
3. Paint the hearts and the letters red.

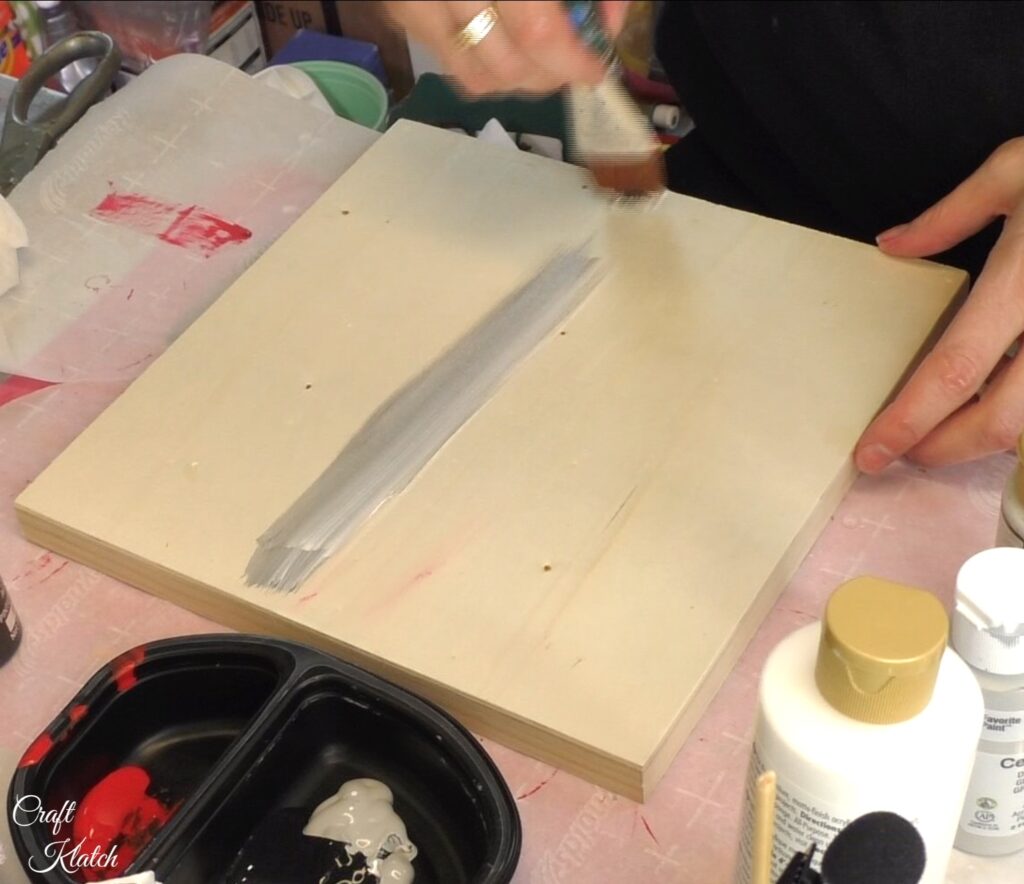
4. Take a combination of black, gray, and white paint on the brush, at one time, and paint it on the plaque. Paint a section and then take a damp paper towel, to wipe it off. This blends the colors for an aged look.
5. Set it aside to dry.
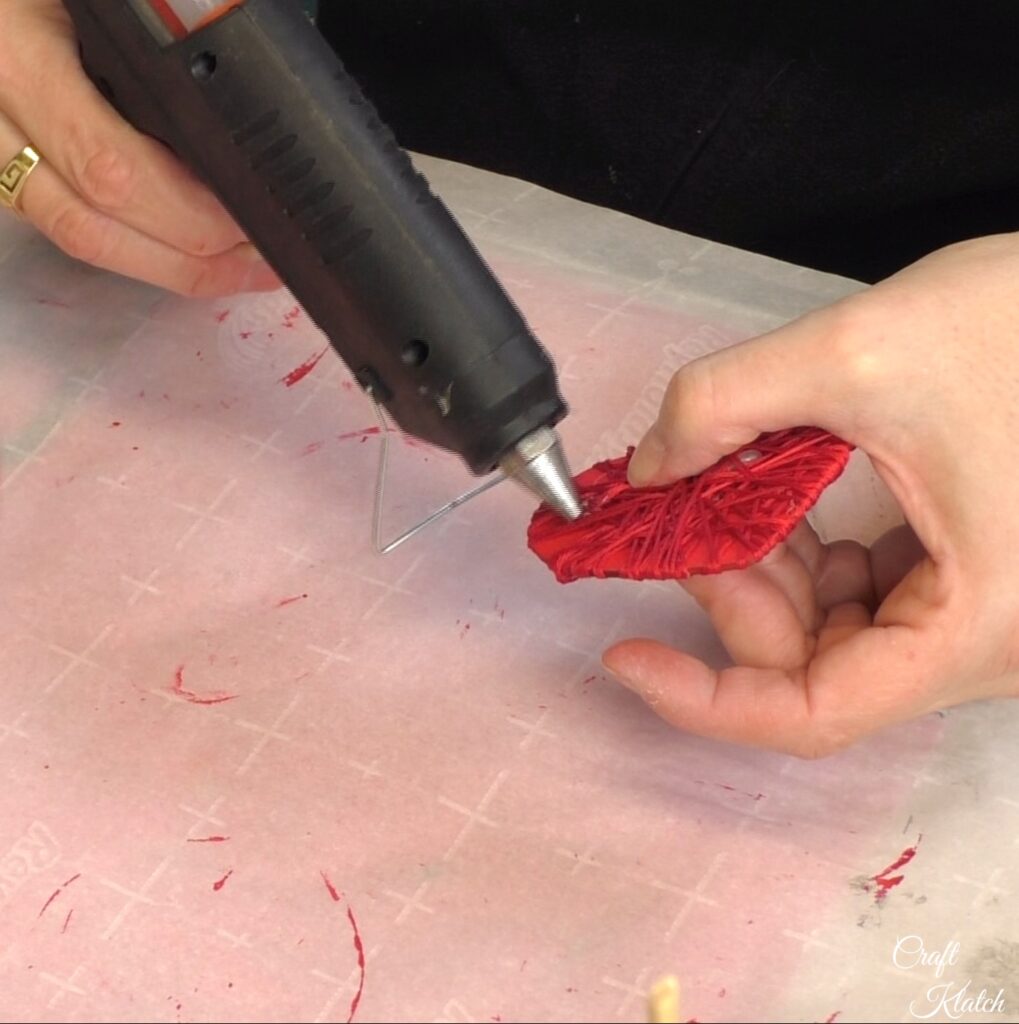
6. Put a dab of hot glue on the heart and put an end of the embroidery floss into to glue and let it cool. Then, wrap the heart with the embroidery floss.
7. You can add a little extra hot glue, every once in a while, just to keep it all in place.
8. Once wrapped, You can add hot glue and other glue. The hot glue will hold the letters and the hearts in place, while the other glue dries.
Once it all dries, you have a great sign for Valentine’s Day!
That’s it!
If you a love sign, but don’t have time to make one, here are some great alternatives!

Thanks so much for stopping by!
Remember: Life’s too short not to shimmer, so grab your glue gun and your glitter!™ Stay safe!
Mona
Love it!! Especially the background!!
That’s a great idea!!
Thank you, Sylvia! This is one of my favorites!