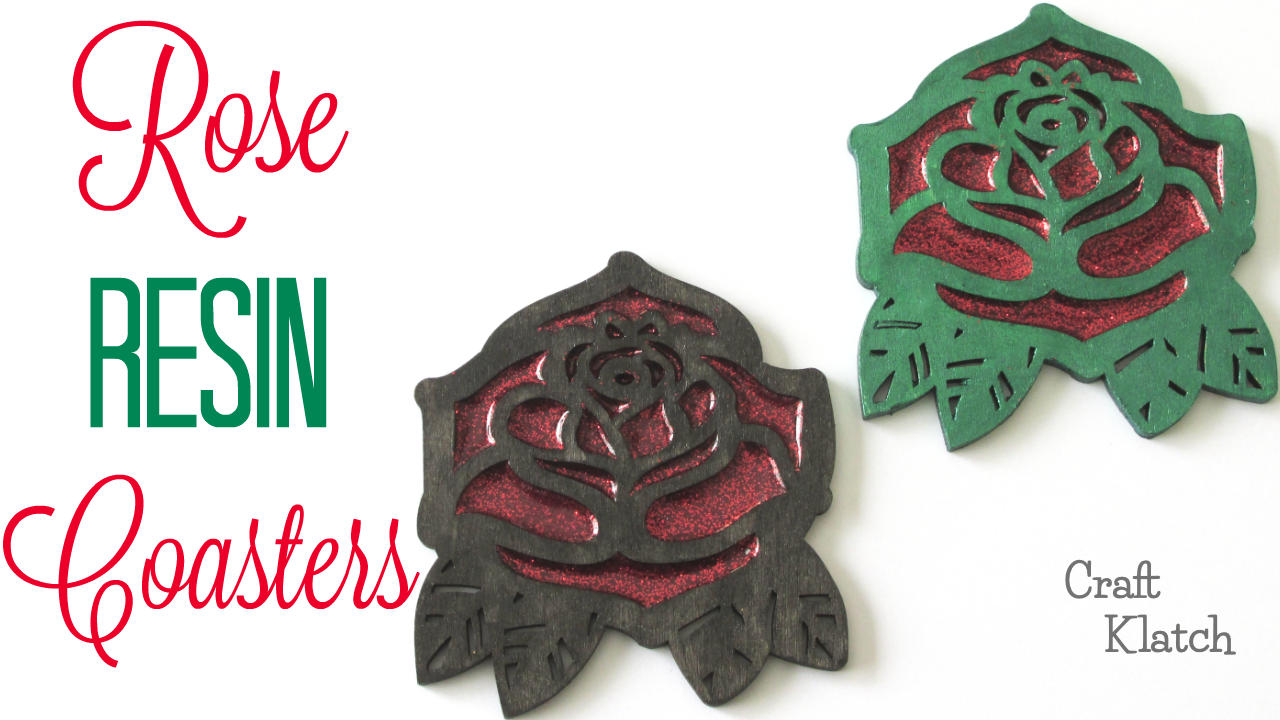
Learn how to make rose resin coasters with this Valentine’s Day craft tutorial! Love me some glitter!
I have a bunch of Valentine’s Day crafts you might enjoy, so be sure to check them out!
- Valentine’s Day Wood and Resin Heart Coasters
- Valentine’s Day Love Sign
- 35 Valentine’s Day Crafts and DIY Projects
Rose Coaster Video Tutorial DIY
Here is the full video tutorial, so you can see exactly how I made it!
*This blog uses affiliate links. As an Amazon Associate I earn from qualifying purchases, at no additional cost to you.
Materials:
- Wood rose: I found them at Hobby Lobby
- Red glitter: https://amzn.to/2ROfo6o
- Metallic black paint: https://amzn.to/2S9858L
- Metallic green paint: https://amzn.to/2WiX8Rb
- Varnish: https://amzn.to/2S579SW
- Lighter: https://amzn.to/2MlkCAp
- Resin (use whatever resin brand you like):
- Easy Cast: https://amzn.to/2yjYmBC
- Art Resin: https://amzn.to/2yk9X3z
- Clear Cast: https://amzn.to/2z4rxGw
- FX Poxy: https://amzn.to/2AF3Pkk ~ According to the manufacturer, this one is heat resistant to 500 degrees F and is UV resistant.
Directions:
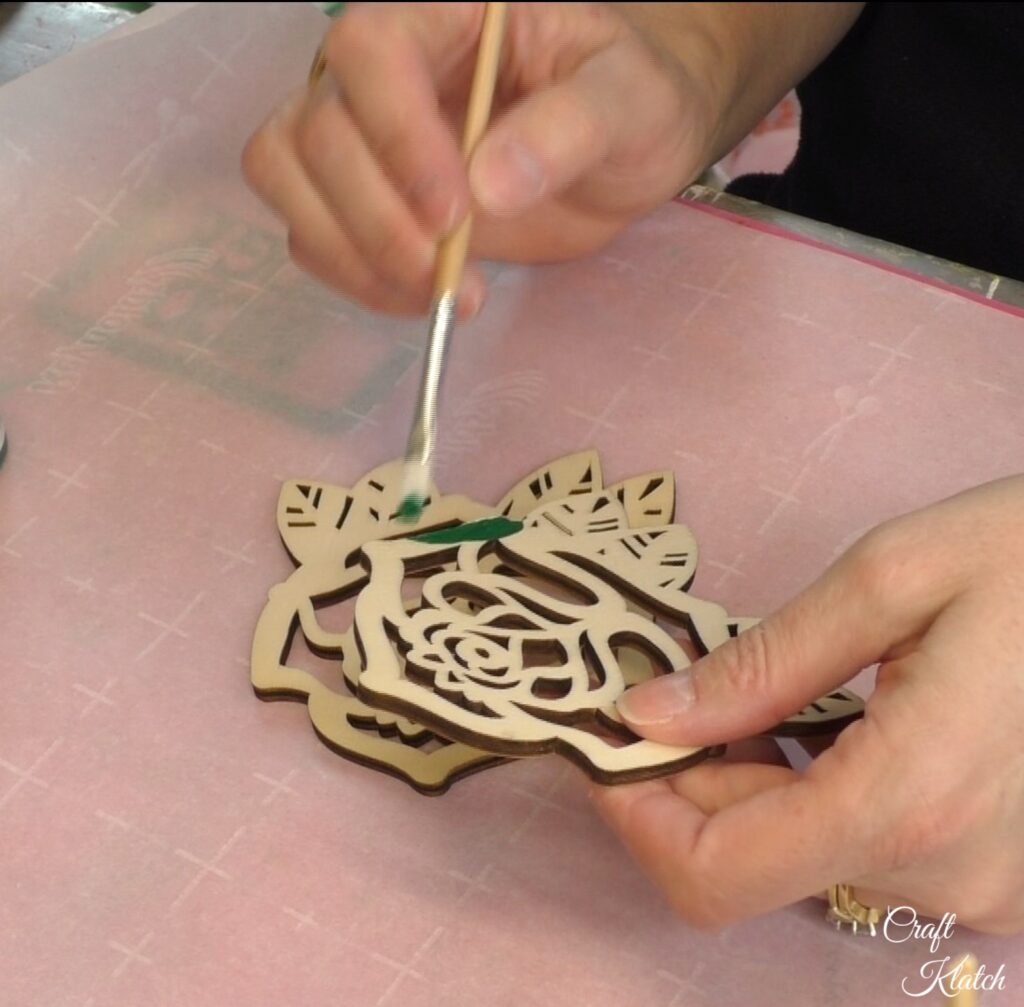
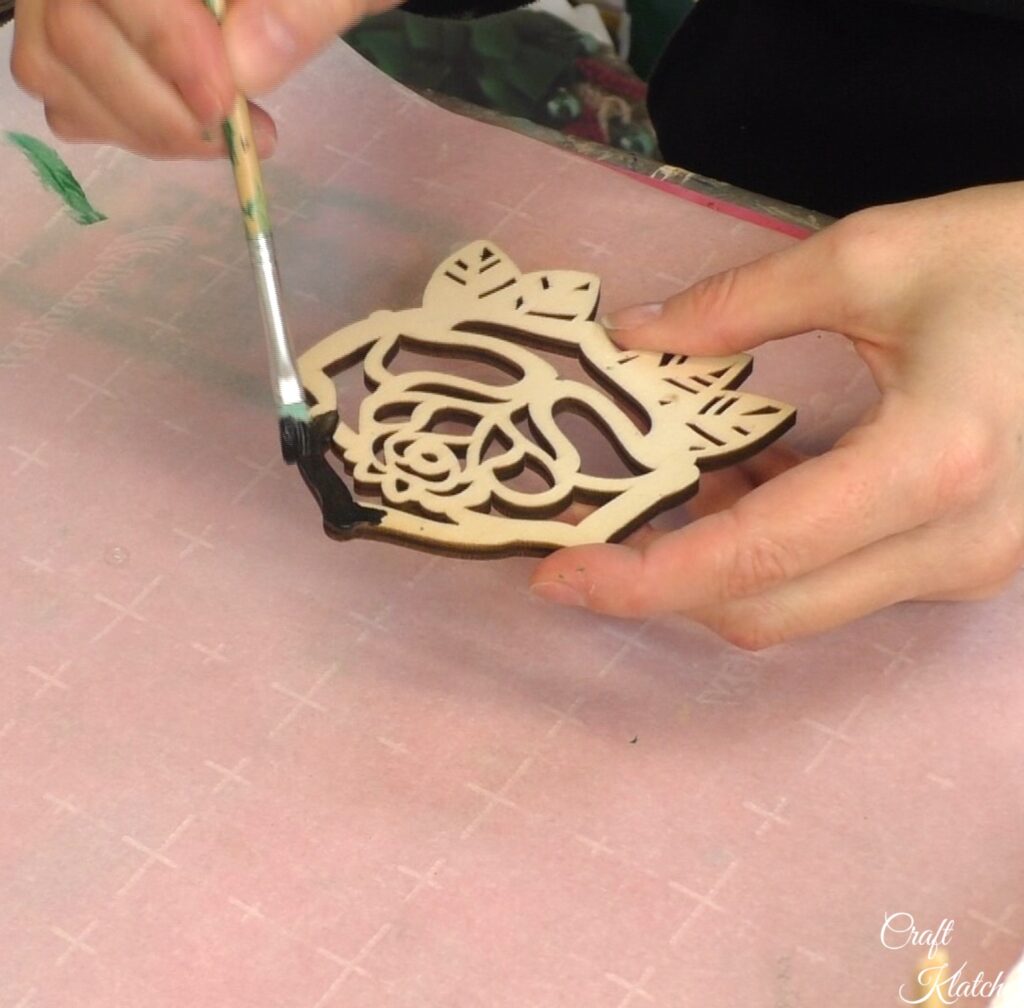
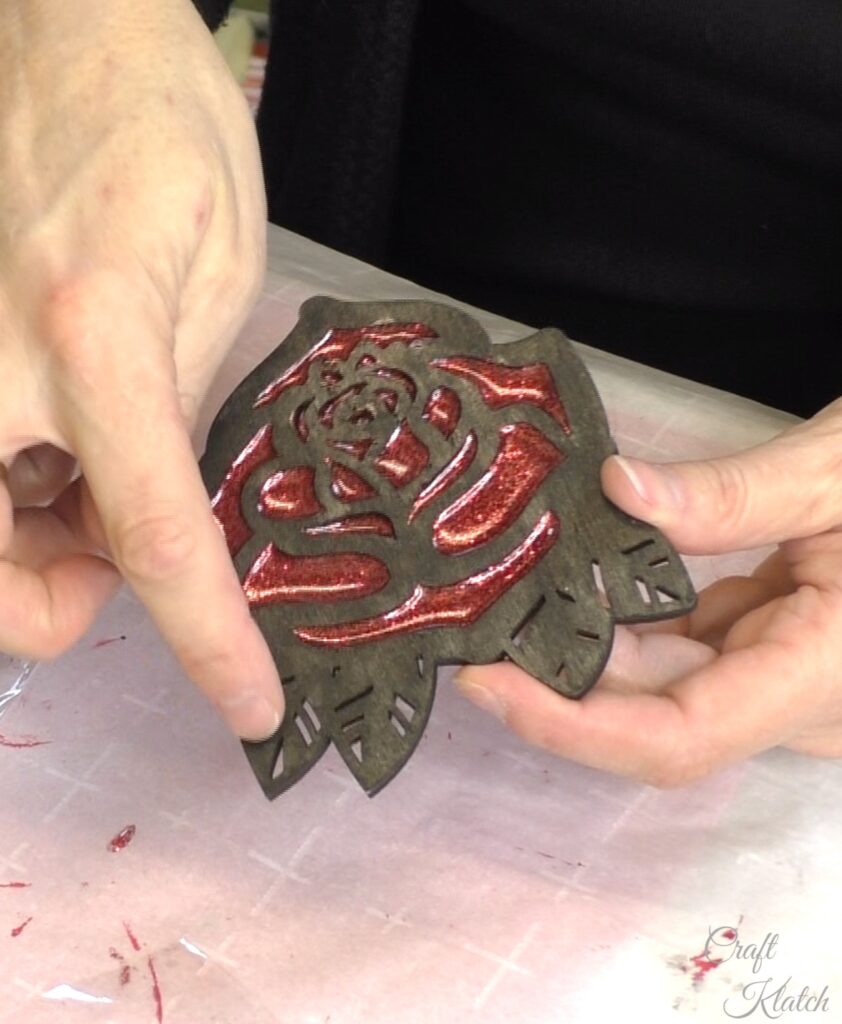
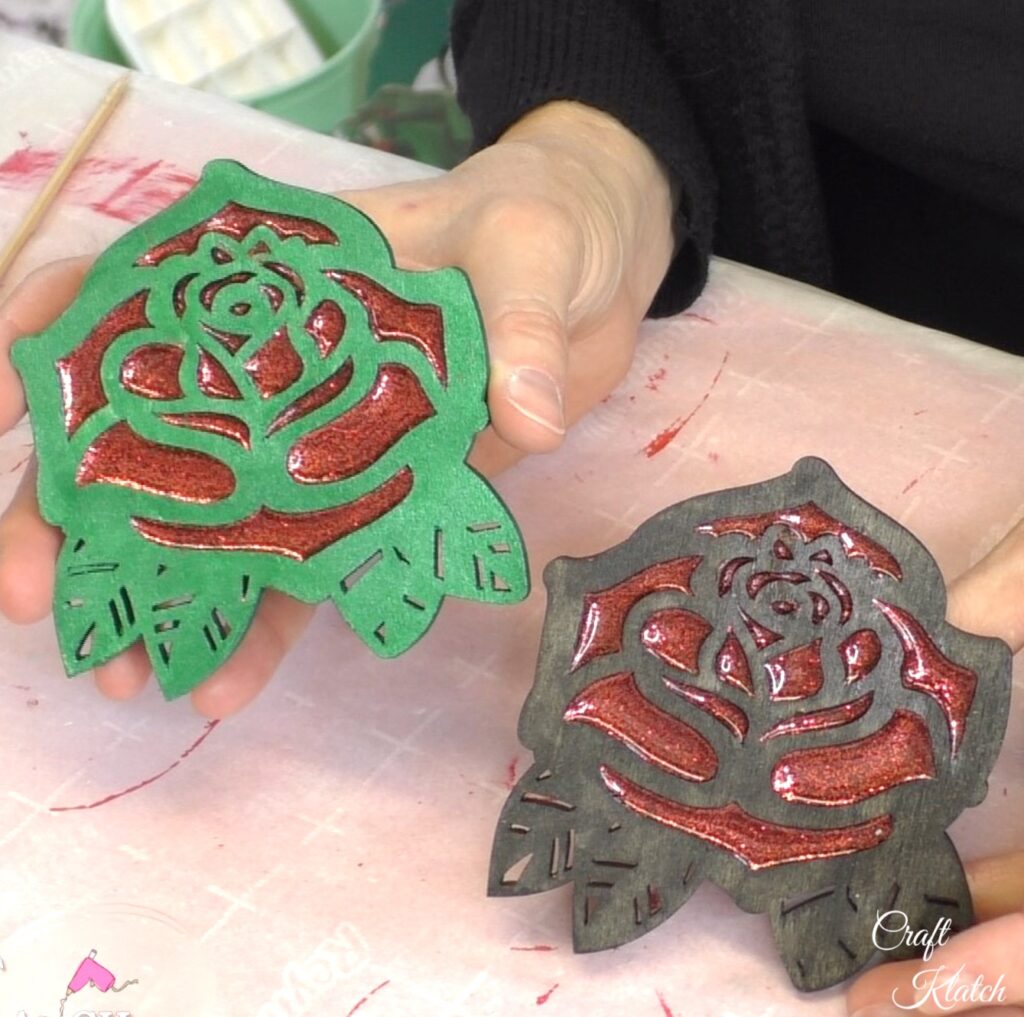
1. Paint the wood pieces. I did one in black and one in green. Once they dry, follow up with a varnish to seal them.
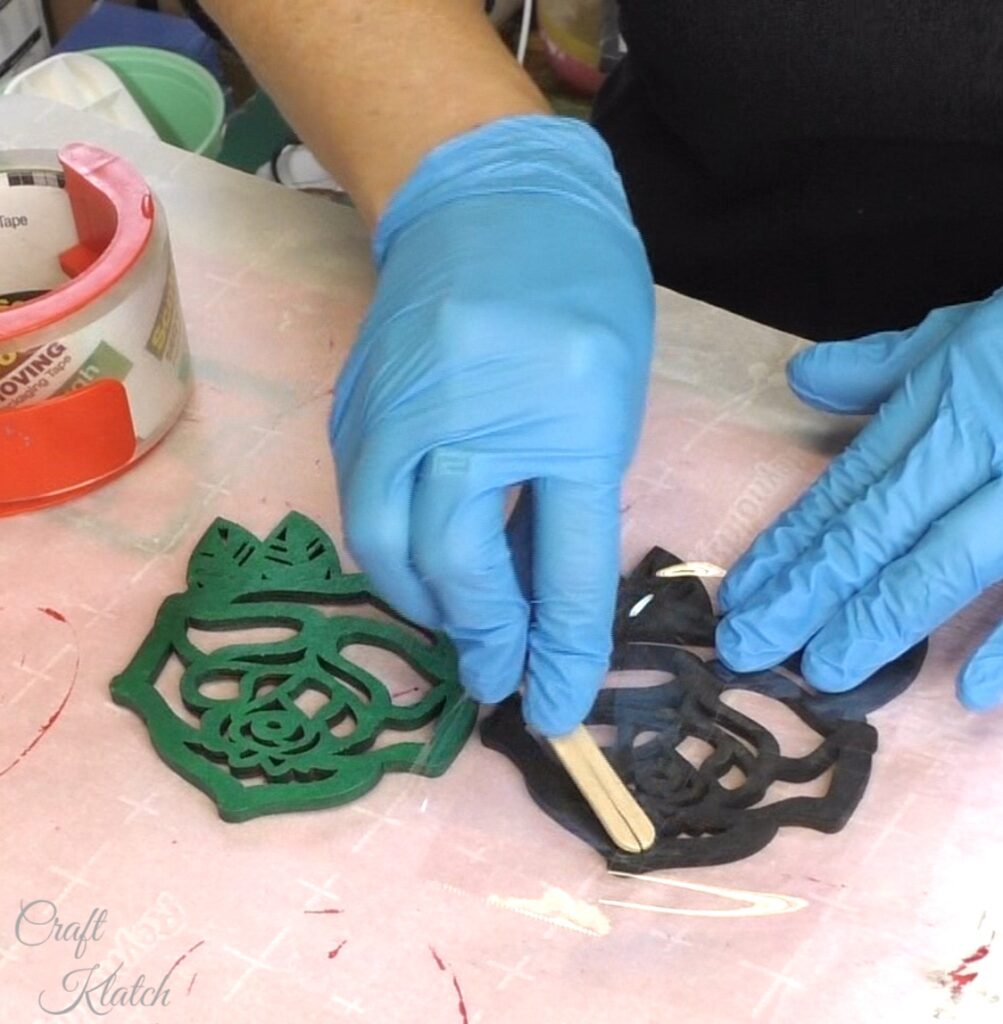
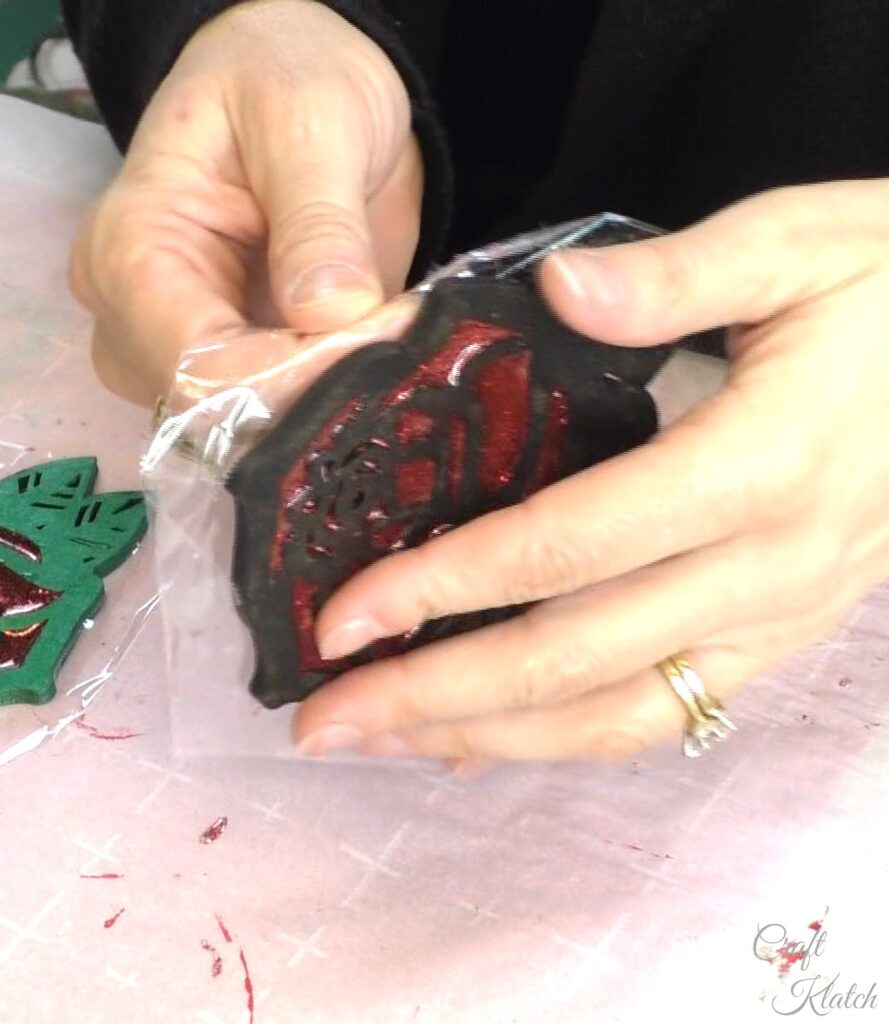
2. When everything has dried, apply packing tape to the backs of the roses.
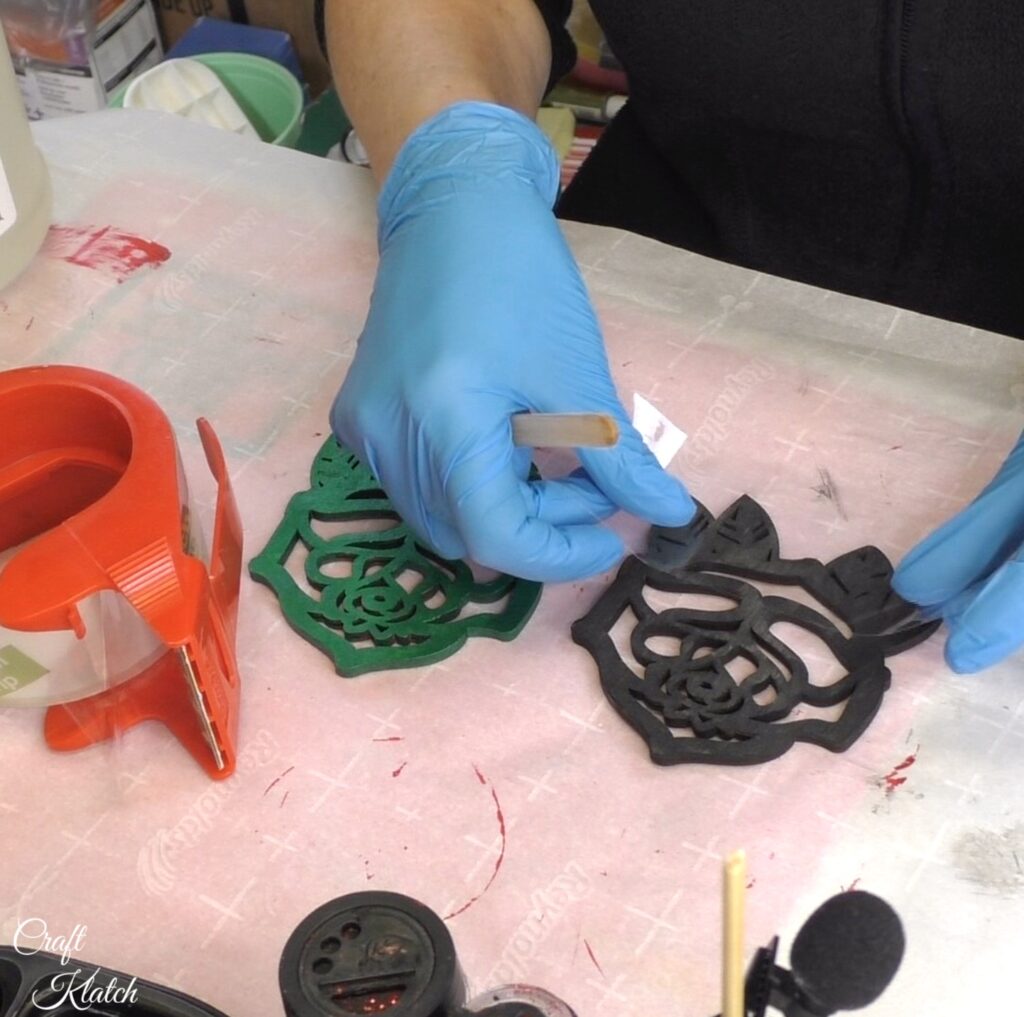
3. Use a stir stick to burnish it. You want to make sure the tape has made strong contact with the wood, so no resin seeps through.
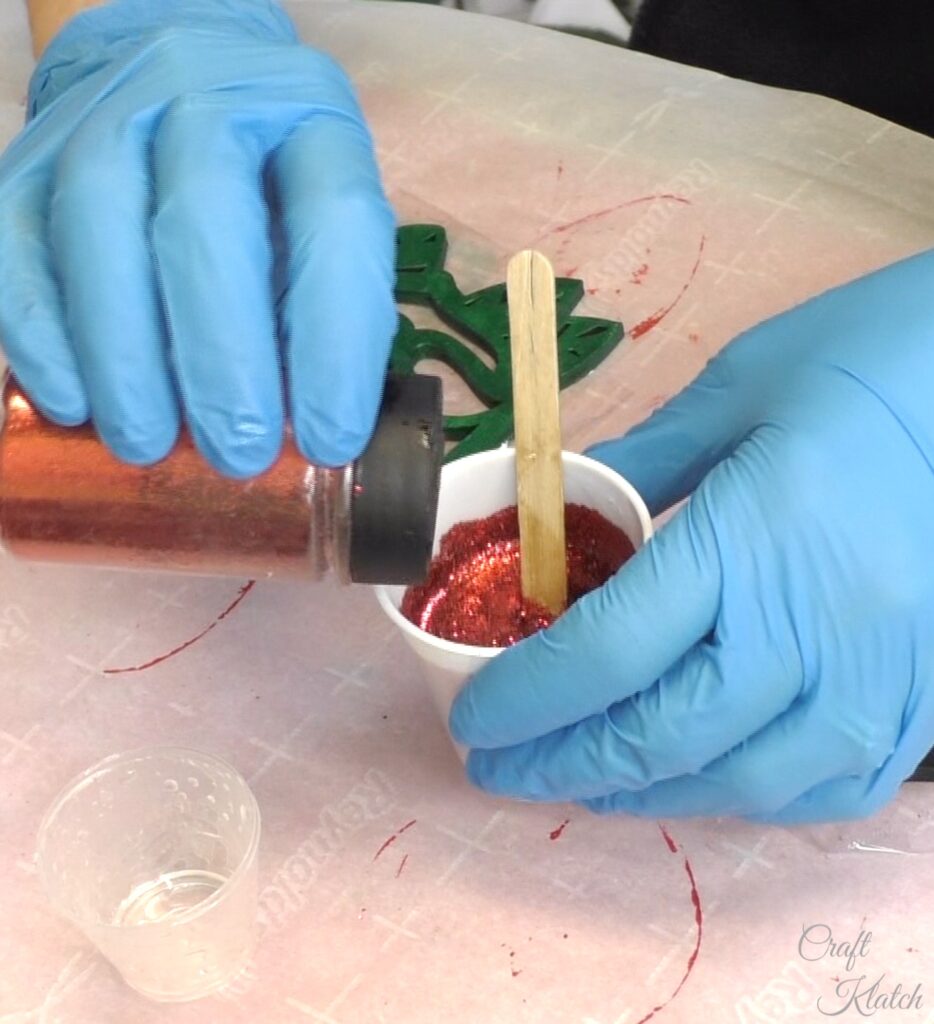
4. Mix two ounces of resin (which was WAY more than needed). Mix in the fine glitter.
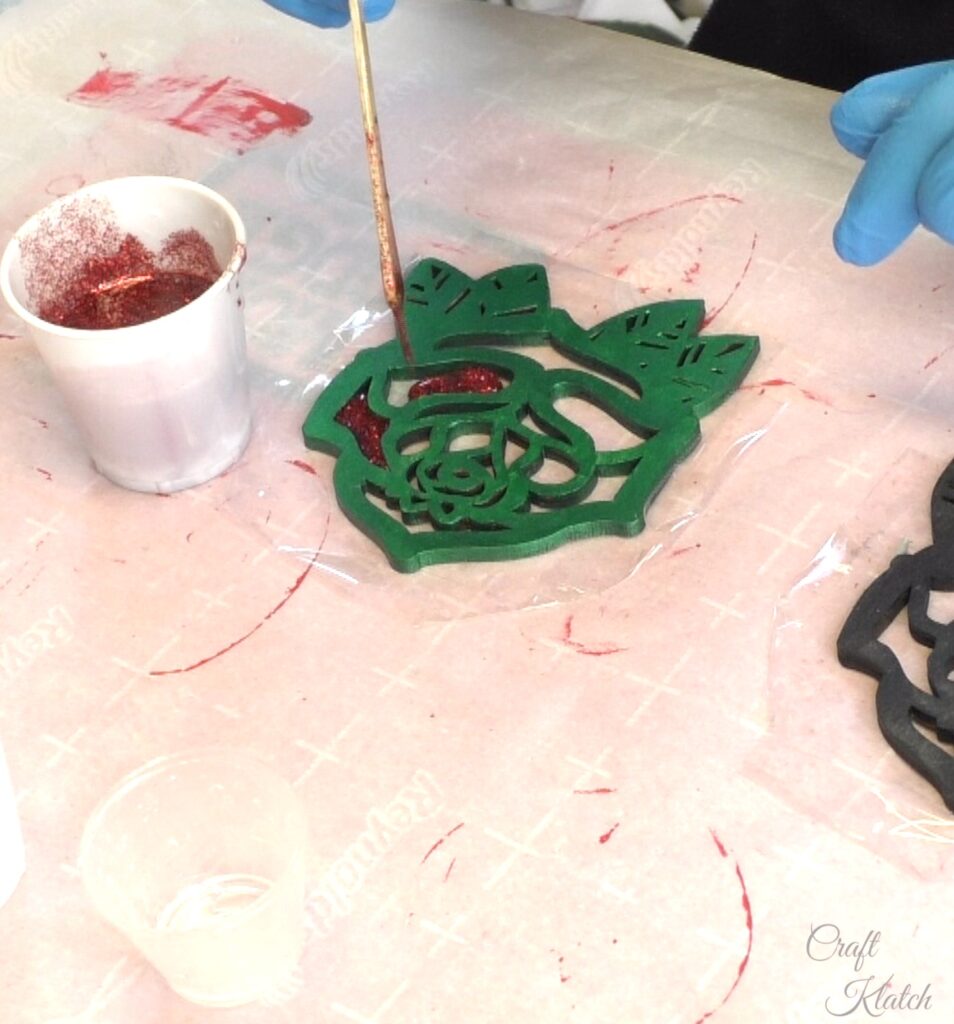
5. Drip the resin into the open areas of the roses.
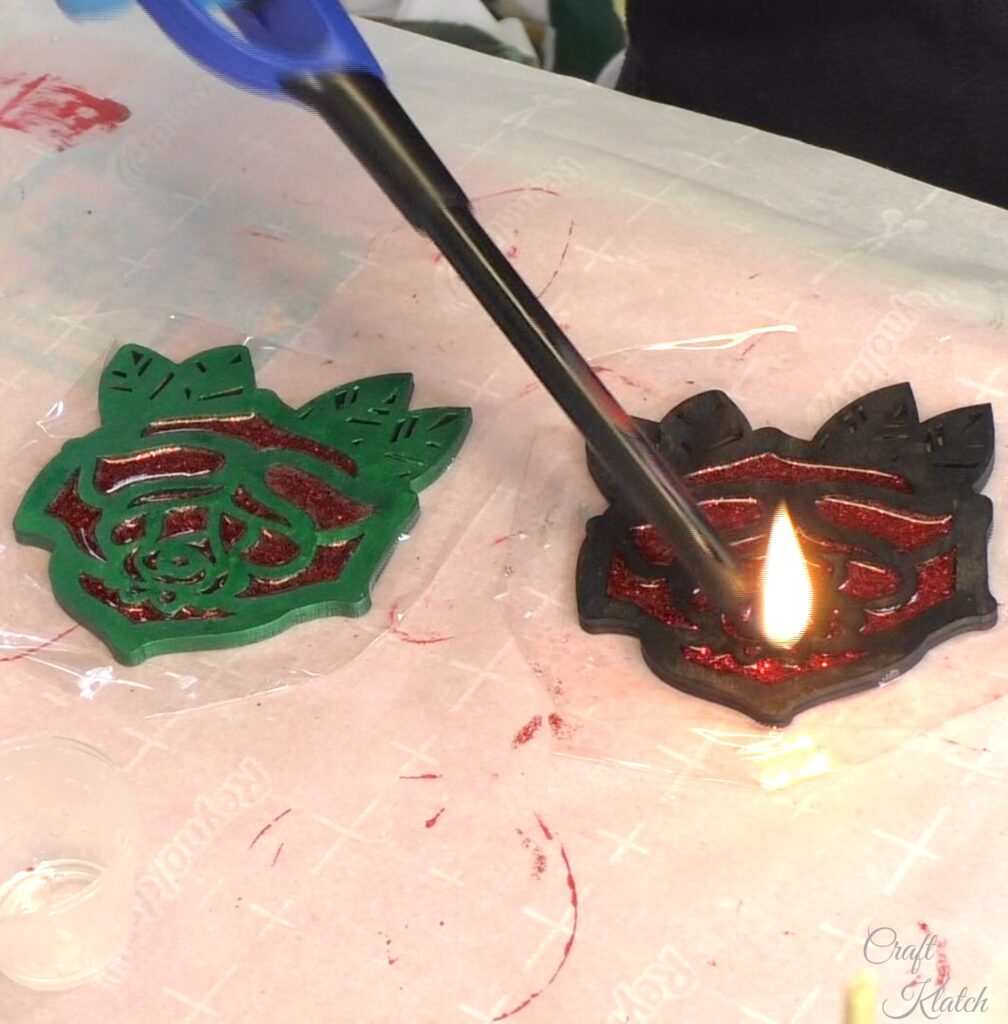
6. Use a lighter to pop any bubbles. Remember the roses are made of wood, so you don’t want to linger too long in one place. Go quickly over the resin areas and let them cure for a minimum of 12 hours.
7. Once cured, remove the tape.
That’s it! Now you have beautiful rose coasters!
Rose Coasters and Decor
If you don’t have time to make these rose coasters, but like the idea of them, here are some alternatives:

Thanks for stopping by! Remember: Life’s too short not to shimmer, so grab your glue gun and your glitter!™ Stay safe!
Mona