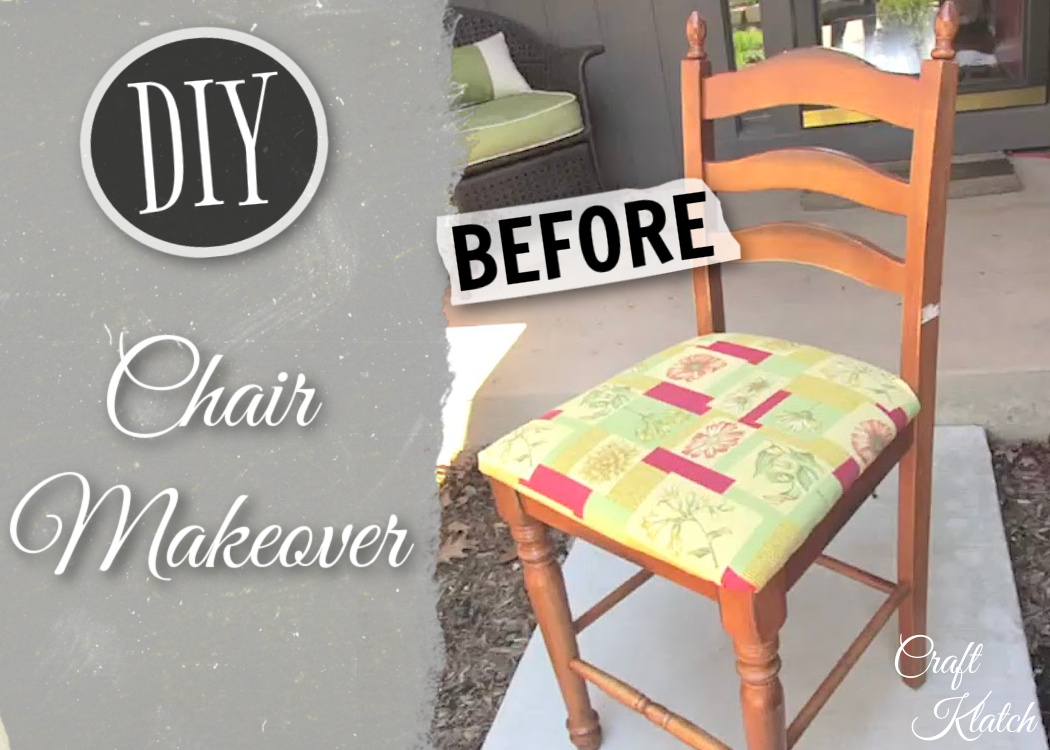
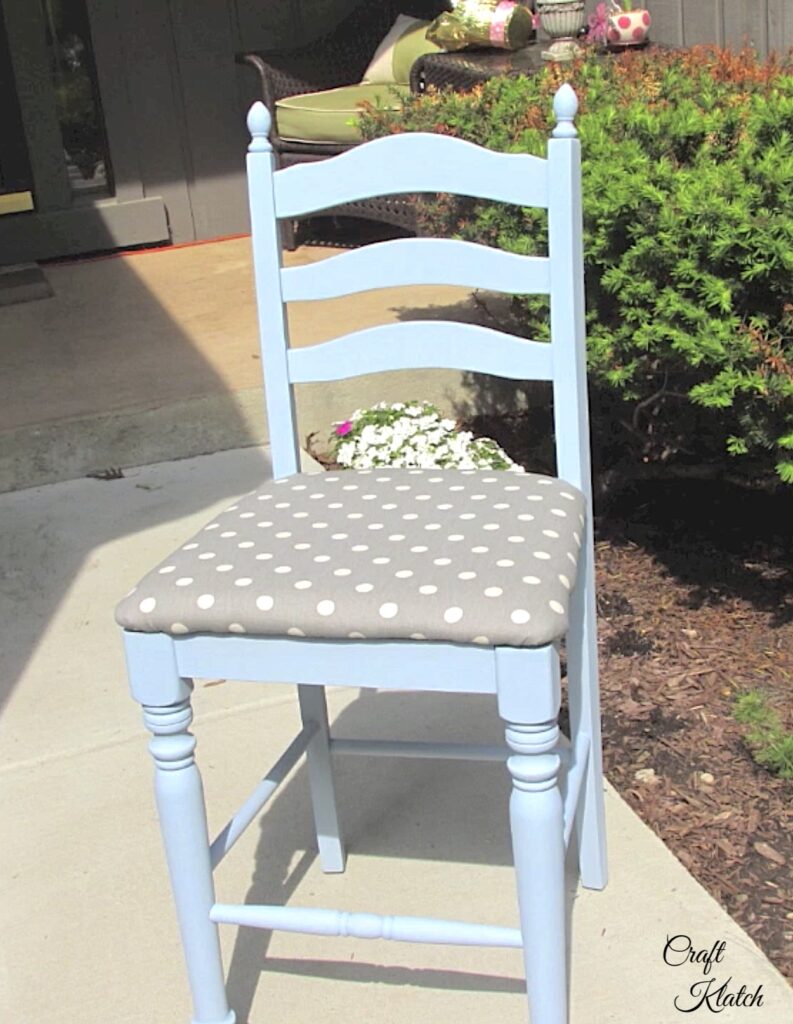
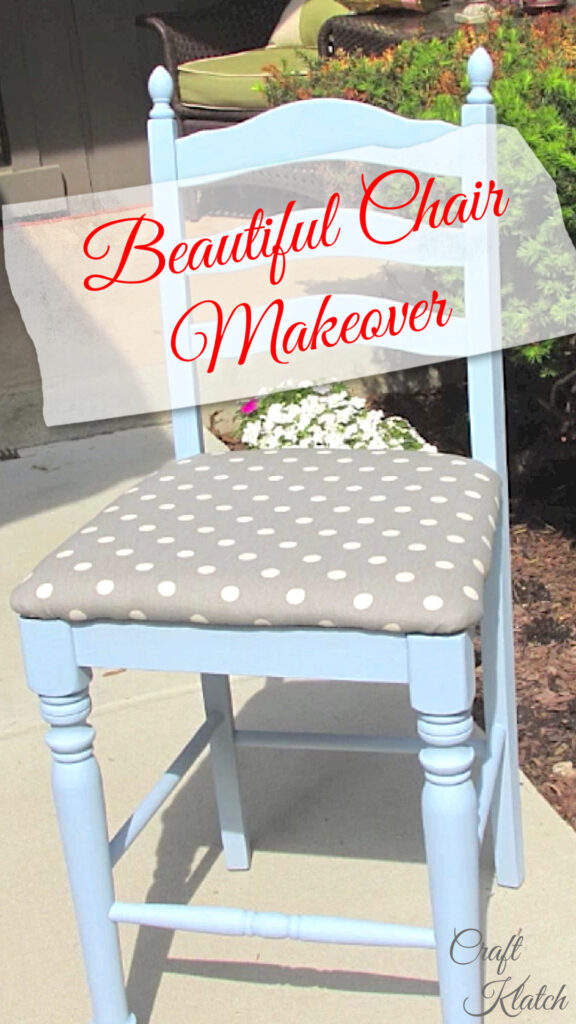
It makes me crazy when I see perfectly good stuff in the trash! This time, I picked up a chair that had been tossed to the curb.
It was spring clean-up in my sister’s neighborhood when I spotted this beauty! Some of the joints were loose and it was dated. My husband added some screws and glue, now it’s nice and sturdy.
It was a little uneven, but that was easily fixed by sticking on a scratchpad.
Now, it’s cute as can be and is a great accent seating in my kitchen!
In case you missed Garbage to Gorgeous #1, you can find it HERE!
Supplies for the Chair Makeover
*This blog uses affiliate links. As an Amazon Associate I earn from qualifying purchases, at no additional cost to you.
Chair Makeover Video
If you want to see exactly how I did the chair makeover, you can see it here.
Chair Makeover Directions
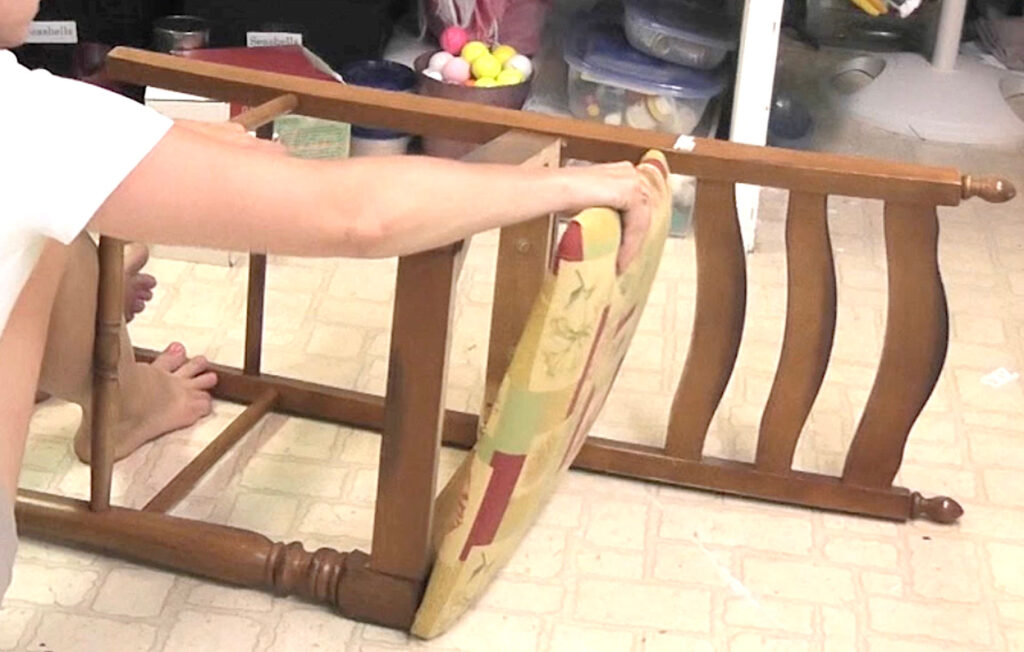
Step 1
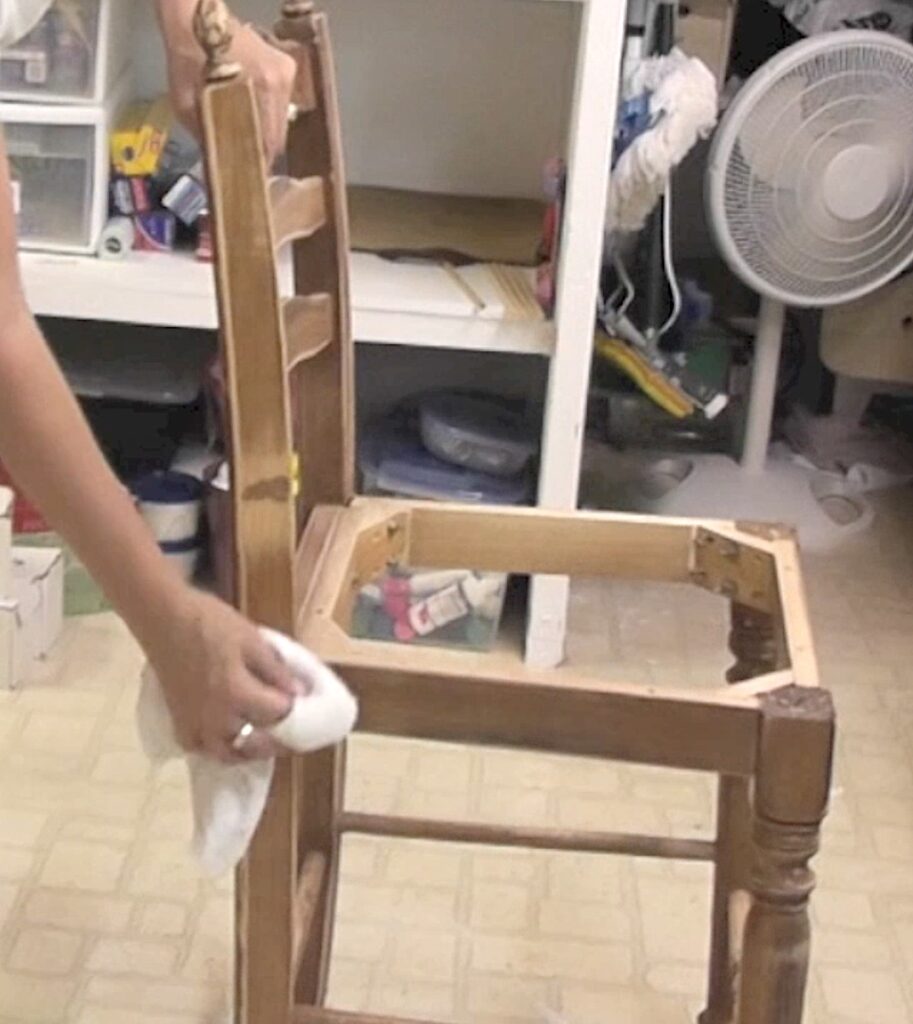
Clean your chair and remove the cushion, fabric, and foam.
Step 2
You can use sandpaper to rough up the finish. Some paints don’t require it so be sure to read the label.
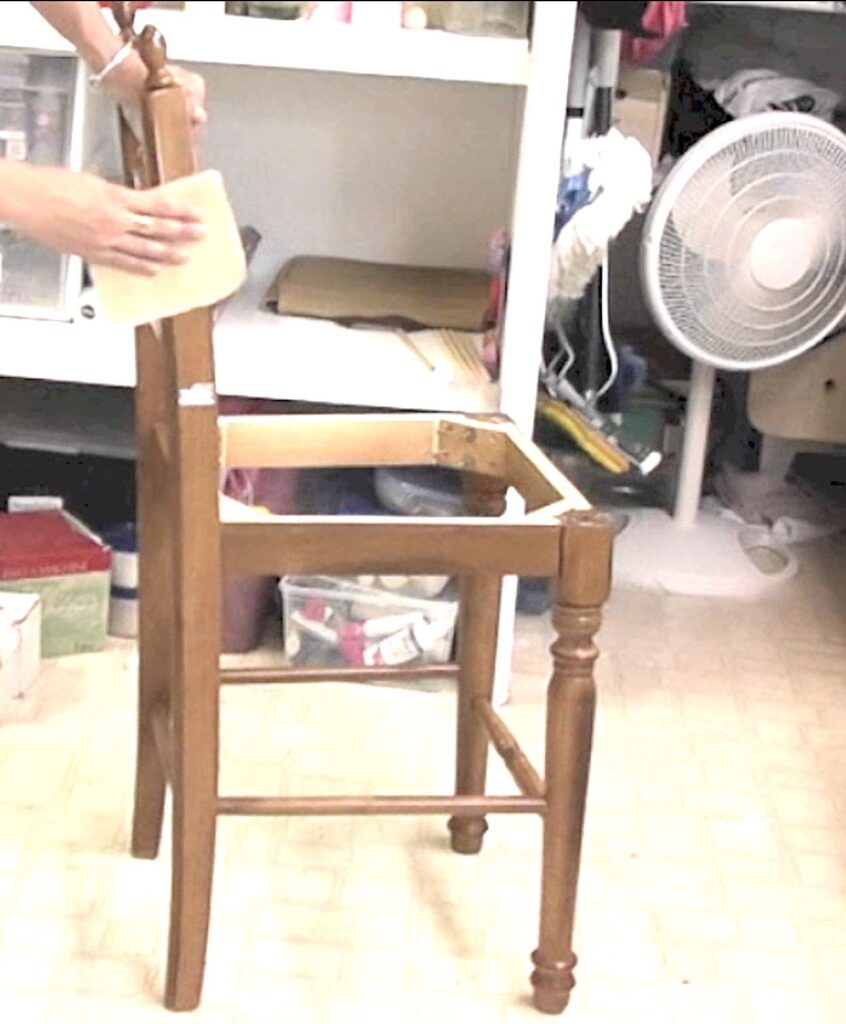
Step 3
With a damp cloth, wipe the dust and dirt off.
Step 4
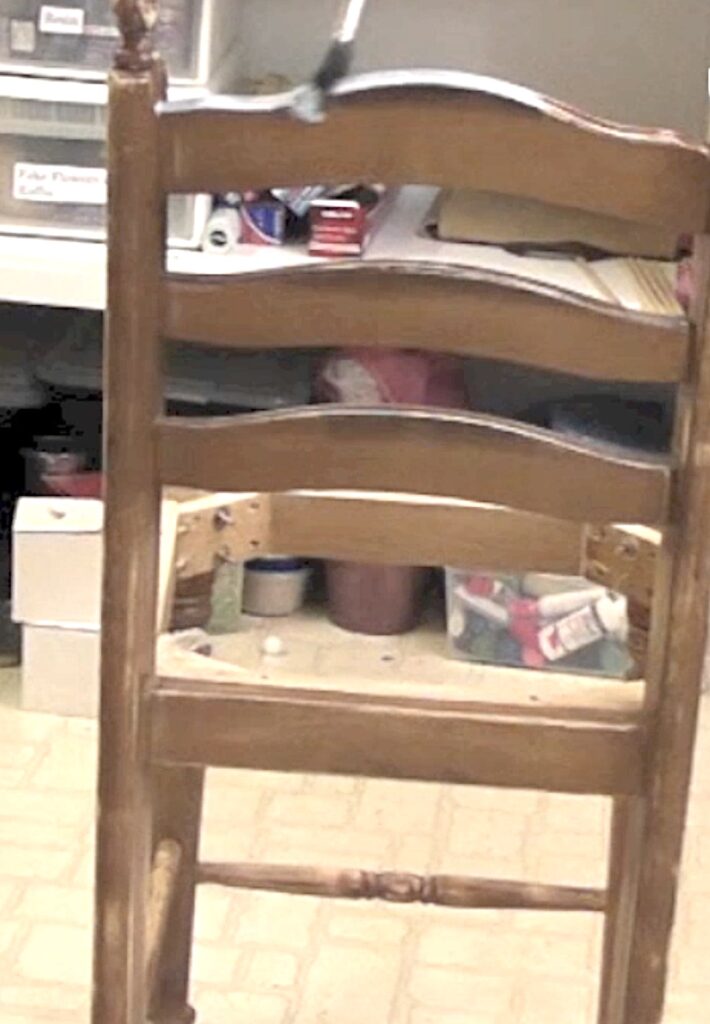
Paint the chair with chalk paint. It will take two coats.
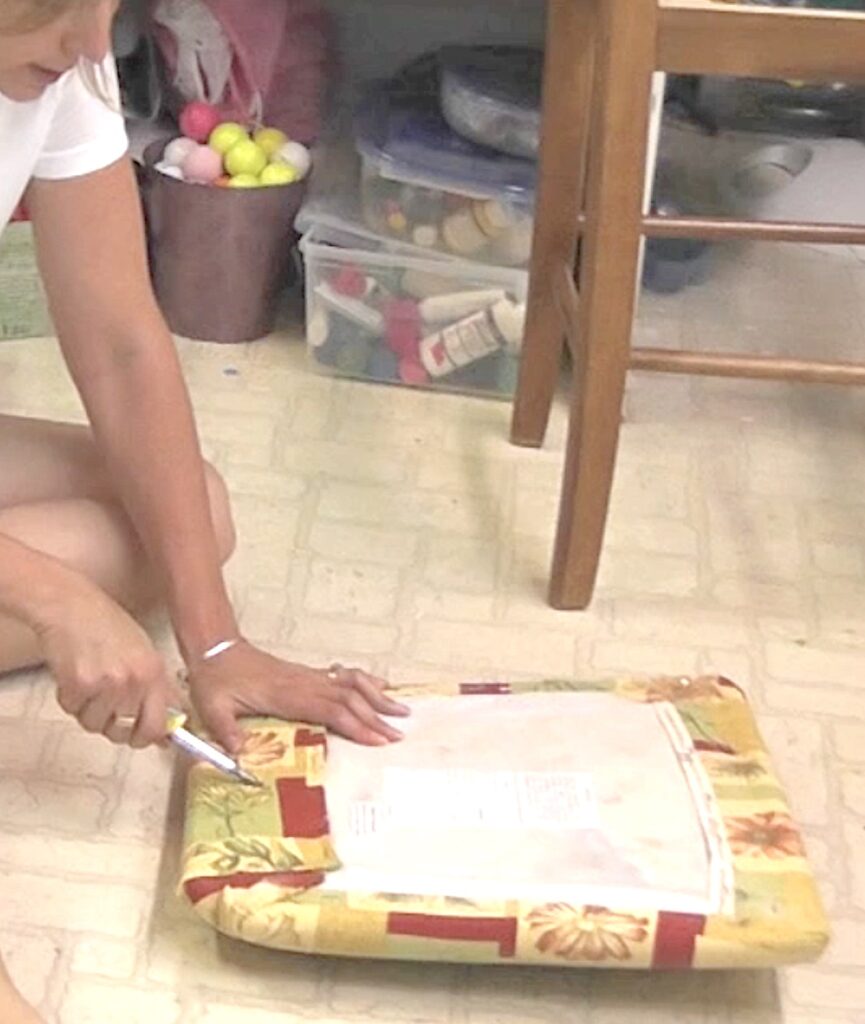
Step 5
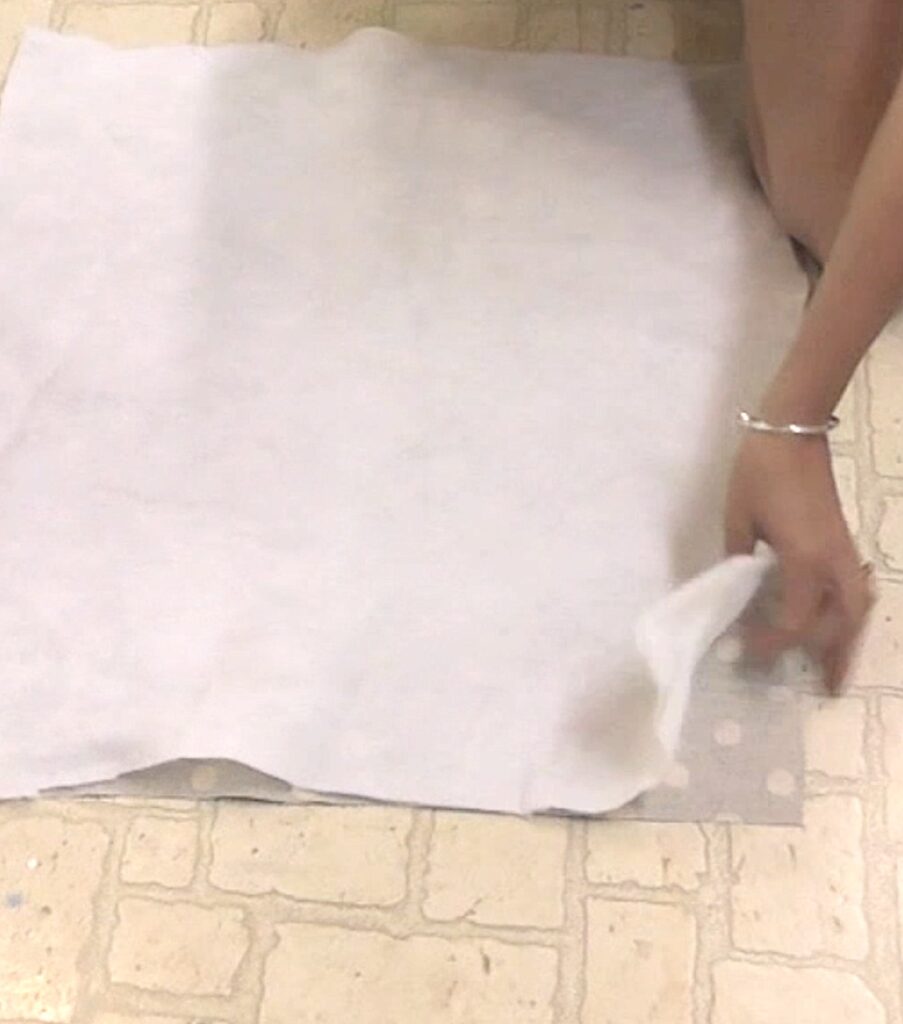
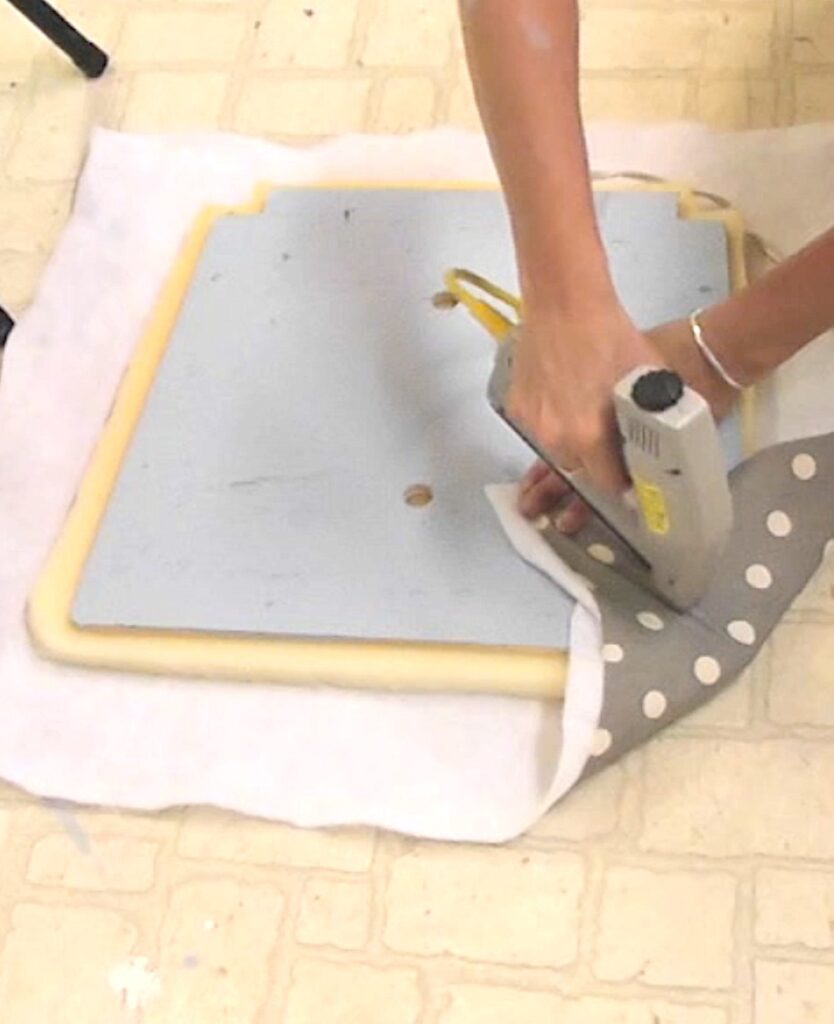
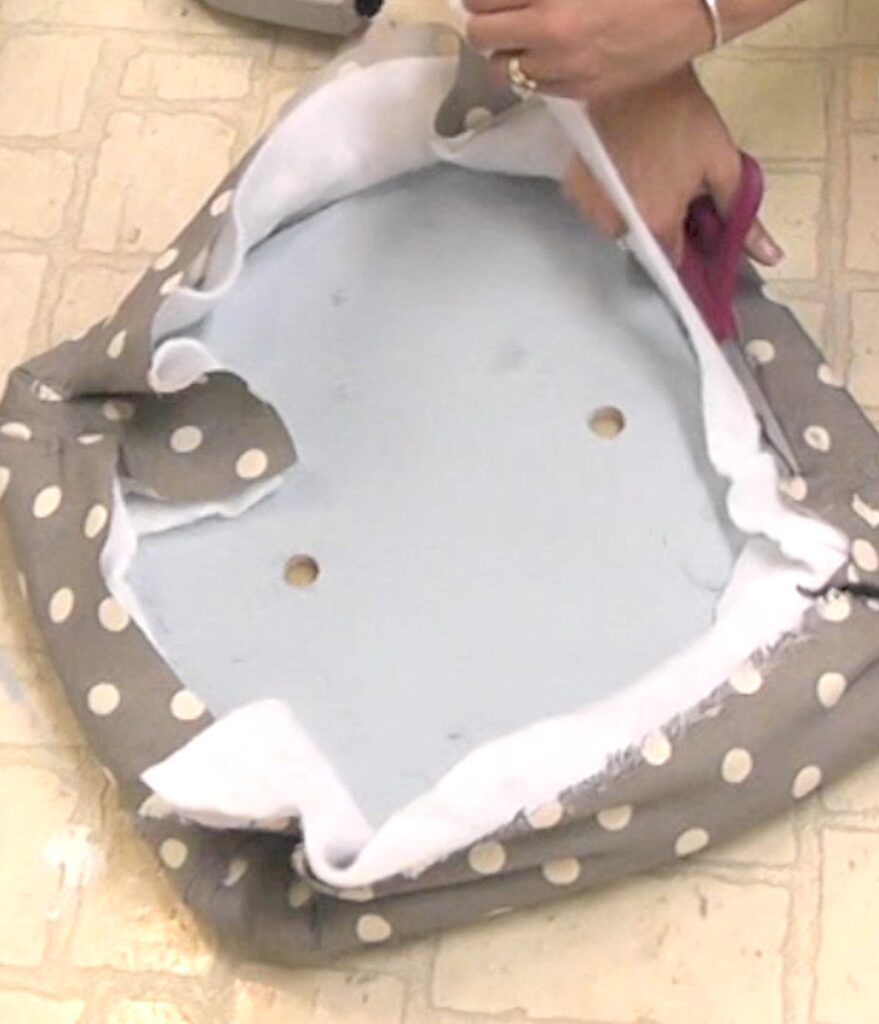
Cut the foam, fabric, and quilt batting to fit the seat that you removed.
Step 6
Staple the corners on first. You can see the technique in the video above.
Step 7
Then, I staple the sides and cut off the excess fabric.
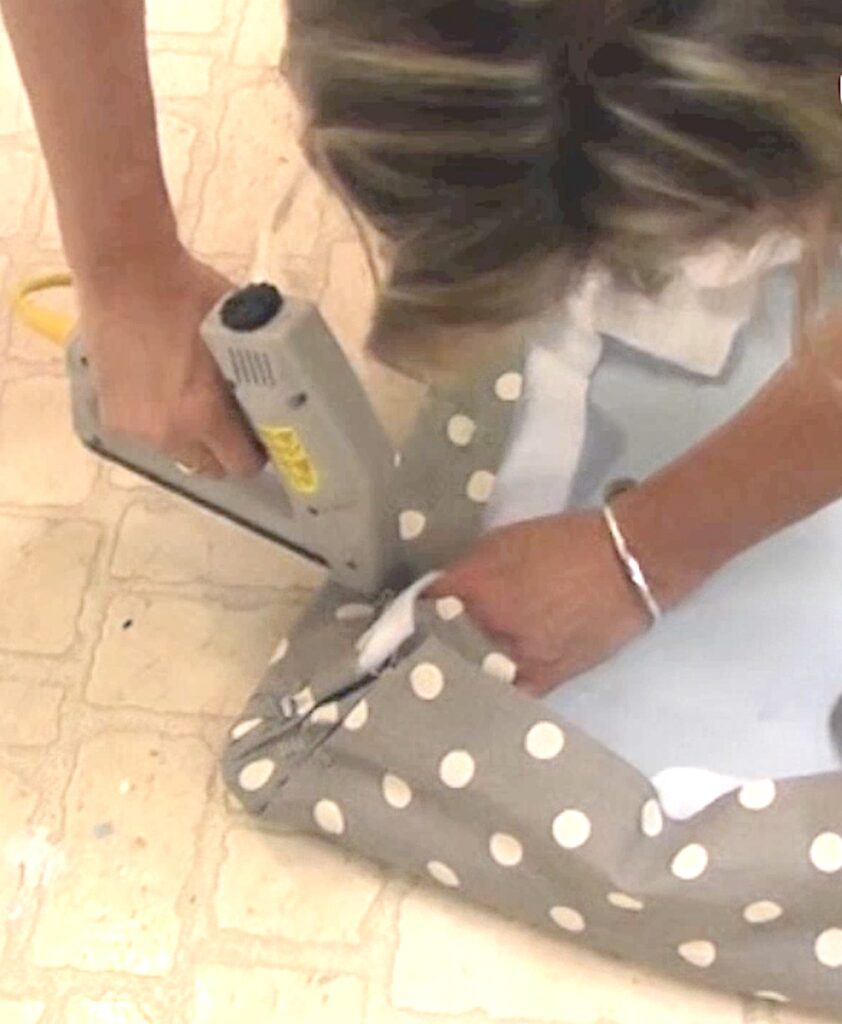
Tip: Use a hammer to make sure all the staples went all the way in. This is especially helpful when the fabric is thick.
Step 8
Once the paint is dry and the cushion is recovered reattach the cushion.
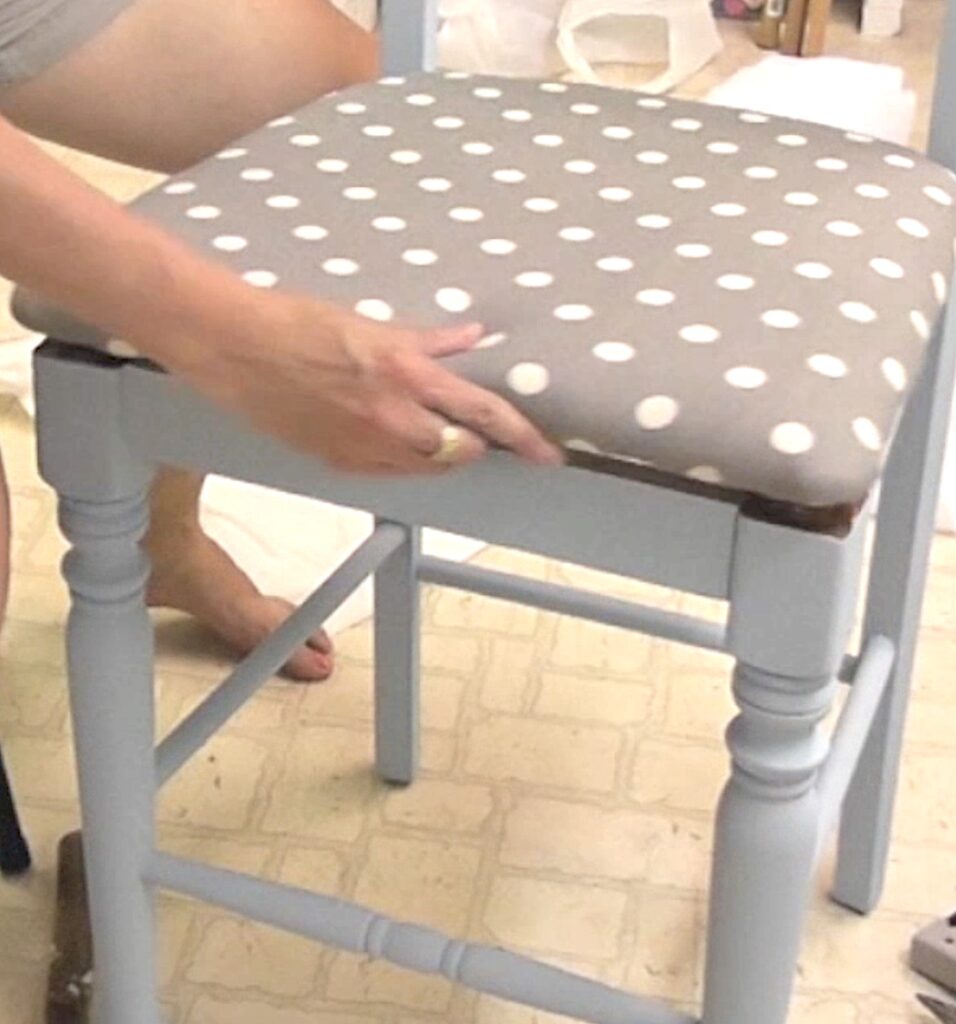
Tip: When you remove the screws from the seat, make sure you put the screws in a safe place, so you have them when it’s time to reattach the cushion.
That’s it! This chair was a piece of garbage that would have ended up in a landfill and instead, it’s a fabulous accent chair!
More Furniture Makeovers
Here are a few other Garbage to Gorgeous® projects:
- Chair Makeover DIY: Garbage to Gorgeous® #9
- Glam Table Makeover: Garbage to Gorgeous® #17
- Gumball Lamp: Garbage to Gorgeous® #24
- Whiskey Sippin’ Chair ~ Rocking Chair MakeoverGarbage to Gorgeous® #13
- Dining Room Makeover – Craigslist Freebies DIY!Garbage to Gorgeous® #10
If You Need an Accent Chair
If you love furniture makeovers, but maybe you just don’t have the time to jump in on a project, here are some beautiful accent chairs that might work with your home decor!

Thanks for stopping by! Keep an eye out on garbage day! You never know what you might find!
Remember: Life’s too short not to shimmer, so grab your glue gun and your glitter!™ Stay safe!
Mona
Be sureto PIN IT for later!
I love this! I would love it if you joined and contribute your awesome posts at my link party at City of Creative Dreams , starts on Fridays 😀 Hope to see you there at City of Creative Dreams Link Party.
This is awesome! Your video was great and super easy to follow! Thank you for posting this!
Gorgeous! That is a fun way of bringing back refuse. We ought to minimize waste as much as possible. Should we begin to dispose them, it should at least be in a way that won't be such a hindrance to other people and our surroundings. That is not only a great start, it's also among a set of alternatives. People should contemplate that more often. Great move on your part!
Aaron Walters @ Green Clean Water and Waste
Article is fine but I can’t able to see the images present in this post. Will you resolve this issue?