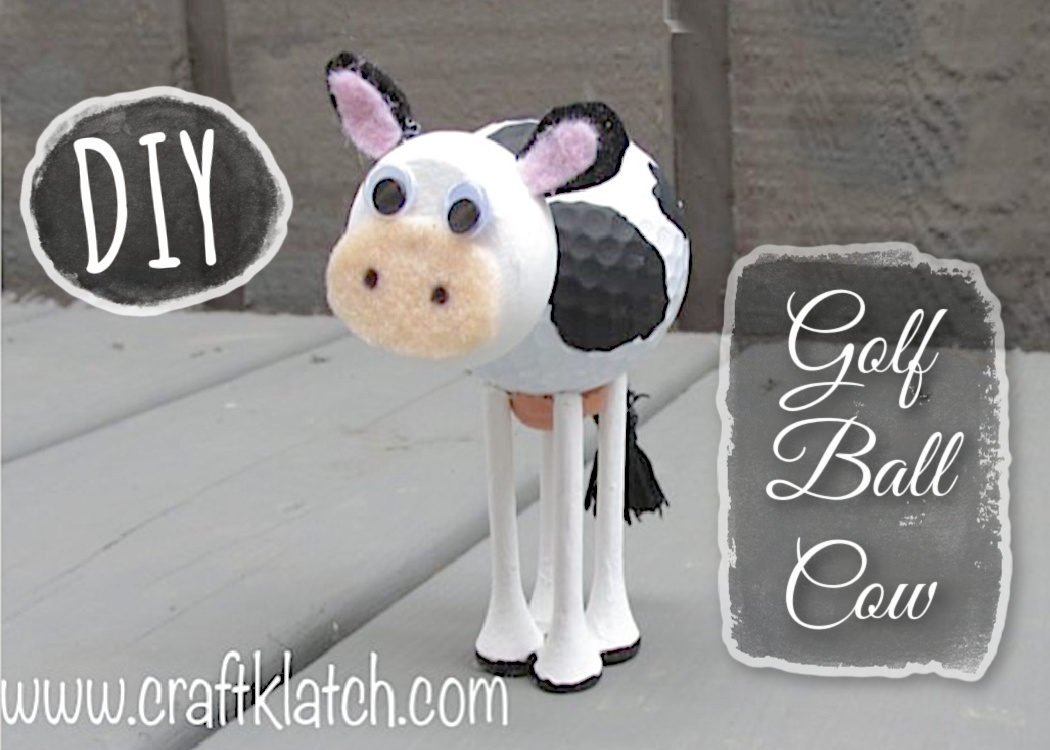
Looking for a little barnyard fun? Check out this cow craft made out of a recycled golf ball! Full video tutorial and written directions!
I’m always trying to think of things to make out of golf balls. I have made several golf ball projects in the past and I was recently asked by one of my YouTube subscribers to make a cow. She has made the other animals with her five-year-old brother but said he would really like a cow.
I’m on it!
Supplies to Make the Cow Golf Ball
*This blog uses affiliate links. As an Amazon Associate I earn from qualifying purchases, at no additional cost to you.
- Golf ball
- White acrylic paint
- Black acrylic paint
- Flesh color acrylic paint
- Flesh-colored felt – if you can’t find flesh – pink or white will work too!
- Black felt
- Pink felt
- Two googly eyes
- Permanent marker
- White felt
- Black embroidery floss
- Four golf tees
- One unfinished wooden wheel
- One small wooden cap
- Glue (hot glue, or other)
Golf Ball Cow Video Tutorial
Other Fun Critters I’ve Made From Golf Balls
Directions to Make the Golf Ball Cow
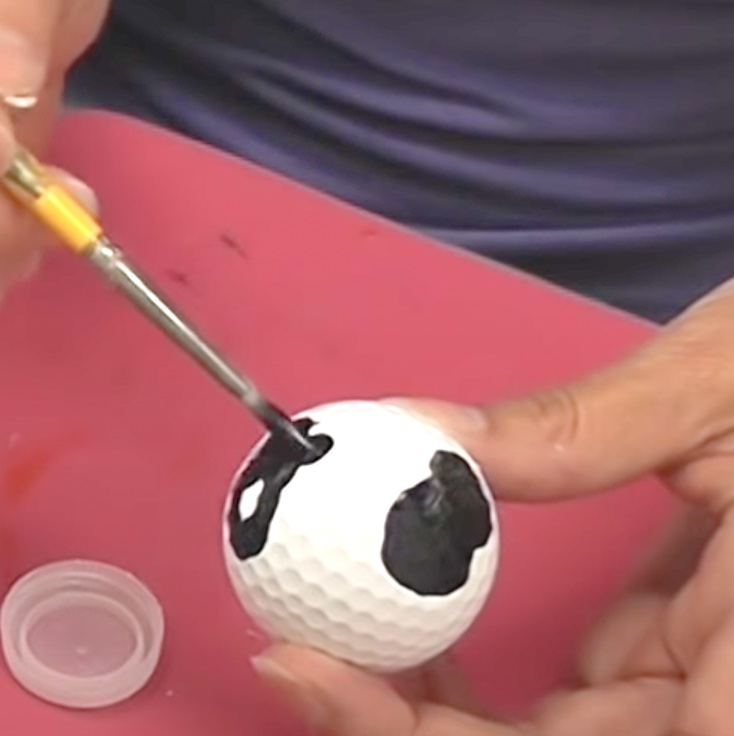
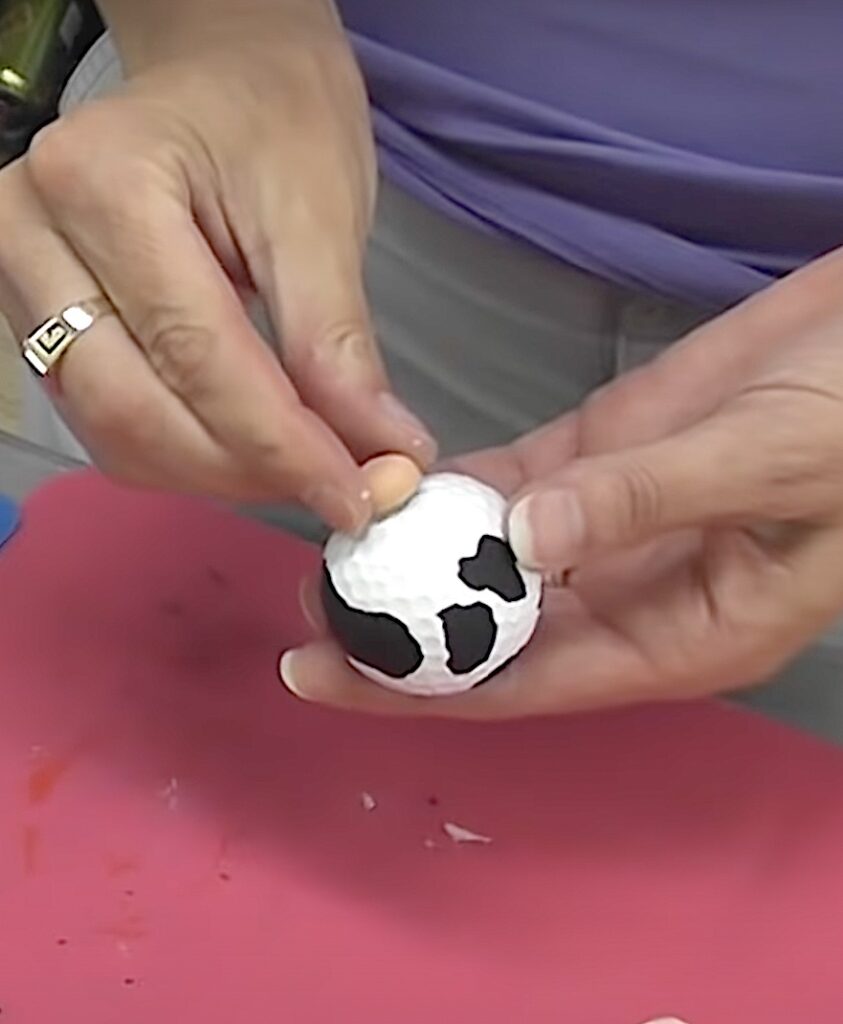
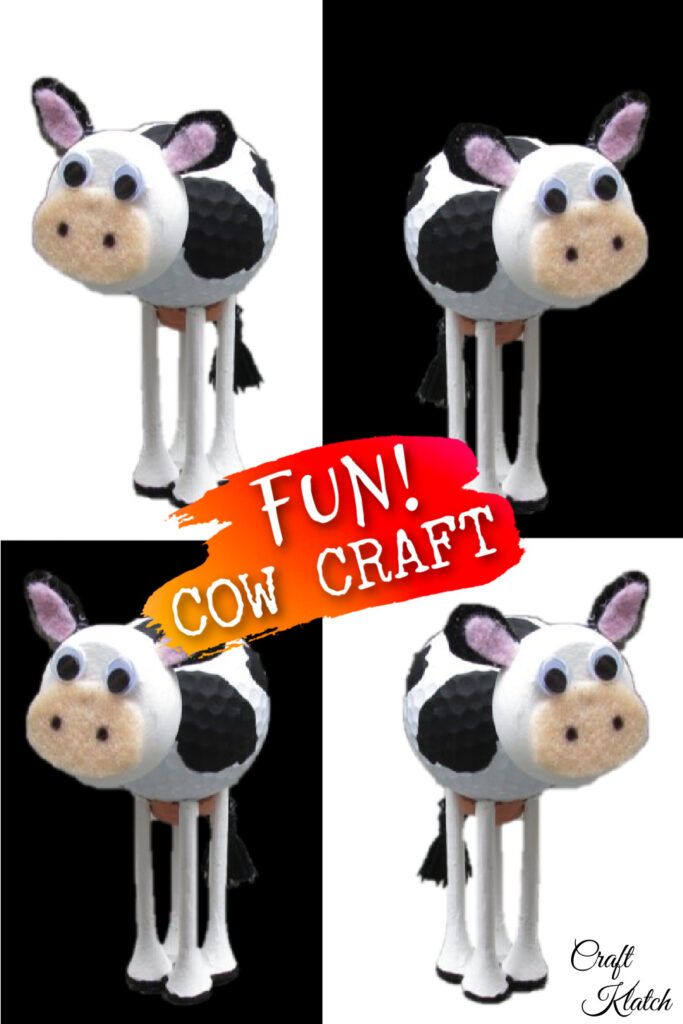
1. Because we are starting with a white ball, all we need to do is strategically paint black spots over the writing. Make it look random. Allow it to dry. This will take two coats.
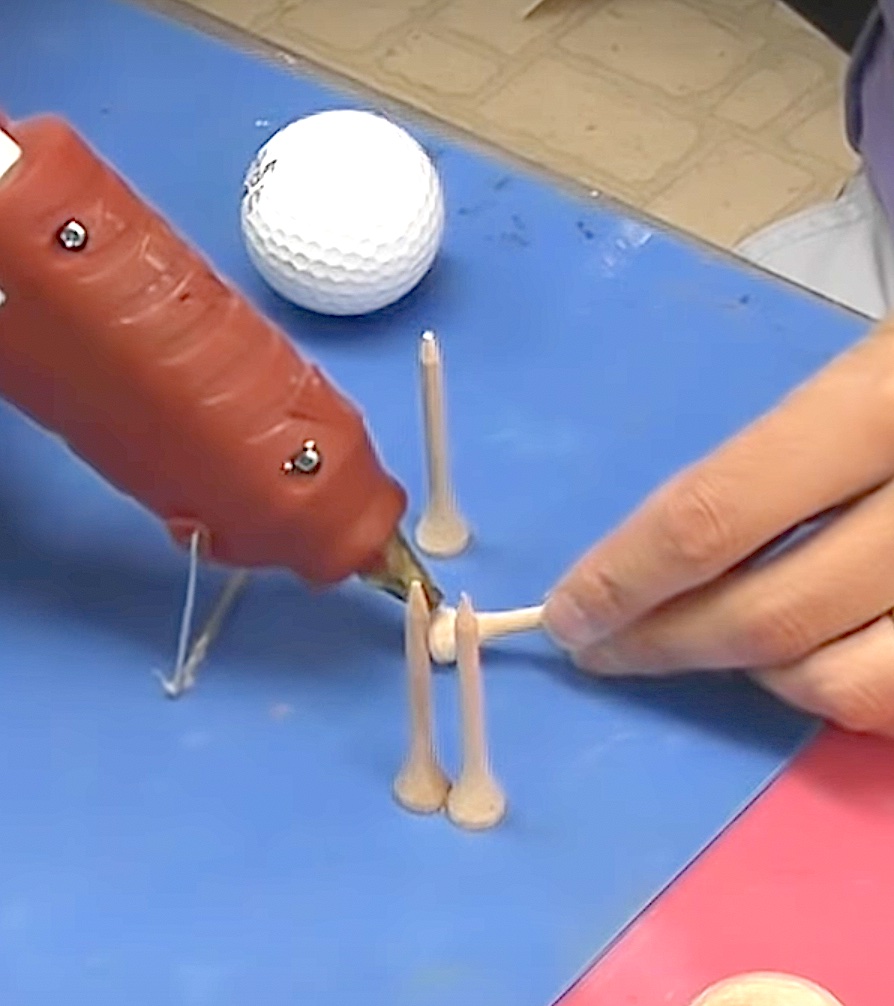
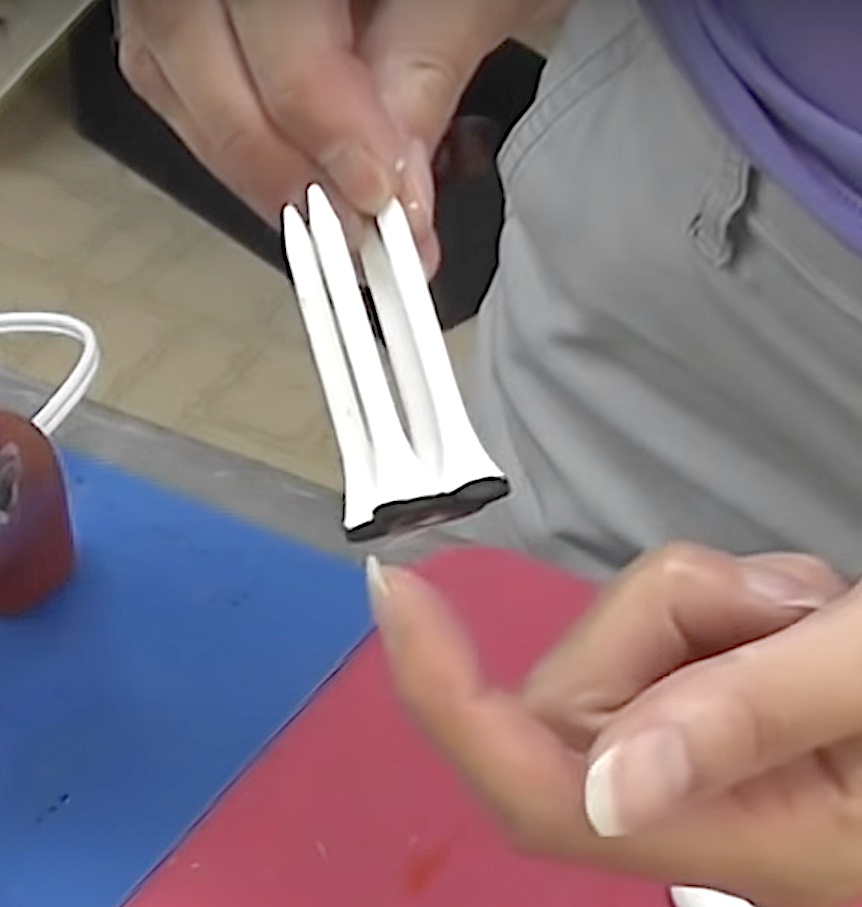
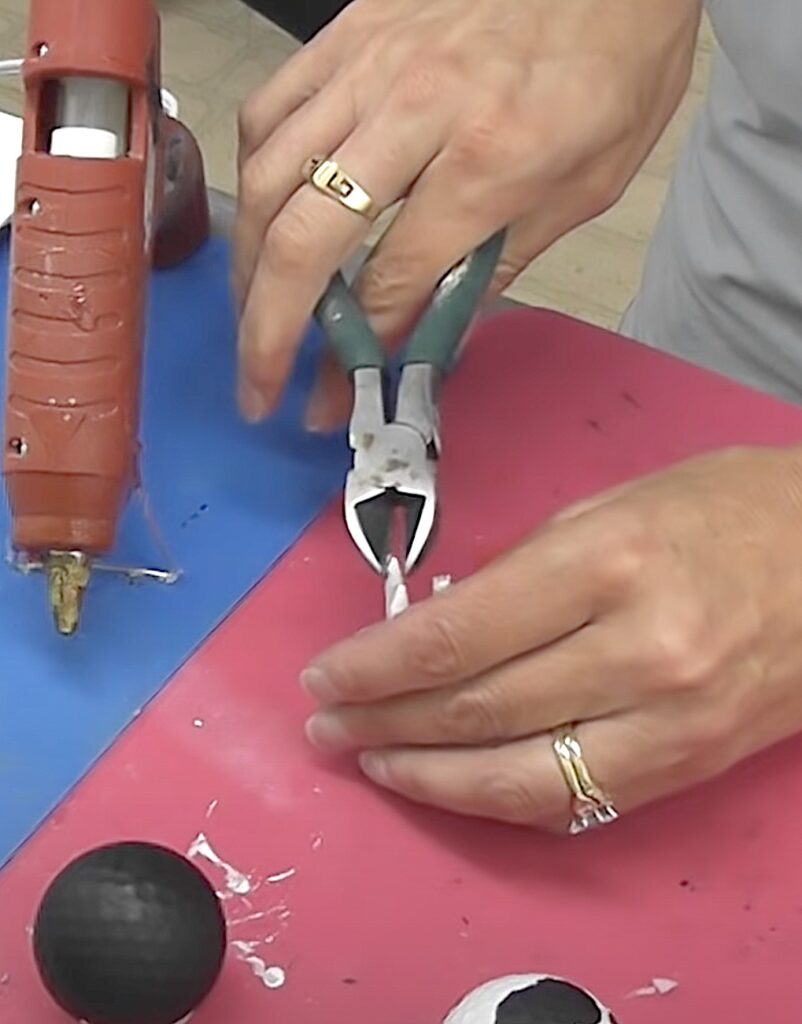
2. Glue the four golf tees together, with the round bottoms touching. This will make up the legs.
Paint golf tees white. This will also take two coats. Allow them to dry. Then, paint a small stripe of black at the bottom of each golf tee, to look like a hoof.
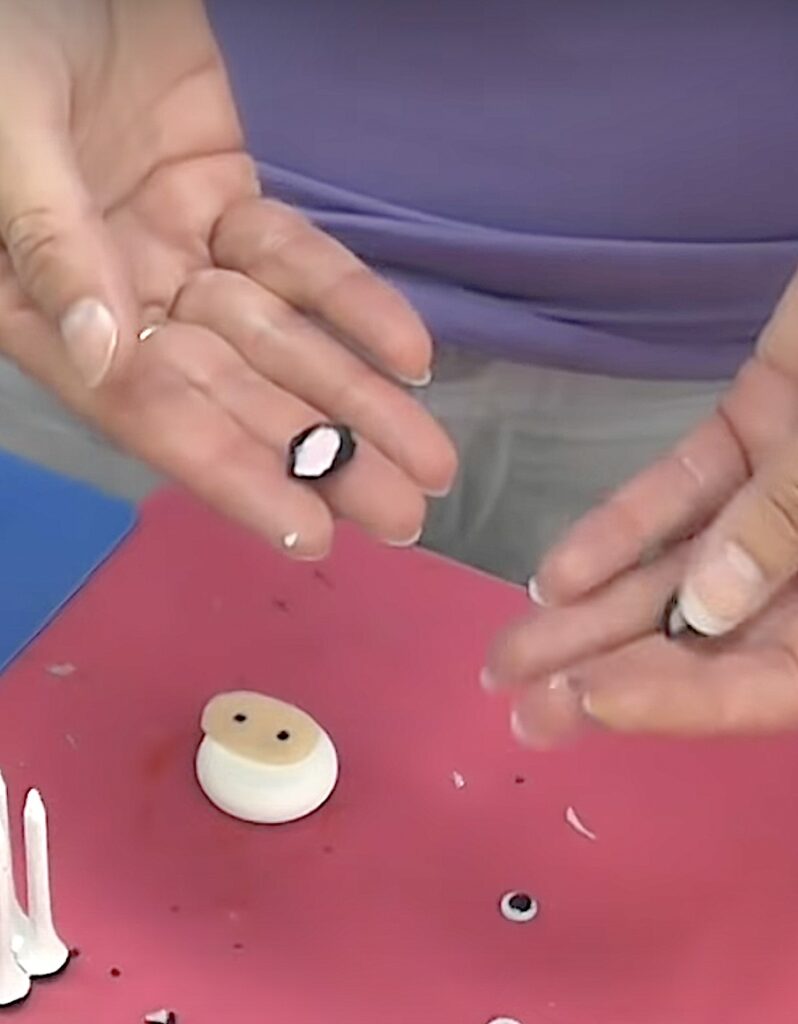
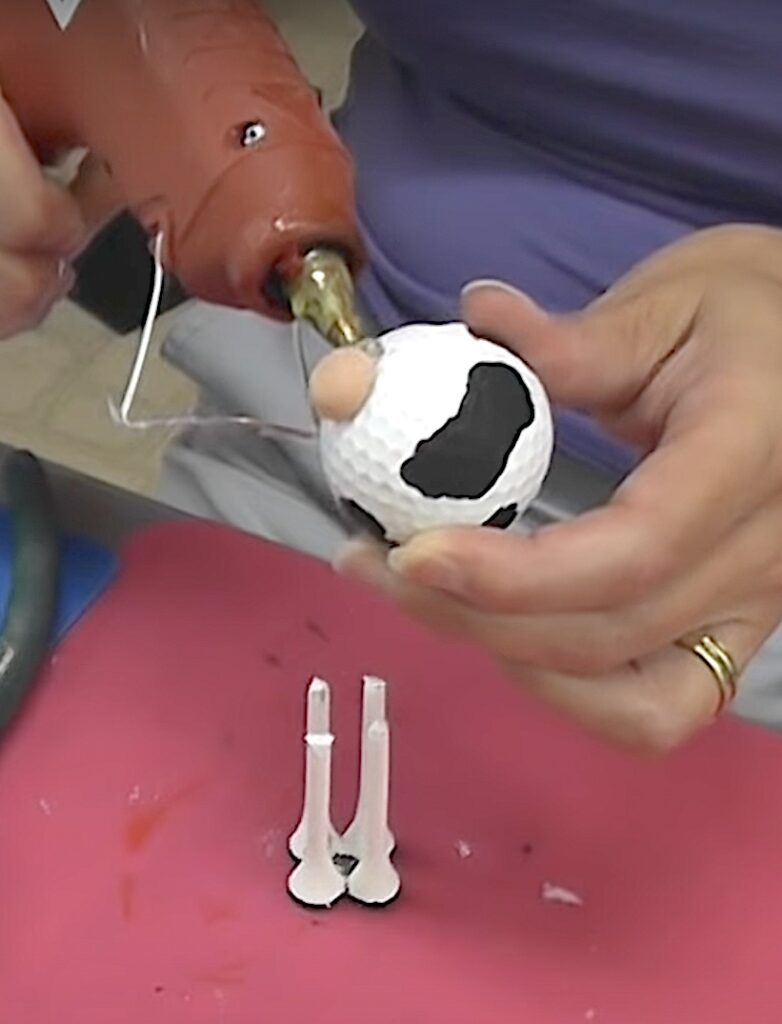
3. Paint the parts. Paint the wooden wheel white. Allow it to dry. Paint the wooden cap flesh. Allow it to dry.
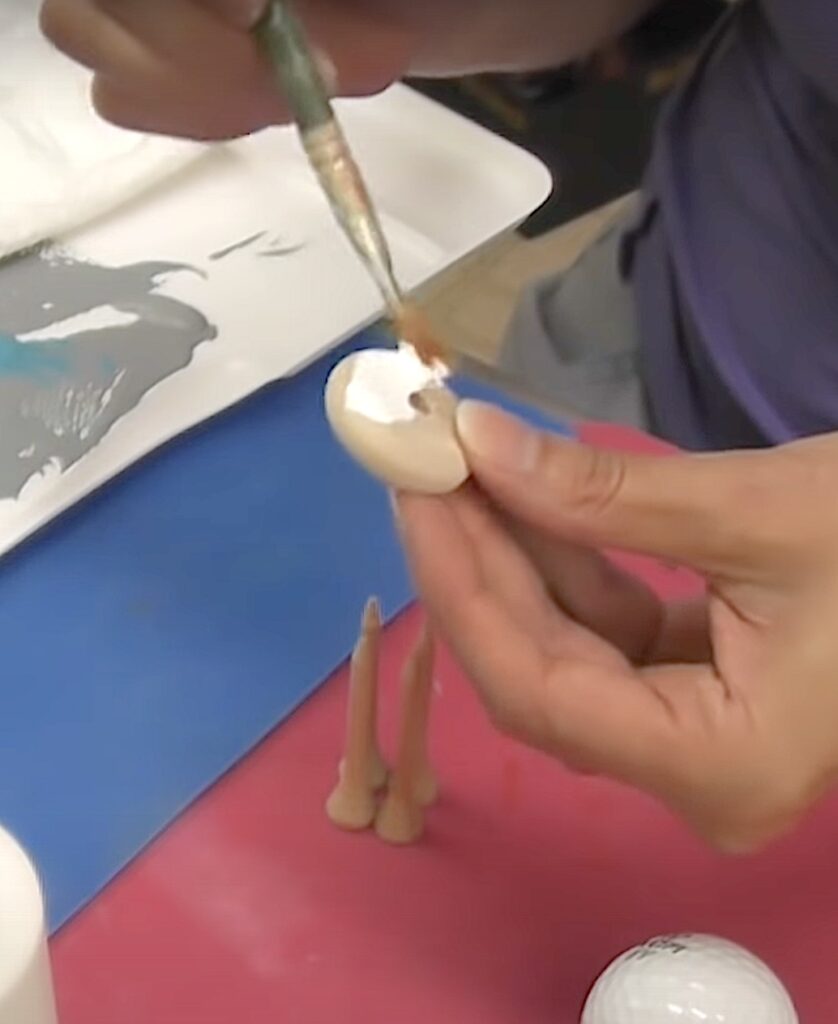
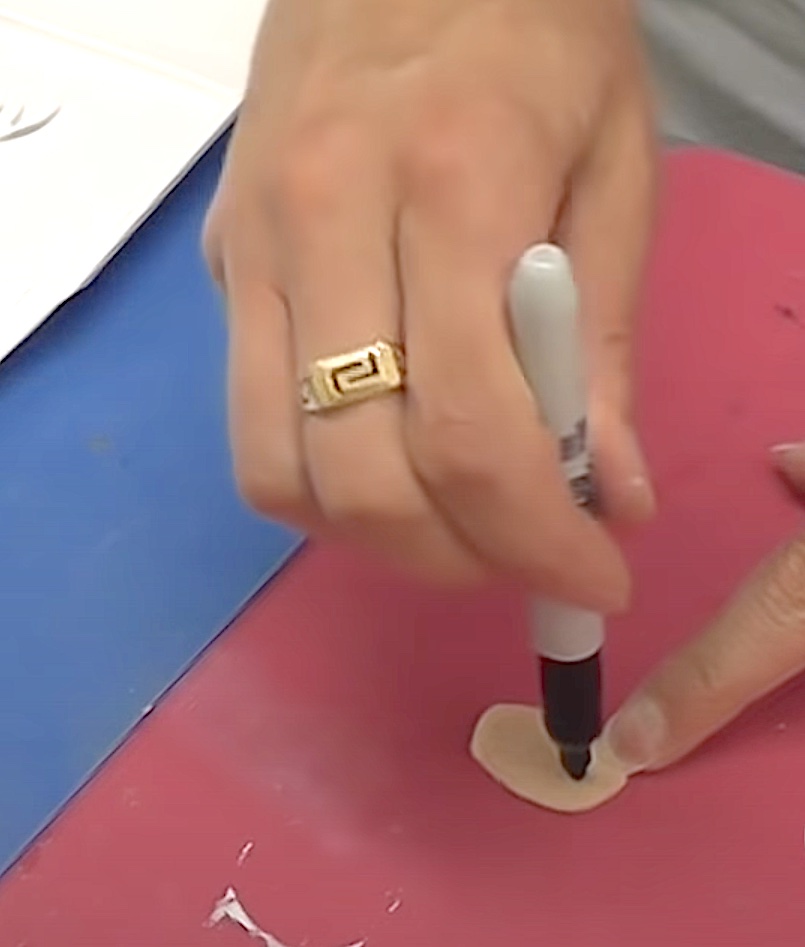
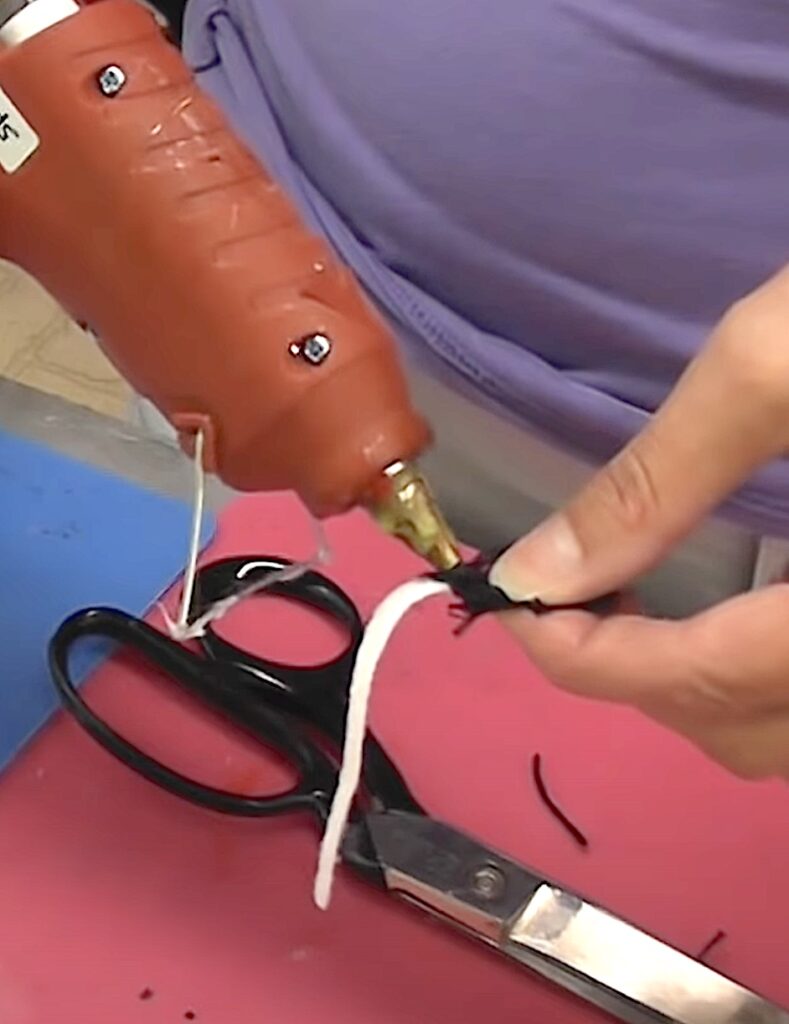
4. While everything is drying, cut an oval from the piece of flesh colored felt. This is for the snout. Take your marker and make two dots for nostrils. Glue the flesh oval onto the white wheel, for the snout.
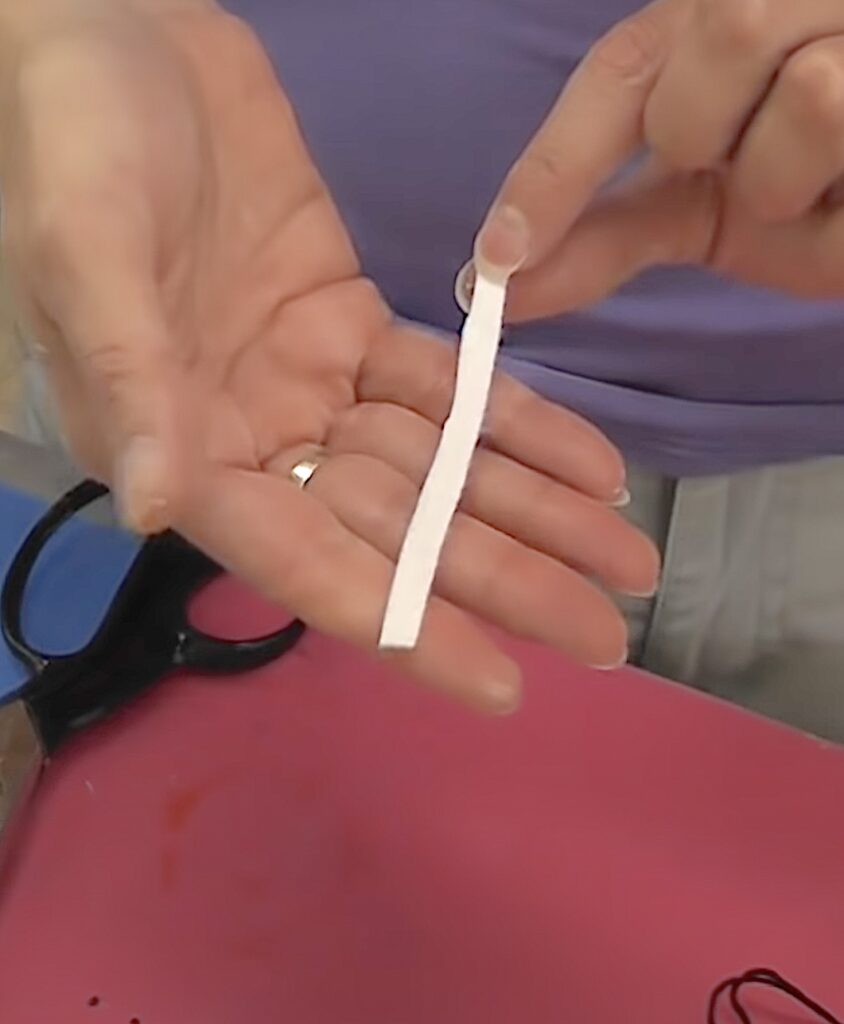
5. Now for the tail. Cut a thin strip of white felt.
Take embroidery floss and wrap it around one of your fingers, many times. Don’t make it too tight. Carefully slip it off your finger, but keeping the opening separated. Fold or squish it together and trim one end of the loop open.
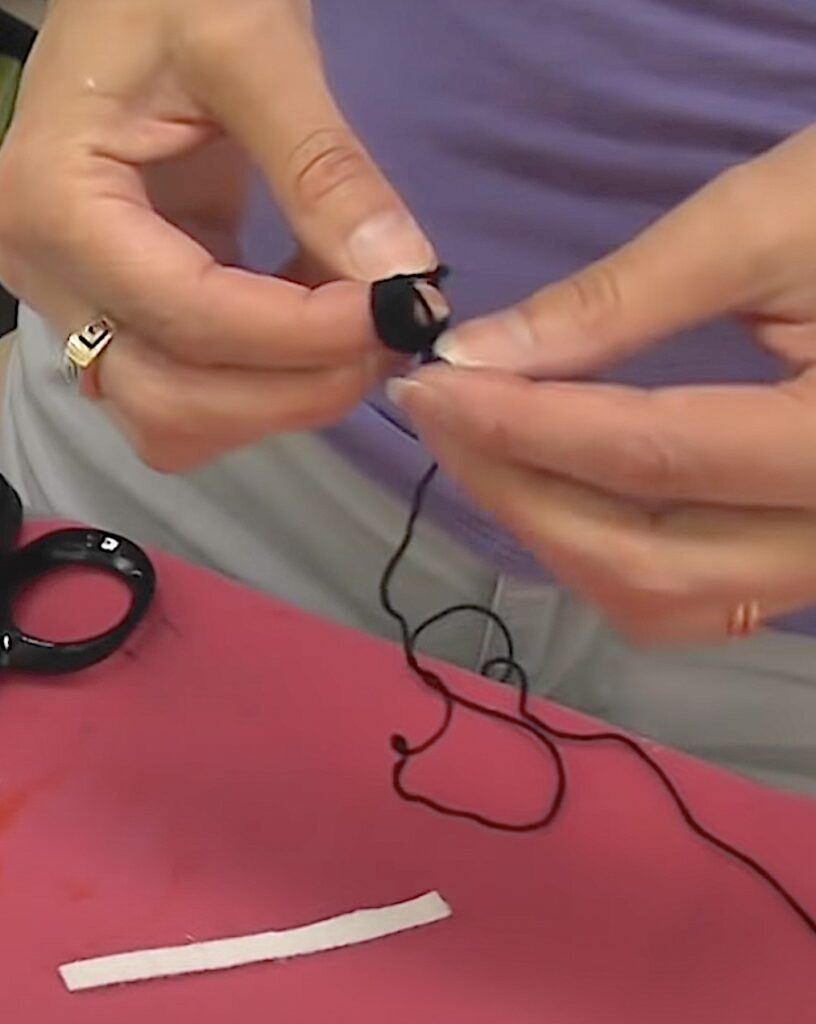
Glue to the end of the white felt strip. Repeat and glue to the other side of the same end.
6. Cut small teardrops out of the black felt and trim off the points. These are for the outer ears. Cut even smaller teardrops out of the pink felt and trim off the points. These are for the inner ears. Glue one pink on top of each of the blacks.
7. Glue the flesh colored cap to the bottom of the cow – this will be the udder.
8. Snip off the points of the golf tees and touch up with white paint, if needed.
9. Glue golf ball onto the tips of the golf tees, with the udder placed between the tees.
10. Start gluing! Glue on googly eyes. Glue on ears. And glue on the tail.
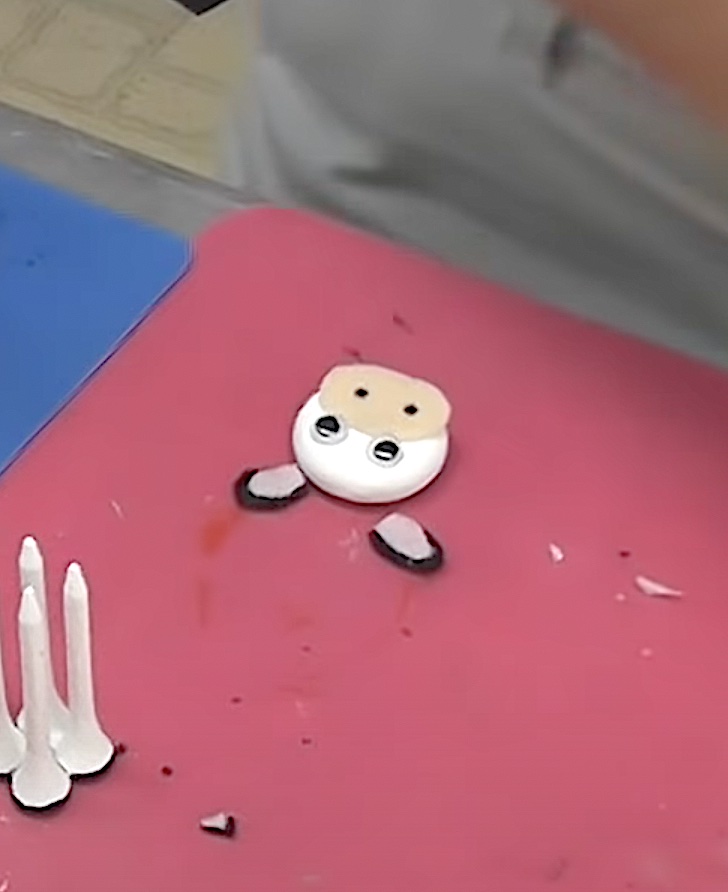
11. Glue the face to the cow body.
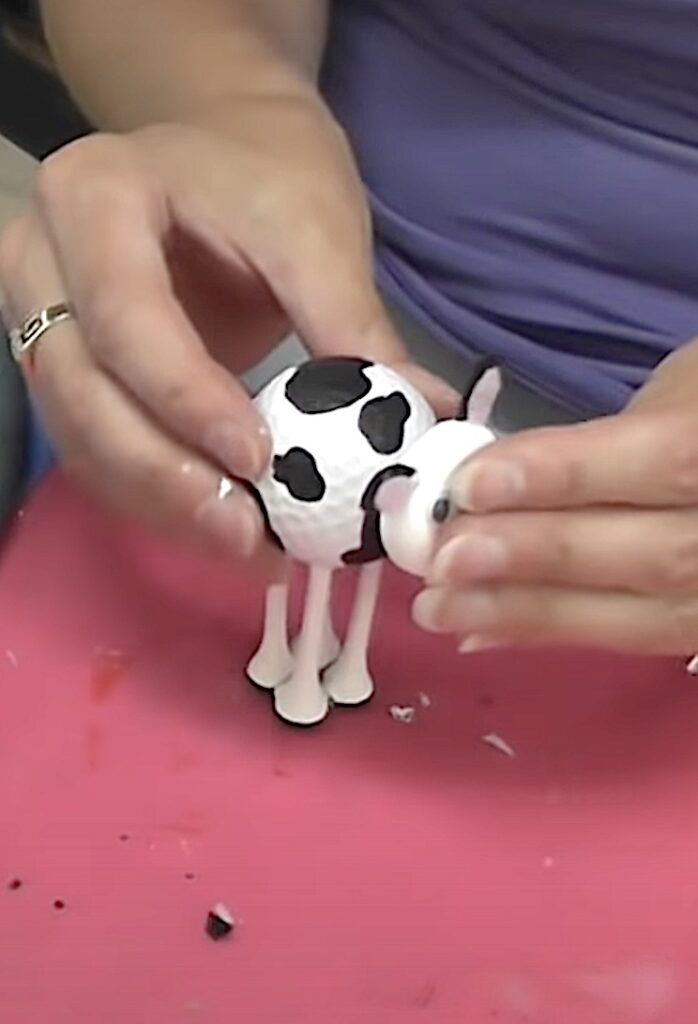
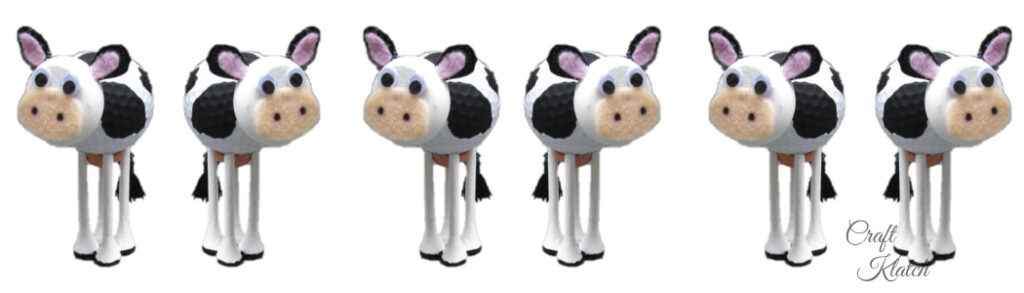
That’s it! Now you can make a whole barnyard full of adorable cows!
Be sure to PIN IT for later!

Super Fun Cow Stuff!
If you love cows, here are some great cow things you can treat yourself to!

Thanks for stopping by! Remember: Life’s too short not to shimmer, so grab your glue gun and your glitter!™ Stay safe!
Mona
Be sure to PIN IT for later!
What a cute craft! This would be fun to make for a farm themed party 🙂 (pinning)
This is absolutely adorable!
What a clever idea. Love the cows, although your ants are cute too.
Bev
This is adorable and I bet golfers will get a kick out of it. Thank you for sharing with the Clever Chicks Blog Hop! I hope you’ll join us again next week!
Cheers,
Kathy Shea Mormino
The Chicken Chick
The-Chicken-Chick.com