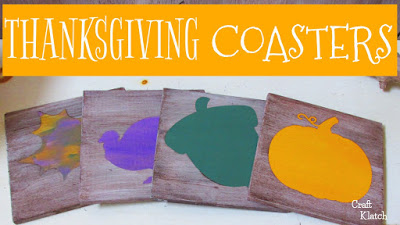
If you like the rustic accessories to add to your home decor, these easy and inexpensive Thanksgiving Coasters are the perfect project!
Here is a quick video tutorial, so you can see exactly how I made them:
You will need:
- Wood squares: https://amzn.to/2iCrRpr
- Stencil or cutting machine: https://shrsl.com/lmoe
- Vinyl: https://shrsl.com/lmol
- Acrylic paint: https://amzn.to/2Apno1p (I used purple, green, orange, gray and white)
- Matte varnish: https://amzn.to/2ybcsml
*I used a cutting machine to cut out the vinyl. You can also do all of the painting and stencil fall images on top of it at the end for a very similar look.
1. Gather your wood squares and paint them.

I painted one orange, one purple, one green and on the fourth square, I combined all three of those colors.

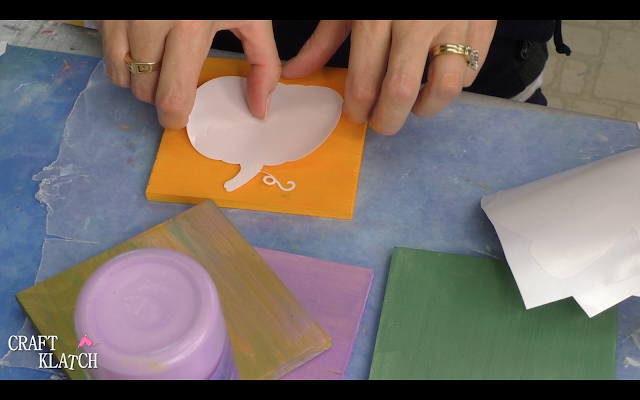
2. I went into Cricut’s Design Space and chose and sized three Fall/Thanksgiving inspired images.

3. Then I cut the images out of vinyl.

4. I then applied the vinyl images to the squares. Make sure you rub down the images really well.
5. Then I painted over all of the images, with the same color that I used on the backgrounds. This seals the vinyl and prevents any leaking under the vinyl from the other colors we will be adding. Basically, it gives you crisp edges.
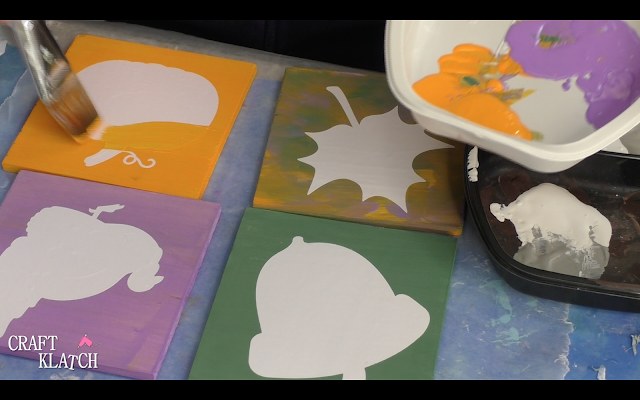
Even the leaf…I just used the combination of the colors on the first layer.

6. Once that has all dried, I used a combination of gray and white paint and painted it over all of the coasters.
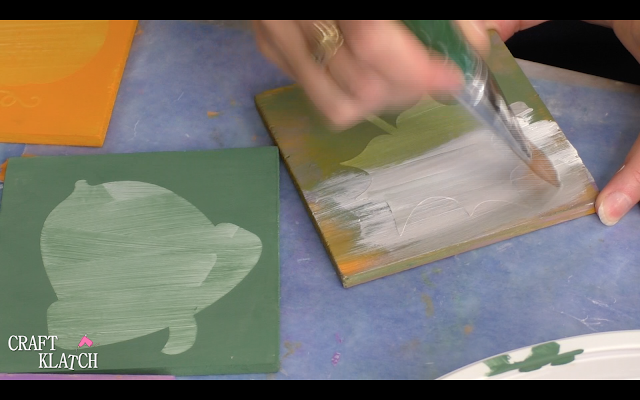
7. Once dry, I watered down some burnt umber paint and painted it over all of the coasters…

…and immediately wiped off the excess.

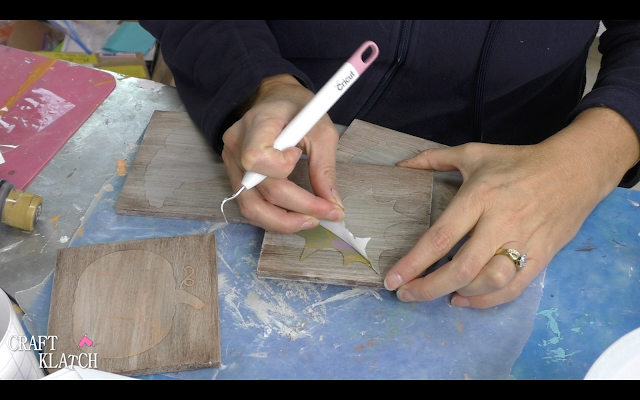
8. Once dry, peel off the vinyl to reveal the images.
9. I used a matte varnish to seal them. Just make sure it is an indoor/outdoor varnish and it should protect them just fine!


I hope you all have a Happy and Healthy Thanksgiving! I’d tell you not to eat too much, but come on! Enjoy your feast!
If you like this coaster project, I made a fun Pumpkin Patch Coaster that you might want to try!
Thanks for stopping by! Remember: Life’s too short not to shimmer, so grab your glue gun and your glitter!™ Stay safe!
Mona